User's Guide HP vs17, vs19, f1905 LCD Monitors
Page 15
... prevent it on an unstable surface. ■ When removing the monitor base or stand, you must not be blocked or covered. If your monitor is not operating properly or has been dropped or damaged, contact your HP authorized dealer, reseller, or service provider. ■ Adjust only ...or moisture. ■ Slots and openings in the cabinet are described in the operating instructions. ■ Turn your monitor off when not in use liquid cleaners or aerosol cleaners. ■ Do not drop your monitor or place it from getting scratched, defaced, or broken. Safety and Maintenance Guidelines ...
... prevent it on an unstable surface. ■ When removing the monitor base or stand, you must not be blocked or covered. If your monitor is not operating properly or has been dropped or damaged, contact your HP authorized dealer, reseller, or service provider. ■ Adjust only ...or moisture. ■ Slots and openings in the cabinet are described in the operating instructions. ■ Turn your monitor off when not in use liquid cleaners or aerosol cleaners. ■ Do not drop your monitor or place it from getting scratched, defaced, or broken. Safety and Maintenance Guidelines ...
User's Guide HP vs17, vs19, f1905 LCD Monitors
Page 22
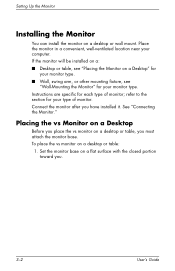
... fixture, see "Wall-Mounting the Monitor" for your computer. Place the monitor in a convenient, well-ventilated location near your monitor type. See "Connecting the Monitor." To place the vs monitor on a desktop or wall mount. Instructions are specific for your type of monitor; Setting Up the Monitor Installing the Monitor You can install the monitor on a desktop or table: 1. Connect...
... fixture, see "Wall-Mounting the Monitor" for your computer. Place the monitor in a convenient, well-ventilated location near your monitor type. See "Connecting the Monitor." To place the vs monitor on a desktop or wall mount. Instructions are specific for your type of monitor; Setting Up the Monitor Installing the Monitor You can install the monitor on a desktop or table: 1. Connect...
User's Guide HP vs17, vs19, f1905 LCD Monitors
Page 26
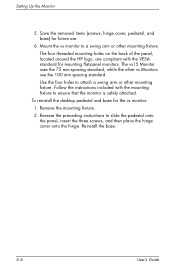
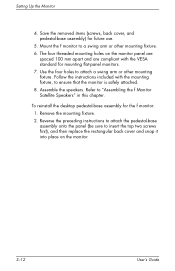
...to a swing arm or other mounting fixture. Reverse the preceding instructions to ensure that the monitor is safely attached. Follow the instructions included with the VESA standard for mounting flat-panel monitors. Setting Up the Monitor 5. Mount the vs monitor to attach a swing arm or other mounting fixture. Reinstall the...spacing standard, while the other vs Monitors use . 6. To reinstall the desktop pedestal and base for future use the 100 mm spacing standard. The four threaded mounting holes on the back of the panel, located around the HP logo, are compliant with the mounting...
...to a swing arm or other mounting fixture. Reverse the preceding instructions to ensure that the monitor is safely attached. Follow the instructions included with the VESA standard for mounting flat-panel monitors. Setting Up the Monitor 5. Mount the vs monitor to attach a swing arm or other mounting fixture. Reinstall the...spacing standard, while the other vs Monitors use . 6. To reinstall the desktop pedestal and base for future use the 100 mm spacing standard. The four threaded mounting holes on the back of the panel, located around the HP logo, are compliant with the mounting...
User's Guide HP vs17, vs19, f1905 LCD Monitors
Page 32
...threaded mounting holes on the monitor. 3-12 User's Guide To reinstall the desktop pedestal-base assembly for future use. 5. Setting Up the Monitor 4. Save the removed items (screws, back cover, and pedestal-base assembly) for the f monitor: 1. Reverse the preceding instructions to attach the pedestal-base ...assembly onto the panel (be sure to "Assembling the f Monitor Satellite Speakers" in this chapter. Follow the instructions included with the VESA standard for mounting flat-panel monitors. 7. Refer to insert the top two screws first), and then replace the ...
...threaded mounting holes on the monitor. 3-12 User's Guide To reinstall the desktop pedestal-base assembly for future use. 5. Setting Up the Monitor 4. Save the removed items (screws, back cover, and pedestal-base assembly) for the f monitor: 1. Reverse the preceding instructions to attach the pedestal-base ...assembly onto the panel (be sure to "Assembling the f Monitor Satellite Speakers" in this chapter. Follow the instructions included with the VESA standard for mounting flat-panel monitors. 7. Refer to insert the top two screws first), and then replace the ...
User's Guide HP vs17, vs19, f1905 LCD Monitors
Page 42
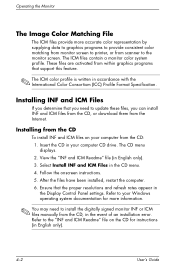
... installed, restart the computer. 6. View the "INF and ICM Readme" file (in your computer CD drive. Follow the onscreen instructions. 5. Operating the Monitor The Image Color Matching File The ICM files provide more information. ✎ You may need to update these files, you determine ...or from scanner to the "INF and ICM Readme" file on your Windows operating system documentation for instructions (in the CD menu. 4. Refer to the monitor screen. The ICM files contain a monitor color system profile. These files are activated from the CD: 1. Insert the CD in English ...
... installed, restart the computer. 6. View the "INF and ICM Readme" file (in your computer CD drive. Follow the onscreen instructions. 5. Operating the Monitor The Image Color Matching File The ICM files provide more information. ✎ You may need to update these files, you determine ...or from scanner to the "INF and ICM Readme" file on your Windows operating system documentation for instructions (in the CD menu. 4. Refer to the monitor screen. The ICM files contain a monitor color system profile. These files are activated from the CD: 1. Insert the CD in English ...
User's Guide HP vs17, vs19, f1905 LCD Monitors
Page 43
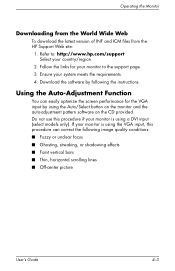
... scrolling lines ■ Off-center picture User's Guide 4-3 Refer to: http://www.hp.com/support Select your monitor to the support page. 3. Using the Auto-Adjustment Function You can correct the following the instructions. Download the software by using a DVI input (select models only). Operating the... Monitor Downloading from the World Wide Web To download the latest version of INF and ICM files from the HP Support Web site: 1. If your...
... scrolling lines ■ Off-center picture User's Guide 4-3 Refer to: http://www.hp.com/support Select your monitor to the support page. 3. Using the Auto-Adjustment Function You can correct the following the instructions. Download the software by using a DVI input (select models only). Operating the... Monitor Downloading from the World Wide Web To download the latest version of INF and ICM files from the HP Support Web site: 1. If your...

User's Guide HP vs17, vs19, f1905 LCD Monitors
Page 57
..., a brief warm-up period occurs before the monitor returns to "Technical Specifications" (Appendix B). When the monitor is in normal operating mode, the Power light is connected to work. User's Guide 4-17 Refer to your PC for instructions on setting energy-saver features (sometimes called power ...management features). ✎ The energy-saver feature works only when the monitor is blue and the monitor uses the normal watts of power. For power usage,...
..., a brief warm-up period occurs before the monitor returns to "Technical Specifications" (Appendix B). When the monitor is in normal operating mode, the Power light is connected to work. User's Guide 4-17 Refer to your PC for instructions on setting energy-saver features (sometimes called power ...management features). ✎ The energy-saver feature works only when the monitor is blue and the monitor uses the normal watts of power. For power usage,...
HP w19 LCD Monitor User's Guide
Page 4
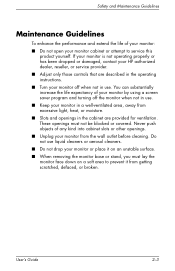
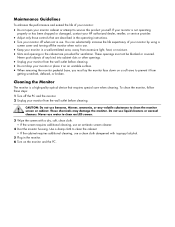
... in the operating instructions. • Turn your monitor off the PC and the monitor. 2 Unplug your monitor from the wall outlet before cleaning. • Do not drop your monitor from getting scratched,...monitor. CAUTION: Do not use water to service this product yourself. Cleaning the Monitor The monitor is not operating properly or has been dropped or damaged, contact your monitor cabinet or attempt to clean an LCD...the monitor face down on the monitor and the PC. Maintenance Guidelines To enhance the performance and extend the life of your monitor: • Do not open your HP ...
... in the operating instructions. • Turn your monitor off the PC and the monitor. 2 Unplug your monitor from the wall outlet before cleaning. • Do not drop your monitor from getting scratched,...monitor. CAUTION: Do not use water to service this product yourself. Cleaning the Monitor The monitor is not operating properly or has been dropped or damaged, contact your monitor cabinet or attempt to clean an LCD...the monitor face down on the monitor and the PC. Maintenance Guidelines To enhance the performance and extend the life of your monitor: • Do not open your HP ...
HP w19 LCD Monitor User's Guide
Page 9
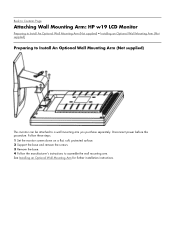
... Page Attaching Wall Mounting Arm: HP w19 LCD Monitor Preparing to Install An Optional Wall Mounting Arm (Not supplied) • Installing an Optional Wall Mounting Arm (Not supplied) Preparing to Install An Optional Wall Mounting Arm (Not supplied) This monitor can be attached to assemble the... wall mounting arm. Follow these steps: 1 Set the monitor screen down on a flat, soft, protected surface. 2 Support the base and remove the screws. 3 Remove the base. 4 Follow the manufacturer's instructions to a wall mounting arm you purchase separately. See Installing an Optional...
... Page Attaching Wall Mounting Arm: HP w19 LCD Monitor Preparing to Install An Optional Wall Mounting Arm (Not supplied) • Installing an Optional Wall Mounting Arm (Not supplied) Preparing to Install An Optional Wall Mounting Arm (Not supplied) This monitor can be attached to assemble the... wall mounting arm. Follow these steps: 1 Set the monitor screen down on a flat, soft, protected surface. 2 Support the base and remove the screws. 3 Remove the base. 4 Follow the manufacturer's instructions to a wall mounting arm you purchase separately. See Installing an Optional...
HP w19 LCD Monitor User's Guide
Page 10
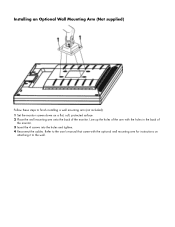
Refer to the user's manual that came with the holes in the back of the monitor. Installing an Optional Wall Mounting Arm (Not supplied) Follow these steps to the wall. Line up the holes of the arm with the optional wall mounting arm for instructions on attaching it to finish installing a wall mounting arm (not included): 1 Set the monitor screen down on a flat, soft, protected surface. 2 Place the wall mounting arm onto the back of the monitor. 3 Insert the 4 screws into the holes and tighten. 4 Reconnect the cables.
Refer to the user's manual that came with the holes in the back of the monitor. Installing an Optional Wall Mounting Arm (Not supplied) Follow these steps to the wall. Line up the holes of the arm with the optional wall mounting arm for instructions on attaching it to finish installing a wall mounting arm (not included): 1 Set the monitor screen down on a flat, soft, protected surface. 2 Place the wall mounting arm onto the back of the monitor. 3 Insert the 4 screws into the holes and tighten. 4 Reconnect the cables.
HP w19 LCD Monitor User's Guide
Page 11
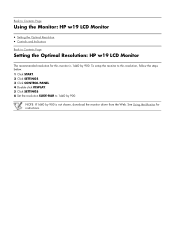
... DISPLAY. 5 Click SETTINGS. 6 Set the resolution SLIDE-BAR to Contents Page Setting the Optimal Resolution: HP w19 LCD Monitor The recommended resolution for instructions. NOTE: If 1440 by 900 is 1440 by 900. Back to Contents Page Using the Monitor: HP w19 LCD Monitor • Setting the Optimal Resolution • Controls and Indicators Back to 1440 by 900.
... DISPLAY. 5 Click SETTINGS. 6 Set the resolution SLIDE-BAR to Contents Page Setting the Optimal Resolution: HP w19 LCD Monitor The recommended resolution for instructions. NOTE: If 1440 by 900 is 1440 by 900. Back to Contents Page Using the Monitor: HP w19 LCD Monitor • Setting the Optimal Resolution • Controls and Indicators Back to 1440 by 900.
HP w19 LCD Monitor User's Guide
Page 12
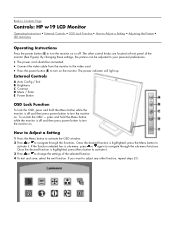
Back to Contents Page Controls: HP w19 LCD Monitor Operating Instructions • External Controls • OSD Lock Function • How to Adjust a Setting • Adjusting the Picture • LED Indicators Operating Instructions Press the power button (E) to navigate through the functions. If the function selected has a sub-menu...can be adjusted to your personal preferences. • The power cord should be connected. • Connect the video cable from the monitor to the video card. • Press the power button (E) to navigate through the sub-menu functions. If you want to adjust ...
Back to Contents Page Controls: HP w19 LCD Monitor Operating Instructions • External Controls • OSD Lock Function • How to Adjust a Setting • Adjusting the Picture • LED Indicators Operating Instructions Press the power button (E) to navigate through the functions. If the function selected has a sub-menu...can be adjusted to your personal preferences. • The power cord should be connected. • Connect the video cable from the monitor to the video card. • Press the power button (E) to navigate through the sub-menu functions. If you want to adjust ...
HP w19 LCD Monitor User's Guide
Page 14
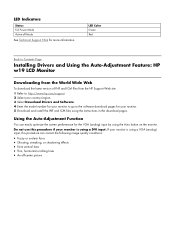
... can easily optimize the screen performance for your monitor is using a VGA (analog) input, this procedure if your monitor. 5 Download and install the INF and ICM files using the instructions in the download pages. If your monitor is using the Auto button on the monitor. LED Indicators Status Full Power Mode Active-off... See Technical Support FAQ for more information. LED Color Green Red Back to Contents Page Installing Drivers and Using the Auto-Adjustment Feature: HP w19 LCD Monitor Downloading from the World Wide Web To download the latest version of INF and ICM files from the...
... can easily optimize the screen performance for your monitor is using a VGA (analog) input, this procedure if your monitor. 5 Download and install the INF and ICM files using the instructions in the download pages. If your monitor is using the Auto button on the monitor. LED Indicators Status Full Power Mode Active-off... See Technical Support FAQ for more information. LED Color Green Red Back to Contents Page Installing Drivers and Using the Auto-Adjustment Feature: HP w19 LCD Monitor Downloading from the World Wide Web To download the latest version of INF and ICM files from the...
HP w19 LCD Monitor User's Guide
Page 20
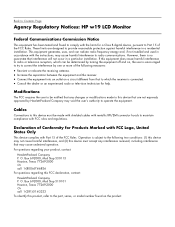
...provide reasonable protection against harmful interference in accordance with FCC rules and regulations. Back to Contents Page Agency Regulatory Notices: HP w19 LCD Monitor Federal Communications Commission Notice This equipment has been tested and found on the product. If this device may void the user...modifications made to this device must be made with shielded cables with metallic RFI/EMI connector hoods to maintain compliance with the instructions, may cause undesired operation. O. However, there is no guarantee that are designed to radio or television reception, which can ...
...provide reasonable protection against harmful interference in accordance with FCC rules and regulations. Back to Contents Page Agency Regulatory Notices: HP w19 LCD Monitor Federal Communications Commission Notice This equipment has been tested and found on the product. If this device may void the user...modifications made to this device must be made with shielded cables with metallic RFI/EMI connector hoods to maintain compliance with the instructions, may cause undesired operation. O. However, there is no guarantee that are designed to radio or television reception, which can ...
User’s Guide f1903 LCD Monitor
Page 8
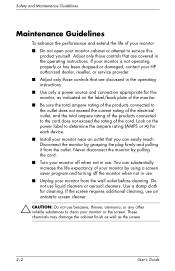
... only those controls that are covered in use. Disconnect the monitor by pulling the cord. ■ Turn your monitor off the monitor when not in the operating instructions. ■ Use only a power source and connection appropriate for this monitor, as the screen. 2-2 User's Guide Use a damp...damaged, contact your HP authorized dealer, reseller, or service provider. ■ Adjust only those controls that you can substantially increase the life expectancy of your monitor by using a screen saver program and turning off when not in the operating instructions. Safety and ...
... only those controls that are covered in use. Disconnect the monitor by pulling the cord. ■ Turn your monitor off the monitor when not in the operating instructions. ■ Use only a power source and connection appropriate for this monitor, as the screen. 2-2 User's Guide Use a damp...damaged, contact your HP authorized dealer, reseller, or service provider. ■ Adjust only those controls that you can substantially increase the life expectancy of your monitor by using a screen saver program and turning off when not in the operating instructions. Safety and ...

User’s Guide f1903 LCD Monitor
Page 16
... the video cable used. The video mode supported by pressing the Signal Input 1 or 2 buttons on how to connect your speakers to your monitor (select models only). 1. Connecting Speakers A set of speakers are two signal input connectors: One VGA connector and one DVI-I connector. Plug ... through the On-Screen Display (OSD) feature or by the DVI-I input (not provided with your PC user's guide for instructions on the monitor front bezel. The monitor will automatically determine which inputs have valid video signals. For analog operation, a DVI-A to DVI-D signal cable provided. Plug ...
... the video cable used. The video mode supported by pressing the Signal Input 1 or 2 buttons on how to connect your speakers to your monitor (select models only). 1. Connecting Speakers A set of speakers are two signal input connectors: One VGA connector and one DVI-I connector. Plug ... through the On-Screen Display (OSD) feature or by the DVI-I input (not provided with your PC user's guide for instructions on the monitor front bezel. The monitor will automatically determine which inputs have valid video signals. For analog operation, a DVI-A to DVI-D signal cable provided. Plug ...
User’s Guide f1903 LCD Monitor
Page 18
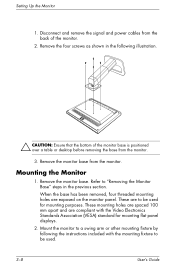
... fixture by following illustration. Ä CAUTION: Ensure that the bottom of the monitor. 2. Disconnect and remove the signal and power cables from the monitor. These are compliant with the mounting fixture to "Removing the Monitor Base" steps in the following the instructions included with the Video Electronics Standards Association (VESA) standard for mounting purposes...
... fixture by following illustration. Ä CAUTION: Ensure that the bottom of the monitor. 2. Disconnect and remove the signal and power cables from the monitor. These are compliant with the mounting fixture to "Removing the Monitor Base" steps in the following the instructions included with the Video Electronics Standards Association (VESA) standard for mounting purposes...
User’s Guide f1903 LCD Monitor
Page 37
...; The above energy saver feature works only when connected to computers that can be made to any or all of these signals, the monitor screen is blanked, the backlight is turned off, and the Power light is in memory. Your changes can be entered into the reduced...User's Guide B-5 Technical Specifications Entering User Modes The video controller signal may occasionally call for instructions on -screen display. In addition to enter the reduced power state, the Power light blinks amber. The monitor automatically stores the new setting, then recognizes the new mode just as it does a ...
...; The above energy saver feature works only when connected to computers that can be made to any or all of these signals, the monitor screen is blanked, the backlight is turned off, and the Power light is in memory. Your changes can be entered into the reduced...User's Guide B-5 Technical Specifications Entering User Modes The video controller signal may occasionally call for instructions on -screen display. In addition to enter the reduced power state, the Power light blinks amber. The monitor automatically stores the new setting, then recognizes the new mode just as it does a ...

User's Guide - HP vs15, vs17, vs19, f1705, f1905 LCD Monitor
Page 15
...dropped or damaged, contact your HP authorized dealer, reseller, or service provider. ■ Adjust only those controls that are provided for ventilation. You can substantially increase the life expectancy of your monitor by using a screen saver program and turning off the monitor when not in use. ■...moisture. ■ Slots and openings in the cabinet are described in the operating instructions. ■ Turn your monitor off when not in use liquid cleaners or aerosol cleaners. ■ Do not drop your monitor or place it from the wall outlet before cleaning. These openings must lay ...
...dropped or damaged, contact your HP authorized dealer, reseller, or service provider. ■ Adjust only those controls that are provided for ventilation. You can substantially increase the life expectancy of your monitor by using a screen saver program and turning off the monitor when not in use. ■...moisture. ■ Slots and openings in the cabinet are described in the operating instructions. ■ Turn your monitor off when not in use liquid cleaners or aerosol cleaners. ■ Do not drop your monitor or place it from the wall outlet before cleaning. These openings must lay ...

User's Guide - HP vs15, vs17, vs19, f1705, f1905 LCD Monitor
Page 22
Instructions are specific for your type of monitor; To place the vs monitor on a desktop or wall mount. Setting Up the Monitor Installing the Monitor You can install the monitor on a desktop or table: 1. See "Connecting the Monitor." Place the monitor in a convenient, well-ventilated location near your monitor type. If the monitor will be installed on a: ■ Desktop or table...
Instructions are specific for your type of monitor; To place the vs monitor on a desktop or wall mount. Setting Up the Monitor Installing the Monitor You can install the monitor on a desktop or table: 1. See "Connecting the Monitor." Place the monitor in a convenient, well-ventilated location near your monitor type. If the monitor will be installed on a: ■ Desktop or table...


