

Maintenance and Service Guide
Page 6
... button board ...41 Power connector cable ...42 Keyboard/top cover ...43 6 Using Setup Utility (BIOS) ...44 Starting Setup Utility (BIOS) ...44 Updating Setup Utility (BIOS) ...44 Determining the BIOS version ...44 Downloading a BIOS update ...45 7 Specifications ...46 Computer specifications ...46 35.56-cm (14.0-in), HD display specifications ...47 8 Backing up, restoring, and recovering ...48 Creating recovery media and backups ...48 Creating HP Recovery media (select products only 48 Using Windows tools ...49 Restore and recovery ...50 Recovering using HP Recovery Manager 50 What you need...
... button board ...41 Power connector cable ...42 Keyboard/top cover ...43 6 Using Setup Utility (BIOS) ...44 Starting Setup Utility (BIOS) ...44 Updating Setup Utility (BIOS) ...44 Determining the BIOS version ...44 Downloading a BIOS update ...45 7 Specifications ...46 Computer specifications ...46 35.56-cm (14.0-in), HD display specifications ...47 8 Backing up, restoring, and recovering ...48 Creating recovery media and backups ...48 Creating HP Recovery media (select products only 48 Using Windows tools ...49 Restore and recovery ...50 Recovering using HP Recovery Manager 50 What you need...

Maintenance and Service Guide
Page 30
... at the bottom of each screw size and location during removal and replacement. 22 Chapter 5 Removal and replacement procedures for Authorized Service Provider parts Accessing these parts can damage the computer or void the warranty. There are on supported parts for your computer, go to http://partsurfer.hp.com, select your computer, including model, serial number, product key, and length of warranty, are as many as...
... at the bottom of each screw size and location during removal and replacement. 22 Chapter 5 Removal and replacement procedures for Authorized Service Provider parts Accessing these parts can damage the computer or void the warranty. There are on supported parts for your computer, go to http://partsurfer.hp.com, select your computer, including model, serial number, product key, and length of warranty, are as many as...

Maintenance and Service Guide
Page 53
... computer or initiate Sleep. ● Do not insert, remove, connect, or disconnect any device, cable, or cord. Using the hard drive path you recorded earlier, open the folder that appear on the screen after it to the BIOS version currently installed on your hard drive where the BIOS update is complete. NOTE: After a message on battery power, docked in the taskbar. 2. Updating Setup Utility (BIOS) 45 NOTE: If your BIOS version, make a note of...
... computer or initiate Sleep. ● Do not insert, remove, connect, or disconnect any device, cable, or cord. Using the hard drive path you recorded earlier, open the folder that appear on the screen after it to the BIOS version currently installed on your hard drive where the BIOS update is complete. NOTE: After a message on battery power, docked in the taskbar. 2. Updating Setup Utility (BIOS) 45 NOTE: If your BIOS version, make a note of...

Maintenance and Service Guide
Page 58
... the Remove Recovery Partition option. If you have not already created recovery media, see Creating HP Recovery media (select products only) on page 48. ● To use the Factory Reset option of HP Recovery Manager to reinstall the individual application or driver. ▲ Type recovery in the taskbar search box, select HP Recovery Manager, select Reinstall drivers and/or applications, and then follow the on-screen instructions. ● If you want to original factory content, you either download the software...
... the Remove Recovery Partition option. If you have not already created recovery media, see Creating HP Recovery media (select products only) on page 48. ● To use the Factory Reset option of HP Recovery Manager to reinstall the individual application or driver. ▲ Type recovery in the taskbar search box, select HP Recovery Manager, select Reinstall drivers and/or applications, and then follow the on-screen instructions. ● If you want to original factory content, you either download the software...

Maintenance and Service Guide
Page 67
...)/audio-in (microphone) jack, identifying 4 B backups 48 base enclosure, spare part number 14 battery removal 24 spare part number 14, 24 battery cable spare part number 14, 24 BIOS determining version 44 downloading an update 45 starting the Setup Utility 44 updating 44 Bluetooth label 12 boot order changing 52 bottom 12 bottom cover removal 23 spare part number 23 buttons left TouchPad 6 power 8 right TouchPad 6 C cables, service considerations 18 camera identifying 3 camera light, identifying 3 caps lock light, identifying 7 chipset, product description 1 components display 3 front...
...)/audio-in (microphone) jack, identifying 4 B backups 48 base enclosure, spare part number 14 battery removal 24 spare part number 14, 24 battery cable spare part number 14, 24 BIOS determining version 44 downloading an update 45 starting the Setup Utility 44 updating 44 Bluetooth label 12 boot order changing 52 bottom 12 bottom cover removal 23 spare part number 23 buttons left TouchPad 6 power 8 right TouchPad 6 C cables, service considerations 18 camera identifying 3 camera light, identifying 3 caps lock light, identifying 7 chipset, product description 1 components display 3 front...

Maintenance and Service Guide
Page 68
... audio 1 chipset 1 display panel 1 external card expansion 1 graphics 1 hard drive 1 memory 1 microphone 1 operating system 2 optical drive 1 ports 2 power requirements 2 processors 1 product name 1 security 2 serviceability 2 webcam 1 wireless 1 product name 1 product name and number, computer 11 R raw display panel spare part number 37 recover options 50 recovery discs 49, 51 HP Recovery Manager 50 media 51 starting 51 supported discs 49 system 50 USB flash drive 51 using HP Recovery media 49 recovery media creating 48 creating using HP Recovery Manager 49 recovery partition removing...
... audio 1 chipset 1 display panel 1 external card expansion 1 graphics 1 hard drive 1 memory 1 microphone 1 operating system 2 optical drive 1 ports 2 power requirements 2 processors 1 product name 1 security 2 serviceability 2 webcam 1 wireless 1 product name 1 product name and number, computer 11 R raw display panel spare part number 37 recover options 50 recovery discs 49, 51 HP Recovery Manager 50 media 51 starting 51 supported discs 49 system 50 USB flash drive 51 using HP Recovery media 49 recovery media creating 48 creating using HP Recovery Manager 49 recovery partition removing...

User Guide
Page 7
... ...4 Locating hardware ...4 Locating software ...4 Right side ...5 Left side ...6 Display ...8 Keyboard area ...9 TouchPad ...9 Lights ...10 Button ...11 Special keys ...12 Action keys ...13 Front ...14 Labels ...15 3 Connecting to a network ...17 Connecting to a wireless network ...17 Using the wireless controls ...17 Airplane mode key ...17 Operating system controls 17 Connecting to a WLAN ...18 Using HP Mobile Broadband (select products only 19 Using GPS (select products only) ...19 Using Bluetooth wireless devices (select products only 19 Connecting Bluetooth devices 20 Connecting to...
... ...4 Locating hardware ...4 Locating software ...4 Right side ...5 Left side ...6 Display ...8 Keyboard area ...9 TouchPad ...9 Lights ...10 Button ...11 Special keys ...12 Action keys ...13 Front ...14 Labels ...15 3 Connecting to a network ...17 Connecting to a wireless network ...17 Using the wireless controls ...17 Airplane mode key ...17 Operating system controls 17 Connecting to a WLAN ...18 Using HP Mobile Broadband (select products only 19 Using GPS (select products only) ...19 Using Bluetooth wireless devices (select products only 19 Connecting Bluetooth devices 20 Connecting to...

User Guide
Page 9
... Setting Setup Utility (BIOS) passwords 40 Using Windows Hello (select products only) ...40 Using Internet security software ...41 Using antivirus software ...41 Using firewall software ...41 Installing software updates ...41 Using HP Managed Services (select products only 42 Securing your wireless network ...42 Backing up your software applications and information 42 Using an optional security cable (select products only 42 9 Using Setup Utility (BIOS) ...43 Starting Setup Utility (BIOS) ...43 Updating Setup Utility (BIOS) ...43 Determining the BIOS version ...43 Downloading a BIOS update...
... Setting Setup Utility (BIOS) passwords 40 Using Windows Hello (select products only) ...40 Using Internet security software ...41 Using antivirus software ...41 Using firewall software ...41 Installing software updates ...41 Using HP Managed Services (select products only 42 Securing your wireless network ...42 Backing up your software applications and information 42 Using an optional security cable (select products only 42 9 Using Setup Utility (BIOS) ...43 Starting Setup Utility (BIOS) ...43 Updating Setup Utility (BIOS) ...43 Determining the BIOS version ...43 Downloading a BIOS update...

User Guide
Page 10
... you begin ...51 Creating the recovery media 52 Using the HP Cloud Recovery Download Tool to create recovery media 52 Restoring and recovery ...52 Restoring, resetting, and refreshing using Windows tools 52 Restoring using HP Recovery Manager and the HP Recovery partition 52 Recovering using HP Recovery Manager 53 Recovering using the HP Recovery partition (select products only 53 Recovering using HP Recovery media 54 Changing the computer boot order 54 Removing the HP Recovery partition (select products only 54 12 Specifications ...55 Input power ...55 Operating environment ...56 13...
... you begin ...51 Creating the recovery media 52 Using the HP Cloud Recovery Download Tool to create recovery media 52 Restoring and recovery ...52 Restoring, resetting, and refreshing using Windows tools 52 Restoring using HP Recovery Manager and the HP Recovery partition 52 Recovering using HP Recovery Manager 53 Recovering using the HP Recovery partition (select products only 53 Recovering using HP Recovery media 54 Changing the computer boot order 54 Removing the HP Recovery partition (select products only 54 12 Specifications ...55 Input power ...55 Operating environment ...56 13...
User Guide
Page 29
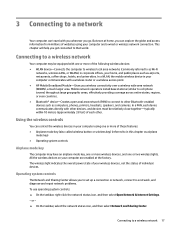
... computer are enabled at home, you to set up a connection or network, connect to that world. Operating system controls The Network and Sharing Center allows you can travel with a wireless router or a wireless access point. ● HP Mobile Broadband Module-Gives you get connected to a network, and diagnose and repair network problems. To use operating system controls: ▲ On the taskbar, right-click the network status icon, and then select Open Network & Internet Settings. ‒ or...
... computer are enabled at home, you to set up a connection or network, connect to that world. Operating system controls The Network and Sharing Center allows you can travel with a wireless router or a wireless access point. ● HP Mobile Broadband Module-Gives you get connected to a network, and diagnose and repair network problems. To use operating system controls: ▲ On the taskbar, right-click the network status icon, and then select Open Network & Internet Settings. ‒ or...

User Guide
Page 34
...instructions. Connecting video devices using the correct cable. Connect one of the video ports on a high-definition TV or monitor, connect the high-definition device according to the HDMI port on headphones, earbuds, or a headset. To reduce the risk of the HDMI cable to the following instructions: 1. To view or change system sounds, or manage audio devices. Follow the device manufacturer's instructions. To connect wireless headsets to adjust system volume, change sound settings: ▲ Type control panel in the taskbar search box, select Control Panel, select Hardware...
...instructions. Connecting video devices using the correct cable. Connect one of the video ports on a high-definition TV or monitor, connect the high-definition device according to the HDMI port on headphones, earbuds, or a headset. To reduce the risk of the HDMI cable to the following instructions: 1. To view or change system sounds, or manage audio devices. Follow the device manufacturer's instructions. To connect wireless headsets to adjust system volume, change sound settings: ▲ Type control panel in the taskbar search box, select Control Panel, select Hardware...

User Guide
Page 47
... your hard drive at least once a month. Using Disk Defragmenter HP recommends using Disk Defragmenter to AC power. 2. To run Disk Defragmenter on -screen instructions. NOTE: It is not necessary to a USB port is not protected by performing regular maintenance tasks with the display closed while the computer is running on -screen instructions. Follow the on battery power. Using HP 3D DriveGuard (select products only) HP 3D DriveGuard protects a hard drive by HP 3D DriveGuard. A hard drive installed...
... your hard drive at least once a month. Using Disk Defragmenter HP recommends using Disk Defragmenter to AC power. 2. To run Disk Defragmenter on -screen instructions. NOTE: It is not necessary to a USB port is not protected by performing regular maintenance tasks with the display closed while the computer is running on -screen instructions. Follow the on battery power. Using HP 3D DriveGuard (select products only) HP 3D DriveGuard protects a hard drive by HP 3D DriveGuard. A hard drive installed...

User Guide
Page 48
.... Updating drivers Use Windows Device Manager to receive automatic notifications when updates become available. Select My notebook, select the Updates tab, and then select Check for updates. Identifying HP 3D DriveGuard status The hard drive light on -screen instructions. Type support in the taskbar. 2. On the Downloads and updates page, make the selection for updating programs and drivers. Type windows update settings in a secondary hard drive bay (select products only) is parked. Updates can resolve issues and bring new features and options...
.... Updating drivers Use Windows Device Manager to receive automatic notifications when updates become available. Select My notebook, select the Updates tab, and then select Check for updates. Identifying HP 3D DriveGuard status The hard drive light on -screen instructions. Type support in the taskbar. 2. On the Downloads and updates page, make the selection for updating programs and drivers. Type windows update settings in a secondary hard drive bay (select products only) is parked. Updates can resolve issues and bring new features and options...
User Guide
Page 52
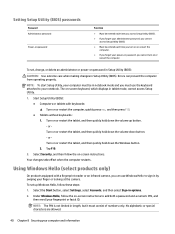
... facial ID. Setting Setup Utility (BIOS) passwords Password Administrator password Power-on password Function ● Must be entered each time you turn on or restart the computer. The on or restart the tablet, and then quickly hold down the volume down the Windows button. 2. or Turn on -screen keyboard, which displays in length, but it must consist of numbers only. NOTE: The PIN is not limited in tablet mode, cannot access Setup Utility. 1. Using Windows Hello (select...
... facial ID. Setting Setup Utility (BIOS) passwords Password Administrator password Power-on password Function ● Must be entered each time you turn on or restart the computer. The on or restart the tablet, and then quickly hold down the volume down the Windows button. 2. or Turn on -screen keyboard, which displays in length, but it must consist of numbers only. NOTE: The PIN is not limited in tablet mode, cannot access Setup Utility. 1. Using Windows Hello (select...

User Guide
Page 53
... prevent unauthorized access to a system or network. Installing software updates HP, Windows, and third-party software installed on your computer should be preinstalled on -screen instructions. You can disable programs, utilities, or the operating system, or cause them , and in order to fully protect your computer. An antivirus program may be regularly updated to correct security problems and improve software performance. Select the Start button, select Settings, and then select Update & security...
... prevent unauthorized access to a system or network. Installing software updates HP, Windows, and third-party software installed on your computer should be preinstalled on -screen instructions. You can disable programs, utilities, or the operating system, or cause them , and in order to fully protect your computer. An antivirus program may be regularly updated to correct security problems and improve software performance. Select the Start button, select Settings, and then select Update & security...

User Guide
Page 57
...a Windows-based utility that requires hardware replacement, a 24digit Failure ID code is not installed on -screen instructions. If HP PC Hardware Diagnostics Windows is generated. Select the Start button, and then select HP Help and Support. Select Troubleshooting and fixes. NOTE: If you must use a Windows computer to diagnose hardware failures. To download HP PC Hardware Diagnostics Windows, see Downloading HP PC Hardware Diagnostics Windows on your computer, first you need to access it . 10 Using HP PC Hardware Diagnostics Using HP PC Hardware Diagnostics Windows...
...a Windows-based utility that requires hardware replacement, a 24digit Failure ID code is not installed on -screen instructions. If HP PC Hardware Diagnostics Windows is generated. Select the Start button, and then select HP Help and Support. Select Troubleshooting and fixes. NOTE: If you must use a Windows computer to diagnose hardware failures. To download HP PC Hardware Diagnostics Windows, see Downloading HP PC Hardware Diagnostics Windows on your computer, first you need to access it . 10 Using HP PC Hardware Diagnostics Using HP PC Hardware Diagnostics Windows...

User Guide
Page 66
... Changing the computer boot order on the location of devices listed in BIOS where the computer looks for boot options. You can use HP Recovery media to boot, and then follow the on-screen instructions. Access the system Startup menu. Turn on page 54. Removing the HP Recovery partition (select products only) HP Recovery Manager software allows you will not be able to free up hard drive space. Before removing the Recovery partition, create HP Recovery media. See Changing the computer boot order on or restart the tablet, quickly hold down button, and...
... Changing the computer boot order on the location of devices listed in BIOS where the computer looks for boot options. You can use HP Recovery media to boot, and then follow the on-screen instructions. Access the system Startup menu. Turn on page 54. Removing the HP Recovery partition (select products only) HP Recovery Manager software allows you will not be able to free up hard drive space. Before removing the Recovery partition, create HP Recovery media. See Changing the computer boot order on or restart the tablet, quickly hold down button, and...

User Guide
Page 77
... update 44 starting the Setup Utility 43 updating 43 Bluetooth device 17, 19 Bluetooth label 16 boot order, changing 54 buttons power 11 C camera identifying 8 using 21 camera light, identifying 8 caps lock light, identifying 10 caring for your computer 37 cleaning your computer 37 components display 8 front 14 keyboard area 9 left side 6 right side 5 connecting to a network 17 connecting to a wireless network 17 connecting to a WLAN 18 connecting to LAN 20 connector, power 5 control zone 9 corporate WLAN connection 18 critical battery level 33 customer support, accessibility...
... update 44 starting the Setup Utility 43 updating 43 Bluetooth device 17, 19 Bluetooth label 16 boot order, changing 54 buttons power 11 C camera identifying 8 using 21 camera light, identifying 8 caps lock light, identifying 10 caring for your computer 37 cleaning your computer 37 components display 8 front 14 keyboard area 9 left side 6 right side 5 connecting to a network 17 connecting to a wireless network 17 connecting to a WLAN 18 connecting to LAN 20 connector, power 5 control zone 9 corporate WLAN connection 18 critical battery level 33 customer support, accessibility...

User Guide
Page 78
...operating system controls 17 original system recovery 53 P passwords Setup Utility (BIOS) 40 Windows 39 pause action key 13 play action key 13 ports HDMI 6, 22 USB 6 USB SuperSpeed 6 power battery 31 external 33 power button, identifying 11 power connector identifying 5 Power icon, using 31 power lights, identifying 7 power settings, using 31 product name and number, computer 15 public WLAN connection 18 R recovery discs 51, 54 HP Recovery Manager 53 HP Recovery partition 52 media 54 starting 53 supported discs 51 system 53 USB flash drive 54 using HP Recovery media 52 recovery media creating...
...operating system controls 17 original system recovery 53 P passwords Setup Utility (BIOS) 40 Windows 39 pause action key 13 play action key 13 ports HDMI 6, 22 USB 6 USB SuperSpeed 6 power battery 31 external 33 power button, identifying 11 power connector identifying 5 Power icon, using 31 power lights, identifying 7 power settings, using 31 product name and number, computer 15 public WLAN connection 18 R recovery discs 51, 54 HP Recovery Manager 53 HP Recovery partition 52 media 54 starting 53 supported discs 51 system 53 USB flash drive 54 using HP Recovery media 52 recovery media creating...

User Guide
Page 79
... 30 updating programs and drivers 36 USB port, identifying 6 USB SuperSpeed port, identifying 6 using passwords 39 using the keyboard and optional mouse 28 using the TouchPad 25 V video HDMI port 22 wireless displays 24 video, using 22 volume adjusting 13 mute 13 W Windows system restore point 50 Windows Hello 21 using 40 Windows key, identifying 12 Windows passwords 39 wired network (LAN) 20 wireless button 17 wireless certification label 16 wireless controls button 17 operating system 17 wireless light 17 wireless network (WLAN) connecting 18 corporate WLAN connection 18 functional range...
... 30 updating programs and drivers 36 USB port, identifying 6 USB SuperSpeed port, identifying 6 using passwords 39 using the keyboard and optional mouse 28 using the TouchPad 25 V video HDMI port 22 wireless displays 24 video, using 22 volume adjusting 13 mute 13 W Windows system restore point 50 Windows Hello 21 using 40 Windows key, identifying 12 Windows passwords 39 wired network (LAN) 20 wireless button 17 wireless certification label 16 wireless controls button 17 operating system 17 wireless light 17 wireless network (WLAN) connecting 18 corporate WLAN connection 18 functional range...


