
HP SpectreXT Maintenance and Service Guide
Page 5
... ...1 2 External component identification ...3 Display ...3 Button, speakers, and other components 4 Keys ...6 Lights ...7 TouchPad ...8 Left side ...9 Right side ...10 Rear ...12 Bottom ...12 3 Illustrated parts catalog ...13 Service tag ...13 Computer major components ...14 Display assembly subcomponents ...18 Mass storage device ...19 Miscellaneous parts ...19 Sequential part number listing ...20 4 Removal and replacement procedures ...24 Preliminary replacement requirements 24 Tools required ...24 Service considerations ...24 Plastic parts ...24 Cables and connectors 24 Drive handling...
... ...1 2 External component identification ...3 Display ...3 Button, speakers, and other components 4 Keys ...6 Lights ...7 TouchPad ...8 Left side ...9 Right side ...10 Rear ...12 Bottom ...12 3 Illustrated parts catalog ...13 Service tag ...13 Computer major components ...14 Display assembly subcomponents ...18 Mass storage device ...19 Miscellaneous parts ...19 Sequential part number listing ...20 4 Removal and replacement procedures ...24 Preliminary replacement requirements 24 Tools required ...24 Service considerations ...24 Plastic parts ...24 Cables and connectors 24 Drive handling...
HP SpectreXT Maintenance and Service Guide
Page 6
... drive ...35 WLAN module ...36 Fan ...37 RJ-45 module cover ...37 System board ...39 Heat sink ...43 Speakers ...44 USB/Audio board ...46 TouchPad module ...48 TouchPad LED board ...49 Power connector cable ...50 Power button board ...52 Display panel ...54 Webcam assembly ...58 Backlit keyboard ...59 WLAN antenna cables ...61 Top cover ...62 5 Setup Utility (BIOS) and System Diagnostics 64 Using Setup Utility ...64 Starting Setup Utility ...64 Changing the language of Setup Utility 64 Navigating and selecting in Setup Utility 65 Displaying system information 65 Restoring factory settings...
... drive ...35 WLAN module ...36 Fan ...37 RJ-45 module cover ...37 System board ...39 Heat sink ...43 Speakers ...44 USB/Audio board ...46 TouchPad module ...48 TouchPad LED board ...49 Power connector cable ...50 Power button board ...52 Display panel ...54 Webcam assembly ...58 Backlit keyboard ...59 WLAN antenna cables ...61 Top cover ...62 5 Setup Utility (BIOS) and System Diagnostics 64 Using Setup Utility ...64 Starting Setup Utility ...64 Changing the language of Setup Utility 64 Navigating and selecting in Setup Utility 65 Displaying system information 65 Restoring factory settings...

HP SpectreXT Maintenance and Service Guide
Page 9
.../100/1000 GB network interface card (NIC) Integrated WLAN options by way of wireless module Two WLAN antennas built into display assembly Supports the following WLAN formats: ● Intel® Centrino® Advanced-N 6235 + Bluetooth combo w/* 2 Antennas (802.11 a/g/n)) Push-push insertion/removal 1 Platform Controller Hub (PCH - 1 Product description Category Product Name Processors Chipset Graphics Panel Memory Drives Audio and video Ethernet Wireless External media card Description HP ENVY Spectre XT Ultrabook PC...
.../100/1000 GB network interface card (NIC) Integrated WLAN options by way of wireless module Two WLAN antennas built into display assembly Supports the following WLAN formats: ● Intel® Centrino® Advanced-N 6235 + Bluetooth combo w/* 2 Antennas (802.11 a/g/n)) Push-push insertion/removal 1 Platform Controller Hub (PCH - 1 Product description Category Product Name Processors Chipset Graphics Panel Memory Drives Audio and video Ethernet Wireless External media card Description HP ENVY Spectre XT Ultrabook PC...

HP SpectreXT Maintenance and Service Guide
Page 10
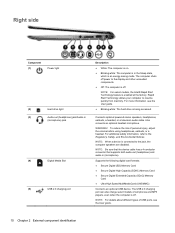
...; RJ-45 (Ethernet, includes link and activity lights) ● USB 3.0 port ● USB 2.0 charging port Backlit, island-style keyboard in black finish TouchPad with multi-touch gestures Taps enabled as default Supports the following HP AC adapters: ● 65-W (non-smart) PFC RC V EM 3-wire HP AC adapter Supports the following batteries: ● 4-cell, 45WHr 3.05 AH Li-ion battery Preinstalled: ● Windows 8 Standard ● Windows 8 Professional End-user replaceable parts: ● AC adapter 2 Chapter 1 Product description
...; RJ-45 (Ethernet, includes link and activity lights) ● USB 3.0 port ● USB 2.0 charging port Backlit, island-style keyboard in black finish TouchPad with multi-touch gestures Taps enabled as default Supports the following HP AC adapters: ● 65-W (non-smart) PFC RC V EM 3-wire HP AC adapter Supports the following batteries: ● 4-cell, 45WHr 3.05 AH Li-ion battery Preinstalled: ● Windows 8 Standard ● Windows 8 Professional End-user replaceable parts: ● AC adapter 2 Chapter 1 Product description
HP SpectreXT Maintenance and Service Guide
Page 18
...) and audio-in the Sleep state, which is an energy-saving mode. NOTE: For details about different types of USB ports, see the User guide. ● Blinking white: The hard drive is being accessed. Also connects an optional headset microphone. The computer shuts off power to resume quickly from inactivity. For more information ,see the User guide. 10 Chapter 2 External component identification Supports the following digital card formats: ● Secure Digital (SD) Memory Card ●...
...) and audio-in the Sleep state, which is an energy-saving mode. NOTE: For details about different types of USB ports, see the User guide. ● Blinking white: The hard drive is being accessed. Also connects an optional headset microphone. The computer shuts off power to resume quickly from inactivity. For more information ,see the User guide. 10 Chapter 2 External component identification Supports the following digital card formats: ● Secure Digital (SD) Memory Card ●...
HP SpectreXT Maintenance and Service Guide
Page 21
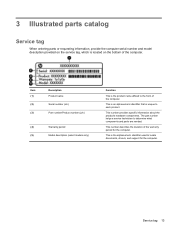
... each product. The part number helps a service technician to determine what components and parts are needed. This is an alphanumeric identifier that is the alphanumeric identifier used to locate documents, drivers, and support for the computer. Service tag 13 This number describes the duration of the computer. 3 Illustrated parts catalog Service tag When ordering parts or requesting information, provide the computer serial number and model description provided on the...
... each product. The part number helps a service technician to determine what components and parts are needed. This is an alphanumeric identifier that is the alphanumeric identifier used to locate documents, drivers, and support for the computer. Service tag 13 This number describes the duration of the computer. 3 Illustrated parts catalog Service tag When ordering parts or requesting information, provide the computer serial number and model description provided on the...
HP SpectreXT Maintenance and Service Guide
Page 35
... static-safe tubes, bags, or boxes. ● Protect ESD-sensitive parts and assemblies with pins, leads, or circuitry. ● Turn off power and input signals before removing items from their containers. ● Always be properly grounded when touching a component or assembly. ● Store reusable ESD-sensitive parts from assemblies in protective packaging or nonconductive foam. ● Use transporters...
... static-safe tubes, bags, or boxes. ● Protect ESD-sensitive parts and assemblies with pins, leads, or circuitry. ● Turn off power and input signals before removing items from their containers. ● Always be properly grounded when touching a component or assembly. ● Store reusable ESD-sensitive parts from assemblies in protective packaging or nonconductive foam. ● Use transporters...
HP SpectreXT Maintenance and Service Guide
Page 44
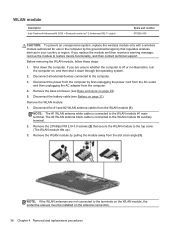
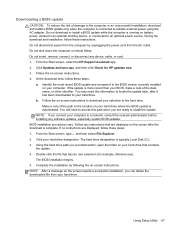
... installed on the antenna connectors. 36 Chapter 4 Removal and replacement procedures Disconnect the battery cable (see Base enclosure on page 29). 5. Shut down through the operating system. 2. Remove the 2 Phillips PM 2.0×3.0 screws (2) that regulates wireless devices in Hibernation, turn the computer on, and then shut it down the computer. If you replace the module and then receive a warning message, remove the module to restore device functionality...
... installed on the antenna connectors. 36 Chapter 4 Removal and replacement procedures Disconnect the battery cable (see Base enclosure on page 29). 5. Shut down through the operating system. 2. Remove the 2 Phillips PM 2.0×3.0 screws (2) that regulates wireless devices in Hibernation, turn the computer on, and then shut it down the computer. If you replace the module and then receive a warning message, remove the module to restore device functionality...
HP SpectreXT Maintenance and Service Guide
Page 48
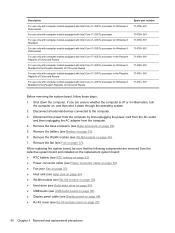
...; WLAN module see (WLAN module on page 36). ● Hard drive (see Solid-state drive on page 35). ● USB/Audio (see USB/Audio board on page 46), ● Display panel cable (see Display panel on page 54). ● RJ-45 cover (see Battery on page 29). 5. Description For use only with computer models equipped with Intel Core i7-3537U processor for Windows 8 Professional For use only with computer models equipped with...
...; WLAN module see (WLAN module on page 36). ● Hard drive (see Solid-state drive on page 35). ● USB/Audio (see USB/Audio board on page 46), ● Display panel cable (see Display panel on page 54). ● RJ-45 cover (see Battery on page 29). 5. Description For use only with computer models equipped with Intel Core i7-3537U processor for Windows 8 Professional For use only with computer models equipped with...

HP SpectreXT Maintenance and Service Guide
Page 72
... of the screen. 2. Press f10 to select Exit > Exit Saving Changes, and then press enter. Turn on the system (such as disk drives, display, keyboard, mouse, and printer). When a confirmation prompt with Setup Utility only if USB legacy support is enabled. Changing the language of system and extended memory. Use the arrow keys to select System Configuration > Language, and then press enter. 3. Setup Utility includes settings for Startup Menu" message is displayed, press enter. 5. To start Setup Utility, follow these...
... of the screen. 2. Press f10 to select Exit > Exit Saving Changes, and then press enter. Turn on the system (such as disk drives, display, keyboard, mouse, and printer). When a confirmation prompt with Setup Utility only if USB legacy support is enabled. Changing the language of system and extended memory. Use the arrow keys to select System Configuration > Language, and then press enter. 3. Setup Utility includes settings for Startup Menu" message is displayed, press enter. 5. To start Setup Utility, follow these...
HP SpectreXT Maintenance and Service Guide
Page 73
... enter. Start Setup Utility. 2. Use the tab key and the arrow keys to the main Setup Utility screen, press esc, and then follow the onscreen instructions. - Your changes go into effect when the computer restarts. Turn on or restart the computer, and then press esc while the "Press the ESC key for Startup Menu" message is displayed. 3. Select the Main menu. To exit Setup Utility without saving your changes and exit Setup Utility...
... enter. Start Setup Utility. 2. Use the tab key and the arrow keys to the main Setup Utility screen, press esc, and then follow the onscreen instructions. - Your changes go into effect when the computer restarts. Turn on or restart the computer, and then press esc while the "Press the ESC key for Startup Menu" message is displayed. 3. Select the Main menu. To exit Setup Utility without saving your changes and exit Setup Utility...
HP SpectreXT Maintenance and Service Guide
Page 74
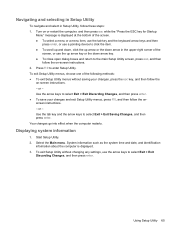
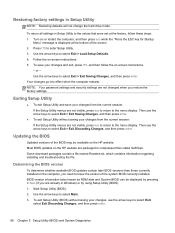
... follow these steps: 1. Then use the arrow keys to the menu display. Start Setup Utility (BIOS). 2. Restoring factory settings in Setup Utility to select Exit, select Exit Discarding Changes, and then press enter. 66 Chapter 5 Setup Utility (BIOS) and System Diagnostics Most BIOS updates on the HP website are not changed when you need to know the version of the screen. 2. To save your changes from the current session: If the Setup Utility menus are already in...
... follow these steps: 1. Then use the arrow keys to the menu display. Start Setup Utility (BIOS). 2. Restoring factory settings in Setup Utility to select Exit, select Exit Discarding Changes, and then press enter. 66 Chapter 5 Setup Utility (BIOS) and System Diagnostics Most BIOS updates on the HP website are not changed when you need to know the version of the screen. 2. To save your changes from the current session: If the Setup Utility menus are already in...
HP SpectreXT Maintenance and Service Guide
Page 75
... the on-screen instructions to download your computer. If no instructions are displayed on the screen after it to the BIOS version currently installed on your selection to a network, consult the network administrator before installing any software updates, especially system BIOS updates. The hard drive designation is typically Local Disk (C:). 3. Using Setup Utility 67 Identify the most recent BIOS update and compare it has been downloaded to your computer to the hard drive. b. From the Start screen, type e, and...
... the on-screen instructions to download your computer. If no instructions are displayed on the screen after it to the BIOS version currently installed on your selection to a network, consult the network administrator before installing any software updates, especially system BIOS updates. The hard drive designation is typically Local Disk (C:). 3. Using Setup Utility 67 Identify the most recent BIOS update and compare it has been downloaded to your computer to the hard drive. b. From the Start screen, type e, and...

HP SpectreXT Maintenance and Service Guide
Page 79
... HP Support Assistant app. On Start screen, type backup, click Settings, and then select Save backup copies of your computer. NOTE: Windows includes the User Account Control feature to improve the security of your files with File History. Backing up your information Recovery after initial system setup. To create a backup using the installed optical drive (select models only) or an optional external optical drive, or create system restore points. 7 Backup and recovery To protect your information, use Windows backup...
... HP Support Assistant app. On Start screen, type backup, click Settings, and then select Save backup copies of your computer. NOTE: Windows includes the User Account Control feature to improve the security of your files with File History. Backing up your information Recovery after initial system setup. To create a backup using the installed optical drive (select models only) or an optional external optical drive, or create system restore points. 7 Backup and recovery To protect your information, use Windows backup...

HP SpectreXT Maintenance and Service Guide
Page 80
... the Start screen, type backup, click Settings, and then select from the backup used for the presence of displayed options. 2. When reformatting is complete, the recovery process restores the operating system, as well as the drivers, software, and utilities from the list of the HP Recovery partition and the Windows partition. From the Start screen, type c, and then select Computer. Follow the on the Start screen, select the HP Support Assistant app. All files you must recover your original hard drive...
... the Start screen, type backup, click Settings, and then select from the backup used for the presence of displayed options. 2. When reformatting is complete, the recovery process restores the operating system, as well as the drivers, software, and utilities from the list of the HP Recovery partition and the Windows partition. From the Start screen, type c, and then select Computer. Follow the on the Start screen, select the HP Support Assistant app. All files you must recover your original hard drive...
HP SpectreXT Maintenance and Service Guide
Page 81
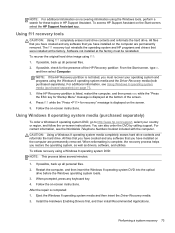
... Start screen, type C, and then select Computer. Press f11 while the "Press for Startup Menu" message is displayed on the screen. 5. Follow the on -screen instructions. You can also order the DVD by calling support. All files that you have created and any software that you have created and any keyboard key. 4. To initiate recovery using f11: 1. Install the Hardware Enabling Drivers first, and then install Recommended Applications. Using f11 recovery tools CAUTION: Using f11 completely erases hard drive...
... Start screen, type C, and then select Computer. Press f11 while the "Press for Startup Menu" message is displayed on the screen. 5. Follow the on -screen instructions. You can also order the DVD by calling support. All files that you have created and any software that you have created and any keyboard key. 4. To initiate recovery using f11: 1. Install the Hardware Enabling Drivers first, and then install Recommended Applications. Using f11 recovery tools CAUTION: Using f11 completely erases hard drive...
HP SpectreXT Maintenance and Service Guide
Page 82
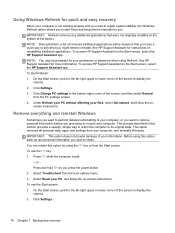
... before you press the power button. 2. Select Troubleshoot from the Start screen. Click Settings. 3. Remove everything and reinstall Windows Sometimes you want to perform detailed reformatting of the screen to its original state. Click Change PC settings in this option, back up any traditional applications that you have a quick way to see what is important to display the charms. 2. Select Reset your files, select Get...
... before you press the power button. 2. Select Troubleshoot from the Start screen. Click Settings. 3. Remove everything and reinstall Windows Sometimes you want to perform detailed reformatting of the screen to its original state. Click Change PC settings in this option, back up any traditional applications that you have a quick way to see what is important to display the charms. 2. Select Reset your files, select Get...

HP SpectreXT Maintenance and Service Guide
Page 83
Under Remove everything and reinstall Windows, select Get started, and follow the onscreen instructions. Using HP Software Setup HP Software Setup can be used to reinstall drivers or select software. Follow the on-screen directions to reinstall drivers or select software that has been corrupted or deleted from the PC settings screen. 4. Open HP Software Setup. 3. Performing a system recovery 75 From the Start screen, type HP Software Setup, and select Apps. 2. Click Change PC settings in the bottom-right corner of the screen, and then select General from the system. 1. 3.
Under Remove everything and reinstall Windows, select Get started, and follow the onscreen instructions. Using HP Software Setup HP Software Setup can be used to reinstall drivers or select software. Follow the on-screen directions to reinstall drivers or select software that has been corrupted or deleted from the PC settings screen. 4. Open HP Software Setup. 3. Performing a system recovery 75 From the Start screen, type HP Software Setup, and select Apps. 2. Click Change PC settings in the bottom-right corner of the screen, and then select General from the system. 1. 3.
HP SpectreXT Maintenance and Service Guide
Page 87
... 27 H hard drive precautions 25 product description 1 removal 35 spare part numbers 19, 35 hard drive light 10 hard drive recovery 73 hard drive, spare part numbers 17 HDMI port, identifying 9 I integrated webcam light, identifying 3 internal display switch, identifying 3 internal microphones, identifying 3 J jacks audio-out (headphone) 10 network 9 RJ-45 (network) 9 K keyboard product description 2 removal 59 spare part numbers 15, 59 keyboard backlight 7 keys action 6 esc 6 fn 6 Windows applications 6 Windows button 6 L left TouchPad button 8 lights AC adapter 11 caps lock 8 hard drive 10...
... 27 H hard drive precautions 25 product description 1 removal 35 spare part numbers 19, 35 hard drive light 10 hard drive recovery 73 hard drive, spare part numbers 17 HDMI port, identifying 9 I integrated webcam light, identifying 3 internal display switch, identifying 3 internal microphones, identifying 3 J jacks audio-out (headphone) 10 network 9 RJ-45 (network) 9 K keyboard product description 2 removal 59 spare part numbers 15, 59 keyboard backlight 7 keys action 6 esc 6 fn 6 Windows applications 6 Windows button 6 L left TouchPad button 8 lights AC adapter 11 caps lock 8 hard drive 10...
HP SpectreXT Maintenance and Service Guide
Page 88
... audio 1 chipset 1 display panel 1 Ethernet 1 external media cards 1 graphics 1 hard drives 1 keyboard 2 memory module 1 microphone 1 operating system 2 pointing device 2 ports 2 power requirements 2 processors 1 product name 1 serviceability 2 video 1 wireless 1 product name 1, 29 product number 29 R recovery 74 recovery partition 73 recycle computer 74 refresh 74 removal/replacement preliminaries 24 procedures 28 remove everything and reinstall Windows 74 reset computer 74 steps 74 restoring the hard drive 73 right TouchPad button 8 RJ-45 (network) jack, identifying 9 RTC battery removal...
... audio 1 chipset 1 display panel 1 Ethernet 1 external media cards 1 graphics 1 hard drives 1 keyboard 2 memory module 1 microphone 1 operating system 2 pointing device 2 ports 2 power requirements 2 processors 1 product name 1 serviceability 2 video 1 wireless 1 product name 1, 29 product number 29 R recovery 74 recovery partition 73 recycle computer 74 refresh 74 removal/replacement preliminaries 24 procedures 28 remove everything and reinstall Windows 74 reset computer 74 steps 74 restoring the hard drive 73 right TouchPad button 8 RJ-45 (network) jack, identifying 9 RTC battery removal...


