

Limited Warranty and Support Guide
Page 4
... service provider, or (iii) your own installation of end-user-replaceable HP or HP-approved parts if available for your product in the servicing country/region. or (g) by modification or service by anyone other external causes; (b) by operation outside the usage parameters stated in the user documentation that shipped with the product; (c) by software, interfacing, parts, or supplies not supplied by HP; (d) by improper site preparation or maintenance...
... service provider, or (iii) your own installation of end-user-replaceable HP or HP-approved parts if available for your product in the servicing country/region. or (g) by modification or service by anyone other external causes; (b) by operation outside the usage parameters stated in the user documentation that shipped with the product; (c) by software, interfacing, parts, or supplies not supplied by HP; (d) by improper site preparation or maintenance...
Limited Warranty and Support Guide
Page 9
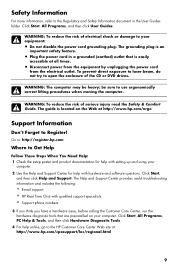
... DVD drives. The guide is easily accessible at all times. • Disconnect power from the equipment by unplugging the power cord from the electrical outlet. Click Start, All Programs, PC Help & Tools, and then click Hardware Diagnostic Tools. 4 For help with qualified support specialists. • Support phone numbers. 3 If you think you have a hardware issue, before calling the Customer Care Center, run the hardware diagnostic tools that is located...
... DVD drives. The guide is easily accessible at all times. • Disconnect power from the equipment by unplugging the power cord from the electrical outlet. Click Start, All Programs, PC Help & Tools, and then click Hardware Diagnostic Tools. 4 For help with qualified support specialists. • Support phone numbers. 3 If you think you have a hardware issue, before calling the Customer Care Center, run the hardware diagnostic tools that is located...

Getting Started Guide
Page 3
Table of contents 1 Getting information 2 Setting up your computer Protecting your computer 3 Guidelines for installing software and hardware devices 4 Connecting to the Internet 4 Transferring files and settings to your new computer 5 3 Troubleshooting and maintenance Computer does not start 5 Power 6 Display (monitor 6 Keyboard and mouse (with cable 7 Keyboard and mouse (wireless 8 Speakers and sound 9 Internet access 10 Software troubleshooting 11 Maintenance 14 System Recovery 16 Recovery discs 18 ENWW iii
Table of contents 1 Getting information 2 Setting up your computer Protecting your computer 3 Guidelines for installing software and hardware devices 4 Connecting to the Internet 4 Transferring files and settings to your new computer 5 3 Troubleshooting and maintenance Computer does not start 5 Power 6 Display (monitor 6 Keyboard and mouse (with cable 7 Keyboard and mouse (wireless 8 Speakers and sound 9 Internet access 10 Software troubleshooting 11 Maintenance 14 System Recovery 16 Recovery discs 18 ENWW iii
Getting Started Guide
Page 5
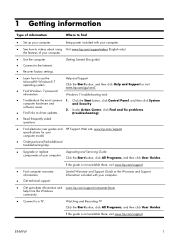
... Center, click Find and fix problems (troubleshooting). ● Read frequently asked questions. ● Find electronic user guides and HP Support Web site: www.hp.com/support specifications for your computer model. ● Order parts and find ● Set up -to-date information and www.hp.com/support/consumer-forum help . ● Upgrade or replace Upgrading and Servicing Guide components of your computer. ● Use the computer. ● Connect to the Internet. ● Recover factory settings...
... Center, click Find and fix problems (troubleshooting). ● Read frequently asked questions. ● Find electronic user guides and HP Support Web site: www.hp.com/support specifications for your computer model. ● Order parts and find ● Set up -to-date information and www.hp.com/support/consumer-forum help . ● Upgrade or replace Upgrading and Servicing Guide components of your computer. ● Use the computer. ● Connect to the Internet. ● Recover factory settings...
Getting Started Guide
Page 6
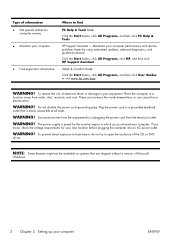
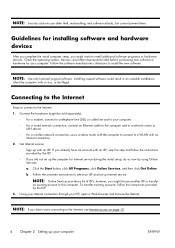
... damage to your computer. ● Find ergonomic information. WARNING! Plug the power cord in a location away from the electrical outlet. Where to open the enclosure of the CD or DVD drives. Click the Start button, click All Programs, click HP, and then click HP Support Assistant. WARNING! Do not disable the power cord grounding plug. NOTE: Some features might not be available on systems...
... damage to your computer. ● Find ergonomic information. WARNING! Plug the power cord in a location away from the electrical outlet. Where to open the enclosure of the CD or DVD drives. Click the Start button, click All Programs, click HP, and then click HP Support Assistant. WARNING! Do not disable the power cord grounding plug. NOTE: Some features might not be available on systems...
Getting Started Guide
Page 7
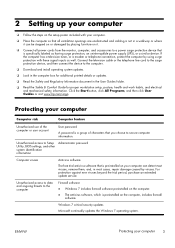
... cable or the telephone line cord to the surge protection device, and then connect the device to a power surge protection device that is specifically labeled as well. Unauthorized access to Setup Utility, BIOS settings, and other system identification information Administrator password Computer viruses Antivirus software The free trial antivirus software that you choose to secure computer information. ENWW Protecting your computer 3 Windows 7 critical security updates Microsoft continually updates the Windows 7 operating...
... cable or the telephone line cord to the surge protection device, and then connect the device to a power surge protection device that is specifically labeled as well. Unauthorized access to Setup Utility, BIOS settings, and other system identification information Administrator password Computer viruses Antivirus software The free trial antivirus software that you choose to secure computer information. ENWW Protecting your computer 3 Windows 7 critical security updates Microsoft continually updates the Windows 7 operating...
Getting Started Guide
Page 8
... original software. Connecting to the Internet Steps to connect to install additional software programs or hardware devices. Get Internet service. ◦ Sign up your computer. ◦ For a wired network connection, connect an Ethernet cable to the computer and to a network router or LAN device. ◦ For a wireless network connection, use a wireless router with an ISP. To transfer existing accounts, follow the instructions provided by the ISP. ◦ If you did not set up the computer for Internet service...
... original software. Connecting to the Internet Steps to connect to install additional software programs or hardware devices. Get Internet service. ◦ Sign up your computer. ◦ For a wired network connection, connect an Ethernet cable to the computer and to a network router or LAN device. ◦ For a wireless network connection, use a wireless router with an ISP. To transfer existing accounts, follow the instructions provided by the ISP. ◦ If you did not set up the computer for Internet service...

Getting Started Guide
Page 9
... start . See Display (monitor) on . The Easy Transfer Cable is a USB cable designed specifically to connect two computers and to work . A standard USB cable does not work with Windows 7 (select models only), to copy files and settings to a storage device or, using your files and settings: 1. For more information or for information about peripheral-specific problems, such as issues with a monitor or a printer. Computer will not turn it in properly. Click the Start button, type Windows...
... start . See Display (monitor) on . The Easy Transfer Cable is a USB cable designed specifically to connect two computers and to work . A standard USB cable does not work with Windows 7 (select models only), to copy files and settings to a storage device or, using your files and settings: 1. For more information or for information about peripheral-specific problems, such as issues with a monitor or a printer. Computer will not turn it in properly. Click the Start button, type Windows...

Getting Started Guide
Page 10
... Power Settings. Press the Ctrl+Alt+Delete keys on the keyboard. Click the Arrow button next to close any programs not responding, or restart the computer: 1. Symptom Possible solution Test the wall outlet by connecting a different electrical device to it cool down automatically. ● The computer might not have an internal fan.) Display (monitor) Symptom Possible solution Screen is blank, Reconnect the power plug to...
... Power Settings. Press the Ctrl+Alt+Delete keys on the keyboard. Click the Arrow button next to close any programs not responding, or restart the computer: 1. Symptom Possible solution Test the wall outlet by connecting a different electrical device to it cool down automatically. ● The computer might not have an internal fan.) Display (monitor) Symptom Possible solution Screen is blank, Reconnect the power plug to...
Getting Started Guide
Page 11
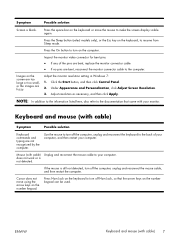
... typing are bent, reconnect the monitor connector cable to turn off the computer, unplug and reconnect the keyboard to your computer. Press the On button to resume from Sleep mode. Click the Start button, and then click Control Panel. 2. Images on the number keypad. If the mouse is still not detected, turn on the number keypad can be used. Press the space bar on the keyboard or move using the arrow keys...
... typing are bent, reconnect the monitor connector cable to turn off the computer, unplug and reconnect the keyboard to your computer. Press the On button to resume from Sleep mode. Click the Start button, and then click Control Panel. 2. Images on the number keypad. If the mouse is still not detected, turn on the number keypad can be used. Press the space bar on the keyboard or move using the arrow keys...
Getting Started Guide
Page 14
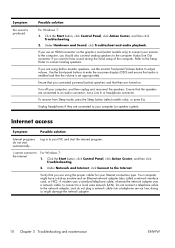
.... Internet access Symptom Possible solution Internet programs do not plug a network cable into a telephone service line; Use the front-panel buttons to hear sound during the initial setup of the computer. Ensure that you are turned on the graphics card (select models only) to the network adapter, and do not start the desired program. Your computer might damage the network adapter. 10 Chapter 3 Troubleshooting and maintenance ENWW Under Hardware and Sound, click Troubleshoot and audio playback. Under Network...
.... Internet access Symptom Possible solution Internet programs do not plug a network cable into a telephone service line; Use the front-panel buttons to hear sound during the initial setup of the computer. Ensure that you are turned on the graphics card (select models only) to the network adapter, and do not start the desired program. Your computer might damage the network adapter. 10 Chapter 3 Troubleshooting and maintenance ENWW Under Hardware and Sound, click Troubleshoot and audio playback. Under Network...
Getting Started Guide
Page 15
... the Start button, click Control Panel, click Network and Internet, and then click Network and Sharing Center. 2. In the Network and Sharing Center window, click Set up a connection or network to connect again later, or contact your computer, and others require performing a System Recovery from files on again. Restores the software (if it on your system has an external antenna, try to move the antenna to move the computer. Restore...
... the Start button, click Control Panel, click Network and Internet, and then click Network and Sharing Center. 2. In the Network and Sharing Center window, click Set up a connection or network to connect again later, or contact your computer, and others require performing a System Recovery from files on again. Restores the software (if it on your system has an external antenna, try to move the antenna to move the computer. Restore...
Getting Started Guide
Page 16
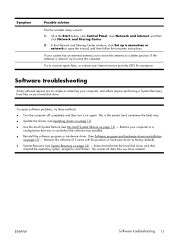
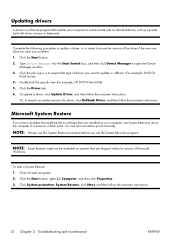
... to communicate with an attached device, such as a printer, hard disk drive, mouse, or keyboard. NOTE: Some features might be available on your problem: 1. You can also set restore points manually. Close all open the Device Manager window. 3. Click the plus sign (+) to expand the type of device you have a problem that might not be due to update or rollback. (For example, DVD/CD- Updating drivers A driver is a software program that are shipped...
... to communicate with an attached device, such as a printer, hard disk drive, mouse, or keyboard. NOTE: Some features might be available on your problem: 1. You can also set restore points manually. Close all open the Device Manager window. 3. Click the plus sign (+) to expand the type of device you have a problem that might not be due to update or rollback. (For example, DVD/CD- Updating drivers A driver is a software program that are shipped...

Getting Started Guide
Page 19
... computer case and the monitor case. Turn the mouse upside down, and rotate the ball-cover ring counterclockwise to the computer and the monitor. 2. To clean the monitor screen, use water on the computer case and the monitor case. 2. Unplug the power to remove the ring and release the roller ball. 2. Use a clean, dry cloth to an external hard disk drive. ENWW Maintenance 15 Check your computer system free of the keyboard and...
... computer case and the monitor case. Turn the mouse upside down, and rotate the ball-cover ring counterclockwise to the computer and the monitor. 2. To clean the monitor screen, use water on the computer case and the monitor case. 2. Unplug the power to remove the ring and release the roller ball. 2. Use a clean, dry cloth to an external hard disk drive. ENWW Maintenance 15 Check your computer system free of the keyboard and...
Upgrading and Servicing Guide
Page 3
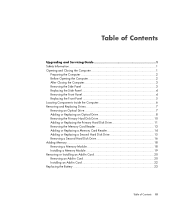
... Upgrading and Servicing Guide 1 Safety Information 1 Opening and Closing the Computer 1 Preparing the Computer 2 Before Opening the Computer 2 After Closing the Computer 3 Removing the Side Panel 3 Replacing the Side Panel 4 Removing the Front Panel 4 Replacing the Front Panel 5 Locating Components Inside the Computer 6 Removing and Replacing Drives 7 Removing an Optical Drive 7 Adding or Replacing an Optical Drive 8 Removing the Primary Hard Disk Drive 10 Adding or Replacing the Primary Hard Disk Drive 11 Removing the Memory Card Reader 13 Adding or Replacing a Memory Card...
... Upgrading and Servicing Guide 1 Safety Information 1 Opening and Closing the Computer 1 Preparing the Computer 2 Before Opening the Computer 2 After Closing the Computer 3 Removing the Side Panel 3 Replacing the Side Panel 4 Removing the Front Panel 4 Replacing the Front Panel 5 Locating Components Inside the Computer 6 Removing and Replacing Drives 7 Removing an Optical Drive 7 Adding or Replacing an Optical Drive 8 Removing the Primary Hard Disk Drive 10 Adding or Replacing the Primary Hard Disk Drive 11 Removing the Memory Card Reader 13 Adding or Replacing a Memory Card...
Upgrading and Servicing Guide
Page 7
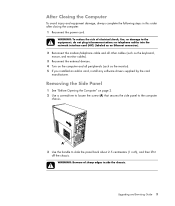
... the equipment, do not plug telecommunications or telephone cables into the network interface card (NIC) (labeled as an Ethernet connector). 2 Reconnect the modem/telephone cable and all other cables (such as the keyboard, mouse, and monitor cables). 3 Reconnect the external devices. 4 Turn on the computer and all peripherals (such as the monitor). 5 If you installed an add-in this order after closing the computer: 1 Reconnect the power cord. Upgrading and Servicing Guide 3
... the equipment, do not plug telecommunications or telephone cables into the network interface card (NIC) (labeled as an Ethernet connector). 2 Reconnect the modem/telephone cable and all other cables (such as the keyboard, mouse, and monitor cables). 3 Reconnect the external devices. 4 Turn on the computer and all peripherals (such as the monitor). 5 If you installed an add-in this order after closing the computer: 1 Reconnect the power cord. Upgrading and Servicing Guide 3

Upgrading and Servicing Guide
Page 11
... software and drivers for the drive types and locations. Failure to be opened, and then remove the side and front panels. Also, ensure that you have a second hard disk drive. NOTE: The following figure shows both optical drives. Removing and Replacing Drives Your computer has several drives that you can add an optical drive to an empty lower optical drive bay. After replacing the hard disk drive, you must run System Recovery using the recovery discs to work with the operating system. See "Locating Components Inside...
... software and drivers for the drive types and locations. Failure to be opened, and then remove the side and front panels. Also, ensure that you have a second hard disk drive. NOTE: The following figure shows both optical drives. Removing and Replacing Drives Your computer has several drives that you can add an optical drive to an empty lower optical drive bay. After replacing the hard disk drive, you must run System Recovery using the recovery discs to work with the operating system. See "Locating Components Inside...

Upgrading and Servicing Guide
Page 19
... the hard disk drive cables are replacing the existing hard disk drive, remove it. C - B - Adding or Replacing a Second Hard Disk Drive NOTE: A second hard disk drive must be purchased separately. 1 If you are facing the closed side panel of the memory card reader, and then attach the screw to secure the memory card reader to a secondary hard disk drive (select models only). Connect to a primary hard disk drive. Upgrading and Servicing Guide 15 See "Opening and Closing the Computer" on page 16. 2 Attach the hard disk drive cables. Connect to the motherboard...
... the hard disk drive cables are replacing the existing hard disk drive, remove it. C - B - Adding or Replacing a Second Hard Disk Drive NOTE: A second hard disk drive must be purchased separately. 1 If you are facing the closed side panel of the memory card reader, and then attach the screw to secure the memory card reader to a secondary hard disk drive (select models only). Connect to a primary hard disk drive. Upgrading and Servicing Guide 15 See "Opening and Closing the Computer" on page 16. 2 Attach the hard disk drive cables. Connect to the motherboard...
Upgrading and Servicing Guide
Page 24
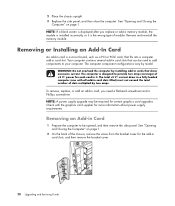
... more information about power supply requirements. Your computer contains several add-in card, you replace or add a memory module, the module is installed incorrectly, or it . NOTE: If a blank screen is displayed after you need a flat-head screwdriver and a Phillips screwdriver. The computer component configurations vary by installing add-in cards that fits into a computer add-in card slots, and then remove the bracket cover. 20 Upgrading and Servicing Guide The computer is...
... more information about power supply requirements. Your computer contains several add-in card, you replace or add a memory module, the module is installed incorrectly, or it . NOTE: If a blank screen is displayed after you need a flat-head screwdriver and a Phillips screwdriver. The computer component configurations vary by installing add-in cards that fits into a computer add-in card slots, and then remove the bracket cover. 20 Upgrading and Servicing Guide The computer is...
Upgrading and Servicing Guide
Page 26
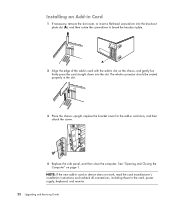
... chassis and gently but firmly press the card straight down into the knockout plate slot (A), and then rotate the screwdriver to the card, power supply, keyboard, and monitor. 22 Upgrading and Servicing Guide NOTE: If the new add-in card slots, and then attach the screw. 4 Replace the side panel, and then close the computer. Installing an Add-in Card 1 If necessary, remove the slot cover, or insert a flat-head screwdriver into...
... chassis and gently but firmly press the card straight down into the knockout plate slot (A), and then rotate the screwdriver to the card, power supply, keyboard, and monitor. 22 Upgrading and Servicing Guide NOTE: If the new add-in card slots, and then attach the screw. 4 Replace the side panel, and then close the computer. Installing an Add-in Card 1 If necessary, remove the slot cover, or insert a flat-head screwdriver into...


