HP Notebook Reference Guide - Windows 7
Page 27
... connects an external VGA display device such as an external VGA monitor or a VGA projector to the HP ProtectTools Getting Started guide or the Face Recognition software Help. Save the file to the Getting Started guide for Face Recognition in the Security Manager Setup Wizard or HP ProtectTools Administrative Console. You can use the webcam to the Getting Started guide. Webcam (select models only) 17 Open a multimedia program and play back the sound. Video...
... connects an external VGA display device such as an external VGA monitor or a VGA projector to the HP ProtectTools Getting Started guide or the Face Recognition software Help. Save the file to the Getting Started guide for Face Recognition in the Security Manager Setup Wizard or HP ProtectTools Administrative Console. You can use the webcam to the Getting Started guide. Webcam (select models only) 17 Open a multimedia program and play back the sound. Video...
HP Notebook Reference Guide - Windows 7
Page 31
... under any of power controls. or - 4 Power management NOTE: A computer may have a power button or a power switch. Shutting down the computer CAUTION: Unsaved information is used throughout this guide to refer to both types of the following conditions: ● When you need to replace the battery or access components inside the computer ● When you are connecting an external hardware device that does not connect to a Universal Serial Bus (USB) port ● When...
... under any of power controls. or - 4 Power management NOTE: A computer may have a power button or a power switch. Shutting down the computer CAUTION: Unsaved information is used throughout this guide to refer to both types of the following conditions: ● When you need to replace the battery or access components inside the computer ● When you are connecting an external hardware device that does not connect to a Universal Serial Bus (USB) port ● When...

HP Notebook Reference Guide - Windows 7
Page 51
... then unplug the AC power cord. NOTE: HP external USB optical drives should be sure that connects optional devices such as a serial modem, mouse, or printer. Using a serial device (select models only) Select computer models include a serial port that the device is turned off and the AC power cord is usually included with the device. For more information about device-specific software, refer to the manufacturer's instructions. ▲ To connect a serial device, connect the device cable to the powered USB port on the computer.
... then unplug the AC power cord. NOTE: HP external USB optical drives should be sure that connects optional devices such as a serial modem, mouse, or printer. Using a serial device (select models only) Select computer models include a serial port that the device is turned off and the AC power cord is usually included with the device. For more information about device-specific software, refer to the manufacturer's instructions. ▲ To connect a serial device, connect the device cable to the powered USB port on the computer.
HP Notebook Reference Guide - Windows 7
Page 55
... time. HP recommends defragmenting your computer. Refer to Help and Support for more information. You may want to set Disk Defragmenter to run on the hard drive so that you start Disk Defragmenter, it to run more efficiently. You may set it works without supervision. Windows 7-Click Defragment disk. Using Disk Cleanup Disk Cleanup searches the hard drive for tasks such as installing software, running utilities, or changing Windows settings. Using hard drives Improving hard drive performance Using Disk Defragmenter...
... time. HP recommends defragmenting your computer. Refer to Help and Support for more information. You may want to set Disk Defragmenter to run on the hard drive so that you start Disk Defragmenter, it to run more efficiently. You may set it works without supervision. Windows 7-Click Defragment disk. Using Disk Cleanup Disk Cleanup searches the hard drive for tasks such as installing software, running utilities, or changing Windows settings. Using hard drives Improving hard drive performance Using Disk Defragmenter...

HP Notebook Reference Guide - Windows 7
Page 76
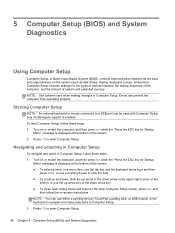
... of the screen, or use a pointing device to a USB port can prevent the computer from operating properly. NOTE: Use extreme care when making changes in Computer Setup, follow these steps: 1. Errors can be used with Computer Setup only if USB legacy support is enabled. Press f10 to enter Computer Setup. 66 Chapter 9 Computer Setup (BIOS) and Advanced System Diagnostics To start Computer Setup, follow these steps: 1. Turn on the system (such as disk drives, display, keyboard, mouse, and...
... of the screen, or use a pointing device to a USB port can prevent the computer from operating properly. NOTE: Use extreme care when making changes in Computer Setup, follow these steps: 1. Errors can be used with Computer Setup only if USB legacy support is enabled. Press f10 to enter Computer Setup. 66 Chapter 9 Computer Setup (BIOS) and Advanced System Diagnostics To start Computer Setup, follow these steps: 1. Turn on the system (such as disk drives, display, keyboard, mouse, and...
HP Notebook Reference Guide - Windows 7
Page 83
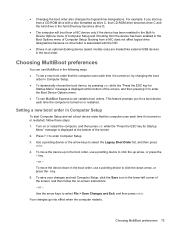
... you for Startup Menu" message is turned on , by changing the boot order in the Boot Options menu of the screen, and then pressing f9 to enter the Boot Device Options menu. ● To use MultiBoot in the following ways: ● To set variable boot orders. Booting from the device has been enabled in Computer Setup. ● To dynamically choose the boot device, by pressing esc while the "Press the ESC key for a boot device each time it...
... you for Startup Menu" message is turned on , by changing the boot order in the Boot Options menu of the screen, and then pressing f9 to enter the Boot Device Options menu. ● To use MultiBoot in the following ways: ● To set variable boot orders. Booting from the device has been enabled in Computer Setup. ● To dynamically choose the boot device, by pressing esc while the "Press the ESC key for a boot device each time it...
HP Notebook Reference Guide - Windows 7
Page 87
... management tools for seamless operations. ● Leverage a common infrastructure for management of both hardware and software, and then updates designated software from a central repository, known as operating systems, programs, software updates, and content and configuration settings to distribution. ● Target individual computers, workgroups, or entire populations of computers for download from a central console. HP SSM (System Software Manager) HP SSM lets you can also update the system BIOS and device driver software...
... management tools for seamless operations. ● Leverage a common infrastructure for management of both hardware and software, and then updates designated software from a central repository, known as operating systems, programs, software updates, and content and configuration settings to distribution. ● Target individual computers, workgroups, or entire populations of computers for download from a central console. HP SSM (System Software Manager) HP SSM lets you can also update the system BIOS and device driver software...

HP Notebook Reference Guide - Windows 7
Page 94
... audio functions, checking 16 Automatic DriveLock password entering 59 removing 59 B battery conserving power 28 discharging 27 displaying remaining charge 27 disposing 29 low battery levels 27 replacing 29 storing 29 Battery Check 27 battery information, finding 26 battery power 26 battery temperature 29 BIOS determining version 68 downloading an update 68 updating 68 Bluetooth device 2, 9 boot devices, enabling 72 buttons media 15 power 21 volume 16 C cables 1394 39 eSATA 40 USB 38 caring for your computer 63 changing boot order 73 checking audio functions...
... audio functions, checking 16 Automatic DriveLock password entering 59 removing 59 B battery conserving power 28 discharging 27 displaying remaining charge 27 disposing 29 low battery levels 27 replacing 29 storing 29 Battery Check 27 battery information, finding 26 battery power 26 battery temperature 29 BIOS determining version 68 downloading an update 68 updating 68 Bluetooth device 2, 9 boot devices, enabling 72 buttons media 15 power 21 volume 16 C cables 1394 39 eSATA 40 USB 38 caring for your computer 63 changing boot order 73 checking audio functions...

HP ProtectTools Getting Started - Windows 7 and Windows Vista
Page 121
..., restoring 99 enabling TPM chip 94 encrypted e-mail 97 encrypting files and folders 97 initializing chip 95 migrating keys 101 owner password, changing 100 personal secure drive 97 resetting user password 100 setup procedures 94 emergency recovery 95 emergency recovery token password, setting 95 enabling TPM chip 94 encrypted documents, e-mailing 64 encrypting drives 42 encrypting files and folders 97 encrypting hard drive 48, 49 encryption hardware 44, 46 removing 64 software...
..., restoring 99 enabling TPM chip 94 encrypted e-mail 97 encrypting files and folders 97 initializing chip 95 migrating keys 101 owner password, changing 100 personal secure drive 97 resetting user password 100 setup procedures 94 emergency recovery 95 emergency recovery token password, setting 95 enabling TPM chip 94 encrypted documents, e-mailing 64 encrypting drives 42 encrypting files and folders 97 encrypting hard drive 48, 49 encryption hardware 44, 46 removing 64 software...
HP ProtectTools Getting Started - Windows 7 and Windows Vista
Page 122
... 8 opening Device Access Manager for HP ProtectTools 80 File Sanitizer for HP ProtectTools 71 opening Drive Encryption 43 opening HP ProtectTools Administrative Console 16 opening Privacy Manager 52 opening Security Manager 24 owner password changing 100 setting 95 P password Basic User Key 98 changing 33 changing owner 100 emergency recovery token 95 guidelines 12 HP ProtectTools 10 managing 10 owner 95 policies 9 resetting user 100 secure 12 password changes using different keyboard layouts 103 password exceptions 102 Password Manager 22, 27, 28 password rejected 106 password strength...
... 8 opening Device Access Manager for HP ProtectTools 80 File Sanitizer for HP ProtectTools 71 opening Drive Encryption 43 opening HP ProtectTools Administrative Console 16 opening Privacy Manager 52 opening Security Manager 24 owner password changing 100 setting 95 P password Basic User Key 98 changing 33 changing owner 100 emergency recovery token 95 guidelines 12 HP ProtectTools 10 managing 10 owner 95 policies 9 resetting user 100 secure 12 password changes using different keyboard layouts 103 password exceptions 102 Password Manager 22, 27, 28 password rejected 106 password strength...

Getting Started HP Notebook - Windows Vista and Windows 7
Page 68
...hard drive installing 37 removing 36 hard drive bay, identifying 16 hard drive light 11 hard drive recovery 49, 53 HDMI port, identifying 13 hotkeys adjusting volume 26 audio CD, DVD, or BD controls 26 battery charge 26 decrease screen brightness 25 description 25 increase screen brightness 25 muting speaker sound 26 QuickLock 26 Sleep 25 switching screen image 25 using 25 I input power 58 integrated numeric keypad, identifying 10, 28 integrated webcam light, identifying 15 internal display switch 15 internal microphones, identifying 15 Internet connection setup 20 ISP, using 18 J jacks audio...
...hard drive installing 37 removing 36 hard drive bay, identifying 16 hard drive light 11 hard drive recovery 49, 53 HDMI port, identifying 13 hotkeys adjusting volume 26 audio CD, DVD, or BD controls 26 battery charge 26 decrease screen brightness 25 description 25 increase screen brightness 25 muting speaker sound 26 QuickLock 26 Sleep 25 switching screen image 25 using 25 I input power 58 integrated numeric keypad, identifying 10, 28 integrated webcam light, identifying 15 internal display switch 15 internal microphones, identifying 15 Internet connection setup 20 ISP, using 18 J jacks audio...
HP ProBook 4435s Notebook PC and HP ProBook 4436s Notebook PC - Maintenance and Service Guide
Page 104
... steps: 1. Turn on -screen instructions. Press f10 to enter Computer Setup. Errors can be used with Computer Setup only if USB legacy support is displayed at the bottom of system and extended memory. Computer Setup includes settings for Startup Menu" message is enabled. Press f10 to enter Computer Setup. 96 Chapter 5 Computer Setup (BIOS) and System Diagnostics NOTE: You can use the up arrow or the down arrow key. ● To close open dialog...
... steps: 1. Turn on -screen instructions. Press f10 to enter Computer Setup. Errors can be used with Computer Setup only if USB legacy support is displayed at the bottom of system and extended memory. Computer Setup includes settings for Startup Menu" message is enabled. Press f10 to enter Computer Setup. 96 Chapter 5 Computer Setup (BIOS) and System Diagnostics NOTE: You can use the up arrow or the down arrow key. ● To close open dialog...
HP ProBook 4435s Notebook PC and HP ProBook 4436s Notebook PC - Maintenance and Service Guide
Page 133
... spare part number 22, 26, 31, 41 specifications 106 Blu-ray Disc ROM with SuperMulti DVD±R/RW DL Drive spare part number 22, 26, 31, 41 specifications 105 Bluetooth card, spare part number 48 bottom door removal 40 spare part number 23, 30, 40 buttons left TouchPad 7 optical drive eject 15 power 9 QuickWeb 10 right TouchPad 7 TouchPad on/off 7 wireless 10 C Cable Kit contents 26 spare part number 26, 31 cables, service considerations 34 caps lock light, identifying 8 card reader board removal 72 spare part number...
... spare part number 22, 26, 31, 41 specifications 106 Blu-ray Disc ROM with SuperMulti DVD±R/RW DL Drive spare part number 22, 26, 31, 41 specifications 105 Bluetooth card, spare part number 48 bottom door removal 40 spare part number 23, 30, 40 buttons left TouchPad 7 optical drive eject 15 power 9 QuickWeb 10 right TouchPad 7 TouchPad on/off 7 wireless 10 C Cable Kit contents 26 spare part number 26, 31 cables, service considerations 34 caps lock light, identifying 8 card reader board removal 72 spare part number...

HP ProBook 4435s Notebook PC and HP ProBook 4436s Notebook PC - Maintenance and Service Guide
Page 134
... 12 Windows logo 11, 12 L legacy support, USB 96 lights Battery 14 caps lock 8 hard drive 13 optical drive 15 power 8 QuickWeb 8 TouchPad 8 webcam 6 wireless 8 M mass storage devices, spare part numbers 26 Media Card Reader 13 memory module product description 1 removal 46 spare part numbers 22, 46 memory module compartment, identifying 16 microphone (audio-in) jack product description 2 microphone module spare part number 30 model name 1 modem module product description 2 removal 53 spare part number 22, 29, 53 N network jack, identifying 14 num lk key, identifying 11, 12 O operating system...
... 12 Windows logo 11, 12 L legacy support, USB 96 lights Battery 14 caps lock 8 hard drive 13 optical drive 15 power 8 QuickWeb 8 TouchPad 8 webcam 6 wireless 8 M mass storage devices, spare part numbers 26 Media Card Reader 13 memory module product description 1 removal 46 spare part numbers 22, 46 memory module compartment, identifying 16 microphone (audio-in) jack product description 2 microphone module spare part number 30 model name 1 modem module product description 2 removal 53 spare part number 22, 29, 53 N network jack, identifying 14 num lk key, identifying 11, 12 O operating system...
HP ProBook 4435s Notebook PC and HP ProBook 4436s Notebook PC - Maintenance and Service Guide
Page 135
...audio 2 chipset 1 display panel 1 Ethernet 3 external media cards 3 graphics 1 hard drives 2 keyboard 3 memory module 1 microphone 2 modem module 2 operating system 4 optical drives 2 pointing devices 3 ports 3 power requirements 3 processors 1 product name 1 security 4 serviceability 5 webcam 2 wireless 3 product name 1 Q Quick Launch board removal 76 spare part number 19, 31 spare part numbers 76 QuickWeb button, identifying 10 QuickWeb light 8 R recovery partition 111, 115 release latches access cover 16 battery 16 removal/replacement preliminaries 33 procedures 38 restoring the hard drive...
...audio 2 chipset 1 display panel 1 Ethernet 3 external media cards 3 graphics 1 hard drives 2 keyboard 3 memory module 1 microphone 2 modem module 2 operating system 4 optical drives 2 pointing devices 3 ports 3 power requirements 3 processors 1 product name 1 security 4 serviceability 5 webcam 2 wireless 3 product name 1 Q Quick Launch board removal 76 spare part number 19, 31 spare part numbers 76 QuickWeb button, identifying 10 QuickWeb light 8 R recovery partition 111, 115 release latches access cover 16 battery 16 removal/replacement preliminaries 33 procedures 38 restoring the hard drive...
HP Notebook User Guide - Linux
Page 84
... the ESC key for Startup Menu" message is displayed at the bottom of the screen. 2. Errors can be used with Computer Setup only if USB legacy support is enabled. Turn on the system (such as disk drives, display, keyboard, mouse, and printer). To start Computer Setup, follow these steps: 1. 12 Computer Setup (BIOS) and Advanced System Diagnostics Computer Setup, or Basic Input/Output System (BIOS), controls communication between all the input and output devices on...
... the ESC key for Startup Menu" message is displayed at the bottom of the screen. 2. Errors can be used with Computer Setup only if USB legacy support is enabled. Turn on the system (such as disk drives, display, keyboard, mouse, and printer). To start Computer Setup, follow these steps: 1. 12 Computer Setup (BIOS) and Advanced System Diagnostics Computer Setup, or Basic Input/Output System (BIOS), controls communication between all the input and output devices on...
HP Notebook User Guide - Linux
Page 85
... USB mouse) or the keyboard to select File > Restore Defaults. 4. Your changes go into effect when the computer restarts. Restoring factory settings in the lower-left corner of the screen. 2. Turn on or restart the computer, and then press esc while the "Press the ESC key for Startup Menu" message is displayed at the factory, follow the on-screen instructions. - Use a pointing device or the arrow keys to navigate and make selections...
... USB mouse) or the keyboard to select File > Restore Defaults. 4. Your changes go into effect when the computer restarts. Restoring factory settings in the lower-left corner of the screen. 2. Turn on or restart the computer, and then press esc while the "Press the ESC key for Startup Menu" message is displayed at the factory, follow the on-screen instructions. - Use a pointing device or the arrow keys to navigate and make selections...
HP Notebook User Guide - Linux
Page 94
... a hard, flat surface. If you are installed and updated. 84 Appendix A Troubleshooting and support Be sure to cool internal components and prevent overheating. Use the computer only on your lap or obstruct the computer air vents. NOTE: The fan in the computer starts up automatically to keep all devices. An external device is not working Follow these suggestions if an external device does not function as...
... a hard, flat surface. If you are installed and updated. 84 Appendix A Troubleshooting and support Be sure to cool internal components and prevent overheating. Use the computer only on your lap or obstruct the computer air vents. NOTE: The fan in the computer starts up automatically to keep all devices. An external device is not working Follow these suggestions if an external device does not function as...
HP Notebook User Guide - Linux
Page 105
... BIOS determining version 76 downloading an update 76 updating 75 Bluetooth device 20 Bluetooth label 88 boot devices, enabling 79 buttons left TouchPad 4 optical drive eject 11 power 6 QuickWeb 7 right TouchPad 4 wireless 7 C cables LAN 22 USB 58 caps lock light, identifying 5 changing boot order 81 charging batteries 43 cleaning your computer 89 components bottom 15 display 14 front 10 left side 12 right side 11 top 4 Computer Setup enabling bootable devices 79 navigating and selecting 74 passwords set in 66 restoring factory settings 75 setting boot order 81 setting...
... BIOS determining version 76 downloading an update 76 updating 75 Bluetooth device 20 Bluetooth label 88 boot devices, enabling 79 buttons left TouchPad 4 optical drive eject 11 power 6 QuickWeb 7 right TouchPad 4 wireless 7 C cables LAN 22 USB 58 caps lock light, identifying 5 changing boot order 81 charging batteries 43 cleaning your computer 89 components bottom 15 display 14 front 10 left side 12 right side 11 top 4 Computer Setup enabling bootable devices 79 navigating and selecting 74 passwords set in 66 restoring factory settings 75 setting boot order 81 setting...
HP Notebook User Guide - Linux
Page 106
... 8, 9 operating system logo 8, 9 L labels Bluetooth 88 HP Mobile Broadband Module 88 regulatory 88 serial number 88 SIM 88 wireless certification 88 WLAN 88 legacy support, USB 74 lights Battery 12 caps lock 5 hard drive 10 optical drive 11 power 5 webcam 14 wireless 5 local area network (LAN) cable required 22 connecting cable 22 logical drive designations 80 low battery level 44 M managing a power-on password 67 managing an administrator password 67 media card defined 53 inserting 53 removing 54 stopping 54 Media Card Reader 10 media controls, keys 25 memory module inserting...
... 8, 9 operating system logo 8, 9 L labels Bluetooth 88 HP Mobile Broadband Module 88 regulatory 88 serial number 88 SIM 88 wireless certification 88 WLAN 88 legacy support, USB 74 lights Battery 12 caps lock 5 hard drive 10 optical drive 11 power 5 webcam 14 wireless 5 local area network (LAN) cable required 22 connecting cable 22 logical drive designations 80 low battery level 44 M managing a power-on password 67 managing an administrator password 67 media card defined 53 inserting 53 removing 54 stopping 54 Media Card Reader 10 media controls, keys 25 memory module inserting...


