HP Notebook Hard Drives & Solid State Drives Identifying, Preventing, Diagnosing and Recovering from Drive Failures Care and Ma
Page 6
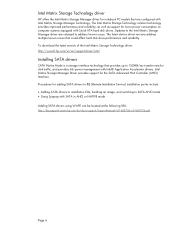
Updates to the Intel Matrix Storage Manager driver are configured with Intel® Application Accelerator drivers. Procedures for adding SATA drivers to RIS (Remote Installation Service) installation points include: • Adding SATA drivers to installation CDs, building an image, and switching to SATA AHCI mode • Using Sysprep with Serial ATA hard disk drives. Intel Matrix Storage Manager Driver provides support for disk traffic, and provides link power management with Intel Matrix Storage Manager Technology. Page...
Updates to the Intel Matrix Storage Manager driver are configured with Intel® Application Accelerator drivers. Procedures for adding SATA drivers to RIS (Remote Installation Service) installation points include: • Adding SATA drivers to installation CDs, building an image, and switching to SATA AHCI mode • Using Sysprep with Serial ATA hard disk drives. Intel Matrix Storage Manager Driver provides support for disk traffic, and provides link power management with Intel Matrix Storage Manager Technology. Page...
User Guide - Windows 7
Page 5
...computer ...4 Finding your hardware and software information 4 Front ...4 Right side ...5 Left side ...7 Rear ...8 Display ...9 Top ...10 TouchPad ...10 Lights ...11 Buttons, speakers, and fingerprint reader 12 Keys ...13 Bottom ...15 Labels ...16 3 Connecting to a network ...17 Connecting to a wireless network ...17 Using the wireless controls 17 Using the wireless button 18 Using HP Connection Manager (select models only 18 Using operating system controls 18 Using a WLAN ...19 Using an Internet service provider 19 Setting up a WLAN 20 Configuring a wireless router 20 Protecting your...
...computer ...4 Finding your hardware and software information 4 Front ...4 Right side ...5 Left side ...7 Rear ...8 Display ...9 Top ...10 TouchPad ...10 Lights ...11 Buttons, speakers, and fingerprint reader 12 Keys ...13 Bottom ...15 Labels ...16 3 Connecting to a network ...17 Connecting to a wireless network ...17 Using the wireless controls 17 Using the wireless button 18 Using HP Connection Manager (select models only 18 Using operating system controls 18 Using a WLAN ...19 Using an Internet service provider 19 Setting up a WLAN 20 Configuring a wireless router 20 Protecting your...
User Guide - Windows 7
Page 7
... Connecting a powered USB device 50 Inserting and removing digital storage cards 51 Using optical drives ...52 Inserting an optical disc ...53 Removing an optical disc 53 Sharing drives on the network 54 8 Maintaining your computer ...55 Improving performance ...55 Handling drives ...55 Replacing a hard drive ...56 Using HP 3D DriveGuard 58 Using Disk Defragmenter 58 Using Disk Cleanup ...58 Adding or replacing memory modules 59 Updating programs and drivers ...62 Cleaning your computer ...63 Cleaning the display, sides, and cover...
... Connecting a powered USB device 50 Inserting and removing digital storage cards 51 Using optical drives ...52 Inserting an optical disc ...53 Removing an optical disc 53 Sharing drives on the network 54 8 Maintaining your computer ...55 Improving performance ...55 Handling drives ...55 Replacing a hard drive ...56 Using HP 3D DriveGuard 58 Using Disk Defragmenter 58 Using Disk Cleanup ...58 Adding or replacing memory modules 59 Updating programs and drivers ...62 Cleaning your computer ...63 Cleaning the display, sides, and cover...
User Guide - Windows 7
Page 8
...69 Using firewall software ...69 Installing software updates ...69 Installing Windows security updates 69 Installing HP and third-party software updates 69 Securing your wireless network ...70 Backing up your software applications and information 70 Using an optional security cable lock 70 10 Using Setup Utility (BIOS) and System Diagnostics 71 Starting Setup Utility (BIOS) ...71 Updating the BIOS ...71 Determining the BIOS version 71 Downloading a BIOS update 72 Using System Diagnostics ...73 11 Backing up, restoring, and recovering ...74 Creating backups ...74 Creating recovery media...
...69 Using firewall software ...69 Installing software updates ...69 Installing Windows security updates 69 Installing HP and third-party software updates 69 Securing your wireless network ...70 Backing up your software applications and information 70 Using an optional security cable lock 70 10 Using Setup Utility (BIOS) and System Diagnostics 71 Starting Setup Utility (BIOS) ...71 Updating the BIOS ...71 Determining the BIOS version 71 Downloading a BIOS update 72 Using System Diagnostics ...73 11 Backing up, restoring, and recovering ...74 Creating backups ...74 Creating recovery media...
User Guide - Windows 7
Page 31
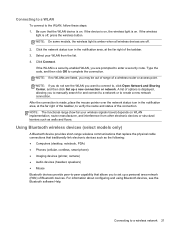
... or access point. If the WLAN is on . If the device is on, the wireless light is a security-enabled WLAN, you are listed, you want to connect to the WLAN, follow these steps: 1. Click the network status icon in the notification area, at the far right of the taskbar. 3. Using Bluetooth wireless devices (select models only) A Bluetooth device provides short-range wireless communications that replace the physical cable connections...
... or access point. If the WLAN is on . If the device is on, the wireless light is a security-enabled WLAN, you are listed, you want to connect to the WLAN, follow these steps: 1. Click the network status icon in the notification area, at the far right of the taskbar. 3. Using Bluetooth wireless devices (select models only) A Bluetooth device provides short-range wireless communications that replace the physical cable connections...

User Guide - Windows 7
Page 34
... (microphone) jack HDMI port External monitor port Description On: The webcam is in use. NOTE: For details about using headphones, earbuds, or a headset. Connects optional USB 3.0 devices and provides enhanced USB power performance. Connects an external VGA monitor or projector. Connect optional USB devices. To reduce the risk of USB ports, see the Regulatory, Safety and Environmental Notices. Connects an optional video or audio device, such as speakers or headphones. 24 Chapter 4 Enjoying entertainment features WARNING! For details about different types...
... (microphone) jack HDMI port External monitor port Description On: The webcam is in use. NOTE: For details about using headphones, earbuds, or a headset. Connects optional USB 3.0 devices and provides enhanced USB power performance. Connects an external VGA monitor or projector. Connect optional USB devices. To reduce the risk of USB ports, see the Regulatory, Safety and Environmental Notices. Connects an optional video or audio device, such as speakers or headphones. 24 Chapter 4 Enjoying entertainment features WARNING! For details about different types...
User Guide - Windows 7
Page 35
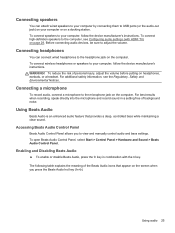
... see the Regulatory, Safety and Environmental Notices. Using Beats Audio Beats Audio is an enhanced audio feature that appear on headphones, earbuds, or a headset. To open Beats Audio Control Panel, select Start > Control Panel > Hardware and Sound > Beats Audio Control Panel. Enabling and Disabling Beats Audio ▲ To enable or disable Beats Audio, press the fn key in a setting free of the Beats Audio icons that provides a deep, controlled bass while maintaining a clear sound. WARNING! Connecting a microphone To record audio, connect a microphone to adjust the volume.
... see the Regulatory, Safety and Environmental Notices. Using Beats Audio Beats Audio is an enhanced audio feature that appear on headphones, earbuds, or a headset. To open Beats Audio Control Panel, select Start > Control Panel > Hardware and Sound > Beats Audio Control Panel. Enabling and Disabling Beats Audio ▲ To enable or disable Beats Audio, press the fn key in a setting free of the Beats Audio icons that provides a deep, controlled bass while maintaining a clear sound. WARNING! Connecting a microphone To record audio, connect a microphone to adjust the volume.

User Guide - Windows 7
Page 41
... external monitors receive video information from operating properly. To use an action key function, press and hold down the key. CAUTION: Use extreme care when making changes in Setup Utility (BIOS). Using the action keys An action key performs an assigned function. Using the keyboard The keyboard allows you to type and the action keys and hot keys allow you to the system. For more details about the keyboard keys, see Keys on opening Setup Utility (BIOS), and then follow the instructions at...
... external monitors receive video information from operating properly. To use an action key function, press and hold down the key. CAUTION: Use extreme care when making changes in Setup Utility (BIOS). Using the action keys An action key performs an assigned function. Using the keyboard The keyboard allows you to type and the action keys and hot keys allow you to the system. For more details about the keyboard keys, see Keys on opening Setup Utility (BIOS), and then follow the instructions at...
User Guide - Windows 7
Page 50
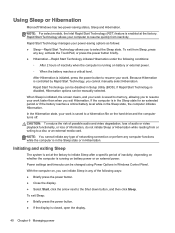
... screen clears, and your computer to a disc or an external media card. CAUTION: To reduce the risk of possible audio and video degradation, loss of audio or video playback functionality, or loss of inactivity when the computer is in the Sleep state or in Windows Control Panel. Rapid Start Technology can be changed using Power Options in Hibernation. Power settings and timeouts can be manually selected. Using Sleep or Hibernation Microsoft Windows has two power-saving states, Sleep...
... screen clears, and your computer to a disc or an external media card. CAUTION: To reduce the risk of possible audio and video degradation, loss of audio or video playback functionality, or loss of inactivity when the computer is in the Sleep state or in Windows Control Panel. Rapid Start Technology can be changed using Power Options in Hibernation. Power settings and timeouts can be manually selected. Using Sleep or Hibernation Microsoft Windows has two power-saving states, Sleep...
User Guide - Windows 7
Page 55
... charged. ● Turn off wireless devices when you are not using . ● Before you are not plugged into an external power source, such as an external hard drive connected to a USB port. ● Stop, disable, or remove any unsaved information. do not expose it to a battery, do not dispose of time. Running on page 42. Conserving battery power Use the following actions for a critical battery level: ● If Hibernation is enabled...
... charged. ● Turn off wireless devices when you are not using . ● Before you are not plugged into an external power source, such as an external hard drive connected to a USB port. ● Stop, disable, or remove any unsaved information. do not expose it to a battery, do not dispose of time. Running on page 42. Conserving battery power Use the following actions for a critical battery level: ● If Hibernation is enabled...
User Guide - Windows 7
Page 68
... you can safely delete to USB ports are protected by HP 3D DriveGuard. Follow the on battery power. Using HP 3D DriveGuard HP 3D DriveGuard protects a hard drive by parking the drive and halting data requests under either of the following conditions: ● You drop the computer. ● You move the computer with the display closed while the computer is running on -screen instructions. NOTE...
... you can safely delete to USB ports are protected by HP 3D DriveGuard. Follow the on battery power. Using HP 3D DriveGuard HP 3D DriveGuard protects a hard drive by parking the drive and halting data requests under either of the following conditions: ● You drop the computer. ● You move the computer with the display closed while the computer is running on -screen instructions. NOTE...
User Guide - Windows 7
Page 77
... ESC key for Startup Menu" message is set in Setup Utility (BIOS): 1. NOTE: Your administrator password is not interchangeable with an administrator password set , entered, changed , or deleted. Open Setup Utility (BIOS) by turning on password Function ● Must be used in place of the fingerprint reader on your computer, see Getting to know your administrator password, you forget your computer on -screen instructions. In order to use the fingerprint reader, you cannot turn on -screen instructions. NOTE: A power-on password. To set , entered, changed...
... ESC key for Startup Menu" message is set in Setup Utility (BIOS): 1. NOTE: Your administrator password is not interchangeable with an administrator password set , entered, changed , or deleted. Open Setup Utility (BIOS) by turning on password Function ● Must be used in place of the fingerprint reader on your computer, see Getting to know your administrator password, you forget your computer on -screen instructions. In order to use the fingerprint reader, you cannot turn on -screen instructions. NOTE: A power-on password. To set , entered, changed...

User Guide - Windows 7
Page 82
... no instructions are ready to install the update. Using the hard drive path you want to download. 3. Follow the on battery power, docked in Windows) or by using the AC adapter. NOTE: If you are displayed on your hard drive designation. Start Setup Utility (BIOS). 2. Use the arrow keys to reliable external power using Setup Utility (BIOS). 1. During the download and installation, follow these steps: a. Make a note of the path to the location on the screen after it has been downloaded to your hard drive...
... no instructions are ready to install the update. Using the hard drive path you want to download. 3. Follow the on battery power, docked in Windows) or by using the AC adapter. NOTE: If you are displayed on your hard drive designation. Start Setup Utility (BIOS). 2. Use the arrow keys to reliable external power using Setup Utility (BIOS). 1. During the download and installation, follow these steps: a. Make a note of the path to the location on the screen after it has been downloaded to your hard drive...

User Guide - Windows 7
Page 101
... settings hot key 32 battery conserving power 45 disposing 45 replacing 46 storing 45 battery bay 15, 16 battery information, finding 44 battery power 44 battery release latch 15 battery temperature 45 Beats Audio 13, 25, 32 Beats Audio Control Panel 25 Beats Audio hot key 25 BIOS determining version 71 downloading an update 72 updating 71 Bluetooth device 17, 21 Bluetooth label 16 boot order changing 80 buttons left TouchPad 10, 34 optical drive eject 5 power 12 right TouchPad 10, 34 C cables USB 50 caps lock light...
... settings hot key 32 battery conserving power 45 disposing 45 replacing 46 storing 45 battery bay 15, 16 battery information, finding 44 battery power 44 battery release latch 15 battery temperature 45 Beats Audio 13, 25, 32 Beats Audio Control Panel 25 Beats Audio hot key 25 BIOS determining version 71 downloading an update 72 updating 71 Bluetooth device 17, 21 Bluetooth label 16 boot order changing 80 buttons left TouchPad 10, 34 optical drive eject 5 power 12 right TouchPad 10, 34 C cables USB 50 caps lock light...

User Guide - Windows 7
Page 102
...16 mouse, external setting preferences 30 mute light, identifying 11 N network jack, identifying 7 num lock key, identifying 14, 33 O operating environment 82 operating system Microsoft Certificate of Authenticity label 16 Product Key 16 optical disc inserting 53 removing 53 optical drive eject button, identifying 5 optical drive light, identifying 5 optical drive, identifying 5, 24 optional external devices, using 50 original system recovery 78 P passwords Setup Utility (BIOS) 67 Windows 66 pinching TouchPad gesture 37 ports external monitor 7, 24, 26 HDMI 7, 24, 27 Intel Wireless Display 29...
...16 mouse, external setting preferences 30 mute light, identifying 11 N network jack, identifying 7 num lock key, identifying 14, 33 O operating environment 82 operating system Microsoft Certificate of Authenticity label 16 Product Key 16 optical disc inserting 53 removing 53 optical drive eject button, identifying 5 optical drive light, identifying 5 optical drive, identifying 5, 24 optional external devices, using 50 original system recovery 78 P passwords Setup Utility (BIOS) 67 Windows 66 pinching TouchPad gesture 37 ports external monitor 7, 24, 26 HDMI 7, 24, 27 Intel Wireless Display 29...
User Guide - Windows 7
Page 103
... labels 16 restore points 75 restoring the original system creating recovery media 74 RJ-45 (network) jack, identifying 7 rotating TouchPad gesture 38 S scrolling TouchPad gesture 37 security cable lock, installing 70 security cable slot, identifying 6 security, wireless 20 serial number 16 serial number, computer 16 service labels locating 16 setting password protection on /off button 10, 34 TouchPad zone, identifying 10, 34 traveling with the computer 16, 45, 64 Troubleshooting and support 83 troubleshooting; low battery level 88 troubleshooting; wireless connection 84 turning off...
... labels 16 restore points 75 restoring the original system creating recovery media 74 RJ-45 (network) jack, identifying 7 rotating TouchPad gesture 38 S scrolling TouchPad gesture 37 security cable lock, installing 70 security cable slot, identifying 6 security, wireless 20 serial number 16 serial number, computer 16 service labels locating 16 setting password protection on /off button 10, 34 TouchPad zone, identifying 10, 34 traveling with the computer 16, 45, 64 Troubleshooting and support 83 troubleshooting; low battery level 88 troubleshooting; wireless connection 84 turning off...
HP Pavilion dv7 Entertainment PC - Maintenance and Service Guide
Page 52
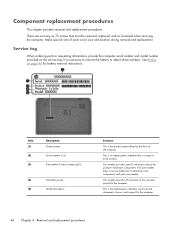
... servicing the computer. This number provides specific information about the product's hardware components. This is unique to the front of each product. Make special note of the computer. There are needed. See Battery on the service tag. It is the product name affixed to each screw size and location during removal and replacement. Item (1) (2) (3) Description Product name Serial number (s/n) Part number/Product number (p/n) (4) Warranty period (5) Model description Function...
... servicing the computer. This number provides specific information about the product's hardware components. This is unique to the front of each product. Make special note of the computer. There are needed. See Battery on the service tag. It is the product name affixed to each screw size and location during removal and replacement. Item (1) (2) (3) Description Product name Serial number (s/n) Part number/Product number (p/n) (4) Warranty period (5) Model description Function...
HP Pavilion dv7 Entertainment PC - Maintenance and Service Guide
Page 105
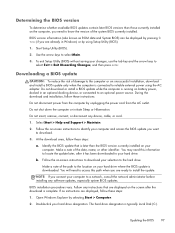
... are displayed on the screen after it has been downloaded to the hard drive. Do not download or install a BIOS update while the computer is connected to a network, consult the network administrator before installing any device, cable, or cord. 1. Do not insert, remove, connect, or disconnect any software updates, especially system BIOS updates. Follow the on-screen instructions to identify your computer and access the BIOS update you connect your computer to reliable external power using Setup Utility (BIOS). 1. b. Start Setup Utility (BIOS). 2. At...
... are displayed on the screen after it has been downloaded to the hard drive. Do not download or install a BIOS update while the computer is connected to a network, consult the network administrator before installing any device, cable, or cord. 1. Do not insert, remove, connect, or disconnect any software updates, especially system BIOS updates. Follow the on-screen instructions to identify your computer and access the BIOS update you connect your computer to reliable external power using Setup Utility (BIOS). 1. b. Start Setup Utility (BIOS). 2. At...
HP Pavilion dv7 Entertainment PC - Maintenance and Service Guide
Page 121
...-ray Disc R/RW with SuperMulti Drive precautions 40 removal 51 spare part number 26, 30, 36, 51 Blu-ray Disc ROM with SuperMulti DVD±R/RW Double-Layer Drive precautions 40 removal 51 spare part number 26, 30, 36, 51 Bluetooth module, spare part number 32 bottom components 20 button components 11 buttons optical drive eject button 18 power 11 TouchPad 13 TouchPad on/off 13 C cables, service considerations 39 caps lock light 15 Card Reader board removal 83 spare part number 25...
...-ray Disc R/RW with SuperMulti Drive precautions 40 removal 51 spare part number 26, 30, 36, 51 Blu-ray Disc ROM with SuperMulti DVD±R/RW Double-Layer Drive precautions 40 removal 51 spare part number 26, 30, 36, 51 Bluetooth module, spare part number 32 bottom components 20 button components 11 buttons optical drive eject button 18 power 11 TouchPad 13 TouchPad on/off 13 C cables, service considerations 39 caps lock light 15 Card Reader board removal 83 spare part number 25...

HP Pavilion dv7 Entertainment PC - Maintenance and Service Guide
Page 123
... 81 product description audio 6 chipset 2 display panel 4 Ethernet 6 external media cards 7 graphics 2 hard drive 5 keyboard 7 memory module 4 microphone 6 operating system 8 optical drive 5 pointing device 7 ports 7 power requirements 7 processors 1 product name 1 security 8 serviceability 8 solid-state drives 5 video 6 wireless 6 product name 1, 21, 44 R rear component 19 removal/replacement preliminaries 39 procedures 44 right-side components RJ-45 jack 17 RTC battery removal 50 spare part number 18 27, 37, 50 S Screw Kit, spare part number 31, 36 security cable slot 19 security, product...
... 81 product description audio 6 chipset 2 display panel 4 Ethernet 6 external media cards 7 graphics 2 hard drive 5 keyboard 7 memory module 4 microphone 6 operating system 8 optical drive 5 pointing device 7 ports 7 power requirements 7 processors 1 product name 1 security 8 serviceability 8 solid-state drives 5 video 6 wireless 6 product name 1, 21, 44 R rear component 19 removal/replacement preliminaries 39 procedures 44 right-side components RJ-45 jack 17 RTC battery removal 50 spare part number 18 27, 37, 50 S Screw Kit, spare part number 31, 36 security cable slot 19 security, product...


