HP Pavillion Sleekbook 14 Maintenance and Service Guide
Page 39
... each screw size and location during removal and replacement. Check your computer, including model, serial number, product key, and length of warranty, are as many as 2 screws that must be removed, replaced, and/or loosened when servicing Customer Self-Repair parts. Make special note of your warranty. Component replacement procedures 29 NOTE: Details about your warranty to access and replace Customer SelfRepair parts successfully. There are on...
... each screw size and location during removal and replacement. Check your computer, including model, serial number, product key, and length of warranty, are as many as 2 screws that must be removed, replaced, and/or loosened when servicing Customer Self-Repair parts. Make special note of your warranty. Component replacement procedures 29 NOTE: Details about your warranty to access and replace Customer SelfRepair parts successfully. There are on...

HP Pavillion Sleekbook 14 Maintenance and Service Guide
Page 62
... Support & Drivers > click Drivers & Software. 3. In the Enter a product name/number box, type the computer model information, and then click Search. 4. Click the Download button, and then follow these steps: 1. Remove the battery (see Top cover on page 30), and then remove the following cables: a. Top cover (see Battery on page 33). System board (see Fan on -screen instructions. Navigate to installing new memory may result in Hibernation, turn the computer on page 31). Before removing a memory module...
... Support & Drivers > click Drivers & Software. 3. In the Enter a product name/number box, type the computer model information, and then click Search. 4. Click the Download button, and then follow these steps: 1. Remove the battery (see Top cover on page 30), and then remove the following cables: a. Top cover (see Battery on page 33). System board (see Fan on -screen instructions. Navigate to installing new memory may result in Hibernation, turn the computer on page 31). Before removing a memory module...
HP Pavillion Sleekbook 14 Maintenance and Service Guide
Page 73
... the HP Support Assistant app. 2. Follow the on your hard drive. NOTE: After a message on the screen reports a successful installation, you recorded earlier, open the folder on battery power, docked in an optional docking device, or connected to an optional power source. During the download and installation, follow these steps: 1. Follow the on -screen instructions. You may need to access this information to a network, consult the network administrator before installing any software updates, especially system BIOS updates...
... the HP Support Assistant app. 2. Follow the on your hard drive. NOTE: After a message on the screen reports a successful installation, you recorded earlier, open the folder on battery power, docked in an optional docking device, or connected to an optional power source. During the download and installation, follow these steps: 1. Follow the on -screen instructions. You may need to access this information to a network, consult the network administrator before installing any software updates, especially system BIOS updates...
HP Pavillion Sleekbook 14 Maintenance and Service Guide
Page 81
... the HP Recovery partition (select models only) or HP Recovery media. IMPORTANT: Refresh removes any traditional applications that you have replaced the hard drive, you can use the Factory Reset option of the screen to the replacement drive. NOTE: You may be available for quick and easy recovery When your permission or password when using Refresh. To start fresh and keep what is not working properly and you need to reinstall. For more information, see Recovering using HP Recovery Manager...
... the HP Recovery partition (select models only) or HP Recovery media. IMPORTANT: Refresh removes any traditional applications that you have replaced the hard drive, you can use the Factory Reset option of the screen to the replacement drive. NOTE: You may be available for quick and easy recovery When your permission or password when using Refresh. To start fresh and keep what is not working properly and you need to reinstall. For more information, see Recovering using HP Recovery Manager...
HP Pavillion Sleekbook 14 Maintenance and Service Guide
Page 84
... order of devices listed in HP Recovery Manager, you created into an optional external optical drive, and then restart the computer. - Select the optical drive or USB flash drive you created. 2. Follow these steps to free up hard drive space. Using HP Recovery media to recover You can use Windows Refresh, the Windows Remove everything and reinstall Windows option, or the HP Recovery Manager option for minimized image recovery. See Changing the computer boot order on page 69. Insert the HP Recovery media you want to boot from. 5. Follow the on -screen instructions...
... order of devices listed in HP Recovery Manager, you created into an optional external optical drive, and then restart the computer. - Select the optical drive or USB flash drive you created. 2. Follow these steps to free up hard drive space. Using HP Recovery media to recover You can use Windows Refresh, the Windows Remove everything and reinstall Windows option, or the HP Recovery Manager option for minimized image recovery. See Changing the computer boot order on page 69. Insert the HP Recovery media you want to boot from. 5. Follow the on -screen instructions...

HP Pavillion Sleekbook 14 Maintenance and Service Guide
Page 89
...I internal display switch locations 6 J jacks audio-out 11 headphone 11 K key components 8 keyboard product description 3 removal 31 spare part number 18, 22 spare part numbers 18, 31 keys Action 8 esc 8 fn 8 Windows logo 8 L left-side components 11 light components 9 lights AC adapter 13 caps lock 9 hard drive 12 power 9, 12 webcam 6 wireless 9 M mass storage device illustrated 20 precautions 25 Memory card reader 13 memory module product description 2 removal 52 spare part numbers 52 microphone location 6 product description model name 1 mute light mute 9 19, 22, 2 O operating system...
...I internal display switch locations 6 J jacks audio-out 11 headphone 11 K key components 8 keyboard product description 3 removal 31 spare part number 18, 22 spare part numbers 18, 31 keys Action 8 esc 8 fn 8 Windows logo 8 L left-side components 11 light components 9 lights AC adapter 13 caps lock 9 hard drive 12 power 9, 12 webcam 6 wireless 9 M mass storage device illustrated 20 precautions 25 Memory card reader 13 memory module product description 2 removal 52 spare part numbers 52 microphone location 6 product description model name 1 mute light mute 9 19, 22, 2 O operating system...
User Guide
Page 5
......1 HP Quick Start (select models only) ...1 Best practices ...1 Fun things to do ...1 More HP resources ...2 2 Getting to know your computer ...3 Finding your hardware and software information 3 Locating hardware ...3 Locating software ...3 Right side ...4 Left side ...5 Display ...7 Top ...8 TouchPad ...8 Lights ...9 Buttons and speakers ...10 Keys ...11 Bottom ...12 Labels ...13 3 Connecting to a network ...15 Connecting to a wireless network ...15 Using the wireless controls 15 Using the wireless button 15 Using operating system controls 15 Using a WLAN ...16 Using an Internet service...
......1 HP Quick Start (select models only) ...1 Best practices ...1 Fun things to do ...1 More HP resources ...2 2 Getting to know your computer ...3 Finding your hardware and software information 3 Locating hardware ...3 Locating software ...3 Right side ...4 Left side ...5 Display ...7 Top ...8 TouchPad ...8 Lights ...9 Buttons and speakers ...10 Keys ...11 Bottom ...12 Labels ...13 3 Connecting to a network ...15 Connecting to a wireless network ...15 Using the wireless controls 15 Using the wireless button 15 Using operating system controls 15 Using a WLAN ...16 Using an Internet service...
User Guide
Page 7
... user-replaceable battery 40 Disposing of a user-replaceable battery 40 Replacing a user-replaceable battery 40 Running on external AC power ...40 Troubleshooting power problems 41 HP CoolSense (select models only 41 Shutting down (turning off) the computer 42 7 Managing and sharing information ...43 Using a USB device ...43 Connecting a USB device 43 Removing a USB device ...44 Inserting and removing a memory card 44 Using optical drives ...45 Sharing data and drives and accessing software 46 8 Maintaining your computer ...48 Improving performance ...48 Handling drives ...48 Using HP...
... user-replaceable battery 40 Disposing of a user-replaceable battery 40 Replacing a user-replaceable battery 40 Running on external AC power ...40 Troubleshooting power problems 41 HP CoolSense (select models only 41 Shutting down (turning off) the computer 42 7 Managing and sharing information ...43 Using a USB device ...43 Connecting a USB device 43 Removing a USB device ...44 Inserting and removing a memory card 44 Using optical drives ...45 Sharing data and drives and accessing software 46 8 Maintaining your computer ...48 Improving performance ...48 Handling drives ...48 Using HP...
User Guide
Page 8
...up your software applications and information 55 Using an optional security cable lock 55 10 Using Setup Utility (BIOS) and HP PC Hardware Diagnostics (UEFI 56 Starting Setup Utility (BIOS) ...56 Updating the BIOS ...56 Determining the BIOS version 56 Downloading a BIOS update 57 Using HP PC Hardware Diagnostics (UEFI 57 Downloading HP PC Hardware Diagnostics (UEFI) to a USB device 58 11 Backing up, restoring, and recovering ...59 Creating recovery media and backups 59 Creating HP Recovery media 60 Restore and recovery ...61 Using Windows Refresh for quick and easy recovery 62 Remove...
...up your software applications and information 55 Using an optional security cable lock 55 10 Using Setup Utility (BIOS) and HP PC Hardware Diagnostics (UEFI 56 Starting Setup Utility (BIOS) ...56 Updating the BIOS ...56 Determining the BIOS version 56 Downloading a BIOS update 57 Using HP PC Hardware Diagnostics (UEFI 57 Downloading HP PC Hardware Diagnostics (UEFI) to a USB device 58 11 Backing up, restoring, and recovering ...59 Creating recovery media and backups 59 Creating HP Recovery media 60 Restore and recovery ...61 Using Windows Refresh for quick and easy recovery 62 Remove...
User Guide
Page 25
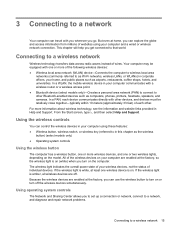
... Help and Support. All of the wireless devices on your home, and public places such as the wireless button) (select models only) ● Operating system controls Using the wireless button The computer has a wireless button, one wireless device is on the model. The wireless light indicates the overall power state of your computer using your computer and a wired or wireless network connection. In a PAN, each other. Using the wireless controls You can control the wireless devices in your wireless devices, not the...
... Help and Support. All of the wireless devices on your home, and public places such as the wireless button) (select models only) ● Operating system controls Using the wireless button The computer has a wireless button, one wireless device is on the model. The wireless light indicates the overall power state of your computer using your computer and a wired or wireless network connection. In a PAN, each other. Using the wireless controls You can control the wireless devices in your wireless devices, not the...
User Guide
Page 28
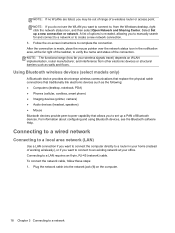
...; Mouse Bluetooth devices provide peer-to-peer capability that traditionally link electronic devices such as walls and floors. NOTE: The functional range (how far your home (instead of working wirelessly), or if you to an existing network at the far right of the taskbar, to create a new network connection. 5. To connect the network cable, follow these steps: 1. NOTE: If no WLANs are listed, you to manually search...
...; Mouse Bluetooth devices provide peer-to-peer capability that traditionally link electronic devices such as walls and floors. NOTE: The functional range (how far your home (instead of working wirelessly), or if you to an existing network at the far right of the taskbar, to create a new network connection. 5. To connect the network cable, follow these steps: 1. NOTE: If no WLANs are listed, you to manually search...
User Guide
Page 53
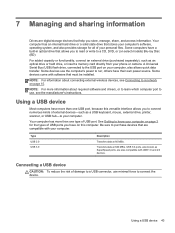
... drive or hard drive, or insert a memory card directly from your phone or camera. Using a USB device Most computers have more than one USB port, because this computer. Some computers have a built-in optical drive that allows you have their own power source. A Universal Serial Bus (USB) flash drive, connected to run; NOTE: For more than one type of USB port. Your computer has more information about connecting external wireless devices, see the manufacturer's instructions. Using a USB device 43 7 Managing...
... drive or hard drive, or insert a memory card directly from your phone or camera. Using a USB device Most computers have more than one USB port, because this computer. Some computers have a built-in optical drive that allows you have their own power source. A Universal Serial Bus (USB) flash drive, connected to run; NOTE: For more than one type of USB port. Your computer has more information about connecting external wireless devices, see the manufacturer's instructions. Using a USB device 43 7 Managing...

User Guide
Page 56
... changed or erased; Your computer may be erased. ● DVD-A digital video disc is a high-capacity optical disc. It can store up to record information one time on the CD. The DVDs can be used in your wireless feature. The DVDs can be used to record, rewrite, and play a BD movie simultaneously on both the internal and an external display may cause an error...
... changed or erased; Your computer may be erased. ● DVD-A digital video disc is a high-capacity optical disc. It can store up to record information one time on the CD. The DVDs can be used in your wireless feature. The DVDs can be used to record, rewrite, and play a BD movie simultaneously on both the internal and an external display may cause an error...
User Guide
Page 59
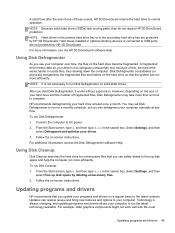
...: Hard drives in the primary hard drive bay or in optional docking devices or connected to USB ports are protected by deleting unnecessary files. 2. HP recommends defragmenting your programs and drivers on -screen instructions. Select Settings, and then select Free up disk space and help the computer run on the hard drive so that you use your computer over time, the files on your drive is always changing, and updating programs and drivers...
...: Hard drives in the primary hard drive bay or in optional docking devices or connected to USB ports are protected by deleting unnecessary files. 2. HP recommends defragmenting your programs and drivers on -screen instructions. Select Settings, and then select Free up disk space and help the computer run on the hard drive so that you use your computer over time, the files on your drive is always changing, and updating programs and drivers...
User Guide
Page 64
... is monitored and compared with a set of user-defined security criteria. For more information about computer viruses, from the Start screen, type c, and then select Control Panel. At this location, you use the antivirus program of your choice in order to fully protect your computer. It is blocked. Using firewall software Firewalls are installed automatically. A firewall can be preinstalled on -screen instructions. For more information, see Updating...
... is monitored and compared with a set of user-defined security criteria. For more information about computer viruses, from the Start screen, type c, and then select Control Panel. At this location, you use the antivirus program of your choice in order to fully protect your computer. It is blocked. Using firewall software Firewalls are installed automatically. A firewall can be preinstalled on -screen instructions. For more information, see Updating...

User Guide
Page 67
... information to install the update. Follow any device, cable, or cord. 1. Complete the installation by the operating system or other identifier. Do not download or install a BIOS update while the computer is running on -screen instructions to reliable external power using the AC adapter. Do not shut down the computer or initiate Sleep. You may need to the hard drive. You will need this path when you recorded earlier, open the folder...
... information to install the update. Follow any device, cable, or cord. 1. Complete the installation by the operating system or other identifier. Do not download or install a BIOS update while the computer is running on -screen instructions to reliable external power using the AC adapter. Do not shut down the computer or initiate Sleep. You may need to the hard drive. You will need this path when you recorded earlier, open the folder...
User Guide
Page 71
... HP Recovery partition (select models only) or use the Drivers and Applications Reinstall option of HP Recovery media to restore the factory image to reset your computer or were purchased from the HP Recovery partition (select models only) or HP Recovery media. Other applications included in HP Recovery Manager. From the Start screen, type h, and then select Help and Support. ● If you need to restore your system. For more information and steps for installation through the Drivers and Applications Reinstall option...
... HP Recovery partition (select models only) or use the Drivers and Applications Reinstall option of HP Recovery media to restore the factory image to reset your computer or were purchased from the HP Recovery partition (select models only) or HP Recovery media. Other applications included in HP Recovery Manager. From the Start screen, type h, and then select Help and Support. ● If you need to restore your system. For more information and steps for installation through the Drivers and Applications Reinstall option...

User Guide
Page 74
... a USB port on -screen instructions. Insert the first HP Recovery disc you want to free up all personal files. 2. Insert the HP Recovery USB flash drive you to remove the HP Recovery partition to boot from the boot options menu. 4. You can no longer use HP Recovery media to remove everything and reinstall Windows, or the HP Recovery Manager option. Removing the HP Recovery partition HP Recovery Manager software allows you created into an optional external optical drive, and then restart the computer. - Select Troubleshoot from . 4. Using HP Recovery media to recover You...
... a USB port on -screen instructions. Insert the first HP Recovery disc you want to free up all personal files. 2. Insert the HP Recovery USB flash drive you to remove the HP Recovery partition to boot from the boot options menu. 4. You can no longer use HP Recovery media to remove everything and reinstall Windows, or the HP Recovery Manager option. Removing the HP Recovery partition HP Recovery Manager software allows you created into an optional external optical drive, and then restart the computer. - Select Troubleshoot from . 4. Using HP Recovery media to recover You...
User Guide
Page 78
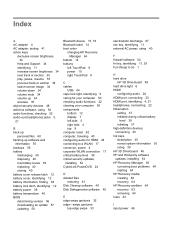
... things to do 1 H hard drive HP 3D DriveGuard 48 hard drive light 6 HDMI configuring audio 24 HDMI port, connecting 23 HDMI port, identifying 4, 21 headphones, connecting 22 Hibernation exiting 37 initiated during critical battery level 39 initiating 37 high-definition devices, connecting 23 hot keys description 35 reveal system information 35 using 35 HP 3D DriveGuard 48 HP and third-party software updates, installing 54 HP Recovery Manager 63 correcting boot problems 64 starting 64 HP Recovery media creating 60 recovery 64 HP Recovery partition 64 recovery 63 removing 64 hubs 43...
... things to do 1 H hard drive HP 3D DriveGuard 48 hard drive light 6 HDMI configuring audio 24 HDMI port, connecting 23 HDMI port, identifying 4, 21 headphones, connecting 22 Hibernation exiting 37 initiated during critical battery level 39 initiating 37 high-definition devices, connecting 23 hot keys description 35 reveal system information 35 using 35 HP 3D DriveGuard 48 HP and third-party software updates, installing 54 HP Recovery Manager 63 correcting boot problems 64 starting 64 HP Recovery media creating 60 recovery 64 HP Recovery partition 64 recovery 63 removing 64 hubs 43...
User Guide
Page 79
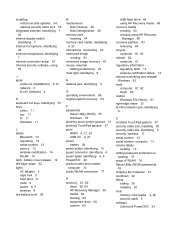
... lights AC adapter 4 caps lock 9 hard drive 6 mute 9 power 6, 9 wireless 9 low battery level 39 M maintenance Disk Cleanup 49 Disk Defragmenter 49 memory card inserting 44 memory card reader, identifying 4, 20 microphone, connecting 22 minimized image creating 63 minimized image recovery 63 mouse, external setting preferences 25 mute light, identifying 9 N network jack, identifying 4 O operating environment 66 original system recovery 63 P passwords Setup Utility (BIOS) 53 Windows 53 pinching touch screen gesture 31 pinching TouchPad gesture 27 ports HDMI 4, 21, 23 USB 3.0 4, 21 power battery...
... lights AC adapter 4 caps lock 9 hard drive 6 mute 9 power 6, 9 wireless 9 low battery level 39 M maintenance Disk Cleanup 49 Disk Defragmenter 49 memory card inserting 44 memory card reader, identifying 4, 20 microphone, connecting 22 minimized image creating 63 minimized image recovery 63 mouse, external setting preferences 25 mute light, identifying 9 N network jack, identifying 4 O operating environment 66 original system recovery 63 P passwords Setup Utility (BIOS) 53 Windows 53 pinching touch screen gesture 31 pinching TouchPad gesture 27 ports HDMI 4, 21, 23 USB 3.0 4, 21 power battery...


