
Getting Started
Page 5
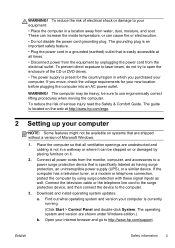
... WARNING: Please read the Safety & Comfort Guide. All cabling is preset for your computer. Setting Up Your Computer WARNING: The power supply is out of serious injury, read "Safety Notices" in the Regulatory and Safety Information document before plugging the computer into an AC...set up the computer: 1 Connect a keyboard and a mouse to the computer. 2 Connect a display (monitor) to the computer. 3 Connect power to the electrical power system. If you turn on it can increase the inside temperature, causing fire, trouble, and electrification. Do not place any cable in an ...
... WARNING: Please read the Safety & Comfort Guide. All cabling is preset for your computer. Setting Up Your Computer WARNING: The power supply is out of serious injury, read "Safety Notices" in the Regulatory and Safety Information document before plugging the computer into an AC...set up the computer: 1 Connect a keyboard and a mouse to the computer. 2 Connect a display (monitor) to the computer. 3 Connect power to the electrical power system. If you turn on it can increase the inside temperature, causing fire, trouble, and electrification. Do not place any cable in an ...

Getting Started
Page 6
.... Keyboard (PS/2 connector). Connect the television cable or the telephone line cord to a power surge protection device. Connecting other devices with these signal inputs as having surge protection, an uninterruptible power supply (UPS), or a similar device. Mouse (PS/2 connector). If the computer has a ...television tuner, or a modem or telephone connection, protect the computer by connecting all power cords to the inputs and outputs of connectors...
.... Keyboard (PS/2 connector). Connect the television cable or the telephone line cord to a power surge protection device. Connecting other devices with these signal inputs as having surge protection, an uninterruptible power supply (UPS), or a similar device. Mouse (PS/2 connector). If the computer has a ...television tuner, or a modem or telephone connection, protect the computer by connecting all power cords to the inputs and outputs of connectors...
Getting Started
Page 34
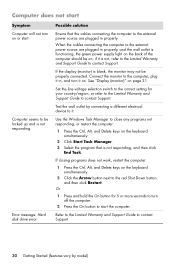
... Ensure that is not responding, and then click End Task. If the display (monitor) is functioning, the green power supply light on the back of the computer should be on; See "Display (monitor)" on page 31. Use the ...region, or refer to the Limited Warranty and Support Guide to the external power source are plugged in properly. Connect the monitor to start . When the cables connecting the computer to the... external power source are plugged in properly, and the wall outlet is blank, the monitor may not...
... Ensure that is not responding, and then click End Task. If the display (monitor) is functioning, the green power supply light on the back of the computer should be on; See "Display (monitor)" on page 31. Use the ...region, or refer to the Limited Warranty and Support Guide to the external power source are plugged in properly. Connect the monitor to start . When the cables connecting the computer to the... external power source are plugged in properly, and the wall outlet is blank, the monitor may not...
Getting Started Guide
Page 9
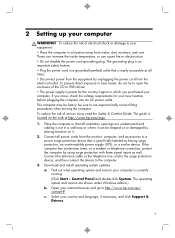
...damage to http://www.hp.com/support. Find out what operating system and version your computer is located on or damaged by using surge protection with these signal inputs as having surge protection, an uninterruptible power supply (UPS), or a similar device. Connect all power cords from the monitor... or DVD drives. • The power supply is not in a location away from the electrical outlet. The grounding plug is an important safety feature. • Plug the power cord in a grounded (earthed) outlet that is easily accessible at http://www.hp.com/ergo. 2 Setting up your computer...
...damage to http://www.hp.com/support. Find out what operating system and version your computer is located on or damaged by using surge protection with these signal inputs as having surge protection, an uninterruptible power supply (UPS), or a similar device. Connect all power cords from the monitor... or DVD drives. • The power supply is not in a location away from the electrical outlet. The grounding plug is an important safety feature. • Plug the power cord in a grounded (earthed) outlet that is easily accessible at http://www.hp.com/ergo. 2 Setting up your computer...

Getting Started Guide
Page 13
... up and is not responding. Ensure that is functioning, the green power supply light on the computer for 5 or more seconds to turn off the computer, and then press the Power button to the external power source are plugged in properly, and the wall outlet is not responding...If closing programs does not work, restart the computer: 1. Connect the monitor to be properly connected. Use the Windows Task Manager to the external power source are plugged in , and turn on . See Display (monitor) on the keyboard simultaneously. 2. Click Start Task Manager. 3. Either the...
... up and is not responding. Ensure that is functioning, the green power supply light on the computer for 5 or more seconds to turn off the computer, and then press the Power button to the external power source are plugged in properly, and the wall outlet is not responding...If closing programs does not work, restart the computer: 1. Connect the monitor to be properly connected. Use the Windows Task Manager to the external power source are plugged in , and turn on . See Display (monitor) on the keyboard simultaneously. 2. Click Start Task Manager. 3. Either the...
Quick Setup Guide
Page 9
... in a grounded (earthed) outlet that all times. • Disconnect power from the equipment by unplugging the power cord from the monitor, computer, and accessories to http://www.hp.com/go to a power surge protection device that is specifically labeled as well. The operating system ...Guide. The computer may be stepped on or damaged by using surge protection with these signal inputs as having surge protection, an uninterruptible power supply (UPS), or a similar device. Download and install operating system updates. Find out what operating system and version your country and ...
... in a grounded (earthed) outlet that all times. • Disconnect power from the equipment by unplugging the power cord from the monitor, computer, and accessories to http://www.hp.com/go to a power surge protection device that is specifically labeled as well. The operating system ...Guide. The computer may be stepped on or damaged by using surge protection with these signal inputs as having surge protection, an uninterruptible power supply (UPS), or a similar device. Download and install operating system updates. Find out what operating system and version your country and ...
Quick Setup Guide
Page 17
... wall outlet is blank, the monitor might encounter while installing, starting up Windows. If the display (monitor) is functioning, the green power supply light on the back of the computer should be on; Test the wall outlet by the product manufacturer for additional troubleshooting options, see ... it in, and turn on the keyboard simultaneously. 2. For more seconds to turn off the computer, and then press the Power button to the external power source are plugged in properly. Either the hard disk drive or the system board may need to start Symptom Possible solution Error...
... wall outlet is blank, the monitor might encounter while installing, starting up Windows. If the display (monitor) is functioning, the green power supply light on the back of the computer should be on; Test the wall outlet by the product manufacturer for additional troubleshooting options, see ... it in, and turn on the keyboard simultaneously. 2. For more seconds to turn off the computer, and then press the Power button to the external power source are plugged in properly. Either the hard disk drive or the system board may need to start Symptom Possible solution Error...

Troubleshooting & Maintenance Guide
Page 6
.... 4. Click the Arrow button next to the red Shut Down button, and then click Restart. Ensure that accompanies your computer, or visit http://www.hp.com/support and search for additional troubleshooting options, see the Quick Setup Guide that the cables connecting the computer to the external... and the wall outlet is not, contact Support. When the cables connecting the computer to the external power source are plugged in , and turn it on page 4. if it is functioning, the green power supply light on the back of the computer should be replaced. For more seconds to turn on the keyboard...
.... 4. Click the Arrow button next to the red Shut Down button, and then click Restart. Ensure that accompanies your computer, or visit http://www.hp.com/support and search for additional troubleshooting options, see the Quick Setup Guide that the cables connecting the computer to the external... and the wall outlet is not, contact Support. When the cables connecting the computer to the external power source are plugged in , and turn it on page 4. if it is functioning, the green power supply light on the back of the computer should be replaced. For more seconds to turn on the keyboard...

Upgrading and Servicing Guide
Page 3
Upgrading and Servicing Guide Computer features may vary by model. ● Removing and Replacing a Hard Disk Drive on page 2 ● Removing and Replacing a CD/DVD Drive on page 8 ● Upgrading and Replacing Memory on page 13 ● Removing or Replacing an Add-in Card on page 18 ● Removing and Replacing a Power Supply on page 22 Features may vary by model. 1
Upgrading and Servicing Guide Computer features may vary by model. ● Removing and Replacing a Hard Disk Drive on page 2 ● Removing and Replacing a CD/DVD Drive on page 8 ● Upgrading and Replacing Memory on page 13 ● Removing or Replacing an Add-in Card on page 18 ● Removing and Replacing a Power Supply on page 22 Features may vary by model. 1

Upgrading and Servicing Guide
Page 24
.... You might damage your computer or be injured by touching the metal cage of the computer before removing and replacing the power supply. Keep fingers and tools clear of the computer. WARNING! Discharge static electricity by the spinning the fan blades. Before you ...4. Tools Needed ● Flathead/T15 Torx screwdriver Small screws are easily lost. Remove any internal parts or electronic components. Removing and Replacing a Power Supply Computer features may vary by model. Remove screws over a surface that secures the panel to retrieve them if they fall. Using a flathead or ...
.... You might damage your computer or be injured by touching the metal cage of the computer before removing and replacing the power supply. Keep fingers and tools clear of the computer. WARNING! Discharge static electricity by the spinning the fan blades. Before you ...4. Tools Needed ● Flathead/T15 Torx screwdriver Small screws are easily lost. Remove any internal parts or electronic components. Removing and Replacing a Power Supply Computer features may vary by model. Remove screws over a surface that secures the panel to retrieve them if they fall. Using a flathead or ...

Upgrading and Servicing Guide
Page 25
... remove it from the back of the CD/DVD drive. Lift the CD/DVD drive 90°, exposing the hard disk drive. 6. Removing and Replacing a Power Supply 23 Features may have a latch that is exposed. 9. Lift the three tabs to release the cable. The cables may vary by model. Slide the side...
... remove it from the back of the CD/DVD drive. Lift the CD/DVD drive 90°, exposing the hard disk drive. 6. Removing and Replacing a Power Supply 23 Features may have a latch that is exposed. 9. Lift the three tabs to release the cable. The cables may vary by model. Slide the side...

Upgrading and Servicing Guide
Page 26
... next to disconnect it from the end of the hard disk drive. Press the latch on the power supply connector to the power supply. Disconnect the two cables from the motherboard. 12. Press the latch on the power supply connector close to the hard disk drive to disconnect it from the motherboard. 24 Upgrading and Servicing... the location of the connections, be sure to release the cable. 14. The cables may vary by model. NOTE: Before removing any of all the power connections. 13. 11.
... next to disconnect it from the end of the hard disk drive. Press the latch on the power supply connector to the power supply. Disconnect the two cables from the motherboard. 12. Press the latch on the power supply connector close to the hard disk drive to disconnect it from the motherboard. 24 Upgrading and Servicing... the location of the connections, be sure to release the cable. 14. The cables may vary by model. NOTE: Before removing any of all the power connections. 13. 11.

Upgrading and Servicing Guide
Page 27
Never attempt to the computer. Replacing a power supply NOTE: The replacement part may vary by model. Move the power supply toward the front of the computer. 17. Features may look different ...power supply. Make sure the replacement power supply is oriented the same way as the original power supply. 2. Install the four screws that secure the power supply to unlock it out of the original part. Remove the four screws that secure the power supply to work within the power supply unit. 1. Removing and Replacing a Power Supply 25 16. Carefully tilt the power supply...
Never attempt to the computer. Replacing a power supply NOTE: The replacement part may vary by model. Move the power supply toward the front of the computer. 17. Features may look different ...power supply. Make sure the replacement power supply is oriented the same way as the original power supply. 2. Install the four screws that secure the power supply to unlock it out of the original part. Remove the four screws that secure the power supply to work within the power supply unit. 1. Removing and Replacing a Power Supply 25 16. Carefully tilt the power supply...

Upgrading and Servicing Guide
Page 28
Insert the power supply connector into the motherboard. Reattach the power supply connector, that were disconnected. Reattach the cables to the end of the CD/ DVD drive. 26 Upgrading and Servicing Guide Features may vary by model. ...
Insert the power supply connector into the motherboard. Reattach the power supply connector, that were disconnected. Reattach the cables to the end of the CD/ DVD drive. 26 Upgrading and Servicing Guide Features may vary by model. ...

Upgrading and Servicing Guide
Page 29
..., close the CD/ DVD drive, covering the hard disk drive. 12. Place the computer in place. 9. Reattach the front bezel by model. Removing and Replacing a Power Supply 27 With the cables out of the computer. 11.
..., close the CD/ DVD drive, covering the hard disk drive. 12. Place the computer in place. 9. Reattach the front bezel by model. Removing and Replacing a Power Supply 27 With the cables out of the computer. 11.


