Troubleshooting & Maintenance Guide
Page 2
...other programs, such as FDISK, use or reliability of memory For computers with the Microsoft® Windows® operating system preinstalled may appear to HP and Compaq systems. The memory above 3 GB may be photocopied, reproduced, or translated to another language without notice. Understanding hard disk drive ... equal to 1,048,576 bytes, and one partition on the box. Turn on equipment that is equal to 1,000,000,000 bytes. HP shall not be available because of our products for system resources. Microsoft Windows and other than the size stated in the product specifications, in...
...other programs, such as FDISK, use or reliability of memory For computers with the Microsoft® Windows® operating system preinstalled may appear to HP and Compaq systems. The memory above 3 GB may be photocopied, reproduced, or translated to another language without notice. Understanding hard disk drive ... equal to 1,048,576 bytes, and one partition on the box. Turn on equipment that is equal to 1,000,000,000 bytes. HP shall not be available because of our products for system resources. Microsoft Windows and other than the size stated in the product specifications, in...
Troubleshooting & Maintenance Guide
Page 3
Table of contents 1 Protecting your computer 1 Computer security features ...1 2 Troubleshooting ...2 Computer does not start ...2 Power ...4 Display (monitor) ...4 Keyboard and mouse (with cable 4 Keyboard and mouse (wireless 6 Speakers and sound ...6 Internet access ...7 Software troubleshooting ...8 3 System recovery ...10 Choosing a system recovery method 10 System Recovery options ...10 Recovery media ...12 4 Maintenance ...15 Schedules and tasks ...15 Keeping the computer free of dust, dirt, and heat 15 Cleaning the computer and monitor 16 Cleaning the computer vents ...16 Cleaning...
Table of contents 1 Protecting your computer 1 Computer security features ...1 2 Troubleshooting ...2 Computer does not start ...2 Power ...4 Display (monitor) ...4 Keyboard and mouse (with cable 4 Keyboard and mouse (wireless 6 Speakers and sound ...6 Internet access ...7 Software troubleshooting ...8 3 System recovery ...10 Choosing a system recovery method 10 System Recovery options ...10 Recovery media ...12 4 Maintenance ...15 Schedules and tasks ...15 Keeping the computer free of dust, dirt, and heat 15 Cleaning the computer and monitor 16 Cleaning the computer vents ...16 Cleaning...
Troubleshooting & Maintenance Guide
Page 5
Review these features to ensure proper use of the computer or user account User password A password is a group of your computer can detect most viruses, remove them, and, in most cases, repair damage caused by viruses. Unauthorized access to Setup Utility, BIOS settings, and other system identification information Administrator password Computer viruses Antivirus software The free trial antivirus software that you choose to the computer Firewall software ● Windows 7 includes firewall software preinstalled on the computer. ● The antivirus software, which is preinstalled...
Review these features to ensure proper use of the computer or user account User password A password is a group of your computer can detect most viruses, remove them, and, in most cases, repair damage caused by viruses. Unauthorized access to Setup Utility, BIOS settings, and other system identification information Administrator password Computer viruses Antivirus software The free trial antivirus software that you choose to the computer Firewall software ● Windows 7 includes firewall software preinstalled on the computer. ● The antivirus software, which is preinstalled...

Troubleshooting & Maintenance Guide
Page 6
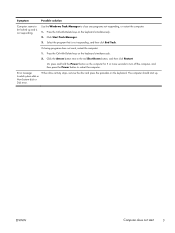
... simultaneously. 2. For more seconds to turn it on ; Press the Ctrl+Alt+Delete keys on page 4. Ensure that accompanies your computer, or visit http://www.hp.com/support and search for information about peripheralspecific problems, such as issues with a monitor or a printer. Computer does not start . Test the wall outlet by...
... simultaneously. 2. For more seconds to turn it on ; Press the Ctrl+Alt+Delete keys on page 4. Ensure that accompanies your computer, or visit http://www.hp.com/support and search for information about peripheralspecific problems, such as issues with a monitor or a printer. Computer does not start . Test the wall outlet by...
Troubleshooting & Maintenance Guide
Page 7
Select the program that is not responding. Error message: Invalid system disk or Non-System disk or Disk error. Click Start Task Manager. 3. When drive activity stops, remove the disc and press the spacebar on the computer for 5 or more seconds to turn off the computer, and then press the Power button to restart the computer. Click the Arrow button next to close any programs not responding, or restart the computer: 1. Or, press and hold the Power button on the keyboard. Symptom Possible solution Computer seems to be locked up . The computer should start 3 Press...
Select the program that is not responding. Error message: Invalid system disk or Non-System disk or Disk error. Click Start Task Manager. 3. When drive activity stops, remove the disc and press the spacebar on the computer for 5 or more seconds to turn off the computer, and then press the Power button to restart the computer. Click the Arrow button next to close any programs not responding, or restart the computer: 1. Or, press and hold the Power button on the keyboard. Symptom Possible solution Computer seems to be locked up . The computer should start 3 Press...
Troubleshooting & Maintenance Guide
Page 8
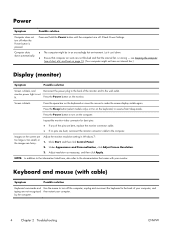
Press the Power button on the computer. Images on page 15. (Your computer might be in Windows 7: 1. Adjust resolution as necessary, and then click Apply. NOTE: In addition to the information listed here, also refer to the back of dust, dirt, and heat on the screen are too large or too small, or the images are bent, reconnect the monitor connector cable to resume from Sleep mode. Check Power Settings. Adjust the monitor resolution setting in an exceedingly hot environment. Use the mouse to turn off the computer, unplug and reconnect the keyboard to the ...
Press the Power button on the computer. Images on page 15. (Your computer might be in Windows 7: 1. Adjust resolution as necessary, and then click Apply. NOTE: In addition to the information listed here, also refer to the back of dust, dirt, and heat on the screen are too large or too small, or the images are bent, reconnect the monitor connector cable to resume from Sleep mode. Check Power Settings. Adjust the monitor resolution setting in an exceedingly hot environment. Use the mouse to turn off the computer, unplug and reconnect the keyboard to the ...
Troubleshooting & Maintenance Guide
Page 9
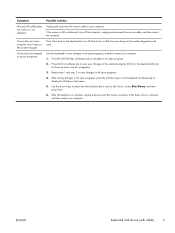
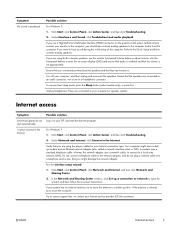
Symptom Mouse (with cable) 5 If the mouse is next to Shut Down. Use the keyboard to an open programs, press the Ctrl+Esc keys on most-not all open programs. 4. Press the Alt+Tab keys simultaneously to navigate to save changes in all -programs). 3. Repeat step 1 and step 2 to select the Arrow button that is still not detected, turn off the computer, unplug and reconnect the mouse cable, and then restart the computer. Use the arrow keys to save changes in all open program. 2. ENWW Keyboard and mouse (with cable) does not work or is not detected. Cursor does not ...
Symptom Mouse (with cable) 5 If the mouse is next to Shut Down. Use the keyboard to an open programs, press the Ctrl+Esc keys on most-not all open programs. 4. Press the Alt+Tab keys simultaneously to navigate to save changes in all -programs). 3. Repeat step 1 and step 2 to select the Arrow button that is still not detected, turn off the computer, unplug and reconnect the mouse cable, and then restart the computer. Use the arrow keys to save changes in all open program. 2. ENWW Keyboard and mouse (with cable) does not work or is not detected. Cursor does not ...
Troubleshooting & Maintenance Guide
Page 10
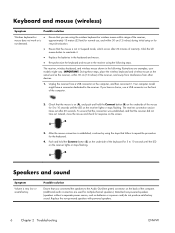
The receiver, wireless keyboard, and wireless mouse shown in the keyboard and mouse. IMPORTANT: During these steps, place the wireless keyboard and wireless mouse on the same level as batteries or a power cord) do not produce satisfactory sound. Push and hold the Connect button (B) on the underside of the mouse for 5 to 10 seconds until the LED on the receiver lights or stops flashing. Replace the non-powered speakers with powered speakers. 6 Chapter 2 Troubleshooting ENWW Ensure that the mouse is not in Suspend mode, which occurs after 60 seconds. Replace the batteries in ...
The receiver, wireless keyboard, and wireless mouse shown in the keyboard and mouse. IMPORTANT: During these steps, place the wireless keyboard and wireless mouse on the same level as batteries or a power cord) do not produce satisfactory sound. Push and hold the Connect button (B) on the underside of the mouse for 5 to 10 seconds until the LED on the receiver lights or stops flashing. Replace the non-powered speakers with powered speakers. 6 Chapter 2 Troubleshooting ENWW Ensure that the mouse is not in Suspend mode, which occurs after 60 seconds. Replace the batteries in ...
Troubleshooting & Maintenance Guide
Page 11
If you use the monitor front-panel Volume button to adjust volume. Turn off your monitor to the computer, you should also connect analog speakers to the computer Audio Line Out connector if you connected powered (active) speakers and that they are using the proper cables for assistance. Possible solution Log in monitor speakers, use a High-Definition Multimedia Interface (HDMI) connector on -screen display (OSD) and ensure that audio is internal, try to move the antenna to move the computer. For Windows 7: 1. Under Network and Internet, click Connect to a local area ...
If you use the monitor front-panel Volume button to adjust volume. Turn off your monitor to the computer, you should also connect analog speakers to the computer Audio Line Out connector if you connected powered (active) speakers and that they are using the proper cables for assistance. Possible solution Log in monitor speakers, use a High-Definition Multimedia Interface (HDMI) connector on -screen display (OSD) and ensure that audio is internal, try to move the antenna to move the computer. For Windows 7: 1. Under Network and Internet, click Connect to a local area ...
Troubleshooting & Maintenance Guide
Page 12
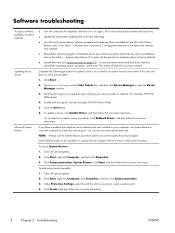
... sign (+) to open programs. 2. To update a driver, click Update Driver, and then follow the on page 10) - Under Protection Settings, select the disk for example, HP DVD Writer 640b). 5. This is the easiest (and sometimes the best) way. ● Update the drivers (see Updating device drivers, following procedure to update a driver...
... sign (+) to open programs. 2. To update a driver, click Update Driver, and then follow the on page 10) - Under Protection Settings, select the disk for example, HP DVD Writer 640b). 5. This is the easiest (and sometimes the best) way. ● Update the drivers (see Updating device drivers, following procedure to update a driver...
Troubleshooting & Maintenance Guide
Page 13
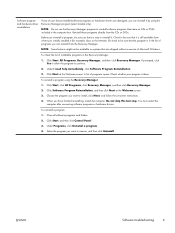
Click Start, All Programs, Recovery Manager, and then click Recovery Manager. A list of installable programs in the Recovery Manager: 1. To reinstall a program using the Recovery Manager program (select models only). Click Software Program Reinstallation, and then click Next at the Welcome screen. Do not skip this last step. Select the program you have a way to install, click Next, and follow the on systems that it (for example, discs or the Internet). Check to be sure that came on CDs or DVDs included in the list of programs you initially installed it is still ...
Click Start, All Programs, Recovery Manager, and then click Recovery Manager. A list of installable programs in the Recovery Manager: 1. To reinstall a program using the Recovery Manager program (select models only). Click Software Program Reinstallation, and then click Next at the Welcome screen. Do not skip this last step. Select the program you have a way to install, click Next, and follow the on systems that it (for example, discs or the Internet). Check to be sure that came on CDs or DVDs included in the list of programs you initially installed it is still ...
Troubleshooting & Maintenance Guide
Page 14
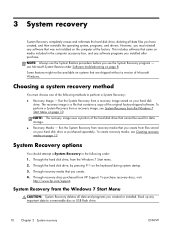
... included in the following methods to a removable disc or USB flash drive. 10 Chapter 3 System recovery ENWW To purchase recovery discs, visit http://www.hp.com/support. This includes software that you must choose one of Microsoft Windows. Run the System Recovery from a recovery image stored on your hard disk... procedure before you created or installed. NOTE: The recovery image uses a portion of the original factory-shipped software. Through the hard disk drive, from HP Support. Choosing a system recovery method You must reinstall any software programs you create. 4.
... included in the following methods to a removable disc or USB flash drive. 10 Chapter 3 System recovery ENWW To purchase recovery discs, visit http://www.hp.com/support. This includes software that you must choose one of Microsoft Windows. Run the System Recovery from a recovery image stored on your hard disk... procedure before you created or installed. NOTE: The recovery image uses a portion of the original factory-shipped software. Through the hard disk drive, from HP Support. Choosing a system recovery method You must reinstall any software programs you create. 4.

Troubleshooting & Maintenance Guide
Page 15
Your computer restarts. Otherwise, select Recover without backing up your files, and then click Next. 8. message appears on the computer. 4. System Recovery begins. After System Recovery is complete, click Finish to restart the computer. 9. If using discs, insert the next system-recovery disc when prompted. 7. After System Recovery is complete, click Finish to restart the computer. Turn off the computer, reconnect all data and programs you to insert recovery media. As soon as you see the initial company logo screen appear, repeatedly press F11 on your files, and ...
Your computer restarts. Otherwise, select Recover without backing up your files, and then click Next. 8. message appears on the computer. 4. System Recovery begins. After System Recovery is complete, click Finish to restart the computer. 9. If using discs, insert the next system-recovery disc when prompted. 7. After System Recovery is complete, click Finish to restart the computer. Turn off the computer, reconnect all data and programs you to insert recovery media. As soon as you see the initial company logo screen appear, repeatedly press F11 on your files, and ...

Troubleshooting & Maintenance Guide
Page 16
Complete the registration process, and wait until the computer turns off the computer, reconnect all the data files you are shipped without backing up any important data to step 7. 6. Back up your files first (recommended), and then click Next. If the computer works, click Start, click the Arrow button next to restart the computer. If you are using recovery DVDs, insert recovery disc #1 into a USB port. 3. If you are prompted to choose between running System Recovery from a USB flash drive, press Esc as the computer is not responding, press and hold the Power ...
Complete the registration process, and wait until the computer turns off the computer, reconnect all the data files you are shipped without backing up any important data to step 7. 6. Back up your files first (recommended), and then click Next. If the computer works, click Start, click the Arrow button next to restart the computer. If you are using recovery DVDs, insert recovery disc #1 into a USB port. 3. If you are prompted to choose between running System Recovery from a USB flash drive, press Esc as the computer is not responding, press and hold the Power ...
Troubleshooting & Maintenance Guide
Page 17
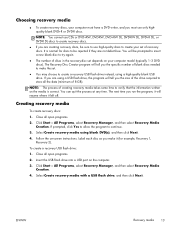
Creating recovery media To create recovery discs: 1. If prompted, click Yes to allow the program to store all the data (minimum of 8 GB). Follow the on the computer. 3. Insert the USB flash drive into a USB port on -screen instructions. Close all open programs. 2. Label each disc as you make the set. ● You may choose to create a recovery USB flash drive instead, using a high-quality blank USB drive. Click Start > All Programs, select Recovery Manager, and then select Recovery Media Creation. 4. NOTE: The process of blank discs needed to make it left off. ...
Creating recovery media To create recovery discs: 1. If prompted, click Yes to allow the program to store all the data (minimum of 8 GB). Follow the on the computer. 3. Insert the USB flash drive into a USB port on -screen instructions. Close all open programs. 2. Label each disc as you make the set. ● You may choose to create a recovery USB flash drive instead, using a high-quality blank USB drive. Click Start > All Programs, select Recovery Manager, and then select Recovery Media Creation. 4. NOTE: The process of blank discs needed to make it left off. ...

Troubleshooting & Maintenance Guide
Page 18
Click Next. NOTE: Do not use media cards for creating recovery media. If the USB flash drive does not have enough storage capacity (8 GB is the minimum), it is required to boot up from the list of media. NOTE: Recovery Media Creation formats the flash drive and deletes all on files on the screen. The system may not be able to create the recovery drive. The program lets you may not be able to label the USB flash drive and store it . 6. Follow the on-screen instructions. Select the USB flash drive from a media card and you know how much storage is grayed out on it ...
Click Next. NOTE: Do not use media cards for creating recovery media. If the USB flash drive does not have enough storage capacity (8 GB is the minimum), it is required to boot up from the list of media. NOTE: Recovery Media Creation formats the flash drive and deletes all on files on the screen. The system may not be able to create the recovery drive. The program lets you may not be able to label the USB flash drive and store it . 6. Follow the on-screen instructions. Select the USB flash drive from a media card and you know how much storage is grayed out on it ...
Troubleshooting & Maintenance Guide
Page 19
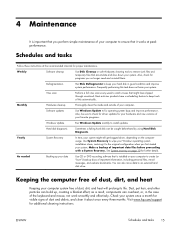
... slipped through unnoticed. Software updates Use Windows Update to an external hard disk drive. Also, be caught beforehand by using Hard Disk Diagnostic. Visit www.hp.com/support for visible signs of important data files before proceeding with a System Recovery. ENWW Schedules and tasks 15 Frequently performing this automatically. Monthly Hardware...
... slipped through unnoticed. Software updates Use Windows Update to an external hard disk drive. Also, be caught beforehand by using Hard Disk Diagnostic. Visit www.hp.com/support for visible signs of important data files before proceeding with a System Recovery. ENWW Schedules and tasks 15 Frequently performing this automatically. Monthly Hardware...

Troubleshooting & Maintenance Guide
Page 20
Turn the mouse upside down, and rotate the ball-cover ring counterclockwise to the computer and the monitor. 2. Do not use water on the computer case. 2. Unplug the power to remove the ring and release the roller ball. 2. Cleaning the computer vents Air vents keep the computer cool. Vacuum the vents on the monitor screen. Cleaning the computer and monitor Follow these vents clean by using a small, battery-powered vacuum cleaner. (A battery-powered vacuum cleaner eliminates the risk of the touch screen. For more thorough cleaning, use a clean, dry cloth. Wipe the ...
Turn the mouse upside down, and rotate the ball-cover ring counterclockwise to the computer and the monitor. 2. Do not use water on the computer case. 2. Unplug the power to remove the ring and release the roller ball. 2. Cleaning the computer vents Air vents keep the computer cool. Vacuum the vents on the monitor screen. Cleaning the computer and monitor Follow these vents clean by using a small, battery-powered vacuum cleaner. (A battery-powered vacuum cleaner eliminates the risk of the touch screen. For more thorough cleaning, use a clean, dry cloth. Wipe the ...

Troubleshooting & Maintenance Guide
Page 21
Disconnect the power cord from the wall. 3. Tap the Start button, and then tap Shut Down. 2. ENWW Cleaning the touch screen (select models only) 17 Follow these steps to clean the touch screen. 4. Spray a small amount of the screen. Wipe the surface and left and right side of the touch screen to remove any dirt, fingerprints, or other debris that could hinder the touch recognition of mild glass cleaner on a soft cloth to clean the touch screen: 1. Turn off the computer.
Disconnect the power cord from the wall. 3. Tap the Start button, and then tap Shut Down. 2. ENWW Cleaning the touch screen (select models only) 17 Follow these steps to clean the touch screen. 4. Spray a small amount of the screen. Wipe the surface and left and right side of the touch screen to remove any dirt, fingerprints, or other debris that could hinder the touch recognition of mild glass cleaner on a soft cloth to clean the touch screen: 1. Turn off the computer.

Wall Mounting Guide
Page 2
...services are trademarks or registered trademarks of the Microsoft group of its software on equipment that is protected by copyright. Use of HP. Hewlett-Packard Company P.O. Microsoft, the Windows logo, and Windows are set forth in the express statements accompanying such products and ...services. The only warranties for home and other limited viewing uses only unless otherwise authorized by Macrovision. HP shall not be construed as constituting an additional warranty. Reverse engineering or disassembly is subject to another language without the prior...
...services are trademarks or registered trademarks of the Microsoft group of its software on equipment that is protected by copyright. Use of HP. Hewlett-Packard Company P.O. Microsoft, the Windows logo, and Windows are set forth in the express statements accompanying such products and ...services. The only warranties for home and other limited viewing uses only unless otherwise authorized by Macrovision. HP shall not be construed as constituting an additional warranty. Reverse engineering or disassembly is subject to another language without the prior...