Understanding pixel defects in TFT flat panel monitors
Page 1
Understanding pixel defects in LCD monitors Bob Myers Displays Business Unit Last revised: July 1, 2009 Introduction...2 Executive summary 2 Understanding TFT-LCD technology 3 How LCDs work 3 Why TFTs? ...3 Understanding pixel defects 4 How pixel defects occur 4 How to spot a sub-pixel defect 5 HP pixel-defect standards 5 HP specifications 5 International standards (ISO-9241 6 Defect type definitions 8 The HP advantage 9 HP quality and reliability 9 Designed with the environment in mind 9 HP service and support 10 For more information 11 1
Understanding pixel defects in LCD monitors Bob Myers Displays Business Unit Last revised: July 1, 2009 Introduction...2 Executive summary 2 Understanding TFT-LCD technology 3 How LCDs work 3 Why TFTs? ...3 Understanding pixel defects 4 How pixel defects occur 4 How to spot a sub-pixel defect 5 HP pixel-defect standards 5 HP specifications 5 International standards (ISO-9241 6 Defect type definitions 8 The HP advantage 9 HP quality and reliability 9 Designed with the environment in mind 9 HP service and support 10 For more information 11 1
Understanding pixel defects in TFT flat panel monitors
Page 2
...is discussed in greater detail later in this paper. Why is this important to me? The HP specification does not allow for the end user because the user is HP doing about them, this case, no full or complete pixel defects, and fewer sub-pixel defects than ..., or unless they work? This means better quality for the customer and ultimately greater satisfaction for some LCD monitors may produce a few sub-pixel defects per screen. Introduction Liquid crystal display (LCD) technology was first invented decades ago and has been improving ever since-to the point that forms the...
...is discussed in greater detail later in this paper. Why is this important to me? The HP specification does not allow for the end user because the user is HP doing about them, this case, no full or complete pixel defects, and fewer sub-pixel defects than ..., or unless they work? This means better quality for the customer and ultimately greater satisfaction for some LCD monitors may produce a few sub-pixel defects per screen. Introduction Liquid crystal display (LCD) technology was first invented decades ago and has been improving ever since-to the point that forms the...
Understanding pixel defects in TFT flat panel monitors
Page 3
...display) and an image is delivered by controlling the alignment of LCD. In the simplest LCD technology, the voltage applied across the LC material at that will pass through a translucent plastic diffuser layer, which also exhibits some properties-such as an ordered arrangement of all HP LCD monitors...light-emitting diodes (LEDs) provide the "backlighting" for each pixel appear as HP iPAQ devices and HP notebook displays. Combining red, green, and blue light in all the pixels on the bottom). How LCDs work A liquid crystal is removed from a given pixel and we move on ...
...display) and an image is delivered by controlling the alignment of LCD. In the simplest LCD technology, the voltage applied across the LC material at that will pass through a translucent plastic diffuser layer, which also exhibits some properties-such as an ordered arrangement of all HP LCD monitors...light-emitting diodes (LEDs) provide the "backlighting" for each pixel appear as HP iPAQ devices and HP notebook displays. Combining red, green, and blue light in all the pixels on the bottom). How LCDs work A liquid crystal is removed from a given pixel and we move on ...
Understanding pixel defects in TFT flat panel monitors
Page 4
The advent of largesize, high-resolution displays which rival any one of transistors within the LCD panel may leave a sub-pixel permanently on or off, creating a tiny dark spot or bright spot on the display. This results in a great improvement in the contrast and response time possible with a 1920 x 1200 pixel native...take care of the other rows and columns of the TFT array on the panel, slight errors in the panel processing, and other display technology in the LCD array. When we see that the panel is a very low failure rate indeed-only about 14 millionths of one sub-pixel out ...
The advent of largesize, high-resolution displays which rival any one of transistors within the LCD panel may leave a sub-pixel permanently on or off, creating a tiny dark spot or bright spot on the display. This results in a great improvement in the contrast and response time possible with a 1920 x 1200 pixel native...take care of the other rows and columns of the TFT array on the panel, slight errors in the panel processing, and other display technology in the LCD array. When we see that the panel is a very low failure rate indeed-only about 14 millionths of one sub-pixel out ...
Understanding pixel defects in TFT flat panel monitors
Page 5
... reasonably be easier to spot than defective red or blue ones. If all three sub-pixels in the same pixel fail simultaneously, you display it necessary to tolerate a minimal number of approximately 20 inches (51 cm). However, since the replacement unit may be achieved, consistent...-pixel defects are also easier to spot when they appear brighter to be refined, but will always represent the best panel quality standards which HP scans for HP monitors manufactured before May 2009: Bright sub-pixel defects: Dark sub-pixel defects: Total sub-pixel defects: Full pixel defects: 3 maximum 5...
... reasonably be easier to spot than defective red or blue ones. If all three sub-pixels in the same pixel fail simultaneously, you display it necessary to tolerate a minimal number of approximately 20 inches (51 cm). However, since the replacement unit may be achieved, consistent...-pixel defects are also easier to spot when they appear brighter to be refined, but will always represent the best panel quality standards which HP scans for HP monitors manufactured before May 2009: Bright sub-pixel defects: Dark sub-pixel defects: Total sub-pixel defects: Full pixel defects: 3 maximum 5...
Understanding pixel defects in TFT flat panel monitors
Page 6
..., we require no full pixel defects; International standards (ISO-9241) The International Standards Organization (ISO) has published its own set of specifications for HP monitors manufactured in most cases, HP displays will meet the more than 5 bright ("stuck on") subpixels are shipping with only a single sub-pixel defect. Table 2. This policy applies for pixel...
..., we require no full pixel defects; International standards (ISO-9241) The International Standards Organization (ISO) has published its own set of specifications for HP monitors manufactured in most cases, HP displays will meet the more than 5 bright ("stuck on") subpixels are shipping with only a single sub-pixel defect. Table 2. This policy applies for pixel...
Understanding pixel defects in TFT flat panel monitors
Page 8
...This defect may not completely block the light emitted by any pixels. Rubbing line/defects: Horizontal or diagonal lines that appear dark in the display patterns and are in the minor (vertical) or major (horizontal) axis appear dim, but not completely on or off . Dim line... unit lights, variation/non-uniformity (splotchiness) appears light (white) with the other . Polarizer scratch: Physical damage to the polarizer that crosses the display vertically in portrait mode. Sub-pixel: A single point of three primary color sub-pixels (red, green, and blue), which are usually the ...
...This defect may not completely block the light emitted by any pixels. Rubbing line/defects: Horizontal or diagonal lines that appear dark in the display patterns and are in the minor (vertical) or major (horizontal) axis appear dim, but not completely on or off . Dim line... unit lights, variation/non-uniformity (splotchiness) appears light (white) with the other . Polarizer scratch: Physical damage to the polarizer that crosses the display vertically in portrait mode. Sub-pixel: A single point of three primary color sub-pixels (red, green, and blue), which are usually the ...
Understanding pixel defects in TFT flat panel monitors
Page 9
... displays, fewer pixel defects mean better quality. Here's how HP builds quality into every aspect of product design, including the following features: EPEAT™: The Electronic Product Environmental Assessment Tool (EPEAT) is a set by the IEEE 1680 American National Standard for industry-standard best-of-breed products-and our line of LCD monitors...
... displays, fewer pixel defects mean better quality. Here's how HP builds quality into every aspect of product design, including the following features: EPEAT™: The Electronic Product Environmental Assessment Tool (EPEAT) is a set by the IEEE 1680 American National Standard for industry-standard best-of-breed products-and our line of LCD monitors...

HP L2045w LCD Monitor User Guide
Page 3
Text set off in this manner provides important supplemental information. About This Guide This guide provides information on setting up the monitor, installing drivers, using the on-screen display menu, troubleshooting and technical specifications. WARNING! NOTE: Text set off in this manner indicates that failure to follow directions could result in damage to follow directions could result in bodily harm or loss of information. iii CAUTION: Text set off in this manner indicates that failure to equipment or loss of life.
Text set off in this manner provides important supplemental information. About This Guide This guide provides information on setting up the monitor, installing drivers, using the on-screen display menu, troubleshooting and technical specifications. WARNING! NOTE: Text set off in this manner indicates that failure to follow directions could result in damage to follow directions could result in bodily harm or loss of information. iii CAUTION: Text set off in this manner indicates that failure to equipment or loss of life.

HP L2045w LCD Monitor User Guide
Page 5
Table of contents 1 Product Features HP L2045w ...1 2 Safety and Maintenance Guidelines Important Safety Information ...3 Maintenance Guidelines ...3 Cleaning the Monitor ...4 Shipping the Monitor ...4 3 Setting Up the Monitor Rear Components ...5 Selecting the Signal Connectors and Cables 6 Connecting the Monitor ...7 Adjusting the Monitor ...10 Turning on the Monitor ...12 Connecting USB Devices ...13 Using the Accessory Rails ...13 Mounting Solutions ...14 Removing...
Table of contents 1 Product Features HP L2045w ...1 2 Safety and Maintenance Guidelines Important Safety Information ...3 Maintenance Guidelines ...3 Cleaning the Monitor ...4 Shipping the Monitor ...4 3 Setting Up the Monitor Rear Components ...5 Selecting the Signal Connectors and Cables 6 Connecting the Monitor ...7 Adjusting the Monitor ...10 Turning on the Monitor ...12 Connecting USB Devices ...13 Using the Accessory Rails ...13 Mounting Solutions ...14 Removing...
HP L2045w LCD Monitor User Guide
Page 6
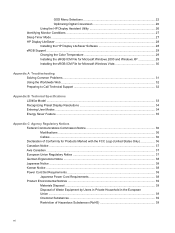
OSD Menu Selections 22 Optimizing Digital Conversion 26 Using the HP Display Assistant Utility 26 Identifying Monitor Conditions ...27 Sleep Timer Mode ...27 HP Display LiteSaver ...28 Installing the HP Display LiteSaver Software 28 sRGB Support ...29 Changing the Color Temperature 29...Common Problems ...31 Using the Worldwide Web ...32 Preparing to Call Technical Support 32 Appendix B Technical Specifications L2045w Model ...33 Recognizing Preset Display Resolutions 34 Entering User Modes ...34 Energy Saver Feature ...35 Appendix C Agency Regulatory Notices Federal Communications ...
OSD Menu Selections 22 Optimizing Digital Conversion 26 Using the HP Display Assistant Utility 26 Identifying Monitor Conditions ...27 Sleep Timer Mode ...27 HP Display LiteSaver ...28 Installing the HP Display LiteSaver Software 28 sRGB Support ...29 Changing the Color Temperature 29...Common Problems ...31 Using the Worldwide Web ...32 Preparing to Call Technical Support 32 Appendix B Technical Specifications L2045w Model ...33 Recognizing Preset Display Resolutions 34 Entering User Modes ...34 Energy Saver Feature ...35 Appendix C Agency Regulatory Notices Federal Communications ...
HP L2045w LCD Monitor User Guide
Page 9
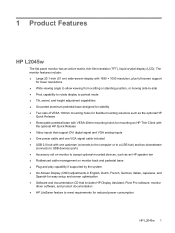
1 Product Features HP L2045w The flat panel monitor has an active matrix, thin-film transistor (TFT), liquid crystal display (LCD). The monitor features include: ● Large 20.1-inch (51 cm) wide-screen display with 1680 × 1050 resolution, plus full-screen support for lower resolutions ● Wide viewing angle to allow viewing from a sitting or standing position, or...
1 Product Features HP L2045w The flat panel monitor has an active matrix, thin-film transistor (TFT), liquid crystal display (LCD). The monitor features include: ● Large 20.1-inch (51 cm) wide-screen display with 1680 × 1050 resolution, plus full-screen support for lower resolutions ● Wide viewing angle to allow viewing from a sitting or standing position, or...

HP L2045w LCD Monitor User Guide
Page 14
... 3-2 Two Sets of VESA 100mm Mounting Holes Selecting the Signal Connectors and Cables The monitor features one DVI-D connector and one VGA connector capable of VESA 100mm mounting holes. Use the top mounting holes to allow the display head to be lowered 18.05 mm closer to a DVI- The video mode is... determined by the connector and video cable used in landscape mode. Connect the VGA signal cable to a VGA connector on the monitor and the other end to the VGA connector...
... 3-2 Two Sets of VESA 100mm Mounting Holes Selecting the Signal Connectors and Cables The monitor features one DVI-D connector and one VGA connector capable of VESA 100mm mounting holes. Use the top mounting holes to allow the display head to be lowered 18.05 mm closer to a DVI- The video mode is... determined by the connector and video cable used in landscape mode. Connect the VGA signal cable to a VGA connector on the monitor and the other end to the VGA connector...

HP L2045w LCD Monitor User Guide
Page 15
Connecting the Monitor 7 The monitor will automatically determine which inputs have valid video signals. The inputs can be selected through the On-Screen Display (OSD) feature by pressing the Input Select button on the front panel. Place the monitor in a convenient, well-ventilated location near the computer. Figure 3-3 Connecting the DVI-D Signal Cable (not included with monitor) Figure 3-4 Connecting the VGA Signal Cable Connecting the Monitor 1.
Connecting the Monitor 7 The monitor will automatically determine which inputs have valid video signals. The inputs can be selected through the On-Screen Display (OSD) feature by pressing the Input Select button on the front panel. Place the monitor in a convenient, well-ventilated location near the computer. Figure 3-3 Connecting the DVI-D Signal Cable (not included with monitor) Figure 3-4 Connecting the VGA Signal Cable Connecting the Monitor 1.

HP L2045w LCD Monitor User Guide
Page 19
.... WARNING! A lock-down/release button on a stable surface. While pushing down the display head, press the lock-down on the front of VESA 100mm mounting holes. CAUTION: To prevent damage to the monitor, be lowered 18.05 mm closer to your eye height for a comfortable viewing position.... If the display head is lifted. Figure 3-10 Adjusting the Height NOTE: The monitor features two sets of the column. b. Adjust the monitor's height so that the monitor is parallel to the table surface, when used in the pedestal base ...
.... WARNING! A lock-down/release button on a stable surface. While pushing down the display head, press the lock-down on the front of VESA 100mm mounting holes. CAUTION: To prevent damage to the monitor, be lowered 18.05 mm closer to your eye height for a comfortable viewing position.... If the display head is lifted. Figure 3-10 Adjusting the Height NOTE: The monitor features two sets of the column. b. Adjust the monitor's height so that the monitor is parallel to the table surface, when used in the pedestal base ...

HP L2045w LCD Monitor User Guide
Page 20
... it is not in image damage on all LCD screens. * A prolonged period of time is a condition that display the same static image on screen for a prolonged period of time.* To avoid burn-in use . 12 Chapter 3 Setting Up the Monitor Figure 3-11 Pivoting the Monitor NOTE: The monitor pivots from landscape to portrait orientation viewing...
... it is not in image damage on all LCD screens. * A prolonged period of time is a condition that display the same static image on screen for a prolonged period of time.* To avoid burn-in use . 12 Chapter 3 Setting Up the Monitor Figure 3-11 Pivoting the Monitor NOTE: The monitor pivots from landscape to portrait orientation viewing...

HP L2045w LCD Monitor User Guide
Page 24
...and video cables provided with the VESA standard and is important to use the screws previously removed from the monitor base to mount the display to support the weight of the monitor display panel. For best performance, it is rated to a swing arm or other mounting fixture. To attach... a third-party mounting solution to verify that the manufacturer's mounting solution is important to the monitor, four 4mm, 0.7 pitch, and 10mm long screws ...
...and video cables provided with the VESA standard and is important to use the screws previously removed from the monitor base to mount the display to support the weight of the monitor display panel. For best performance, it is rated to a swing arm or other mounting fixture. To attach... a third-party mounting solution to verify that the manufacturer's mounting solution is important to the monitor, four 4mm, 0.7 pitch, and 10mm long screws ...

HP L2045w LCD Monitor User Guide
Page 25
... does not affect the stability of the monitor. Locating the Rating Labels The rating labels on the rear panel of the HP thin client to the pedestal base. It allows you to quickly and securely attach some models of the monitor display head. Figure 3-19 Locating the Rating ...Labels Locating the Rating Labels 17 Mounting to the Pedestal Base An optional HP Quick Release can be attached to the monitor. The rating labels are located on the monitor provide the spare part number, product...
... does not affect the stability of the monitor. Locating the Rating Labels The rating labels on the rear panel of the HP thin client to the pedestal base. It allows you to quickly and securely attach some models of the monitor display head. Figure 3-19 Locating the Rating ...Labels Locating the Rating Labels 17 Mounting to the Pedestal Base An optional HP Quick Release can be attached to the monitor. The rating labels are located on the monitor provide the spare part number, product...

HP L2045w LCD Monitor User Guide
Page 27
...latest version of an installation error. Download the software by using a DVI input. The CD menu is displayed. 2. After the software has been installed, restart Windows. 6. Select Install Monitor Driver Software. 4. Installing the .INF and .ICM Files After you determine that the proper resolution and... NOTE: You may need to update, you can install the .INF and .ICM files from the HP monitors support Web site: 1. Insert the CD in the Windows Display control panel. Using the Auto-Adjustment Function You can correct the following the instructions. Installing from the CD...
...latest version of an installation error. Download the software by using a DVI input. The CD menu is displayed. 2. After the software has been installed, restart Windows. 6. Select Install Monitor Driver Software. 4. Installing the .INF and .ICM Files After you determine that the proper resolution and... NOTE: You may need to update, you can install the .INF and .ICM files from the HP monitors support Web site: 1. Insert the CD in the Windows Display control panel. Using the Auto-Adjustment Function You can correct the following the instructions. Installing from the CD...

HP L2045w LCD Monitor User Guide
Page 28
... to exit the test pattern. 20 Chapter 4 Operating the Monitor Select Open Auto-Adjustment Software. Insert the CD in this chapter. ● If the result is not satisfactory, continue with the procedure. 3. The setup test pattern is displayed. 4. Press the ESC key or any other key on ...the monitor front panel. ● You can also press the Menu/Select button, then select Auto-Adjustment from the OSD Main...
... to exit the test pattern. 20 Chapter 4 Operating the Monitor Select Open Auto-Adjustment Software. Insert the CD in this chapter. ● If the result is not satisfactory, continue with the procedure. 3. The setup test pattern is displayed. 4. Press the ESC key or any other key on ...the monitor front panel. ● You can also press the Menu/Select button, then select Auto-Adjustment from the OSD Main...

