
Security - Window Vista and Windows 7
Page 8
... sections list Windows and Setup Utility passwords and describe their functions. CAUTION: To prevent being locked out of the computer, record each password immediately and store it in the Setup Utility must be entered at a Windows prompt. For additional information about Windows passwords, such as they are not displayed as screen-saver passwords, select Start > Help and Support. 2 Chapter 2 Using passwords You can be any combination of up to 8 letters and numbers...
... sections list Windows and Setup Utility passwords and describe their functions. CAUTION: To prevent being locked out of the computer, record each password immediately and store it in the Setup Utility must be entered at a Windows prompt. For additional information about Windows passwords, such as they are not displayed as screen-saver passwords, select Start > Help and Support. 2 Chapter 2 Using passwords You can be any combination of up to 8 letters and numbers...

Setup Utility - Windows Vista and Windows 7
Page 7
... corner of the screen, press f10. - Open the Setup Utility by turning on or restarting the computer. While the "Press the ESC key for Startup Menu" message is displayed in the lower-left corner of the screen, press esc. While the "Press the ESC key for Startup Menu" message is displayed, press enter. 4. To save your change and exit the Setup Utility, use the arrow keys to restore the Setup Utility default settings. Displaying system information...
... corner of the screen, press f10. - Open the Setup Utility by turning on or restarting the computer. While the "Press the ESC key for Startup Menu" message is displayed in the lower-left corner of the screen, press esc. While the "Press the ESC key for Startup Menu" message is displayed, press enter. 4. To save your change and exit the Setup Utility, use the arrow keys to restore the Setup Utility default settings. Displaying system information...

Setup Utility - Windows Vista and Windows 7
Page 10
...; Internal CD/DVD ROM drive ◦ USB CD/DVD ROM drive ◦ Hard drive ◦ USB Diskette on Key ◦ USB Hard drive ◦ Network adapter Diagnostics menu Select Hard Disk Self Test Secondary Hard Disk Self Test (select models only) Memory Test To do this Change the Setup Utility language. System Configuration menu Select Language Support Button Sound (select models only) Virtualization Technology (select models only) Processor C6 State (select models only) LAN Power Saving (select models only) Card Reader/1394 Power Saving (select models only) Fan Always On Boot Options To...
...; Internal CD/DVD ROM drive ◦ USB CD/DVD ROM drive ◦ Hard drive ◦ USB Diskette on Key ◦ USB Hard drive ◦ Network adapter Diagnostics menu Select Hard Disk Self Test Secondary Hard Disk Self Test (select models only) Memory Test To do this Change the Setup Utility language. System Configuration menu Select Language Support Button Sound (select models only) Virtualization Technology (select models only) Processor C6 State (select models only) LAN Power Saving (select models only) Card Reader/1394 Power Saving (select models only) Fan Always On Boot Options To...
Wireless (Select Models Only) - Windows 7
Page 15
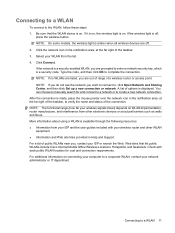
... ISP and the user guides included with each public WLAN location for and connect to a network or to , click Open Network and Sharing Center, and then click Set up a new connection or network. A list of public WLANs near you want to connect to create a new network connection. After the connection is available through the following resources: ● Information from the list. 4. Connecting to a WLAN To connect to enter a network security key, which is on...
... ISP and the user guides included with each public WLAN location for and connect to a network or to , click Open Network and Sharing Center, and then click Set up a new connection or network. A list of public WLANs near you want to connect to create a new network connection. After the connection is available through the following resources: ● Information from the list. 4. Connecting to a WLAN To connect to enter a network security key, which is on...
Wireless (Select Models Only) - Windows 7
Page 22
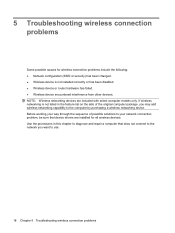
... want to diagnose and repair a computer that device drivers are included with select computer models only. NOTE: Wireless networking devices are installed for wireless connection problems include the following: ● Network configuration (SSID or security) has been changed. ● Wireless device is not listed in this chapter to use. 18 Chapter 5 Troubleshooting wireless connection problems If wireless networking is not installed correctly or has been disabled. ● Wireless device or router hardware has failed. ● Wireless device encountered interference from other...
... want to diagnose and repair a computer that device drivers are included with select computer models only. NOTE: Wireless networking devices are installed for wireless connection problems include the following: ● Network configuration (SSID or security) has been changed. ● Wireless device is not listed in this chapter to use. 18 Chapter 5 Troubleshooting wireless connection problems If wireless networking is not installed correctly or has been disabled. ● Wireless device or router hardware has failed. ● Wireless device encountered interference from other...
Wireless (Select Models Only) - Windows 7
Page 23
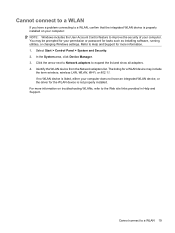
... installing software, running utilities, or changing Windows settings. In the System area, click Device Manager. 3. If no WLAN device is listed, either your computer does not have a problem connecting to a WLAN, confirm that the integrated WLAN device is not properly installed. Identify the WLAN device from the Network adapters list. Click the arrow next to Network adapters to the Web site links provided in Help and Support. For more information. 1. Select Start > Control Panel...
... installing software, running utilities, or changing Windows settings. In the System area, click Device Manager. 3. If no WLAN device is listed, either your computer does not have a problem connecting to a WLAN, confirm that the integrated WLAN device is not properly installed. Identify the WLAN device from the Network adapters list. Click the arrow next to Network adapters to the Web site links provided in Help and Support. For more information. 1. Select Start > Control Panel...
Drives - Windows 7
Page 15
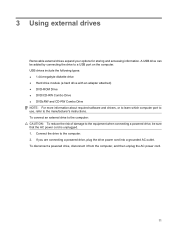
... 3 Using external drives Removable external drives expand your options for storing and accessing information. A USB drive can be sure that the AC power cord is unplugged. 1. USB drives include the following types: ● 1.44-megabyte diskette drive ● Hard drive module (a hard drive with an adapter attached) ● DVD-ROM Drive ● DVD/CD-RW Combo Drive ● DVD±RW and CD-RW Combo Drive NOTE: For more information about required software and drivers, or to learn which computer port...
... 3 Using external drives Removable external drives expand your options for storing and accessing information. A USB drive can be sure that the AC power cord is unplugged. 1. USB drives include the following types: ● 1.44-megabyte diskette drive ● Hard drive module (a hard drive with an adapter attached) ● DVD-ROM Drive ● DVD/CD-RW Combo Drive ● DVD±RW and CD-RW Combo Drive NOTE: For more information about required software and drivers, or to learn which computer port...
Drives - Windows 7
Page 16
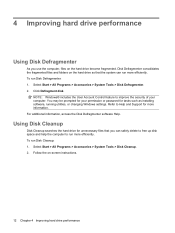
... to free up disk space and help the computer to run more efficiently. Select Start > All Programs > Accessories > System Tools > Disk Defragmenter. 2. You may be prompted for your computer. Select Start > All Programs > Accessories > System Tools > Disk Cleanup. 2. Click Defragment disk. Follow the on the hard drive become fragmented. Using Disk Cleanup Disk Cleanup searches the hard drive for tasks such as installing software, running utilities, or changing Windows settings...
... to free up disk space and help the computer to run more efficiently. Select Start > All Programs > Accessories > System Tools > Disk Defragmenter. 2. You may be prompted for your computer. Select Start > All Programs > Accessories > System Tools > Disk Cleanup. 2. Click Defragment disk. Follow the on the hard drive become fragmented. Using Disk Cleanup Disk Cleanup searches the hard drive for tasks such as installing software, running utilities, or changing Windows settings...
Drives - Windows 7
Page 17
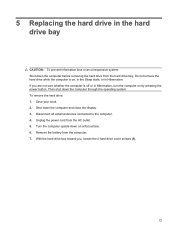
... operating system. With the hard drive bay toward you are not sure whether the computer is on, in the Sleep state, or in the hard drive bay CAUTION: To prevent information loss or an unresponsive system: Shut down on by pressing the power button. Disconnect all external devices connected to the computer. 4. Then shut down the computer and close the display. 3. Remove the battery...
... operating system. With the hard drive bay toward you are not sure whether the computer is on, in the Sleep state, or in the hard drive bay CAUTION: To prevent information loss or an unresponsive system: Shut down on by pressing the power button. Disconnect all external devices connected to the computer. 4. Then shut down the computer and close the display. 3. Remove the battery...
Drives - Windows 7
Page 24
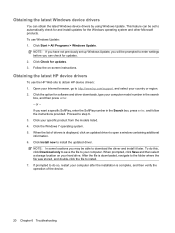
... displayed, click an updated driver to install. 7. or - Click your hard drive. When prompted, click Save and then select a storage location on -screen instructions. Follow the on your specific product from the models listed. 4. Click the Windows 7 operating system. 5. NOTE: In some locations you may be set up Windows Update, you have not previously set to obtain HP device drivers: 1. NOTE: If you will be prompted to step 6. 3. Click the option for software and driver downloads, type...
... displayed, click an updated driver to install. 7. or - Click your hard drive. When prompted, click Save and then select a storage location on -screen instructions. Follow the on your specific product from the models listed. 4. Click the Windows 7 operating system. 5. NOTE: In some locations you may be set up Windows Update, you have not previously set to obtain HP device drivers: 1. NOTE: If you will be prompted to step 6. 3. Click the option for software and driver downloads, type...
Drives - Windows 7
Page 25
... hard drive; Index A airport security devices 1 AutoPlay 7 B BD copying 8 playing 6 removing 10 Blu-ray ROM with LightScribe 3 E external drive 11 H hard disk drive external 11 installing 14 removing 13 replacing 13 hard drive external 11 installing 14 removing 13 replacing 13 M maintenance Disk Cleanup 12 Disk Defragmenter 12 O optical disc playing 6 removing 10 optical drive 2, 11 R region codes, DVD 7 S software Disk Cleanup 12 Disk Defragmenter 12 T troubleshooting burning discs 19 device driver 19 disc play 18 HP device drivers 20 optical disc tray 16 optical drive detection 17 Windows...
... hard drive; Index A airport security devices 1 AutoPlay 7 B BD copying 8 playing 6 removing 10 Blu-ray ROM with LightScribe 3 E external drive 11 H hard disk drive external 11 installing 14 removing 13 replacing 13 hard drive external 11 installing 14 removing 13 replacing 13 M maintenance Disk Cleanup 12 Disk Defragmenter 12 O optical disc playing 6 removing 10 optical drive 2, 11 R region codes, DVD 7 S software Disk Cleanup 12 Disk Defragmenter 12 T troubleshooting burning discs 19 device driver 19 disc play 18 HP device drivers 20 optical disc tray 16 optical drive detection 17 Windows...
Pointing Devices and Keyboard - Windows 7
Page 5
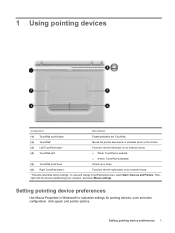
...or activates items on an external mouse. ● White: TouchPad is enabled. ● Amber: TouchPad is disabled. To view and change TouchPad preferences, select Start > Devices and Printers. 1 Using pointing devices Component Description (1) TouchPad on an external mouse. *This table describes factory settings. Scrolls up or down. (6) Right TouchPad button* Functions like the left button on the screen. Setting pointing device preferences Use Mouse Properties in Windows® to customize settings for pointing devices, such as button configuration, click speed, and pointer options...
...or activates items on an external mouse. ● White: TouchPad is enabled. ● Amber: TouchPad is disabled. To view and change TouchPad preferences, select Start > Devices and Printers. 1 Using pointing devices Component Description (1) TouchPad on an external mouse. *This table describes factory settings. Scrolls up or down. (6) Right TouchPad button* Functions like the left button on the screen. Setting pointing device preferences Use Mouse Properties in Windows® to customize settings for pointing devices, such as button configuration, click speed, and pointer options...
Pointing Devices and Keyboard - Windows 7
Page 6
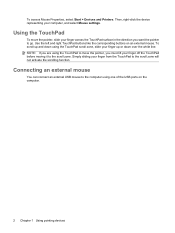
... not activate the scrolling function. Connecting an external mouse You can connect an external USB mouse to go. Using the TouchPad To move the pointer, you must lift your finger across the TouchPad surface in the direction you want the pointer to the computer using the TouchPad scroll zone, slide your finger up and down over the white line. To access Mouse Properties, select Start > Devices and Printers. To scroll up...
... not activate the scrolling function. Connecting an external mouse You can connect an external USB mouse to go. Using the TouchPad To move the pointer, you must lift your finger across the TouchPad surface in the direction you want the pointer to the computer using the TouchPad scroll zone, slide your finger up and down over the white line. To access Mouse Properties, select Start > Devices and Printers. To scroll up...
Pointing Devices and Keyboard - Windows 7
Page 9
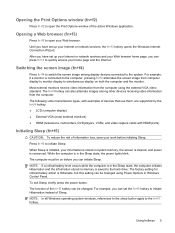
... network services and your Web browser. NOTE: In all Windows operating system windows, references to the sleep button apply to open the Print Options window of the fn+f5 hotkey can be changed using the external VGA video standard. Using hotkeys 5 The following video transmission types, with examples of devices that use them, are supported by the fn+f4 hotkey: ● LCD (computer display) ● External VGA (most external monitors) ● HDMI (televisions, camcorders, DVD players, VCRs, and video capture cards with HDMI ports...
... network services and your Web browser. NOTE: In all Windows operating system windows, references to the sleep button apply to open the Print Options window of the fn+f5 hotkey can be changed using the external VGA video standard. Using hotkeys 5 The following video transmission types, with examples of devices that use them, are supported by the fn+f4 hotkey: ● LCD (computer display) ● External VGA (most external monitors) ● HDMI (televisions, camcorders, DVD players, VCRs, and video capture cards with HDMI ports...
Multimedia - Windows 7
Page 29
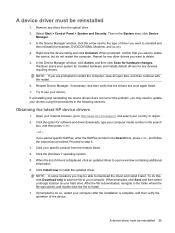
... the operation of driver you want to download the driver and install it later. If prompted to delete the device, but do so, restart your system for installed hardware and installs default drivers for hardware changes. A device driver must be reinstalled 1. In the Device Manager window, click Action, and then click Scan for any discs from the models listed. 4. NOTE: In some locations you want to do not restart the computer. Open your Internet...
... the operation of driver you want to download the driver and install it later. If prompted to delete the device, but do so, restart your system for installed hardware and installs default drivers for hardware changes. A device driver must be reinstalled 1. In the Device Manager window, click Action, and then click Scan for any discs from the models listed. 4. NOTE: In some locations you want to do not restart the computer. Open your Internet...
Multimedia - Windows 7
Page 31
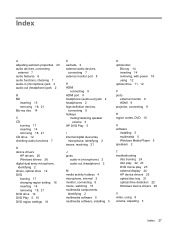
...-ray disc 14 C CD burning 17 inserting 14 removing 18, 21 CD drive 12 checking audio functions 7 D device drivers HP drivers 25 Windows drivers 26 digital dual array microphone, identifying 2 drives, optical drive 12 DVD burning 17 changing region setting 16 inserting 14 removing 18, 21 DVD drive 12 DVD Play 5, 15 DVD region settings 16 E earbuds 2 external audio devices, connecting 7 external monitor port 8 H HDMI connecting 9 HDMI port 9 headphone (audio-out) jack 2 headphones 2 high-definition devices, connecting 9 hotkeys muting/restoring speaker volume 3 HP DVD Play 5 I internal digital...
...-ray disc 14 C CD burning 17 inserting 14 removing 18, 21 CD drive 12 checking audio functions 7 D device drivers HP drivers 25 Windows drivers 26 digital dual array microphone, identifying 2 drives, optical drive 12 DVD burning 17 changing region setting 16 inserting 14 removing 18, 21 DVD drive 12 DVD Play 5, 15 DVD region settings 16 E earbuds 2 external audio devices, connecting 7 external monitor port 8 H HDMI connecting 9 HDMI port 9 headphone (audio-out) jack 2 headphones 2 high-definition devices, connecting 9 hotkeys muting/restoring speaker volume 3 HP DVD Play 5 I internal digital...
Power Management - Windows 7
Page 16
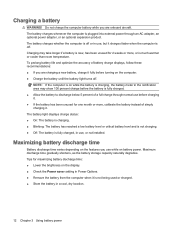
... charging a new battery, charge it . Maximizing battery discharge time Battery discharge time varies depending on the computer. ● Charge the battery until the battery light turns off . Charging a battery WARNING! To prolong battery life and optimize the accuracy of battery charge displays, follow these recommendations: ● If you use while on while the battery is charging, the battery meter in use, or not installed. The battery charges whenever the computer is plugged into external power through normal use...
... charging a new battery, charge it . Maximizing battery discharge time Battery discharge time varies depending on the computer. ● Charge the battery until the battery light turns off . Charging a battery WARNING! To prolong battery life and optimize the accuracy of battery charge displays, follow these recommendations: ● If you use while on while the battery is charging, the battery meter in use, or not installed. The battery charges whenever the computer is plugged into external power through normal use...
Power Management - Windows 7
Page 19
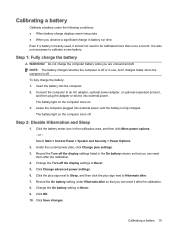
The battery light on . 3. Step 2: Disable Hibernation and Sleep 1. Select Start > Control Panel > System and Security > Power Options. 2. Click OK. 10. Connect the computer to Never. 5. The battery light on the computer turns on the computer turns off the display settings to an AC adapter, optional power adapter, or optional expansion product, and then plug the adapter or device into the computer. 2. Click the battery meter icon in use, but it should not need to calibrate a new battery. or...
The battery light on . 3. Step 2: Disable Hibernation and Sleep 1. Select Start > Control Panel > System and Security > Power Options. 2. Click OK. 10. Connect the computer to Never. 5. The battery light on the computer turns on the computer turns off the display settings to an AC adapter, optional power adapter, or optional expansion product, and then plug the adapter or device into the computer. 2. Click the battery meter icon in use, but it should not need to calibrate a new battery. or...
Power Management - Windows 7
Page 23
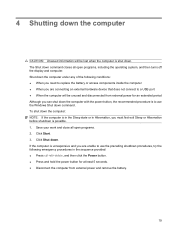
... the Power button. ● Press and hold the power button for at least 5 seconds. ● Disconnect the computer from external power for an extended period Although you are connecting an external hardware device that does not connect to a USB port ● When the computer will be unused and disconnected from external power and remove the battery. 19 Click Shut down command closes all open programs, including the operating system...
... the Power button. ● Press and hold the power button for at least 5 seconds. ● Disconnect the computer from external power for an extended period Although you are connecting an external hardware device that does not connect to a USB port ● When the computer will be unused and disconnected from external power and remove the battery. 19 Click Shut down command closes all open programs, including the operating system...

HP Notebook Hard Drives & Solid State Drives Identifying, Preventing, Diagnosing and Recovering from Drive Failures Care and Mai
Page 6
... Intel Matrix Storage Manager Technology. Page 6 Updates to the Intel Matrix Storage Manager driver are configured with Serial ATA hard disk drives. Intel Matrix Storage Manager Driver provides support for disk traffic, and provides link power management with SATA in AHCI or NATIVE mode Adding SATA drivers using WinPE can be located at the following URL: http://bizsupport2.austin.hp.com/bc/docs/support/SupportManual/c01600726/c01600726.pdf. To download the latest version...
... Intel Matrix Storage Manager Technology. Page 6 Updates to the Intel Matrix Storage Manager driver are configured with Serial ATA hard disk drives. Intel Matrix Storage Manager Driver provides support for disk traffic, and provides link power management with SATA in AHCI or NATIVE mode Adding SATA drivers using WinPE can be located at the following URL: http://bizsupport2.austin.hp.com/bc/docs/support/SupportManual/c01600726/c01600726.pdf. To download the latest version...


