
Compaq Presario CQ61 Notebook PC and HP G61 Notebook PC - Maintenance and Service Guide
Page 10
... Media Slot supporting SD, MMC, MS, MSPro, xD cards. Product description Category Webcam Microphone Audio Modem Ethernet Wireless External media cards Description VGA camera, fixed angle with a modem have a cover over the RJ-11 jack opening) Supports all worldwide certification requirements Integrated 10/100 network interface card (NIC) Realtek 8102E Integrated wireless local area network (WLAN) by way of SD, MMC, MS Duo. Presario CQ61 Intel UMA X X X X X X X X X X X X X X X X Presario CQ61 Intel Discrete X X X X X X X X X X X X X X X X HP G61 Intel...
... Media Slot supporting SD, MMC, MS, MSPro, xD cards. Product description Category Webcam Microphone Audio Modem Ethernet Wireless External media cards Description VGA camera, fixed angle with a modem have a cover over the RJ-11 jack opening) Supports all worldwide certification requirements Integrated 10/100 network interface card (NIC) Realtek 8102E Integrated wireless local area network (WLAN) by way of SD, MMC, MS Duo. Presario CQ61 Intel UMA X X X X X X X X X X X X X X X X Presario CQ61 Intel Discrete X X X X X X X X X X X X X X X X HP G61 Intel...
Compaq Presario CQ61 Notebook PC and HP G61 Notebook PC - Maintenance and Service Guide
Page 18
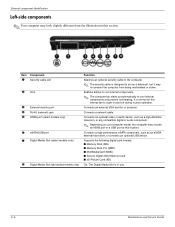
... a network cable. External component identification Left-side components ✎ Your computer may look slightly different from being mishandled or stolen. Item Component 1 Security cable slot 2 Vent 3 External monitor port 4 RJ-45 (network) jack 5 HDMI port (select models only) 6 eSATA/USB port 7 Digital Media Slot (select models only) 8 Digital Media Slot light (select models only) Function Attaches an optional security cable to cool internal components and prevent overheating. Connects an optional video or audio device, such as an eSATA external hard drive, or connects an optional USB...
... a network cable. External component identification Left-side components ✎ Your computer may look slightly different from being mishandled or stolen. Item Component 1 Security cable slot 2 Vent 3 External monitor port 4 RJ-45 (network) jack 5 HDMI port (select models only) 6 eSATA/USB port 7 Digital Media Slot (select models only) 8 Digital Media Slot light (select models only) Function Attaches an optional security cable to cool internal components and prevent overheating. Connects an optional video or audio device, such as an eSATA external hard drive, or connects an optional USB...

Compaq Presario CQ61 Notebook PC and HP G61 Notebook PC - Maintenance and Service Guide
Page 56
... the operating system. 2. Remove hard drive cover (see "Battery" on page 4-7). 5. Disconnect the power from the computer by pulling the module away from the slot at an angle. ✎ Memory modules are unsure whether the computer is off or in Hibernation, turn the computer on page 4-10). Remove the battery (see "Hard drive" on , and then shut it down the computer. Maintenance and Service Guide 4-13 Disconnect all external devices connected to...
... the operating system. 2. Remove hard drive cover (see "Battery" on page 4-7). 5. Disconnect the power from the computer by pulling the module away from the slot at an angle. ✎ Memory modules are unsure whether the computer is off or in Hibernation, turn the computer on page 4-10). Remove the battery (see "Hard drive" on , and then shut it down the computer. Maintenance and Service Guide 4-13 Disconnect all external devices connected to...
Compaq Presario CQ61 Notebook PC and HP G61 Notebook PC - Maintenance and Service Guide
Page 136
...backups 8-2 Screw Kit contents 3-13 spare part number 3-11, 7-1 screw listing 7-1 security cable slot location 2-6 security, product description 1-5 serial number 3-1, 4-5 serviceability, product description 1-6 Setup Utility accessing 5-1 changing the language 5-1 Diagnostics menu 5-4 displaying system information 5-2 Index-4 exiting 5-3 Main menu 5-3 navigating and selecting 5-2 restoring default settings 5-2 System Configuration menu 5-4 speaker removal 4-33 spare part number 3-4, 4-33 specifications Blu-ray ROM with LightScribe DVD±RW SuperMulti Double-Layer Drive 6-5 display 6-2 DVD...
...backups 8-2 Screw Kit contents 3-13 spare part number 3-11, 7-1 screw listing 7-1 security cable slot location 2-6 security, product description 1-5 serial number 3-1, 4-5 serviceability, product description 1-6 Setup Utility accessing 5-1 changing the language 5-1 Diagnostics menu 5-4 displaying system information 5-2 Index-4 exiting 5-3 Main menu 5-3 navigating and selecting 5-2 restoring default settings 5-2 System Configuration menu 5-4 speaker removal 4-33 spare part number 3-4, 4-33 specifications Blu-ray ROM with LightScribe DVD±RW SuperMulti Double-Layer Drive 6-5 display 6-2 DVD...
Software Update - Windows Vista and Windows 7
Page 5
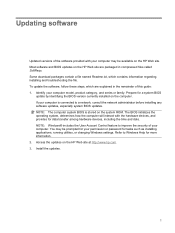
... system ROM. Install the updates. 1 NOTE: The computer system BIOS is connected to a network, consult the network administrator before installing any software updates, especially system BIOS updates. To update the software, follow these steps, which contains information regarding installing and troubleshooting the file. NOTE: Windows® includes the User Account Control feature to Windows Help for tasks such as installing applications, running utilities, or changing Windows settings. Updating software Updated versions of the software provided with the hardware devices, and...
... system ROM. Install the updates. 1 NOTE: The computer system BIOS is connected to a network, consult the network administrator before installing any software updates, especially system BIOS updates. To update the software, follow these steps, which contains information regarding installing and troubleshooting the file. NOTE: Windows® includes the User Account Control feature to Windows Help for tasks such as installing applications, running utilities, or changing Windows settings. Updating software Updated versions of the software provided with the hardware devices, and...

Software Update - Windows Vista and Windows 7
Page 8
... drivers To download and install software other than a BIOS update, follow the instructions provided. If you may be able to your computer model number in the Search box, press enter, and follow these steps: To use the HP Web site: 1. Click your operating system. 5. Open your hard drive. When the list of the device. 4 Updating software Click Install now to open a window containing additional information. 6. When prompted, click Save and then select a storage location...
... drivers To download and install software other than a BIOS update, follow the instructions provided. If you may be able to your computer model number in the Search box, press enter, and follow these steps: To use the HP Web site: 1. Click your operating system. 5. Open your hard drive. When the list of the device. 4 Updating software Click Install now to open a window containing additional information. 6. When prompted, click Save and then select a storage location...
Wireless (Select Models Only) - Windows 7
Page 23
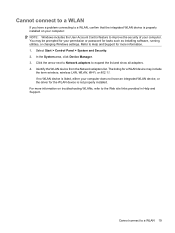
... Start > Control Panel > System and Security. 2. Identify the WLAN device from the Network adapters list. Cannot connect to a WLAN If you have an integrated WLAN device, or the driver for the WLAN device is properly installed on troubleshooting WLANs, refer to Help and Support for your computer. If no WLAN device is listed, either your computer does not have a problem connecting to a WLAN, confirm that the integrated WLAN device...
... Start > Control Panel > System and Security. 2. Identify the WLAN device from the Network adapters list. Cannot connect to a WLAN If you have an integrated WLAN device, or the driver for the WLAN device is properly installed on troubleshooting WLANs, refer to Help and Support for your computer. If no WLAN device is listed, either your computer does not have a problem connecting to a WLAN, confirm that the integrated WLAN device...

Software Update, Backup and Recovery - Windows Vista
Page 5
Most software and BIOS updates on the HP Web site are explained in compressed files called SoftPaqs. NOTE: Windows® includes the User Account Control feature to improve the security of your computer model, product category, and series or family. Install the updates. 1 Updating software Updated versions of the software provided with the hardware devices, and provides for tasks such as installing applications, running utilities, or changing Windows settings. The BIOS initializes the operating system...
Most software and BIOS updates on the HP Web site are explained in compressed files called SoftPaqs. NOTE: Windows® includes the User Account Control feature to improve the security of your computer model, product category, and series or family. Install the updates. 1 Updating software Updated versions of the software provided with the hardware devices, and provides for tasks such as installing applications, running utilities, or changing Windows settings. The BIOS initializes the operating system...

Software Update, Backup and Recovery - Windows Vista
Page 8
... displayed, click an updated driver to http://www.hp.com/support, and select your computer model number in the Search box, press enter, and follow these steps: To use the HP Web site: 1. Click Install now to step 6. 3. or - Updating programs and drivers To download and install software other than a BIOS update, follow the instructions provided. Proceed to install the updated driver. When the list of the device. 4 Updating software Select your hard drive. Click the option for software and driver downloads, type...
... displayed, click an updated driver to http://www.hp.com/support, and select your computer model number in the Search box, press enter, and follow these steps: To use the HP Web site: 1. Click Install now to step 6. 3. or - Updating programs and drivers To download and install software other than a BIOS update, follow the instructions provided. Proceed to install the updated driver. When the list of the device. 4 Updating software Select your hard drive. Click the option for software and driver downloads, type...
Wireless (Select Models Only) - Windows Vista
Page 24
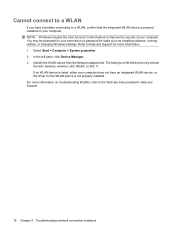
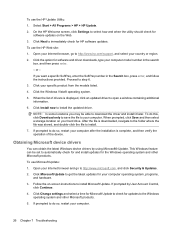
... WLAN device from the Network adapters list. Refer to the Web site links provided in Help and Support. 18 Chapter 5 Troubleshooting wireless connection problems For more information. 1. Cannot connect to a WLAN If you have an integrated WLAN device, or the driver for the WLAN device is properly installed on troubleshooting WLANs, refer to Help and Support for tasks such as installing software, running utilities, or changing Windows settings. If no WLAN device is listed...
... WLAN device from the Network adapters list. Refer to the Web site links provided in Help and Support. 18 Chapter 5 Troubleshooting wireless connection problems For more information. 1. Cannot connect to a WLAN If you have an integrated WLAN device, or the driver for the WLAN device is properly installed on troubleshooting WLANs, refer to Help and Support for tasks such as installing software, running utilities, or changing Windows settings. If no WLAN device is listed...
Drives - Windows 7
Page 15
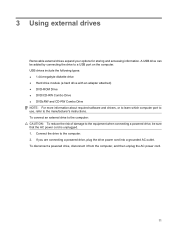
3 Using external drives Removable external drives expand your options for storing and accessing information. A USB drive can be sure that the AC power cord is unplugged. 1. If you are connecting a powered drive, plug the drive power cord into a grounded AC outlet. USB drives include the following types: ● 1.44-megabyte diskette drive ● Hard drive module (a hard drive with an adapter attached) ● DVD-ROM Drive ● DVD/CD-RW Combo Drive ● DVD±RW and CD-RW Combo Drive NOTE: For more...
3 Using external drives Removable external drives expand your options for storing and accessing information. A USB drive can be sure that the AC power cord is unplugged. 1. If you are connecting a powered drive, plug the drive power cord into a grounded AC outlet. USB drives include the following types: ● 1.44-megabyte diskette drive ● Hard drive module (a hard drive with an adapter attached) ● DVD-ROM Drive ● DVD/CD-RW Combo Drive ● DVD±RW and CD-RW Combo Drive NOTE: For more...
Drives - Windows 7
Page 24
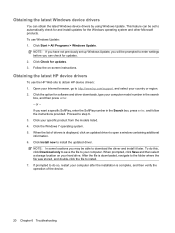
... install the updated driver. NOTE: In some locations you may be able to install. 7. After the file is displayed, click an updated driver to open a window containing additional information. 6. Obtaining the latest HP device drivers To use Windows Update: 1. Open your Internet browser, go to http://www.hp.com/support, and select your specific product from the models listed. 4. Click Start > All Programs > Windows Update. Click your country or region. 2. NOTE: If you have not previously set...
... install the updated driver. NOTE: In some locations you may be able to install. 7. After the file is displayed, click an updated driver to open a window containing additional information. 6. Obtaining the latest HP device drivers To use Windows Update: 1. Open your Internet browser, go to http://www.hp.com/support, and select your specific product from the models listed. 4. Click Start > All Programs > Windows Update. Click your country or region. 2. NOTE: If you have not previously set...
Pointing Devices and Keyboard - Windows 7
Page 6
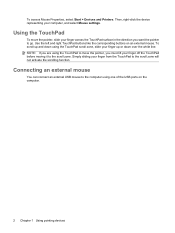
... TouchPad scroll zone, slide your finger up and down using the TouchPad to move the pointer, slide your finger off the TouchPad before moving it to the computer using one of the USB ports on an external mouse. Connecting an external mouse You can connect an external USB mouse to the scroll zone. Use the left and right TouchPad buttons like the corresponding buttons on the computer. 2 Chapter 1 Using pointing devices To access Mouse Properties, select Start > Devices...
... TouchPad scroll zone, slide your finger up and down using the TouchPad to move the pointer, slide your finger off the TouchPad before moving it to the computer using one of the USB ports on an external mouse. Connecting an external mouse You can connect an external USB mouse to the scroll zone. Use the left and right TouchPad buttons like the corresponding buttons on the computer. 2 Chapter 1 Using pointing devices To access Mouse Properties, select Start > Devices...
Multimedia - Windows 7
Page 29
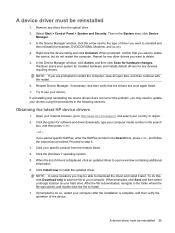
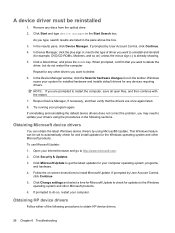
... Download only to save all open a window containing additional information. 6. or - In the Device Manager window, click Action, and then click Scan for example, DVD/CD-ROMs, Modems, and so on your system for installed hardware and installs default drivers for any discs from the models listed. 4. Select Start > Control Panel > System and Security. If you want a specific SoftPaq, enter the SoftPaq number in the System area, click Device Manager. 3. Windows scans your hard drive. Try to install. 7. A device driver...
... Download only to save all open a window containing additional information. 6. or - In the Device Manager window, click Action, and then click Scan for example, DVD/CD-ROMs, Modems, and so on your system for installed hardware and installs default drivers for any discs from the models listed. 4. Select Start > Control Panel > System and Security. If you want a specific SoftPaq, enter the SoftPaq number in the System area, click Device Manager. 3. Windows scans your hard drive. Try to install. 7. A device driver...
Drives - Windows Vista
Page 30
... obtain HP device drivers. 26 Chapter 6 Troubleshooting When prompted, confirm that the drivers are listed in the following procedures to the type of the following sections. Obtaining Microsoft device drivers You can be reinstalled 1. Click Security & Updates. 3. If prompted by User Account Control, click Continue. 4. Click Change settings and select a time for Microsoft Update to check for example, DVD/CD-ROMs, Modems, and so on -screen instructions to the Windows operating...
... obtain HP device drivers. 26 Chapter 6 Troubleshooting When prompted, confirm that the drivers are listed in the following procedures to the type of the following sections. Obtaining Microsoft device drivers You can be reinstalled 1. Click Security & Updates. 3. If prompted by User Account Control, click Continue. 4. Click Change settings and select a time for Microsoft Update to check for example, DVD/CD-ROMs, Modems, and so on -screen instructions to the Windows operating...
Drives - Windows Vista
Page 31
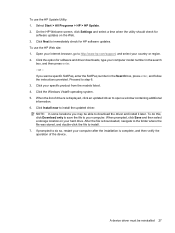
... the Windows Vista® operating system. 5. To do so, restart your computer. To use the HP Update Utility: 1. Open your Internet browser, go to do this, click Download only to save the file to immediately check for HP software updates. If prompted to http://www.hp.com/support, and select your hard drive. Proceed to download the driver and install it later. NOTE: In some locations you want a specific SoftPaq, enter the SoftPaq number...
... the Windows Vista® operating system. 5. To do so, restart your computer. To use the HP Update Utility: 1. Open your Internet browser, go to do this, click Download only to save the file to immediately check for HP software updates. If prompted to http://www.hp.com/support, and select your hard drive. Proceed to download the driver and install it later. NOTE: In some locations you want a specific SoftPaq, enter the SoftPaq number...
Drives - Windows Vista
Page 32
...DL support 4 T troubleshooting burning discs 24 device driver 26 disc play 22, 23 HP device drivers 26 optical disc tray 20 optical drive detection 21 Windows drivers 26 optical drive DVD burning 12, 24 changing region setting 9 copying 11 playing 7 removing 13 DVD drive 2, 14 DVD region settings 9 E external drive 14 H hard disk drive external 14 installing 17 removing 16 replacing 16 hard drive external 14 installing 17 removing 16 replacing 16 M maintenance Disk Cleanup 15 Disk Defragmenter 15 O optical disc playing 7 removing 13 optical drive 2, 14 R region codes, DVD 9 S software Disk...
...DL support 4 T troubleshooting burning discs 24 device driver 26 disc play 22, 23 HP device drivers 26 optical disc tray 20 optical drive detection 21 Windows drivers 26 optical drive DVD burning 12, 24 changing region setting 9 copying 11 playing 7 removing 13 DVD drive 2, 14 DVD region settings 9 E external drive 14 H hard disk drive external 14 installing 17 removing 16 replacing 16 hard drive external 14 installing 17 removing 16 replacing 16 M maintenance Disk Cleanup 15 Disk Defragmenter 15 O optical disc playing 7 removing 13 optical drive 2, 14 R region codes, DVD 9 S software Disk...
Multimedia - Windows Vista
Page 14
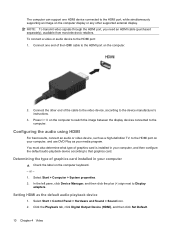
... device manufacturer's instructions. 3. Connect the other supported external display. Select Start > Control Panel > Hardware and Sound > Sound icon. 2. Connect one HDMI device connected to the HDMI port on the computer. 2. You must also determine what type of graphics card installed in your computer ▲ Check the label on the computer display or any other end of the HDMI cable to the HDMI port, while simultaneously supporting an image on the computer keyboard. - or - 1. In the left pane, click Device Manager...
... device manufacturer's instructions. 3. Connect the other supported external display. Select Start > Control Panel > Hardware and Sound > Sound icon. 2. Connect one HDMI device connected to the HDMI port on the computer. 2. You must also determine what type of graphics card installed in your computer ▲ Check the label on the computer display or any other end of the HDMI cable to the HDMI port, while simultaneously supporting an image on the computer keyboard. - or - 1. In the left pane, click Device Manager...
Multimedia - Windows Vista
Page 30
... set to http://www.hp.com/support, and select your computer operating system, programs, and hardware. 3. Proceed to get the latest updates for software and driver downloads, type your computer. After the file is displayed, click an updated driver to your computer model number in the Search box, press enter, and follow the instructions provided. If prompted to do so, restart your specific product from the models listed. 4. Obtaining Microsoft device drivers...
... set to http://www.hp.com/support, and select your computer operating system, programs, and hardware. 3. Proceed to get the latest updates for software and driver downloads, type your computer. After the file is displayed, click an updated driver to your computer model number in the Search box, press enter, and follow the instructions provided. If prompted to do so, restart your specific product from the models listed. 4. Obtaining Microsoft device drivers...
Power Management - Windows Vista
Page 27
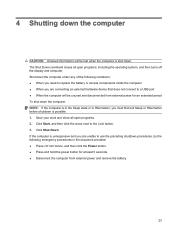
... external power and remove the battery. 23 Save your work and close all open programs. 2. Click Shut Down. 4 Shutting down the computer CAUTION: Unsaved information will be lost when the computer is possible. 1. Click Start, and then click the arrow next to the Lock button. 3. The Shut Down command closes all open programs, including the operating system, and then turns off the display...
... external power and remove the battery. 23 Save your work and close all open programs. 2. Click Shut Down. 4 Shutting down the computer CAUTION: Unsaved information will be lost when the computer is possible. 1. Click Start, and then click the arrow next to the Lock button. 3. The Shut Down command closes all open programs, including the operating system, and then turns off the display...


