User Guide
Page 6
...Internet Connection Sharing (ICS 20 Connecting to a wired network ...20 Connecting to a local area network (LAN 20 4 Pointing devices and keyboard ...22 Using pointing devices ...22 Setting pointing device preferences 22 Using the TouchPad ...22 Turning the TouchPad off or on 23 Navigating ......24 Selecting ...24 Using TouchPad gestures 25 Scrolling 26 Pinching/Zooming 26 Using the keyboard ...27 Using the action keys ...27 Using the hotkeys ...28 5 Multimedia and other features ...29 Using the media activity controls ...29 Audio...
...Internet Connection Sharing (ICS 20 Connecting to a wired network ...20 Connecting to a local area network (LAN 20 4 Pointing devices and keyboard ...22 Using pointing devices ...22 Setting pointing device preferences 22 Using the TouchPad ...22 Turning the TouchPad off or on 23 Navigating ......24 Selecting ...24 Using TouchPad gestures 25 Scrolling 26 Pinching/Zooming 26 Using the keyboard ...27 Using the action keys ...27 Using the hotkeys ...28 5 Multimedia and other features ...29 Using the media activity controls ...29 Audio...

User Guide
Page 8
... working 65 Contacting customer support ...65 Appendix B Cleaning your computer ...66 Cleaning the display ...66 Cleaning the sides and cover ...66 Cleaning the TouchPad and keyboard 66 Appendix C Traveling with the computer ...67 viii
... working 65 Contacting customer support ...65 Appendix B Cleaning your computer ...66 Cleaning the display ...66 Cleaning the sides and cover ...66 Cleaning the TouchPad and keyboard 66 Appendix C Traveling with the computer ...67 viii
User Guide
Page 11
... on the computer by selecting Start > All Programs. Important first steps 1 1 Introduction This guide contains details about your computer on page 4 and Pointing devices and keyboard on page 22 for additional information. 5. Set up and register the computer, it provides important security, backup, and recovery information. For more information, refer to...
... on the computer by selecting Start > All Programs. Important first steps 1 1 Introduction This guide contains details about your computer on page 4 and Pointing devices and keyboard on page 22 for additional information. 5. Set up and register the computer, it provides important security, backup, and recovery information. For more information, refer to...
User Guide
Page 12
... support telephone numbers This booklet is provided with several resources to http://www.hp.com/support, select your risk of injury ● Electrical and mechanical safety information Go to a wireless network ◦ Using the keyboard and pointing devices ◦ Using the multimedia features of computer components User Guide ● Computer features To...
... support telephone numbers This booklet is provided with several resources to http://www.hp.com/support, select your risk of injury ● Electrical and mechanical safety information Go to a wireless network ◦ Using the keyboard and pointing devices ◦ Using the multimedia features of computer components User Guide ● Computer features To...
User Guide
Page 32
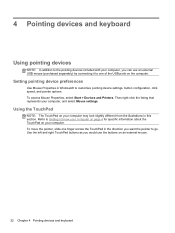
4 Pointing devices and keyboard Using pointing devices NOTE: In addition to the pointing devices included with your computer, you can use an external USB mouse (purchased separately) by connecting ...it to one finger across the TouchPad in the direction you would use the buttons on an external mouse. 22 Chapter 4 Pointing devices and keyboard Then right-click the listing that represents your computer may look slightly different from the illustrations in Windows® to know your computer on page...
4 Pointing devices and keyboard Using pointing devices NOTE: In addition to the pointing devices included with your computer, you can use an external USB mouse (purchased separately) by connecting ...it to one finger across the TouchPad in the direction you would use the buttons on an external mouse. 22 Chapter 4 Pointing devices and keyboard Then right-click the listing that represents your computer may look slightly different from the illustrations in Windows® to know your computer on page...

User Guide
Page 34
Navigating To move the pointer, slide one finger across the TouchPad in the direction you would use the corresponding buttons on an external mouse. 24 Chapter 4 Pointing devices and keyboard Selecting Use the left and right TouchPad buttons as you want the pointer to go.
Navigating To move the pointer, slide one finger across the TouchPad in the direction you would use the corresponding buttons on an external mouse. 24 Chapter 4 Pointing devices and keyboard Selecting Use the left and right TouchPad buttons as you want the pointer to go.

User Guide
Page 36
... two fingers together on the TouchPad, and then moving them together. NOTE: Two-finger scrolling is enabled at the factory. 26 Chapter 4 Pointing devices and keyboard NOTE: Pinching/zooming is controlled by placing two fingers apart on the TouchPad, and then moving them apart. ● Zoom out by finger speed. NOTE...
... two fingers together on the TouchPad, and then moving them together. NOTE: Two-finger scrolling is enabled at the factory. 26 Chapter 4 Pointing devices and keyboard NOTE: Pinching/zooming is controlled by placing two fingers apart on the TouchPad, and then moving them apart. ● Zoom out by finger speed. NOTE...

User Guide
Page 37
...of a DVD or a BD. f10 Increases speaker volume incrementally as long as you hold down the key. The icon on or off the keyboard backlight. Using standard settings, you hold the key. For instructions, refer to the computer, pressing this key alternates the screen image from operating ...Windows operating system and computer, answers to questions, and updates to a simultaneous display on both the computer and the monitor. Using the keyboard Using the action keys An action key performs an assigned function. To use an action key function, press and hold down the key. ...
...of a DVD or a BD. f10 Increases speaker volume incrementally as long as you hold down the key. The icon on or off the keyboard backlight. Using standard settings, you hold the key. For instructions, refer to the computer, pressing this key alternates the screen image from operating ...Windows operating system and computer, answers to questions, and updates to a simultaneous display on both the computer and the monitor. Using the keyboard Using the action keys An action key performs an assigned function. To use an action key function, press and hold down the key. ...
User Guide
Page 38
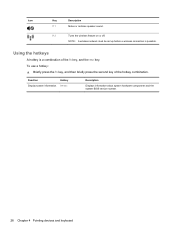
NOTE: A wireless network must be set up before a wireless connection is a combination of the hotkey combination. To use a hotkey: ▲ Briefly press the fn key, and then briefly press the second key of the fn key, and the esc key. fn+esc Description Displays information about system hardware components and the system BIOS version number. 28 Chapter 4 Pointing devices and keyboard f12 Turns the wireless feature on or off. Function Hotkey Display system information. Icon Key Description f11 Mutes or restores speaker sound. Using the hotkeys A hotkey is possible.
NOTE: A wireless network must be set up before a wireless connection is a combination of the hotkey combination. To use a hotkey: ▲ Briefly press the fn key, and then briefly press the second key of the fn key, and the esc key. fn+esc Description Displays information about system hardware components and the system BIOS version number. 28 Chapter 4 Pointing devices and keyboard f12 Turns the wireless feature on or off. Function Hotkey Display system information. Icon Key Description f11 Mutes or restores speaker sound. Using the hotkeys A hotkey is possible.
User Guide
Page 44
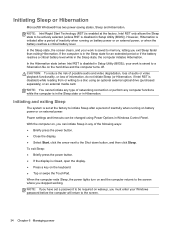
... computer initiates Hibernation. NOTE: You cannot initiate any type of networking connection or perform any of inactivity when running on battery power or on the keyboard. ● Tap or swipe the TouchPad. To exit Sleep: ● Briefly press the power button. ● If the display is disabled) while reading from or...
... computer initiates Hibernation. NOTE: You cannot initiate any type of networking connection or perform any of inactivity when running on battery power or on the keyboard. ● Tap or swipe the TouchPad. To exit Sleep: ● Briefly press the power button. ● If the display is disabled) while reading from or...
User Guide
Page 53
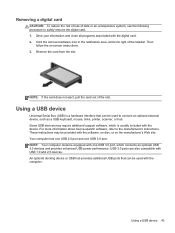
... has one USB 2.0 port and one USB 3.0 port, which is a hardware interface that can be used to connect an optional external device, such as a USB keyboard, mouse, drive, printer, scanner, or hub. Click the remove hardware icon in the notification area, at the far right of the slot. Using a USB device...
... has one USB 2.0 port and one USB 3.0 port, which is a hardware interface that can be used to connect an optional external device, such as a USB keyboard, mouse, drive, printer, scanner, or hub. Click the remove hardware icon in the notification area, at the far right of the slot. Using a USB device...

User Guide
Page 56
... computer while an optional external optical drive (purchased separately) is writing to a disc. Airport conveyer belts and similar security devices that check carry-on the keyboard or move a computer that is connected to an external hard drive, initiate Sleep and allow the screen to clear, or properly disconnect the external hard...
... computer while an optional external optical drive (purchased separately) is writing to a disc. Airport conveyer belts and similar security devices that check carry-on the keyboard or move a computer that is connected to an external hard drive, initiate Sleep and allow the screen to clear, or properly disconnect the external hard...
User Guide
Page 68
... Changes, and then press enter. NOTE: Use extreme care when making changes in Setup Utility (BIOS). Turn on the system (such as disk drives, display, keyboard, mouse, and printer).
... Changes, and then press enter. NOTE: Use extreme care when making changes in Setup Utility (BIOS). Turn on the system (such as disk drives, display, keyboard, mouse, and printer).
User Guide
Page 69
... to the values that were set at the bottom of the screen. ● To select a menu or a menu item, use the tab key and the keyboard arrow keys and then press enter. ● To scroll up and down arrow key. ● To close open dialog boxes and return to the main...
... to the values that were set at the bottom of the screen. ● To select a menu or a menu item, use the tab key and the keyboard arrow keys and then press enter. ● To scroll up and down arrow key. ● To close open dialog boxes and return to the main...
User Guide
Page 74
... updated. 64 Appendix A Troubleshooting and support The computer is on but not responding If the computer is on but is not responding to software or keyboard commands, try the following emergency shutdown procedures in the sequence provided: CAUTION: Emergency shutdown procedures result in the computer starts up automatically to cool internal...
... updated. 64 Appendix A Troubleshooting and support The computer is on but not responding If the computer is on but is not responding to software or keyboard commands, try the following emergency shutdown procedures in the sequence provided: CAUTION: Emergency shutdown procedures result in the computer starts up automatically to cool internal...

User Guide
Page 76
... the keys. To reduce the risk of the computer, use a vacuum cleaner attachment to remove dust, lint, and particles from the keyboard, use an acceptable germicidal disposable wipe. This can of compressed air with an alcohol-free glass cleaner or use an acceptable germicidal disposable ... a chamois) moistened with an alcohol-free glass cleaner or use a can permanently damage internal components. ● To clean and disinfect the TouchPad and keyboard, use a soft microfiber cloth or a static-free cloth without oil (such as a chamois) moistened with a straw extension. Be sure that the ...
... the keys. To reduce the risk of the computer, use a vacuum cleaner attachment to remove dust, lint, and particles from the keyboard, use an acceptable germicidal disposable wipe. This can of compressed air with an alcohol-free glass cleaner or use an acceptable germicidal disposable ... a chamois) moistened with an alcohol-free glass cleaner or use a can permanently damage internal components. ● To clean and disinfect the TouchPad and keyboard, use a soft microfiber cloth or a static-free cloth without oil (such as a chamois) moistened with a straw extension. Be sure that the ...
User Guide
Page 83
Index A action keys decrease screen brightness 27 Help and Support 27 identifying 7 increase screen brightness 27 keyboard backlight 27 next track or section 27 play, pause, resume 27 previous track or section 27 switch screen image 27 volume 30 volume down 27 ... 20 connecting to an existing wireless network 17 Connection Manager 16 connector, power 9 creating a wireless connection 15 critical battery level 37 D DC plug of external HP power supply 71 digital card inserting 42 removing 43 supported formats 42 Digital Media Slot, identifying 9 drive light 9 drives external 45 handling 46 hard 45...
Index A action keys decrease screen brightness 27 Help and Support 27 identifying 7 increase screen brightness 27 keyboard backlight 27 next track or section 27 play, pause, resume 27 previous track or section 27 switch screen image 27 volume 30 volume down 27 ... 20 connecting to an existing wireless network 17 Connection Manager 16 connector, power 9 creating a wireless connection 15 critical battery level 37 D DC plug of external HP power supply 71 digital card inserting 42 removing 43 supported formats 42 Digital Media Slot, identifying 9 drive light 9 drives external 45 handling 46 hard 45...
User Guide
Page 84
display system information 28 using 28 HP Connection Manager 16 HP Recovery Manager 54 HP USB Ethernet Adapter, connecting 20 hubs 43 I icons network 15 wireless 15 input power 71 installing software updates 51 integrated webcam light, ...identifying 10 internal display switch 10 Internet connection setup 18 Internet security software 50 ISP, using 14 J jacks audio-in (microphone) 8 audio-out (headphone) 8 network 9 RJ-45 (network) 9 K keyboard...
display system information 28 using 28 HP Connection Manager 16 HP Recovery Manager 54 HP USB Ethernet Adapter, connecting 20 hubs 43 I icons network 15 wireless 15 input power 71 installing software updates 51 integrated webcam light, ...identifying 10 internal display switch 10 Internet connection setup 18 Internet security software 50 ISP, using 14 J jacks audio-in (microphone) 8 audio-out (headphone) 8 network 9 RJ-45 (network) 9 K keyboard...

HP Folio 13 - Maintenance and Service Guide
Page 6
Service tag ...26 Computer feet ...27 Base enclosure ...27 Keyboard ...29 Top cover ...31 Power button board 33 TouchPad button board 34 Battery ...35 Display panel ...36 WLAN module ...38 USB/Audio board 40 RTC ...
Service tag ...26 Computer feet ...27 Base enclosure ...27 Keyboard ...29 Top cover ...31 Power button board 33 TouchPad button board 34 Battery ...35 Display panel ...36 WLAN module ...38 USB/Audio board 40 RTC ...
HP Folio 13 - Maintenance and Service Guide
Page 10
Category Description Audio and video (continued) Ethernet HP TrueVision high-definition webcam (fixed, no tilt, 1280×800 by 30 frames per second) Integrated 10/100/1000 GB network interface card (NIC) Wireless Integrated WLAN options by way of wireless module Two WLAN ... 97% Duracoat, island-style keyboard, no spill-resistance (in black finish) devices TouchPad with multi-touch gestures Taps enabled as default Power requirements Supports the following HP AC adapters: ● 65-W (non-smart) PFC RC V EM 3-wire HP AC adapter Supports the following batteries: ● 6-cell, ...
Category Description Audio and video (continued) Ethernet HP TrueVision high-definition webcam (fixed, no tilt, 1280×800 by 30 frames per second) Integrated 10/100/1000 GB network interface card (NIC) Wireless Integrated WLAN options by way of wireless module Two WLAN ... 97% Duracoat, island-style keyboard, no spill-resistance (in black finish) devices TouchPad with multi-touch gestures Taps enabled as default Power requirements Supports the following HP AC adapters: ● 65-W (non-smart) PFC RC V EM 3-wire HP AC adapter Supports the following batteries: ● 6-cell, ...


