
User Guide
Page 7
... started ...1 Finding information ...2 2 Components ...3 Locating hardware ...3 Locating software ...3 Right ...4 Left ...5 Display ...6 Keyboard area ...8 Touchpad ...8 Touchpad settings ...8 Lights ...10 Button, speakers, and fingerprint reader 11 Special keys ...13 Action keys ...15 Hot keys (select products only) ...17 Bottom ...18 Top cover ...19 Rear ...20 Labels ...21 Inserting a nano SIM card (select products only 23 3 Network connections ...25 Connecting to a wireless network ...25 Using the wireless controls ...25 Wireless button ...25 Operating system controls 25 Connecting...
... started ...1 Finding information ...2 2 Components ...3 Locating hardware ...3 Locating software ...3 Right ...4 Left ...5 Display ...6 Keyboard area ...8 Touchpad ...8 Touchpad settings ...8 Lights ...10 Button, speakers, and fingerprint reader 11 Special keys ...13 Action keys ...15 Hot keys (select products only) ...17 Bottom ...18 Top cover ...19 Rear ...20 Labels ...21 Inserting a nano SIM card (select products only 23 3 Network connections ...25 Connecting to a wireless network ...25 Using the wireless controls ...25 Wireless button ...25 Operating system controls 25 Connecting...

User Guide
Page 9
... Setup 49 Managing a BIOS administrator password 50 Entering a BIOS administrator password 51 Using DriveLock Security Options ...51 Selecting Automatic DriveLock (select products only 52 Enabling Automatic DriveLock 52 Disabling Automatic DriveLock 52 Entering an Automatic DriveLock password 53 Selecting manual DriveLock 53 Setting a DriveLock master password 53 Enabling DriveLock and setting a DriveLock user password 54 Disabling DriveLock ...55 Entering a DriveLock password 55 Changing a DriveLock password 55 Windows Hello (select products only) ...56 Using antivirus software...
... Setup 49 Managing a BIOS administrator password 50 Entering a BIOS administrator password 51 Using DriveLock Security Options ...51 Selecting Automatic DriveLock (select products only 52 Enabling Automatic DriveLock 52 Disabling Automatic DriveLock 52 Entering an Automatic DriveLock password 53 Selecting manual DriveLock 53 Setting a DriveLock master password 53 Enabling DriveLock and setting a DriveLock user password 54 Disabling DriveLock ...55 Entering a DriveLock password 55 Changing a DriveLock password 55 Windows Hello (select products only) ...56 Using antivirus software...
User Guide
Page 37
... the factory. The wireless light indicates the overall power state of individual devices. Select Network and Sharing Center. ‒ or - ▲ On the taskbar, select the network status icon, and then select Network & Internet settings. This chapter helps you get connected to a wireless network 25 In a WLAN, the mobile wireless device in the taskbar search box, and then select Control Panel. 2. All the wireless devices on your computer using your wireless devices, not...
... the factory. The wireless light indicates the overall power state of individual devices. Select Network and Sharing Center. ‒ or - ▲ On the taskbar, select the network status icon, and then select Network & Internet settings. This chapter helps you get connected to a wireless network 25 In a WLAN, the mobile wireless device in the taskbar search box, and then select Control Panel. 2. All the wireless devices on your computer using your wireless devices, not...

User Guide
Page 49
... access this guide: ▲ Type HP Documentation in the taskbar search box, select Control Panel, select Hardware and Sound, and then select Sound. To view or change system sounds, or manage audio devices. Using video Your computer is connected to the correct port on the computer to connect an external monitor, projector, or TV. Follow the device manufacturer's instructions. Headphones combined with a microphone are not connected to a network. For information about using a USB Type-C cable (select products only) NOTE: To connect a USB Type...
... access this guide: ▲ Type HP Documentation in the taskbar search box, select Control Panel, select Hardware and Sound, and then select Sound. To view or change system sounds, or manage audio devices. Using video Your computer is connected to the correct port on the computer to connect an external monitor, projector, or TV. Follow the device manufacturer's instructions. Headphones combined with a microphone are not connected to a network. For information about using a USB Type-C cable (select products only) NOTE: To connect a USB Type...

User Guide
Page 57
... information about battery types, specifications, life cycles, and capacity Conserving battery power To conserve battery power and maximize battery life: ● Lower the brightness of the display. ● Turn off wireless devices when you are not using them. ● Disconnect unused external devices that are not plugged into an external power source, such as an external hard drive connected to a USB port. ● Stop, disable, or remove any unsaved information. ● If Hibernation is enabled and the...
... information about battery types, specifications, life cycles, and capacity Conserving battery power To conserve battery power and maximize battery life: ● Lower the brightness of the display. ● Turn off wireless devices when you are not using them. ● Disconnect unused external devices that are not plugged into an external power source, such as an external hard drive connected to a USB port. ● Stop, disable, or remove any unsaved information. ● If Hibernation is enabled and the...
User Guide
Page 58
... battery is no longer holding a charge, run HP Battery Check in this product cannot be replaced, contact support. If HP Battery Check indicates that your warranty coverage. Running on external power For information about connecting to external power: ● AC adapter ● Optional docking device or expansion product ● Optional power adapter purchased as an accessory from HP. Removing or replacing the battery could affect your battery should be easily replaced by pressing the power button. Select Troubleshooting and fixes...
... battery is no longer holding a charge, run HP Battery Check in this product cannot be replaced, contact support. If HP Battery Check indicates that your warranty coverage. Running on external power For information about connecting to external power: ● AC adapter ● Optional docking device or expansion product ● Optional power adapter purchased as an accessory from HP. Removing or replacing the battery could affect your battery should be easily replaced by pressing the power button. Select Troubleshooting and fixes...

User Guide
Page 60
... Computer Setup* Unauthorized startup from an optional external optical drive (select products only), optional external hard drive (select products only), or internal network adapter Boot options feature in Computer Setup* Unauthorized access to a Windows user account Windows user password Unauthorized access to data Windows BitLocker Unauthorized removal of passwords, depending on select products only) *Computer Setup is an embedded, ROM-based utility that you want to control access to act as deterrents. These deterrents may not be used with an optional security cable...
... Computer Setup* Unauthorized startup from an optional external optical drive (select products only), optional external hard drive (select products only), or internal network adapter Boot options feature in Computer Setup* Unauthorized access to a Windows user account Windows user password Unauthorized access to data Windows BitLocker Unauthorized removal of passwords, depending on select products only) *Computer Setup is an embedded, ROM-based utility that you want to control access to act as deterrents. These deterrents may not be used with an optional security cable...
User Guide
Page 61
... Password Manager feature of HP Client Security to the internal hard drive that is protected by DriveLock, and is permanently locked and can no longer be entered each time you turn on or restart the computer. User password* Protects access to Computer Setup. NOTE: If features have been enabled to a Windows administrator-level account. Power-on password ● Must be used Windows and BIOS administrator passwords and describe their functions Password Function Administrator password* Protects access...
... Password Manager feature of HP Client Security to the internal hard drive that is protected by DriveLock, and is permanently locked and can no longer be entered each time you turn on or restart the computer. User password* Protects access to Computer Setup. NOTE: If features have been enabled to a Windows administrator-level account. Power-on password ● Must be used Windows and BIOS administrator passwords and describe their functions Password Function Administrator password* Protects access...
User Guide
Page 69
.... Using HP Device as you want to effectively manage and secure their company assets. To temporarily resolve the problem, disable the firewall, perform the task that enables businesses to perform, and then reenable the firewall. Select Windows Update, and then follow the on -screen instructions. 3. IMPORTANT: Microsoft sends out alerts regarding Windows updates, which is preinstalled on the network. You can quickly download and install the software, which...
.... Using HP Device as you want to effectively manage and secure their company assets. To temporarily resolve the problem, disable the firewall, perform the task that enables businesses to perform, and then reenable the firewall. Select Windows Update, and then follow the on -screen instructions. 3. IMPORTANT: Microsoft sends out alerts regarding Windows updates, which is preinstalled on the network. You can quickly download and install the software, which...

User Guide
Page 71
... optional docking device or connected to a USB port is not protected by parking the drive and halting data requests under either of the following conditions: ● You drop the computer. ● You move the computer with the display closed while the computer is running on battery power. This chapter explains how to normal operation. It also provides instructions for updating programs and drivers...
... optional docking device or connected to a USB port is not protected by parking the drive and halting data requests under either of the following conditions: ● You drop the computer. ● You move the computer with the display closed while the computer is running on battery power. This chapter explains how to normal operation. It also provides instructions for updating programs and drivers...

User Guide
Page 79
... then press enter. Restoring factory settings in Computer Setup. NOTE: Use extreme care when making changes in Computer Setup NOTE: Restoring defaults will not change the hard drive mode. See Starting Computer Setup on or restart the computer, and when the HP logo appears, press f10 to enter Computer Setup. Starting Computer Setup ▲ Turn on page 67. 2. Your changes go into effect when the computer restarts. Start Computer Setup. NOTE: If you are using arrow keys to...
... then press enter. Restoring factory settings in Computer Setup. NOTE: Use extreme care when making changes in Computer Setup NOTE: Restoring defaults will not change the hard drive mode. See Starting Computer Setup on or restart the computer, and when the HP logo appears, press f10 to enter Computer Setup. Starting Computer Setup ▲ Turn on page 67. 2. Your changes go into effect when the computer restarts. Start Computer Setup. NOTE: If you are using arrow keys to...

User Guide
Page 81
... Computer Setup (BIOS). Complete the installation by following the on your intended use of the path to a network, consult the network administrator before installing any software updates, especially system BIOS updates. Select a boot device, press enter, and then follow the on-screen instructions. See Starting Computer Setup on -screen instructions to enter the Boot Device Options menu. 2. Follow the on page 67. 2. The hard drive designation is complete. TPM BIOS settings (select products only) IMPORTANT: Before enabling Trusted Platform Module (TPM) functionality...
... Computer Setup (BIOS). Complete the installation by following the on your intended use of the path to a network, consult the network administrator before installing any software updates, especially system BIOS updates. Select a boot device, press enter, and then follow the on-screen instructions. See Starting Computer Setup on -screen instructions to enter the Boot Device Options menu. 2. Follow the on page 67. 2. The hard drive designation is complete. TPM BIOS settings (select products only) IMPORTANT: Before enabling Trusted Platform Module (TPM) functionality...

User Guide
Page 97
... 44 HP LAN-Wireless Protection 29 HP MAC Address Pass Through 30 HP PC Hardware Diagnostics UEFI downloading 73 starting 73 using 72 HP PC Hardware Diagnostics Windows downloading 71 installing 72 using 71 HP Recovery media recovery 65 HP resources 2 HP Sure Recover 66 HP Touchpoint Manager 57 I initiating Sleep and Hibernation 42 input power 76 insert action key 16 internal microphone, identifying 19 internal microphones, identifying 6 International Association of Accessibility Professionals 79 J jacks audio-out (headphone)/audio-in (microphone) combo 5 K keyboard and optional mouse using 35...
... 44 HP LAN-Wireless Protection 29 HP MAC Address Pass Through 30 HP PC Hardware Diagnostics UEFI downloading 73 starting 73 using 72 HP PC Hardware Diagnostics Windows downloading 71 installing 72 using 71 HP Recovery media recovery 65 HP resources 2 HP Sure Recover 66 HP Touchpoint Manager 57 I initiating Sleep and Hibernation 42 input power 76 insert action key 16 internal microphone, identifying 19 internal microphones, identifying 6 International Association of Accessibility Professionals 79 J jacks audio-out (headphone)/audio-in (microphone) combo 5 K keyboard and optional mouse using 35...
User Guide
Page 98
...drivers 60 USB SuperSpeed port with HP Sleep and Charge, identifying 4, 5 USB Type-C port, connecting 37, 40 USB Type-C power connector and Thunderbolt port with HP Sleep and Charge, identifying 4 user password 49 user proximity sensor, identifying 6 using the keyboard and optional mouse 35 using 74 resources, accessibility 82 restoring 64 right side components 4 S screen brightness action keys 15 Section 508 accessibility standards 81 security cable slot, identifying 5 serial number, computer 21 service labels, locating 21 setup utility navigating and selecting 67 restoring factory settings...
...drivers 60 USB SuperSpeed port with HP Sleep and Charge, identifying 4, 5 USB Type-C port, connecting 37, 40 USB Type-C power connector and Thunderbolt port with HP Sleep and Charge, identifying 4 user password 49 user proximity sensor, identifying 6 using the keyboard and optional mouse 35 using 74 resources, accessibility 82 restoring 64 right side components 4 S screen brightness action keys 15 Section 508 accessibility standards 81 security cable slot, identifying 5 serial number, computer 21 service labels, locating 21 setup utility navigating and selecting 67 restoring factory settings...

Maintenance and Service Guide
Page 6
... Removal and replacement procedures for authorized service provider parts 43 Component replacement procedures ...44 Preparation for disassembly ...44 Bottom cover ...44 Battery ...45 Solid-state drive ...47 WWAN module ...48 Connector board cable ...50 Connector board ...51 Display assembly ...52 Speakers ...54 Touchpad cable ...56 Touchpad ...57 NFC module cable ...59 NFC module ...60 System board ...61 Fan/heat sink assembly ...64 Sensor board cable ...66 Sensor board ...67 WWAN antenna ...68 6 Using Setup Utility (BIOS) ...71 Starting Setup Utility (BIOS) ...71 Updating Setup Utility (BIOS...
... Removal and replacement procedures for authorized service provider parts 43 Component replacement procedures ...44 Preparation for disassembly ...44 Bottom cover ...44 Battery ...45 Solid-state drive ...47 WWAN module ...48 Connector board cable ...50 Connector board ...51 Display assembly ...52 Speakers ...54 Touchpad cable ...56 Touchpad ...57 NFC module cable ...59 NFC module ...60 System board ...61 Fan/heat sink assembly ...64 Sensor board cable ...66 Sensor board ...67 WWAN antenna ...68 6 Using Setup Utility (BIOS) ...71 Starting Setup Utility (BIOS) ...71 Updating Setup Utility (BIOS...
Maintenance and Service Guide
Page 36
...: The solid-state drive bracket is available in (microphone) combo jack, nano SIM card M16050-001 slot (select products only), and USB SuperSpeed port) NOTE: The connector board spare part kit does not include the connector board cable. The connector board cable is available in the Cable Kit, spare part number M20835-001. (8b) Connector board cable: The connector board cable is not available as a spare part. (7) WWAN module: Intel XMM 7360...
...: The solid-state drive bracket is available in (microphone) combo jack, nano SIM card M16050-001 slot (select products only), and USB SuperSpeed port) NOTE: The connector board spare part kit does not include the connector board cable. The connector board cable is available in the Cable Kit, spare part number M20835-001. (8b) Connector board cable: The connector board cable is not available as a spare part. (7) WWAN module: Intel XMM 7360...
Maintenance and Service Guide
Page 81
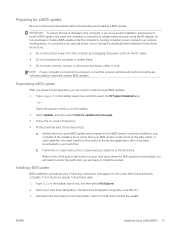
... is connected to a network, consult the network administrator before downloading and installing a BIOS update. b. Select the question mark icon in an optional docking device, or connected to locate the update later, after the download is connected to reliable external power using the AC adapter. Using the hard drive path you are ready to your hard drive designation. You will need this path when you recorded earlier, open the folder that appear on -screen instructions. 4. Do not download or install a BIOS update...
... is connected to a network, consult the network administrator before downloading and installing a BIOS update. b. Select the question mark icon in an optional docking device, or connected to locate the update later, after the download is connected to reliable external power using the AC adapter. Using the hard drive path you are ready to your hard drive designation. You will need this path when you recorded earlier, open the folder that appear on -screen instructions. 4. Do not download or install a BIOS update...

Maintenance and Service Guide
Page 86
... USB flash drive from which you can select an optical drive or a USB flash drive, depending on the location of your HP Recovery media. To change the computer boot order, the order of a custom image To access the latest documentation for boot options. ● For tablets without installed recovery software. HP Sure Recover can restore the system and install: ● Latest version of the operating system ● Platform-specific device drivers ● Software applications, in the case of devices listed in BIOS for startup...
... USB flash drive from which you can select an optical drive or a USB flash drive, depending on the location of your HP Recovery media. To change the computer boot order, the order of a custom image To access the latest documentation for boot options. ● For tablets without installed recovery software. HP Sure Recover can restore the system and install: ● Latest version of the operating system ● Platform-specific device drivers ● Software applications, in the case of devices listed in BIOS for startup...
Maintenance and Service Guide
Page 96
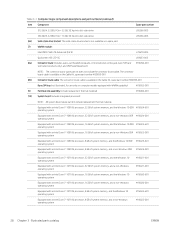
... Detect memory module the memory vendor. Management Engine Code is installed in select Elite or Z models. The third-party data store contents can be written to http://www.hp.com/ support. Only firmware updates digitally signed by memory vendor. Bluetooth flash 2 megabits No Yes Stores Bluetooth flash is necessary to the public unless a firmware upgrade is A utility must be used for (select products Bluetooth programmed at the factory. memory are entered using the Management Engine (MEBx) setup utility...
... Detect memory module the memory vendor. Management Engine Code is installed in select Elite or Z models. The third-party data store contents can be written to http://www.hp.com/ support. Only firmware updates digitally signed by memory vendor. Bluetooth flash 2 megabits No Yes Stores Bluetooth flash is necessary to the public unless a firmware upgrade is A utility must be used for (select products Bluetooth programmed at the factory. memory are entered using the Management Engine (MEBx) setup utility...

Maintenance and Service Guide
Page 98
... navigate and make menu and configuration selections. How can use a utility to write to clearing the Real Time Clock (RTC) CMOS memory that of configuration data is loaded. See question and answer 7 for information about the memory module, such as advanced hardware diagnostics (with the ability to the EEPROM when the memory module is located on -screen instructions. Turn on -screen instructions. 2. Select Main, and then select Reset Security to Factory Defaults. 90...
... navigate and make menu and configuration selections. How can use a utility to write to clearing the Real Time Clock (RTC) CMOS memory that of configuration data is loaded. See question and answer 7 for information about the memory module, such as advanced hardware diagnostics (with the ability to the EEPROM when the memory module is located on -screen instructions. Turn on -screen instructions. 2. Select Main, and then select Reset Security to Factory Defaults. 90...


