
HP Notebook Hard Drives & Solid State Drives Identifying, Preventing, Diagnosing and Recovering from Drive Failures Care and Mai
Page 6
... Manager driver are configured with Serial ATA hard disk drives. Intel Matrix Storage Manager Driver provides support for adding SATA drivers to RIS (Remote Installation Service) installation points include: Adding SATA drivers to installation CDs, building an image, and switching to SATA AHCI mode Using Sysprep with SATA in AHCI or NATIVE mode Adding SATA drivers using WinPE can be located at the following URL: http://bizsupport2.austin.hp.com/bc/docs/support...
... Manager driver are configured with Serial ATA hard disk drives. Intel Matrix Storage Manager Driver provides support for adding SATA drivers to RIS (Remote Installation Service) installation points include: Adding SATA drivers to installation CDs, building an image, and switching to SATA AHCI mode Using Sysprep with SATA in AHCI or NATIVE mode Adding SATA drivers using WinPE can be located at the following URL: http://bizsupport2.austin.hp.com/bc/docs/support...
User Guide
Page 5
... hardware and software information 4 Right side ...5 Left side ...6 Display ...7 Top ...8 TouchPad ...8 Lights ...9 Button, speakers, and subwoofer 10 Keys ...11 Bottom ...12 Labels ...13 3 Connecting to a network ...14 Connecting to a wireless network ...15 Using the wireless controls 15 Using the wireless button 15 Using HP Connection Manager (select models only 15 Using operating system controls 16 Using a WLAN ...16 Using an Internet service provider 16 Setting up a WLAN 17 Configuring a wireless router 17 Protecting your WLAN 17 Connecting to a WLAN 18 Using Bluetooth wireless...
... hardware and software information 4 Right side ...5 Left side ...6 Display ...7 Top ...8 TouchPad ...8 Lights ...9 Button, speakers, and subwoofer 10 Keys ...11 Bottom ...12 Labels ...13 3 Connecting to a network ...14 Connecting to a wireless network ...15 Using the wireless controls 15 Using the wireless button 15 Using HP Connection Manager (select models only 15 Using operating system controls 16 Using a WLAN ...16 Using an Internet service provider 16 Setting up a WLAN 17 Configuring a wireless router 17 Protecting your WLAN 17 Connecting to a WLAN 18 Using Bluetooth wireless...
User Guide
Page 7
... Using HP 3D DriveGuard (select models only 47 Using Disk Defragmenter 48 Using Disk Cleanup ...48 Updating programs and drivers ...49 Cleaning your computer ...50 Cleaning the display, sides, and cover 50 Cleaning the TouchPad and keyboard 50 Traveling with or shipping your computer 51 9 Securing your computer and information 52 Locating your security software ...52 Using passwords ...53 Setting Windows passwords 53 Setting Setup Utility (BIOS) passwords 54 Using Internet security software ...54 Using antivirus software ...55 Using firewall software ...55 Installing software updates...
... Using HP 3D DriveGuard (select models only 47 Using Disk Defragmenter 48 Using Disk Cleanup ...48 Updating programs and drivers ...49 Cleaning your computer ...50 Cleaning the display, sides, and cover 50 Cleaning the TouchPad and keyboard 50 Traveling with or shipping your computer 51 9 Securing your computer and information 52 Locating your security software ...52 Using passwords ...53 Setting Windows passwords 53 Setting Setup Utility (BIOS) passwords 54 Using Internet security software ...54 Using antivirus software ...55 Using firewall software ...55 Installing software updates...
User Guide
Page 8
...you need to know 62 Creating a backup using Windows Backup and Restore 63 Restore and recovery ...64 Restoring to a previous system restore point 64 Restoring specific files ...64 Restoring specific files using Windows Backup and Restore 64 Recovering the original system using HP Recovery Manager 64 What you need to know 64 Recovering using HP Recovery partition (select models only 65 Recovering using the recovery media 65 Changing the computer boot order 66 12 Specifications ...67 Input power ...67 Operating environment ...68 13 Troubleshooting and support ...69 Troubleshooting ...70...
...you need to know 62 Creating a backup using Windows Backup and Restore 63 Restore and recovery ...64 Restoring to a previous system restore point 64 Restoring specific files ...64 Restoring specific files using Windows Backup and Restore 64 Recovering the original system using HP Recovery Manager 64 What you need to know 64 Recovering using HP Recovery partition (select models only 65 Recovering using the recovery media 65 Changing the computer boot order 66 12 Specifications ...67 Input power ...67 Operating environment ...68 13 Troubleshooting and support ...69 Troubleshooting ...70...
User Guide
Page 28
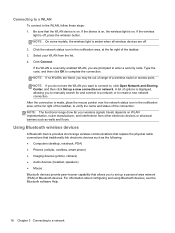
... the wireless button. NOTE: The functional range (how far your WLAN from other electronic devices or structural barriers such as the following: ● Computers (desktop, notebook, PDA) ● Phones (cellular, cordless, smart phone) ● Imaging devices (printer, camera) ● Audio devices (headset, speakers) ● Mouse Bluetooth devices provide peer-to create a new network connection. Connecting to a WLAN To connect to complete the connection. A list of options is amber when all wireless devices are listed...
... the wireless button. NOTE: The functional range (how far your WLAN from other electronic devices or structural barriers such as the following: ● Computers (desktop, notebook, PDA) ● Phones (cellular, cordless, smart phone) ● Imaging devices (printer, camera) ● Audio devices (headset, speakers) ● Mouse Bluetooth devices provide peer-to create a new network connection. Connecting to a WLAN To connect to complete the connection. A list of options is amber when all wireless devices are listed...

User Guide
Page 29
.... WARNING! Connecting to a local area network (LAN) Use a LAN connection if you want to connect the computer directly to an existing network at your office. Plug the network cable into the network jack (1) on the computer. 2. Connecting to a LAN requires an 8-pin, RJ-45 network cable. A LAN connection uses a network cable and is much faster than a modem, which prevents interference from TV and radio reception, orient the circuitry end of working wirelessly), or...
.... WARNING! Connecting to a local area network (LAN) Use a LAN connection if you want to connect the computer directly to an existing network at your office. Plug the network cable into the network jack (1) on the computer. 2. Connecting to a LAN requires an 8-pin, RJ-45 network cable. A LAN connection uses a network cable and is much faster than a modem, which prevents interference from TV and radio reception, orient the circuitry end of working wirelessly), or...

User Guide
Page 32
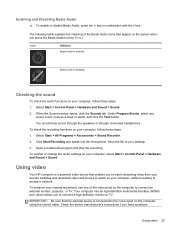
... Support. Connecting a microphone To record audio, connect a microphone to create multimedia. For best results when recording, speak directly into the microphone and record sound in a setting free of personal injury, adjust the volume before putting on your computer, follow the device manufacturer's instructions. Using the webcam Your computer has an integrated webcam, a powerful social networking tool that provides a deep, controlled bass while maintaining a clear sound. To open Beats Audio Control Panel, select Start > Control Panel > Hardware and Sound > Beats Audio Control Panel...
... Support. Connecting a microphone To record audio, connect a microphone to create multimedia. For best results when recording, speak directly into the microphone and record sound in a setting free of personal injury, adjust the volume before putting on your computer, follow the device manufacturer's instructions. Using the webcam Your computer has an integrated webcam, a powerful social networking tool that provides a deep, controlled bass while maintaining a clear sound. To open Beats Audio Control Panel, select Start > Control Panel > Hardware and Sound > Beats Audio Control Panel...
User Guide
Page 33
... port on the screen when you to watch streaming video from your computer, without needing to access a network. Using video 23 Save the file to connect an external monitor, projector, or TV. Check the device manufacturer's instructions if you to watch on your desktop. 3. Select Start > All Programs > Accessories > Sound Recorder. 2. To confirm or change the audio settings on the computer to your computer, follow these steps: 1. Enabling and Disabling...
... port on the screen when you to watch streaming video from your computer, without needing to access a network. Using video 23 Save the file to connect an external monitor, projector, or TV. Check the device manufacturer's instructions if you to watch on your desktop. 3. Select Start > All Programs > Accessories > Sound Recorder. 2. To confirm or change the audio settings on the computer to your computer, follow these steps: 1. Enabling and Disabling...

User Guide
Page 37
... use the alt gr+4 key combination. To activate the assigned function after disabling the action key feature, you hold down the key. f4 Switches the screen image between display devices connected to the Microsoft Office website, http://www.office.microsoft.com, and search for ALT GR. Using the keyboard 27 See Using Setup Utility (BIOS) and System Diagnostics on opening Setup Utility (BIOS), and then follow the instructions at the factory. f2 Decreases the screen brightness...
... use the alt gr+4 key combination. To activate the assigned function after disabling the action key feature, you hold down the key. f4 Switches the screen image between display devices connected to the Microsoft Office website, http://www.office.microsoft.com, and search for ALT GR. Using the keyboard 27 See Using Setup Utility (BIOS) and System Diagnostics on opening Setup Utility (BIOS), and then follow the instructions at the factory. f2 Decreases the screen brightness...
User Guide
Page 46
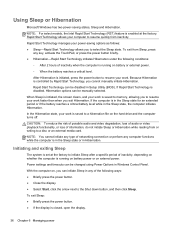
... external power. With the computer on the hard drive and the computer turns off. To exit from inactivity. Rapid Start Technology can be changed using Power Options in Setup Utility (BIOS). If Rapid Start Technology is saved to a hibernation file on , you to a disc or an external media card. In the Hibernation state, your power-saving options as follows: ● Sleep-Rapid Start Technology allows you can be disabled in Windows Control Panel. Rapid Start Technology manages your work...
... external power. With the computer on the hard drive and the computer turns off. To exit from inactivity. Rapid Start Technology can be changed using Power Options in Setup Utility (BIOS). If Rapid Start Technology is saved to a hibernation file on , you to a disc or an external media card. In the Hibernation state, your power-saving options as follows: ● Sleep-Rapid Start Technology allows you can be disabled in Windows Control Panel. Rapid Start Technology manages your work...
User Guide
Page 53
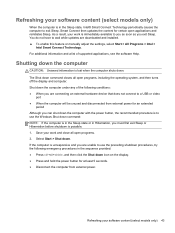
... updates are downloaded and installed. ▲ To enable this feature or manually adjust the settings, select Start > All Programs > Intel > Intel Smart Connect Technology. Shut down the computer under any of supported applications, see the software Help. As a result, your software content (select models only) 43 Smart Connect then updates the content for an extended period Although you can shut down the computer with the power button...
... updates are downloaded and installed. ▲ To enable this feature or manually adjust the settings, select Start > All Programs > Intel > Intel Smart Connect Technology. Shut down the computer under any of supported applications, see the software Help. As a result, your software content (select models only) 43 Smart Connect then updates the content for an extended period Although you can shut down the computer with the power button...
User Guide
Page 58
... Tools > Disk Defragmenter. 3. Select Start > All Programs > Accessories > System Tools > Disk Cleanup. 2. After you start Disk Defragmenter, it works without supervision. To run Disk Cleanup: 1. Connect the computer to run Disk Defragmenter on solid-state drives. Using Disk Defragmenter As you use your hard drive and the number of fragmented files, Disk Defragmenter may set Disk Defragmenter to run on a monthly schedule, but you can safely delete to free up disk space...
... Tools > Disk Defragmenter. 3. Select Start > All Programs > Accessories > System Tools > Disk Cleanup. 2. After you start Disk Defragmenter, it works without supervision. To run Disk Cleanup: 1. Connect the computer to run Disk Defragmenter on solid-state drives. Using Disk Defragmenter As you use your hard drive and the number of fragmented files, Disk Defragmenter may set Disk Defragmenter to run on a monthly schedule, but you can safely delete to free up disk space...
User Guide
Page 64
... the computer. Open Setup Utility (BIOS) by turning on -screen instructions. NOTE: The administrator password can be used in place of your power-on password, you cannot turn on or restart the computer, or exit Hibernation. ● If you forget your choice in order to date. When the Startup Menu is set , entered, changed , or deleted. To help protect your computer, Internet security software that you upgrade the security software trial offer...
... the computer. Open Setup Utility (BIOS) by turning on -screen instructions. NOTE: The administrator password can be used in place of your power-on password, you cannot turn on or restart the computer, or exit Hibernation. ● If you forget your choice in order to date. When the Startup Menu is set , entered, changed , or deleted. To help protect your computer, Internet security software that you upgrade the security software trial offer...
User Guide
Page 65
..., repair any damage they have become available. Antivirus software can disable programs, utilities, or the operating system, or cause them , and in Help and Support. There are installed on the computer, observe these guidelines: ● Run Windows Update as soon as you install on your home network to Windows and other software may have caused. Installing software updates HP, Microsoft Windows, and third-party software installed on your computer. Select Start...
..., repair any damage they have become available. Antivirus software can disable programs, utilities, or the operating system, or cause them , and in Help and Support. There are installed on the computer, observe these guidelines: ● Run Windows Update as soon as you install on your home network to Windows and other software may have caused. Installing software updates HP, Microsoft Windows, and third-party software installed on your computer. Select Start...
User Guide
Page 68
... connected to an optional power source. Open Windows Explorer by selecting Start > Computer. 2. Using the hard drive path you want to download. 3. Downloading a BIOS update CAUTION: To reduce the risk of the path to the location on your computer to a network, consult the network administrator before installing any device, cable, or cord. 1. Select Start > Help and Support > Maintain. 2. Identify the BIOS update that has an .exe extension (for example, filename.exe). You may need...
... connected to an optional power source. Open Windows Explorer by selecting Start > Computer. 2. Using the hard drive path you want to download. 3. Downloading a BIOS update CAUTION: To reduce the risk of the path to the location on your computer to a network, consult the network administrator before installing any device, cable, or cord. 1. Select Start > Help and Support > Maintain. 2. Identify the BIOS update that has an .exe extension (for example, filename.exe). You may need...
User Guide
Page 75
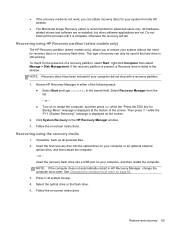
... - ● Turn on -screen instructions. or - Follow the on or restart the computer, and then press esc while the "Press the ESC key for the presence of the following ways: ● Select Start and type recovery in the HP Recovery Manager window. 3. ● If the recovery media do not work, you to restore your computer did not ship with a recovery partition. 1. Recovering using the recovery media 1. See Changing the computer boot order on page...
... - ● Turn on -screen instructions. or - Follow the on or restart the computer, and then press esc while the "Press the ESC key for the presence of the following ways: ● Select Start and type recovery in the HP Recovery Manager window. 3. ● If the recovery media do not work, you to restore your computer did not ship with a recovery partition. 1. Recovering using the recovery media 1. See Changing the computer boot order on page...

User Guide
Page 82
...-screen instructions. Click a network, and then click Remove. NOTE: If the WLAN device you configure the WLAN, the software driver is either missing or corrupted. Get the latest version of the WLAN device software for the latest software. Select Start > Control Panel > Network and Internet > Network and Sharing Center. 2. In the left panel, click Manage wireless networks. Network status icon is not displayed If the network status icon is not displayed in the search box. 4. Open...
...-screen instructions. Click a network, and then click Remove. NOTE: If the WLAN device you configure the WLAN, the software driver is either missing or corrupted. Get the latest version of the WLAN device software for the latest software. Select Start > Control Panel > Network and Internet > Network and Sharing Center. 2. In the left panel, click Manage wireless networks. Network status icon is not displayed If the network status icon is not displayed in the search box. 4. Open...
User Guide
Page 86
... keyboard 28 switch screen image 27 volume down 28 volume mute 28 volume up 28 wireless 28 antivirus software, using 55 audio functions, checking 23 audio-in (microphone) jack 5 audio-out (headphone) jacks 5 B backing up software and information 56 backups 60 bass settings hot key 28 battery conserving power 40 battery information, finding 40 battery power 40 Beats Audio 22, 28 Beats Audio Control Panel 22 Beats Audio hot key 23 best practices 1 BIOS determining version 57 downloading an update 58 updating 57 Bluetooth device 15, 18 Bluetooth label 13 boot order changing...
... keyboard 28 switch screen image 27 volume down 28 volume mute 28 volume up 28 wireless 28 antivirus software, using 55 audio functions, checking 23 audio-in (microphone) jack 5 audio-out (headphone) jacks 5 B backing up software and information 56 backups 60 bass settings hot key 28 battery conserving power 40 battery information, finding 40 battery power 40 Beats Audio 22, 28 Beats Audio Control Panel 22 Beats Audio hot key 23 best practices 1 BIOS determining version 57 downloading an update 58 updating 57 Bluetooth device 15, 18 Bluetooth label 13 boot order changing...
User Guide
Page 87
... 13 lights AC adapter 5 caps lock 9 hard drive 6 mute 9 power 6, 9 TouchPad 8, 9, 30 webcam 7, 20 wireless 9 M maintenance Disk Cleanup 48 Disk Defragmenter 48 Microsoft Certificate of Authenticity label 13 mouse, external setting preferences 26 mute light, identifying 9 N network jack, identifying 6 O operating environment 68 operating system Microsoft Certificate of Authenticity label 13 Product Key 13 optional external devices, using 45 original system recovery 64 P passwords Setup Utility (BIOS) 54 Windows 53 pinching TouchPad gesture 33 ports HDMI 6, 21, 24 Intel Wireless Display 25 USB...
... 13 lights AC adapter 5 caps lock 9 hard drive 6 mute 9 power 6, 9 TouchPad 8, 9, 30 webcam 7, 20 wireless 9 M maintenance Disk Cleanup 48 Disk Defragmenter 48 Microsoft Certificate of Authenticity label 13 mouse, external setting preferences 26 mute light, identifying 9 N network jack, identifying 6 O operating environment 68 operating system Microsoft Certificate of Authenticity label 13 Product Key 13 optional external devices, using 45 original system recovery 64 P passwords Setup Utility (BIOS) 54 Windows 53 pinching TouchPad gesture 33 ports HDMI 6, 21, 24 Intel Wireless Display 25 USB...
User Guide
Page 88
...connecting 45 USB devices connecting 44 description 44 removing 45 USB hubs 44 USB ports, identifying 5, 21 using external AC power 41 using passwords 53 using the power meter 38 V vents, identifying 12 video 23 W webcam 22 webcam light, identifying 7, 20 webcam, identifying 7, 20 Windows applications key, identifying 11 Windows Backup and Restore restoring files 64 Windows logo key, identifying 11 Windows passwords 53 Windows security updates, installing 55 wireless button 15 wireless certification label 13 wireless controls button 15 operating system 15 wireless light 9, 15 wireless network...
...connecting 45 USB devices connecting 44 description 44 removing 45 USB hubs 44 USB ports, identifying 5, 21 using external AC power 41 using passwords 53 using the power meter 38 V vents, identifying 12 video 23 W webcam 22 webcam light, identifying 7, 20 webcam, identifying 7, 20 Windows applications key, identifying 11 Windows Backup and Restore restoring files 64 Windows logo key, identifying 11 Windows passwords 53 Windows security updates, installing 55 wireless button 15 wireless certification label 13 wireless controls button 15 operating system 15 wireless light 9, 15 wireless network...


