
Maintenance and Service Guide
Page 10
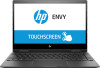
... @ 60Hz through Type-C port using USB Type-C adapter (65W/90W) - supports HP Sleep & Charge (right) (1) USB Type-C port; supports HP Sleep & Charge - supports DP1.4 + HDCP2.2 up to fit embedded panel and external monitor connected) AC Smart Pin adapter plug Audio-out (headphone)/audio-in (microphone) combo jack (2) USB 3.1 Gen 1 ports (1 left, 1 right); beam forming, echo cancellation, noise suppression Audio brand: BANG and OLUFSEN Supports HP Audio Boost 2.0 Quad speakers Compatible with Miracast-certified devices WiFi SAR enabled in BIOS Integrated wireless options with dual...
... @ 60Hz through Type-C port using USB Type-C adapter (65W/90W) - supports HP Sleep & Charge (right) (1) USB Type-C port; supports HP Sleep & Charge - supports DP1.4 + HDCP2.2 up to fit embedded panel and external monitor connected) AC Smart Pin adapter plug Audio-out (headphone)/audio-in (microphone) combo jack (2) USB 3.1 Gen 1 ports (1 left, 1 right); beam forming, echo cancellation, noise suppression Audio brand: BANG and OLUFSEN Supports HP Audio Boost 2.0 Quad speakers Compatible with Miracast-certified devices WiFi SAR enabled in BIOS Integrated wireless options with dual...
Maintenance and Service Guide
Page 62
... BIOS version, make a note of the path to your hard drive. 54 Chapter 6 Using Setup Utility (BIOS) Using the hard drive path you can delete the downloaded file from the AC outlet. ● Do not shut down the computer or initiate Sleep. ● Do not insert, remove, connect, or disconnect any software updates, especially system BIOS updates. 1. Type support in the taskbar. 2. b. Click your selection to reliable external power using the AC adapter. If no instructions...
... BIOS version, make a note of the path to your hard drive. 54 Chapter 6 Using Setup Utility (BIOS) Using the hard drive path you can delete the downloaded file from the AC outlet. ● Do not shut down the computer or initiate Sleep. ● Do not insert, remove, connect, or disconnect any software updates, especially system BIOS updates. 1. Type support in the taskbar. 2. b. Click your selection to reliable external power using the AC adapter. If no instructions...
Maintenance and Service Guide
Page 63
.... 7 Using HP PC Hardware Diagnostics Using HP PC Hardware Diagnostics Windows HP PC Hardware Diagnostics Windows is a Windows-based utility that requires hardware replacement, a 24digit Failure ID code is generated. Right-click HP PC Hardware Diagnostics Windows, select More, and then select Run as administrator. - Select Troubleshooting and fixes. Select Diagnostics, and then select HP PC Hardware Diagnostics Windows. 2. To access HP PC Hardware Diagnostics Windows from HP Support Assistant: a. When the tool opens, select the type of diagnostic test you need...
.... 7 Using HP PC Hardware Diagnostics Using HP PC Hardware Diagnostics Windows HP PC Hardware Diagnostics Windows is a Windows-based utility that requires hardware replacement, a 24digit Failure ID code is generated. Right-click HP PC Hardware Diagnostics Windows, select More, and then select Run as administrator. - Select Troubleshooting and fixes. Select Diagnostics, and then select HP PC Hardware Diagnostics Windows. 2. To access HP PC Hardware Diagnostics Windows from HP Support Assistant: a. When the tool opens, select the type of diagnostic test you need...

Maintenance and Service Guide
Page 72
... -screen instructions. Access the system Startup menu. Type recovery in the taskbar search box, and then select HP Recovery Manager. 2. For tablets without keyboards: ▲ Turn on -screen instructions. 64 Chapter 8 Backing up button, and then select f9. ‒ or - Removing the HP Recovery partition (select products only) HP Recovery Manager software allows you can change the computer boot order, and then follow the on or restart the tablet, quickly hold down the volume down the volume up , restoring, and recovering...
... -screen instructions. Access the system Startup menu. Type recovery in the taskbar search box, and then select HP Recovery Manager. 2. For tablets without keyboards: ▲ Turn on -screen instructions. 64 Chapter 8 Backing up button, and then select f9. ‒ or - Removing the HP Recovery partition (select products only) HP Recovery Manager software allows you can change the computer boot order, and then follow the on or restart the tablet, quickly hold down the volume down the volume up , restoring, and recovering...
Maintenance and Service Guide
Page 77
... speaker volume 11 switch screen image 11 using 11 airplane mode key 10, 11 audio adjusting volume 11 audio, product description 2 audio-out (headphone)/audio-in (microphone) combo jack, identifying 5 B backup, creating 60 backups 60 battery removal 27 spare part number 16, 27 BIOS determining version 53 downloading an update 54 starting the Setup Utility 53 updating 53 Bluetooth label 14 boot order, changing 64 bottom components 12 bottom cover removal 25 spare part number 17, 25 bottom speakers removal 38 spare part number buttons left TouchPad 7 right TouchPad 7 17, 38 C cables, service...
... speaker volume 11 switch screen image 11 using 11 airplane mode key 10, 11 audio adjusting volume 11 audio, product description 2 audio-out (headphone)/audio-in (microphone) combo jack, identifying 5 B backup, creating 60 backups 60 battery removal 27 spare part number 16, 27 BIOS determining version 53 downloading an update 54 starting the Setup Utility 53 updating 53 Bluetooth label 14 boot order, changing 64 bottom components 12 bottom cover removal 25 spare part number 17, 25 bottom speakers removal 38 spare part number buttons left TouchPad 7 right TouchPad 7 17, 38 C cables, service...
Maintenance and Service Guide
Page 78
... port with HP Sleep and Charge 4 USB Type-C with HP Sleep and Charge 4 power button removal 48 spare part number 16, 48 power connector identifying 4 power connector cable removal 51 spare part number 16, 51 power cord set requirements 66 spare part numbers 18 power lights, identifying 5 power requirements, product description 3 privacy screen action key 11 privacy screen action key, identifying 11 processor, product description 1 product description audio 2 camera 2 display panel 1 external media cards 2 graphics 1 hard drive 1 internal card expansion 2 keyboard 2 memory module 1 operating...
... port with HP Sleep and Charge 4 USB Type-C with HP Sleep and Charge 4 power button removal 48 spare part number 16, 48 power connector identifying 4 power connector cable removal 51 spare part number 16, 51 power cord set requirements 66 spare part numbers 18 power lights, identifying 5 power requirements, product description 3 privacy screen action key 11 privacy screen action key, identifying 11 processor, product description 1 product description audio 2 camera 2 display panel 1 external media cards 2 graphics 1 hard drive 1 internal card expansion 2 keyboard 2 memory module 1 operating...
Maintenance and Service Guide
Page 79
... computer 14 U USB SuperSpeed port with HP Sleep and Charge, identifying 4 USB SuperSpeed port, identifying 5 USB Type-C port with HP Sleep and Charge, identifying 4 V vents, identifying 5, 12 volume adjusting 11 mute 11 volume button removal 49 spare part number 16, 49 volume button, identifying 4 W Windows backup 60 recovery media 60 system restore point 60 Windows key, identifying 10 Windows tools, using 60 wireless certification label 14 wireless, product description 2 WLAN antennas, identifying 6 WLAN device 14 WLAN label 14 WLAN module removal 28 spare part numbers 16, 28 workstation...
... computer 14 U USB SuperSpeed port with HP Sleep and Charge, identifying 4 USB SuperSpeed port, identifying 5 USB Type-C port with HP Sleep and Charge, identifying 4 V vents, identifying 5, 12 volume adjusting 11 mute 11 volume button removal 49 spare part number 16, 49 volume button, identifying 4 W Windows backup 60 recovery media 60 system restore point 60 Windows key, identifying 10 Windows tools, using 60 wireless certification label 14 wireless, product description 2 WLAN antennas, identifying 6 WLAN device 14 WLAN label 14 WLAN module removal 28 spare part numbers 16, 28 workstation...

User Guide
Page 7
......4 Locating hardware ...4 Locating software ...4 Right side ...5 Left side ...6 Display ...7 Keyboard area ...8 TouchPad ...8 Lights ...9 Speakers ...10 Special keys ...11 Action keys ...12 Bottom ...14 Labels ...14 3 Connecting to a network ...16 Connecting to a wireless network ...16 Using the wireless controls ...16 Airplane mode key ...16 Operating system controls 16 Connecting to a WLAN ...17 Using HP Mobile Broadband (select products only 18 Using GPS (select products only) ...18 Using Bluetooth wireless devices (select products only 18 Connecting Bluetooth devices 19 Connecting to...
......4 Locating hardware ...4 Locating software ...4 Right side ...5 Left side ...6 Display ...7 Keyboard area ...8 TouchPad ...8 Lights ...9 Speakers ...10 Special keys ...11 Action keys ...12 Bottom ...14 Labels ...14 3 Connecting to a network ...16 Connecting to a wireless network ...16 Using the wireless controls ...16 Airplane mode key ...16 Operating system controls 16 Connecting to a WLAN ...17 Using HP Mobile Broadband (select products only 18 Using GPS (select products only) ...18 Using Bluetooth wireless devices (select products only 18 Connecting Bluetooth devices 19 Connecting to...
User Guide
Page 9
... Setting Setup Utility (BIOS) passwords 39 Using Windows Hello (select products only) ...39 Using Internet security software ...40 Using antivirus software ...40 Using firewall software ...40 Installing software updates ...40 Using HP Managed Services (select products only 41 Securing your wireless network ...41 Backing up your software applications and information 41 Using an optional security cable (select products only 41 9 Using Setup Utility (BIOS) ...42 Starting Setup Utility (BIOS) ...42 Updating Setup Utility (BIOS) ...42 Determining the BIOS version ...42 Downloading a BIOS update...
... Setting Setup Utility (BIOS) passwords 39 Using Windows Hello (select products only) ...39 Using Internet security software ...40 Using antivirus software ...40 Using firewall software ...40 Installing software updates ...40 Using HP Managed Services (select products only 41 Securing your wireless network ...41 Backing up your software applications and information 41 Using an optional security cable (select products only 41 9 Using Setup Utility (BIOS) ...42 Starting Setup Utility (BIOS) ...42 Updating Setup Utility (BIOS) ...42 Determining the BIOS version ...42 Downloading a BIOS update...

User Guide
Page 10
...50 Creating the recovery media 50 Using the HP Cloud Recovery Download Tool to create recovery media 51 Restoring and recovery ...51 Restoring, resetting, and refreshing using Windows tools 51 Restoring using HP Recovery Manager and the HP Recovery partition 51 Recovering using HP Recovery Manager 51 Recovering using the HP Recovery partition (select products only 52 Recovering using HP Recovery media 52 Changing the computer boot order 53 Removing the HP Recovery partition (select products only 53 12 Specifications ...54 Input power ...54 Operating environment ...55 13 Electrostatic...
...50 Creating the recovery media 50 Using the HP Cloud Recovery Download Tool to create recovery media 51 Restoring and recovery ...51 Restoring, resetting, and refreshing using Windows tools 51 Restoring using HP Recovery Manager and the HP Recovery partition 51 Recovering using HP Recovery Manager 51 Recovering using the HP Recovery partition (select products only 52 Recovering using HP Recovery media 52 Changing the computer boot order 53 Removing the HP Recovery partition (select products only 53 12 Specifications ...54 Input power ...54 Operating environment ...55 13 Electrostatic...
User Guide
Page 28
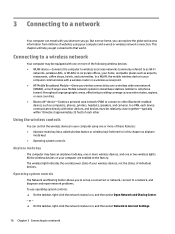
... wireless light indicates the overall power state of your computer are enabled at home, you to set up a connection or network, connect to a network, and diagnose and repair network problems. To use operating system controls: ▲ On the taskbar, right-click the network status icon, and then select Open Network and Sharing Center. ‒ or - ▲ On the taskbar, right-click the network status icon, and then select Network & Internet Settings. 16 Chapter 3 Connecting...
... wireless light indicates the overall power state of your computer are enabled at home, you to set up a connection or network, connect to a network, and diagnose and repair network problems. To use operating system controls: ▲ On the taskbar, right-click the network status icon, and then select Open Network and Sharing Center. ‒ or - ▲ On the taskbar, right-click the network status icon, and then select Network & Internet Settings. 16 Chapter 3 Connecting...

User Guide
Page 33
.... Using video Your computer is connected to the correct port on your viewing enjoyment, use one end of the USB Type-C cable to the USB SuperSpeed and DisplayPort port on the computer to adjust system volume, change sound settings: ▲ Type control panel in the taskbar search box, select Control Panel, select Hardware and Sound, and then select Sound. To enhance your computer when you need a USB Type-C cable, purchased separately. IMPORTANT: Be sure that the external device is a powerful video device...
.... Using video Your computer is connected to the correct port on your viewing enjoyment, use one end of the USB Type-C cable to the USB SuperSpeed and DisplayPort port on the computer to adjust system volume, change sound settings: ▲ Type control panel in the taskbar search box, select Control Panel, select Hardware and Sound, and then select Sound. To enhance your computer when you need a USB Type-C cable, purchased separately. IMPORTANT: Be sure that the external device is a powerful video device...

User Guide
Page 46
... to perform regular maintenance to normal operation. Follow the on -screen instructions. A short time after the end of one of your computer in an optional docking device or connected to free up disk space and help the computer run Disk Defragmenter on battery power. Type defragment in the taskbar search box, and then select Disk Cleanup. 2. Using Disk Cleanup Use Disk Cleanup to search the hard drive for unnecessary files...
... to perform regular maintenance to normal operation. Follow the on -screen instructions. A short time after the end of one of your computer in an optional docking device or connected to free up disk space and help the computer run Disk Defragmenter on battery power. Type defragment in the taskbar search box, and then select Disk Cleanup. 2. Using Disk Cleanup Use Disk Cleanup to search the hard drive for unnecessary files...
User Guide
Page 51
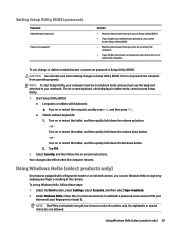
... the computer from operating properly. Errors can use the keyboard attached to sign in options. 2. Select Security, and then follow the on or restart the computer. The on or restart the tablet, and then quickly hold down the Windows button. 2. or Turn on -screen keyboard, which displays in Setup Utility (BIOS). Turn on password in Setup Utility (BIOS): CAUTION: Use extreme care when making changes in tablet mode, cannot access Setup Utility. 1. Select the Start button, select Settings, select Accounts...
... the computer from operating properly. Errors can use the keyboard attached to sign in options. 2. Select Security, and then follow the on or restart the computer. The on or restart the tablet, and then quickly hold down the Windows button. 2. or Turn on -screen keyboard, which displays in Setup Utility (BIOS). Turn on password in Setup Utility (BIOS): CAUTION: Use extreme care when making changes in tablet mode, cannot access Setup Utility. 1. Select the Start button, select Settings, select Accounts...
User Guide
Page 52
... network. Using antivirus software Computer viruses can detect most cases, repair any damage they have caused. An antivirus program may include security updates. Antivirus software can disable programs, utilities, or the operating system, or cause them , and in most viruses, destroy them to and from Microsoft as soon as a trial offer. or - When a firewall is monitored and compared with a set of user...
... network. Using antivirus software Computer viruses can detect most cases, repair any damage they have caused. An antivirus program may include security updates. Antivirus software can disable programs, utilities, or the operating system, or cause them , and in most viruses, destroy them to and from Microsoft as soon as a trial offer. or - When a firewall is monitored and compared with a set of user...
User Guide
Page 53
... cable (purchased separately) is a cloud-based IT solution that enables businesses to effectively manage and secure their company assets. Select the Start button, select Settings, and then select Update & security. 2. To schedule a time for installing updates, select Advanced options, and then follow the on -screen instructions. 3. Using HP Managed Services (select products only) 41 Using HP Managed Services (select products only) HP Managed Services is designed to protect them from unauthorized access. Securing your wireless network...
... cable (purchased separately) is a cloud-based IT solution that enables businesses to effectively manage and secure their company assets. Select the Start button, select Settings, and then select Update & security. 2. To schedule a time for installing updates, select Advanced options, and then follow the on -screen instructions. 3. Using HP Managed Services (select products only) 41 Using HP Managed Services (select products only) HP Managed Services is designed to protect them from unauthorized access. Securing your wireless network...
User Guide
Page 55
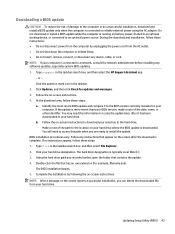
... mark icon in an optional docking device, or connected to a network, consult the network administrator before installing any software updates, especially system BIOS updates. 1. Click Updates, and then click Check for example, filename.exe). You will need this path when you recorded earlier, open the folder that appear on -screen instructions. 4. Updating Setup Utility (BIOS) 43 Follow any device, cable, or cord. The hard drive designation is running on your hard drive. Downloading a BIOS update CAUTION: To reduce...
... mark icon in an optional docking device, or connected to a network, consult the network administrator before installing any software updates, especially system BIOS updates. 1. Click Updates, and then click Check for example, filename.exe). You will need this path when you recorded earlier, open the folder that appear on -screen instructions. 4. Updating Setup Utility (BIOS) 43 Follow any device, cable, or cord. The hard drive designation is running on your hard drive. Downloading a BIOS update CAUTION: To reduce...

User Guide
Page 70
... sound settings 21 speakers 20 audio-out (headphone)/audio-in (microphone) combo jack, identifying 6 B backing up software and information 41 backup, creating 49 backups 49 battery conserving power 31 discharging 31 factory-sealed 32 finding information 31 low battery levels 31 resolving low battery level 32 battery charge 31 battery information, finding 31 battery power 30 best practices 1 BIOS determining version 42 downloading an update 43 starting the Setup Utility 42 updating 42 Bluetooth device 16, 18 Bluetooth label 15 boot order, changing...
... sound settings 21 speakers 20 audio-out (headphone)/audio-in (microphone) combo jack, identifying 6 B backing up software and information 41 backup, creating 49 backups 49 battery conserving power 31 discharging 31 factory-sealed 32 finding information 31 low battery levels 31 resolving low battery level 32 battery charge 31 battery information, finding 31 battery power 30 best practices 1 BIOS determining version 42 downloading an update 43 starting the Setup Utility 42 updating 42 Bluetooth device 16, 18 Bluetooth label 15 boot order, changing...
User Guide
Page 71
... creating using HP Cloud Recovery Download Tool 51 creating using HP Recovery Manager 50 creating using Windows tools 49 discs 50 HP Recovery partition 49 USB flash drive 50 using 50 recovery partition, removing 53 regulatory information regulatory label 15 wireless certification labels 15 Remote HP PC Hardware Diagnostics UEFI settings customizing 47 using 47 restoring 49 right side components 5 S screen brightness action keys 12 security cable, installing 41 serial number, computer 14 service labels, locating 14 Setup Utility (BIOS) passwords 39 shipping the computer 36 shutdown 29 Sleep...
... creating using HP Cloud Recovery Download Tool 51 creating using HP Recovery Manager 50 creating using Windows tools 49 discs 50 HP Recovery partition 49 USB flash drive 50 using 50 recovery partition, removing 53 regulatory information regulatory label 15 wireless certification labels 15 Remote HP PC Hardware Diagnostics UEFI settings customizing 47 using 47 restoring 49 right side components 5 S screen brightness action keys 12 security cable, installing 41 serial number, computer 14 service labels, locating 14 Setup Utility (BIOS) passwords 39 shipping the computer 36 shutdown 29 Sleep...

User Guide
Page 72
... 6 USB Type-C port with HP Sleep and Charge, identifying 5 USB Type-C port, connecting 21, 23 using passwords 38 using the keyboard and optional mouse 27 using the TouchPad 24 functional range 17 public WLAN connection 17 wireless network, securing 41 WLAN antennas, identifying 7 WLAN device 15 WLAN label 15 WWAN device 18 V vents, identifying 6, 14 video DisplayPort device 21 USB Type-C 23 wireless displays 22 video, using 21 volume adjusting 12 mute 12 volume button, identifying 5 W Windows backup 49 recovery media 49 system restore point 49 Windows Hello 20 using 39 Windows key...
... 6 USB Type-C port with HP Sleep and Charge, identifying 5 USB Type-C port, connecting 21, 23 using passwords 38 using the keyboard and optional mouse 27 using the TouchPad 24 functional range 17 public WLAN connection 17 wireless network, securing 41 WLAN antennas, identifying 7 WLAN device 15 WLAN label 15 WWAN device 18 V vents, identifying 6, 14 video DisplayPort device 21 USB Type-C 23 wireless displays 22 video, using 21 volume adjusting 12 mute 12 volume button, identifying 5 W Windows backup 49 recovery media 49 system restore point 49 Windows Hello 20 using 39 Windows key...


