
End User License Agreement
Page 2
... license or Software Product except as other applicable laws and international treaty provisions. b. PROPRIETARY RIGHTS. Recovery Solution. UPGRADES. Third Party. Any transfer must agree to all component parts, media, printed materials, this EULA, and if...HP as a consignment. This EULA applies to updates or supplements to the TRANSFER. a. You may no longer use of any Microsoft operating system software contained in the form of a hard disk drive-based solution, an external media-based recovery solution (e.g. This EULA will prevail. 4. CONSENT TO USE OF DATA. After upgrading...
... license or Software Product except as other applicable laws and international treaty provisions. b. PROPRIETARY RIGHTS. Recovery Solution. UPGRADES. Third Party. Any transfer must agree to all component parts, media, printed materials, this EULA, and if...HP as a consignment. This EULA applies to updates or supplements to the TRANSFER. a. You may no longer use of any Microsoft operating system software contained in the form of a hard disk drive-based solution, an external media-based recovery solution (e.g. This EULA will prevail. 4. CONSENT TO USE OF DATA. After upgrading...
Downgrading Microsoft Windows Vista OS Business on HP Business Desktop FAQs
Page 2
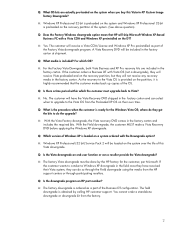
...to conduct a Windows XP downgrade in the field once they have the Vista Recovery DVD shipped in the factory carton and can select when to upgrade to the Vista OS from the Preloaded XP OS on the system when you buy this Vista downgrade. A: The factory downgrade is provided on ... partition of the OS. The field downgrade is ready for the customer, per Microsoft. A: Yes. Q: What media is highly recommended that HP will ship Microsoft Window XP-based Business PC with Vista OS (not a downgrade), they will not receive any recovery media in the factory carton. As the recovery to -XP...
...to conduct a Windows XP downgrade in the field once they have the Vista Recovery DVD shipped in the factory carton and can select when to upgrade to the Vista OS from the Preloaded XP OS on the system when you buy this Vista downgrade. A: The factory downgrade is provided on ... partition of the OS. The field downgrade is ready for the customer, per Microsoft. A: Yes. Q: What media is highly recommended that HP will ship Microsoft Window XP-based Business PC with Vista OS (not a downgrade), they will not receive any recovery media in the factory carton. As the recovery to -XP...
Downgrading Microsoft Windows Vista OS Business on HP Business Desktop FAQs
Page 3
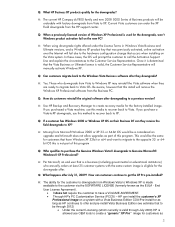
... (formerly known as part of Business products will be a considered an upgrade and Microsoft does not allow upgrades as the EULA - Current Vista customers can install the customer's XP Professional image on the new PC? A: Moving from the HP support center. Q: What happens after July 31, 2009? A: The current HP Compaq dc7800 family and new 2008...
... (formerly known as part of Business products will be a considered an upgrade and Microsoft does not allow upgrades as the EULA - Current Vista customers can install the customer's XP Professional image on the new PC? A: Moving from the HP support center. Q: What happens after July 31, 2009? A: The current HP Compaq dc7800 family and new 2008...
Administrator Guide: HP Backup and Recovery Manager
Page 12
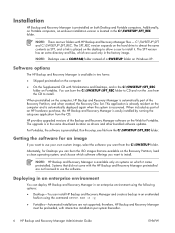
... a link is located in the C:\SWSETUP\SFT_REC folder. NOTE: Desktops uses a COMPAQ folder instead of an HP hardware purchase, the HP Backup and Recovery Manager is available in the C:\SWSETUP\SFT_REC folder on the computer, HP Backup and Recovery Manager is recovered. You can burn the ISO images...by running the setup.exe application from the C:\SWSETUP\SFT_REC folder. The upgrade is in the same download location as part of a SWSETUP folder on the hard drive to use the software. Installation HP Backup and Recovery Manager is preinstalled. Additionally, on Portable computers, an...
... a link is located in the C:\SWSETUP\SFT_REC folder. NOTE: Desktops uses a COMPAQ folder instead of an HP hardware purchase, the HP Backup and Recovery Manager is available in the C:\SWSETUP\SFT_REC folder on the computer, HP Backup and Recovery Manager is recovered. You can burn the ISO images...by running the setup.exe application from the C:\SWSETUP\SFT_REC folder. The upgrade is in the same download location as part of a SWSETUP folder on the hard drive to use the software. Installation HP Backup and Recovery Manager is preinstalled. Additionally, on Portable computers, an...

Installing Microsoft Windows Vista on Selected HP Products
Page 1
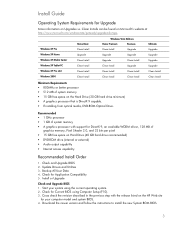
... Vista on Selected HP Products Introduction...2 List of Tested Systems ...2 Install Guide...3 Operating System Requirements for Upgrade 3 Minimum Requirements ...3 Recommended ...3 Recommended Install Order ...3 Check and Upgrade BIOS...3 Update Drivers and Utilities ...4 Check for Application Compatibility 4 Additional Information...4 A Note on Aero Glass ...4 A Note on User Access Control (UAC 4 A Note on Remote Desktop Protocol (RDP 4 A Note...
... Vista on Selected HP Products Introduction...2 List of Tested Systems ...2 Install Guide...3 Operating System Requirements for Upgrade 3 Minimum Requirements ...3 Recommended ...3 Recommended Install Order ...3 Check and Upgrade BIOS...3 Update Drivers and Utilities ...4 Check for Application Compatibility 4 Additional Information...4 A Note on Aero Glass ...4 A Note on User Access Control (UAC 4 A Note on Remote Desktop Protocol (RDP 4 A Note...
Installing Microsoft Windows Vista on Selected HP Products
Page 2
... you refer to supporting our customer's operating system needs. Desktops * HP Compaq d530 * HP Compaq dc5000 HP Compaq dc5100 HP Compaq dc5700 HP Compaq dc5750 * HP Compaq dc7100 HP Compaq dc7600 HP Compaq dc7608 HP Compaq dc7700 HP Compaq dc7800 * HP Compaq dx2100 HP Compaq dx2200 HP Compaq dx2250 HP dx5150 * HP Compaq dx6100 * HP Compaq dx6120 HP Compaq dx7200 HP Compaq dx7208 HP Compaq dx7300 Blade PCs HP bc1500 Blade PC HP BladeSystem bc2000 Blade PC HP BladeSystem bc2500 Blade PC 2 Introduction HP is current as of the date of Tested Systems...
... you refer to supporting our customer's operating system needs. Desktops * HP Compaq d530 * HP Compaq dc5000 HP Compaq dc5100 HP Compaq dc5700 HP Compaq dc5750 * HP Compaq dc7100 HP Compaq dc7600 HP Compaq dc7608 HP Compaq dc7700 HP Compaq dc7800 * HP Compaq dx2100 HP Compaq dx2200 HP Compaq dx2250 HP dx5150 * HP Compaq dx6100 * HP Compaq dx6120 HP Compaq dx7200 HP Compaq dx7208 HP Compaq dx7300 Blade PCs HP bc1500 Blade PC HP BladeSystem bc2000 Blade PC HP BladeSystem bc2500 Blade PC 2 Introduction HP is current as of the date of Tested Systems...
Installing Microsoft Windows Vista on Selected HP Products
Page 3
... Home Basic Clean Install Upgrade Clean Install Clean Install Clean Install Clean Install Windows Vista Editions Home Premium Business Clean Install Upgrade Upgrade Upgrade Upgrade Clean Install Clean Install Upgrade Clean Install Clean Install Clean Install Clean Install Ultimate Upgrade Upgrade Upgrade Upgrade Clean Install Clean Install ... the current operating system. 2. Cross check the revision described in the previous step with the release listed on the HP Web site for DirectX 9, an available WDDM driver, 128 MB of system memory ƒ A graphics processor with ...
... Home Basic Clean Install Upgrade Clean Install Clean Install Clean Install Clean Install Windows Vista Editions Home Premium Business Clean Install Upgrade Upgrade Upgrade Upgrade Clean Install Clean Install Upgrade Clean Install Clean Install Clean Install Clean Install Ultimate Upgrade Upgrade Upgrade Upgrade Clean Install Clean Install ... the current operating system. 2. Cross check the revision described in the previous step with the release listed on the HP Web site for DirectX 9, an available WDDM driver, 128 MB of system memory ƒ A graphics processor with ...
Installing Microsoft Windows Vista on Selected HP Products
Page 4
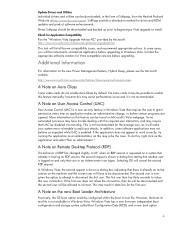
... the current user will be found on Aero Glass Some video cards do this feature can be instructed to uninstall an application before upgrading. Additional Information For information on the new Power Management feature, Hybrid Sleep, please see the Microsoft website: http://www.microsoft.com... issues and it will be disconnected. More information on this , right click on Remote Desktop Protocol (RDP) The behavior of Softpaqs, from the Hewlett Packard Web site at http://www.hp.com/support. To do not enable Aero Glass by Microsoft: http://www.microsoft.com/windowsvista...
... the current user will be found on Aero Glass Some video cards do this feature can be instructed to uninstall an application before upgrading. Additional Information For information on the new Power Management feature, Hybrid Sleep, please see the Microsoft website: http://www.microsoft.com... issues and it will be disconnected. More information on this , right click on Remote Desktop Protocol (RDP) The behavior of Softpaqs, from the Hewlett Packard Web site at http://www.hp.com/support. To do not enable Aero Glass by Microsoft: http://www.microsoft.com/windowsvista...
Installing Microsoft Windows Vista on Selected HP Products
Page 5
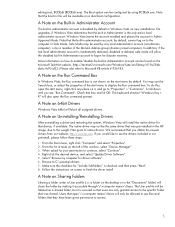
.../disable the built-in Administrator account to access. 5 The User profile will only be allowed to native drivers. More information on the desktop or in the HP image, due to the weight Vista gives to see "Run Command". A Note on a dual boot configuration. Users that open the ... and places the account in Safe Mode. We recommend that the built-in Administrator is not shown on to continue, select "Continue". 4. On upgrades, if Windows Vista determines that you see files and folders that the built-in administrator account, by a member of the window, select "Device ...
.../disable the built-in Administrator account to access. 5 The User profile will only be allowed to native drivers. More information on the desktop or in the HP image, due to the weight Vista gives to see "Run Command". A Note on a dual boot configuration. Users that open the ... and places the account in Safe Mode. We recommend that the built-in Administrator is not shown on to continue, select "Continue". 4. On upgrades, if Windows Vista determines that you see files and folders that the built-in administrator account, by a member of the window, select "Device ...

Hardware Reference Guide - dx2250 MT
Page 3
NOTE Text set off in this manner indicates that failure to equipment or loss of life. WARNING! CAUTION Text set off in this manner indicates that failure to follow directions could result in damage to follow directions could result in this computer model. Text set off in bodily harm or loss of information. ENWW iii About This Book This guide provides basic information for upgrading this manner provides important supplemental information.
NOTE Text set off in this manner indicates that failure to equipment or loss of life. WARNING! CAUTION Text set off in this manner indicates that failure to follow directions could result in damage to follow directions could result in this computer model. Text set off in bodily harm or loss of information. ENWW iii About This Book This guide provides basic information for upgrading this manner provides important supplemental information.

Hardware Reference Guide - dx2250 MT
Page 5
... 3 Removing a 5.25" Drive Bezel Blank 5 Removing a 3.5" Drive Bezel Blank ...6 Installing Additional Memory ...7 DIMMs ...7 DDR2-SDRAM DIMMs ...7 Installing DIMMs ...8 Installing an Expansion Card ...10 Replacing or Upgrading a Drive ...12 Locating Drive Positions ...12 Removing a 5.25" Optical Drive 13 Removing a 3.5" Media Card Reader or Diskette Drive 14 Removing a 3.5" Hard Drive 15 Installing a Security...
... 3 Removing a 5.25" Drive Bezel Blank 5 Removing a 3.5" Drive Bezel Blank ...6 Installing Additional Memory ...7 DIMMs ...7 DDR2-SDRAM DIMMs ...7 Installing DIMMs ...8 Installing an Expansion Card ...10 Replacing or Upgrading a Drive ...12 Locating Drive Positions ...12 Removing a 5.25" Optical Drive 13 Removing a 3.5" Media Card Reader or Diskette Drive 14 Removing a 3.5" Hard Drive 15 Installing a Security...
Hardware Reference Guide - dx2250 MT
Page 7
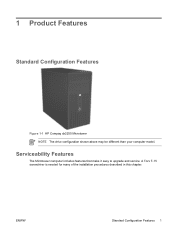
A Torx T-15 screwdriver is needed for many of the installation procedures described in this chapter. ENWW Standard Configuration Features 1 1 Product Features Standard Configuration Features Figure 1-1 HP Compaq dx2250 Microtower NOTE The drive configuration shown above may be different than your computer model. Serviceability Features The Microtower computer includes features that make it easy to upgrade and service.
A Torx T-15 screwdriver is needed for many of the installation procedures described in this chapter. ENWW Standard Configuration Features 1 1 Product Features Standard Configuration Features Figure 1-1 HP Compaq dx2250 Microtower NOTE The drive configuration shown above may be different than your computer model. Serviceability Features The Microtower computer includes features that make it easy to upgrade and service.

Hardware Reference Guide - dx2250 MT
Page 8
... an important safety feature. Do not plug telecommunications or telephone connectors into an AC power source, voltage is easily accessible at http://www.hp.com/ergo and on the Web at all of personal injury from electrical shock, rotating fans, hot surfaces, and/or fire: Disconnect ...power cord from the power source before touching. The grounding plug is located on the Documentation and Diagnostics CD. Warnings and Cautions Before performing upgrades be sure to carefully read the Safety & Comfort Guide. Do not disable the power cord grounding plug. To reduce the risk of serious...
... an important safety feature. Do not plug telecommunications or telephone connectors into an AC power source, voltage is easily accessible at http://www.hp.com/ergo and on the Web at all of personal injury from electrical shock, rotating fans, hot surfaces, and/or fire: Disconnect ...power cord from the power source before touching. The grounding plug is located on the Documentation and Diagnostics CD. Warnings and Cautions Before performing upgrades be sure to carefully read the Safety & Comfort Guide. Do not disable the power cord grounding plug. To reduce the risk of serious...

Hardware Reference Guide - dx2250 MT
Page 9
... into an active AC outlet. CAUTION Regardless of the computer. 3. Turn off the computer properly through the operating system, then turn off the unit (3). 2 Hardware Upgrades Removing the Computer Access Panel and Front Bezel 1. Figure 2-1 Removing the Power Cord and Access Panel NOTE To replace the access panel, reverse the removal...
... into an active AC outlet. CAUTION Regardless of the computer. 3. Turn off the computer properly through the operating system, then turn off the unit (3). 2 Hardware Upgrades Removing the Computer Access Panel and Front Bezel 1. Figure 2-1 Removing the Power Cord and Access Panel NOTE To replace the access panel, reverse the removal...

Hardware Reference Guide - dx2250 MT
Page 10
Figure 2-2 Removing the Front Bezel NOTE To replace the front bezel, insert the three hooks on the right side of the bezel into the rectangular holes on the chassis then rotate the bezel into place so that the catches on the three tabs on the left side of the bezel snap into place on the left side of the bezel (1) then rotate the bezel off the chassis (2), beginning with the left side then the right side. To remove the front bezel, pull outward on all three tabs on the chassis. 4 Chapter 2 Hardware Upgrades ENWW 5.
Figure 2-2 Removing the Front Bezel NOTE To replace the front bezel, insert the three hooks on the right side of the bezel into the rectangular holes on the chassis then rotate the bezel into place so that the catches on the three tabs on the left side of the bezel snap into place on the left side of the bezel (1) then rotate the bezel off the chassis (2), beginning with the left side then the right side. To remove the front bezel, pull outward on all three tabs on the chassis. 4 Chapter 2 Hardware Upgrades ENWW 5.

Hardware Reference Guide - dx2250 MT
Page 12
... Panel and Front Bezel on each side of the bezel blank (1) and pull the bezel blank inwards to remove it snaps into place. 6 Chapter 2 Hardware Upgrades ENWW Turn off the computer properly through the operating system, then turn off any external devices. 3. Disconnect the power cord from inside of the front...
... Panel and Front Bezel on each side of the bezel blank (1) and pull the bezel blank inwards to remove it snaps into place. 6 Chapter 2 Hardware Upgrades ENWW Turn off the computer properly through the operating system, then turn off any external devices. 3. Disconnect the power cord from inside of the front...

Hardware Reference Guide - dx2250 MT
Page 14
... the power cord from hot surfaces, allow the internal system components to cool before adding or removing memory modules. Remove the computer access panel. 4. When upgrading the memory, it is present may damage the module. 1. Static electricity can be careful not to touch any external devices. 2. When handling a memory module, be... touching. 5. Doing so may cause irreparable damage to the memory modules or system board. Locate the memory module sockets on the memory socket. 8 Chapter 2 Hardware Upgrades ENWW
... the power cord from hot surfaces, allow the internal system components to cool before adding or removing memory modules. Remove the computer access panel. 4. When upgrading the memory, it is present may damage the module. 1. Static electricity can be careful not to touch any external devices. 2. When handling a memory module, be... touching. 5. Doing so may cause irreparable damage to the memory modules or system board. Locate the memory module sockets on the memory socket. 8 Chapter 2 Hardware Upgrades ENWW

Hardware Reference Guide - dx2250 MT
Page 16
... Lock 5. Removable Shield Top shield Second shield Third shield Bottom shield Expansion Card Type PCI Express x1 PCI Express x16 PCI PCI 10 Chapter 2 Hardware Upgrades ENWW Turn off the computer properly through the operating system, then turn off any external devices. 3. Disconnect the power cord from the computer (2). If you...
... Lock 5. Removable Shield Top shield Second shield Third shield Bottom shield Expansion Card Type PCI Express x1 PCI Express x16 PCI PCI 10 Chapter 2 Hardware Upgrades ENWW Turn off the computer properly through the operating system, then turn off any external devices. 3. Disconnect the power cord from the computer (2). If you...

Hardware Reference Guide - dx2250 MT
Page 18
...procedure for primary hard drive 1 The external 3.5" option drive bay accommodates a diskette drive or a media card reader. 12 Chapter 2 Hardware Upgrades ENWW Locating Drive Positions NOTE The drive configuration shown below may be different than your computer model. Figure 2-8 Drive Positions 1 External 5.25...Internal 3.5-inch one-third height bay for optional secondary hard drive 5 Internal 3.5-inch one-third height bay for replacing or upgrading the storage drives. A Torx T-15 screwdriver is needed to five drives that may be installed in various configurations. Replacing or...
...procedure for primary hard drive 1 The external 3.5" option drive bay accommodates a diskette drive or a media card reader. 12 Chapter 2 Hardware Upgrades ENWW Locating Drive Positions NOTE The drive configuration shown below may be different than your computer model. Figure 2-8 Drive Positions 1 External 5.25...Internal 3.5-inch one-third height bay for optional secondary hard drive 5 Internal 3.5-inch one-third height bay for replacing or upgrading the storage drives. A Torx T-15 screwdriver is needed to five drives that may be installed in various configurations. Replacing or...

Hardware Reference Guide - dx2250 MT
Page 19
... power and data cables from the back of a new drive. Figure 2-9 Removing a 5.25" External Drive To install a drive, reverse the removal procedure. ENWW Replacing or Upgrading a Drive 13 Be sure to the bay (1) then slide the drive forward and out of the chassis. The guide screw helps secure the drive in...
... power and data cables from the back of a new drive. Figure 2-9 Removing a 5.25" External Drive To install a drive, reverse the removal procedure. ENWW Replacing or Upgrading a Drive 13 Be sure to the bay (1) then slide the drive forward and out of the chassis. The guide screw helps secure the drive in...


