
User Guide
Page 5
Table of contents 1 Product features ...1 HP Z display ...1 2 Safety and maintenance guidelines ...3 Important safety information ...3 Maintenance guidelines ...4 Cleaning the monitor ...4 Shipping the monitor ...4 3 Setting up the monitor ...5 Use caution when setting up the ... Color Matching file ...20 Installing the .INF and .ICM files ...20 Installing from the disc ...20 Downloading from the Web ...21 Using the On-Screen Display (OSD) menu ...22 Reconfiguring the Function buttons ...23 Using Picture-in-Picture (PIP) and Picture-beside-Picture (PBP 24 Using Auto-Sleep Mode ...24 Color...
Table of contents 1 Product features ...1 HP Z display ...1 2 Safety and maintenance guidelines ...3 Important safety information ...3 Maintenance guidelines ...4 Cleaning the monitor ...4 Shipping the monitor ...4 3 Setting up the monitor ...5 Use caution when setting up the ... Color Matching file ...20 Installing the .INF and .ICM files ...20 Installing from the disc ...20 Downloading from the Web ...21 Using the On-Screen Display (OSD) menu ...22 Reconfiguring the Function buttons ...23 Using Picture-in-Picture (PIP) and Picture-beside-Picture (PBP 24 Using Auto-Sleep Mode ...24 Color...

User Guide
Page 6
User ...25 Appendix A Technical specifications ...27 31.5"/80 cm model ...27 Recognizing preset display resolutions ...28 Entering user modes ...29 Appendix B Support and troubleshooting ...30 Solving common problems ...30 Button lockouts ...30 Product support ...31 Preparing to call technical support ...31 Appendix C LCD monitor quality and pixel policy 32 Appendix D Accessibility ...33 Supported assistive technologies ...33 Contacting support ...33 vi Color calibration - factory ...25 Color calibration -
User ...25 Appendix A Technical specifications ...27 31.5"/80 cm model ...27 Recognizing preset display resolutions ...28 Entering user modes ...29 Appendix B Support and troubleshooting ...30 Solving common problems ...30 Button lockouts ...30 Product support ...31 Preparing to call technical support ...31 Appendix C LCD monitor quality and pixel policy 32 Appendix D Accessibility ...33 Supported assistive technologies ...33 Contacting support ...33 vi Color calibration - factory ...25 Color calibration -
User Guide
Page 7
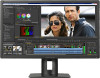
...calibrate to a standard or custom color space by specifying the color primaries, white point, gamma, and luminance (requires the separately purchased HP DreamColor Calibration Solution kit) ● Option to return to Factory Calibration settings or Previous Calibration settings to easily restore the monitor to the ... sitting or standing position, or moving from side-to-side ● Tilt capability ● Pivot capability to rotate the display from landscape to portrait ● Swivel and height adjustment capabilities ● Removable stand for flexible monitor panel mounting solutions ●...
...calibrate to a standard or custom color space by specifying the color primaries, white point, gamma, and luminance (requires the separately purchased HP DreamColor Calibration Solution kit) ● Option to return to Factory Calibration settings or Previous Calibration settings to easily restore the monitor to the ... sitting or standing position, or moving from side-to-side ● Tilt capability ● Pivot capability to rotate the display from landscape to portrait ● Swivel and height adjustment capabilities ● Removable stand for flexible monitor panel mounting solutions ●...
User Guide
Page 8
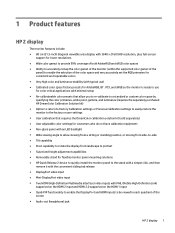
...placement of cables and cords ● On-Screen Display (OSD) adjustments in several languages for easy setup and screen optimization ● HP Display Assistant software for adjusting monitor settings and enabling theft deterrence features (refer to the HP Display Assistant User Guide included on the disc with ... ● Energy saver feature to meet requirements for reduced power consumption NOTE: For safety and regulatory information, refer to http://www.hp.com/support, and select your documentation kit. ● USB 3.0 hub with one is included, or in your country. Select Drivers...
...placement of cables and cords ● On-Screen Display (OSD) adjustments in several languages for easy setup and screen optimization ● HP Display Assistant software for adjusting monitor settings and enabling theft deterrence features (refer to the HP Display Assistant User Guide included on the disc with ... ● Energy saver feature to meet requirements for reduced power consumption NOTE: For safety and regulatory information, refer to http://www.hp.com/support, and select your documentation kit. ● USB 3.0 hub with one is included, or in your country. Select Drivers...
User Guide
Page 9
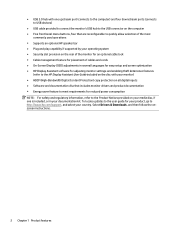
... workstation, setup, posture, and health and work habits for example, by attaching a 2-pin adapter. This guide is easily accessible at http://www.hp.com/ergo. Not all power cords for entertainment purposes. Use a power strip whose manufacturer offers a Damage Replacement Policy so you can replace the... the electrical outlet, grasp the cord by pulling the cord. Do not walk on a cord or cable. Arrange them . Consider placing the display in your safety, do not place anything to rest on dressers, bookcases, shelves, desks, speakers, chests, or carts may cause disturbing reflections ...
... workstation, setup, posture, and health and work habits for example, by attaching a 2-pin adapter. This guide is easily accessible at http://www.hp.com/ergo. Not all power cords for entertainment purposes. Use a power strip whose manufacturer offers a Damage Replacement Policy so you can replace the... the electrical outlet, grasp the cord by pulling the cord. Do not walk on a cord or cable. Arrange them . Consider placing the display in your safety, do not place anything to rest on dressers, bookcases, shelves, desks, speakers, chests, or carts may cause disturbing reflections ...

User Guide
Page 12
...upper lip of the recess in place. 6 Chapter 3 Setting up when the stand is locked in the back of the liquid crystals. The display uses the HP Quick Release 2 for easy mounting of the stand's mounting plate (2) into the recess until it snaps into place. 4. Pressure on a ...covered by a clean, dry cloth. 2. To mount the panel onto the stand: 1. The HP Quick Release 2 latch (3) pops up the monitor Installing the stand CAUTION: Do not touch the surface of the display, because the bezel might cause interfering reflections from surrounding light and bright surfaces. TIP: Consider ...
...upper lip of the recess in place. 6 Chapter 3 Setting up when the stand is locked in the back of the liquid crystals. The display uses the HP Quick Release 2 for easy mounting of the stand's mounting plate (2) into the recess until it snaps into place. 4. Pressure on a ...covered by a clean, dry cloth. 2. To mount the panel onto the stand: 1. The HP Quick Release 2 latch (3) pops up the monitor Installing the stand CAUTION: Do not touch the surface of the display, because the bezel might cause interfering reflections from surrounding light and bright surfaces. TIP: Consider ...

User Guide
Page 14
Before connecting the cables, route the cables through the On-Screen Display (OSD) by pressing the Menu button and selecting Input Control. ● Connect a DisplayPort cable to the DisplayPort connector on the source device. 8 Chapter 3 Setting up ...
Before connecting the cables, route the cables through the On-Screen Display (OSD) by pressing the Menu button and selecting Input Control. ● Connect a DisplayPort cable to the DisplayPort connector on the source device. 8 Chapter 3 Setting up ...

User Guide
Page 20
... exceed a height that is not in full height and full tilt position when pivoting, the bottom right corner of the OSD menu can install the HP Display Assistant software included on the software and documentation CD. If you adjust your eye height. NOTE: To view information on the front panel, select OSD...
... exceed a height that is not in full height and full tilt position when pivoting, the bottom right corner of the OSD menu can install the HP Display Assistant software included on the software and documentation CD. If you adjust your eye height. NOTE: To view information on the front panel, select OSD...

User Guide
Page 21
...NOTE: You can disable the power LED in use for five seconds. To disable this feature, press and hold the monitor power button for the display. Turning on the front of the monitor, and then select Power Control > Power LED > Off. Turning on , a Monitor Status message is ...2 consecutive hours of time. Monitors with a "burned-in image" are not covered under the HP warranty. * A prolonged period of time is displayed for a prolonged period of a static image. Press the power button on all LCD screens. When the monitor is the current active...
...NOTE: You can disable the power LED in use for five seconds. To disable this feature, press and hold the monitor power button for the display. Turning on the front of the monitor, and then select Power Control > Power LED > Off. Turning on , a Monitor Status message is ...2 consecutive hours of time. Monitors with a "burned-in image" are not covered under the HP warranty. * A prolonged period of time is displayed for a prolonged period of a static image. Press the power button on all LCD screens. When the monitor is the current active...

User Guide
Page 23
... up until the mounting plate clears the recess in the panel (2). 5. Slide the stand out of the monitor to unlock the HP Quick Release 2 (1). 4. Swing the bottom of the monitor display panel. NOTE: This apparatus is intended to install the panel on the latch near the bottom center of the recess (3). For...
... up until the mounting plate clears the recess in the panel (2). 5. Slide the stand out of the monitor to unlock the HP Quick Release 2 (1). 4. Swing the bottom of the monitor display panel. NOTE: This apparatus is intended to install the panel on the latch near the bottom center of the recess (3). For...

User Guide
Page 25
Locating the serial number and product number The serial number and product number are located on a label on the rear panel of the display head. Locating the serial number and product number 19 Installing a cable lock You can secure the monitor to read the label. NOTE: You may need to partially pivot the display head to a fixed object with an optional cable lock available from HP. You may need these numbers when contacting HP about the monitor model.
Locating the serial number and product number The serial number and product number are located on a label on the rear panel of the display head. Locating the serial number and product number 19 Installing a cable lock You can secure the monitor to read the label. NOTE: You may need to partially pivot the display head to a fixed object with an optional cable lock available from HP. You may need these numbers when contacting HP about the monitor model.
User Guide
Page 26
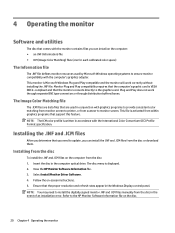
... Ensure that the monitor connects directly to ensure monitor compatibility with the computer's graphics adapter. NOTE: The ICM color profile is displayed. 2. Refer to printer, or from within graphics programs that support this feature. Insert the disc in conjunction with graphics programs to... provide consistent color matching from monitor screen to the HP Monitor Software Information file on -screen instructions. 5. Follow the on the disc. 20 Chapter 4 Operating the monitor 4 Operating ...
... Ensure that the monitor connects directly to ensure monitor compatibility with the computer's graphics adapter. NOTE: The ICM color profile is displayed. 2. Refer to printer, or from within graphics programs that support this feature. Insert the disc in conjunction with graphics programs to... provide consistent color matching from monitor screen to the HP Monitor Software Information file on -screen instructions. 5. Follow the on the disc. 20 Chapter 4 Operating the monitor 4 Operating ...
User Guide
Page 27
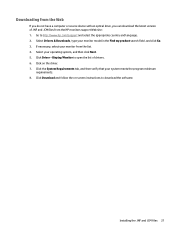
... Download and follow the on the driver. 7. Installing the .INF and .ICM files 21 Click Driver - Select your monitor from the HP monitors support Web site: 1. Display/Monitor to http://www.hp.com/support and select the appropriate country and language. 2. Downloading from the Web If you do not have a computer or source...
... Download and follow the on the driver. 7. Installing the .INF and .ICM files 21 Click Driver - Select your monitor from the HP monitors support Web site: 1. Display/Monitor to http://www.hp.com/support and select the appropriate country and language. 2. Downloading from the Web If you do not have a computer or source...

User Guide
Page 28
... the video input signal. Selects and adjusts the PIP image. Adjusts the power settings. The factory default is displayed. Displays important information about the monitor. The button labels are variable depending on -screen display (OSD) and Function button controls. Adjusts the on the menu or sub-menu that is not already on the...
... the video input signal. Selects and adjusts the PIP image. Adjusts the power settings. The factory default is displayed. Displays important information about the monitor. The button labels are variable depending on -screen display (OSD) and Function button controls. Adjusts the on the menu or sub-menu that is not already on the...

User Guide
Page 29
... Button 1 Menu 2 Information (Function button 1) 3 Next Active Input (Function button 2) 4 Color Control (Function button 3) 5 Luminance (Function button 4) 6 Power Function Opens the OSD (On-Screen Display) main menu. Switches the monitor's input source to open the OSD. 2. You can change the Function buttons from their default values so that when the... buttons are shown below. Press one of the five front bezel buttons activates the buttons and displays the icons above the buttons. You can not reconfigure the Menu button or the power button.
... Button 1 Menu 2 Information (Function button 1) 3 Next Active Input (Function button 2) 4 Color Control (Function button 3) 5 Luminance (Function button 4) 6 Power Function Opens the OSD (On-Screen Display) main menu. Switches the monitor's input source to open the OSD. 2. You can change the Function buttons from their default values so that when the... buttons are shown below. Press one of the five front bezel buttons activates the buttons and displays the icons above the buttons. You can not reconfigure the Menu button or the power button.

User Guide
Page 30
... input source to open the OSD. The monitor will scan the secondary inputs for the PIP/PBP picture. Using Auto-Sleep Mode The display supports an OSD (On-Screen Display) option called Auto-Sleep Mode that input for a valid signal input and use PIP or PBP: 1. The monitor will enter a reduced ... power mode (absence of the five front bezel buttons to activate the buttons, and then press the Menu button to the monitor. 2. You can be displayed in the quad-PIP mode. Press one of either horizontal or vertical sync signal). If you want to adjust the position of the PIP, select...
... input source to open the OSD. The monitor will scan the secondary inputs for the PIP/PBP picture. Using Auto-Sleep Mode The display supports an OSD (On-Screen Display) option called Auto-Sleep Mode that input for a valid signal input and use PIP or PBP: 1. The monitor will enter a reduced ... power mode (absence of the five front bezel buttons to activate the buttons, and then press the Menu button to the monitor. 2. You can be displayed in the quad-PIP mode. Press one of either horizontal or vertical sync signal). If you want to adjust the position of the PIP, select...

User Guide
Page 31
... Three standard color spaces, sRGB, AdobeRGB, and BT.709, are not calibrated and cannot be calibrated by the end user when the HP DreamColor Calibration Solution kit is possible for red, green, and blue) Color calibration - The user calibration software is printed and included in monitor... Solutions kit in the DreamColor Calibration Solution option kit, sold separately). Insert the monitor documentation disc into the host computer's CD/DVD player. 2. One color space can be calibrated and named at any time through the OnScreen Display. The RGB Adjust color selections are pre-...
... Three standard color spaces, sRGB, AdobeRGB, and BT.709, are not calibrated and cannot be calibrated by the end user when the HP DreamColor Calibration Solution kit is possible for red, green, and blue) Color calibration - The user calibration software is printed and included in monitor... Solutions kit in the DreamColor Calibration Solution option kit, sold separately). Insert the monitor documentation disc into the host computer's CD/DVD player. 2. One color space can be calibrated and named at any time through the OnScreen Display. The RGB Adjust color selections are pre-...

User Guide
Page 32
When calibration is complete, the values are saved in the calibration process. the application will ask questions about the user's environment and usage then will be asked to be re-applied at any time through the On-Screen Display. 26 Chapter 4 Operating the monitor the user will suggest settings to input all the variables intended for use in monitor memory. ● Wizard mode - The most recent calibration settings can be used. ● Expert mode -
When calibration is complete, the values are saved in the calibration process. the application will ask questions about the user's environment and usage then will be asked to be re-applied at any time through the On-Screen Display. 26 Chapter 4 Operating the monitor the user will suggest settings to input all the variables intended for use in monitor memory. ● Wizard mode - The most recent calibration settings can be used. ● Expert mode -

User Guide
Page 33
...the latest specifications or additional specifications on this product, go to http://www.hp.com/go/ quickspecs/ and search for your specific display model to find the model-specific QuickSpecs. 31.5"/80 cm model Display Type Viewable Image Size Maximum Weight (Unpacked) Dimensions (include base) Height ... One HDMI connector, one HDMI/MHL connector, one DisplayPort connector, one Mini-DisplayPort connector (cable inclusion varies by HP's component manufacturers; A Technical specifications NOTE: All specifications represent the typical specifications provided by region) 31.5"/80 cm model 27
...the latest specifications or additional specifications on this product, go to http://www.hp.com/go/ quickspecs/ and search for your specific display model to find the model-specific QuickSpecs. 31.5"/80 cm model Display Type Viewable Image Size Maximum Weight (Unpacked) Dimensions (include base) Height ... One HDMI connector, one HDMI/MHL connector, one DisplayPort connector, one Mini-DisplayPort connector (cable inclusion varies by HP's component manufacturers; A Technical specifications NOTE: All specifications represent the typical specifications provided by region) 31.5"/80 cm model 27

User Guide
Page 34
... Mode. 28 Appendix A Technical specifications This monitor automatically recognizes these preset modes and they will appear properly sized and centered on the screen. Recognizing preset display resolutions The display resolutions listed below are the most commonly used modes and are set as factory defaults.
... Mode. 28 Appendix A Technical specifications This monitor automatically recognizes these preset modes and they will appear properly sized and centered on the screen. Recognizing preset display resolutions The display resolutions listed below are the most commonly used modes and are set as factory defaults.

