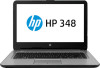
Start Here
Page 5
These new features include the following: ● Enhanced Start menu ● Shut down from the Start menu ● Improved search options ● Enhanced backup and recovery information For details about your computer. 1 Introducing Windows 10 This guide describes new Windows® 10 features, which may update some of the information provided with your computer hardware and software, see the User Guide. Select Drivers & Downloads, and then follow the on-screen instructions. 1 Go to http://www.hp.com/ support, and select your country.
These new features include the following: ● Enhanced Start menu ● Shut down from the Start menu ● Improved search options ● Enhanced backup and recovery information For details about your computer. 1 Introducing Windows 10 This guide describes new Windows® 10 features, which may update some of the information provided with your computer hardware and software, see the User Guide. Select Drivers & Downloads, and then follow the on-screen instructions. 1 Go to http://www.hp.com/ support, and select your country.
Start Here
Page 8
... you start HP Recovery Manager, you will finish burning the current DVD. If you ever need to recover the system, see Recovering using Windows tools. Do not use an external optical drive, it must be connected directly to a USB port on the computer; If you cannot create DVD media yourself, you can obtain recovery discs for the media that were installed at the factory and then configures the settings for the programs. HP Recovery media can also be used to...
... you start HP Recovery Manager, you will finish burning the current DVD. If you ever need to recover the system, see Recovering using Windows tools. Do not use an external optical drive, it must be connected directly to a USB port on the computer; If you cannot create DVD media yourself, you can obtain recovery discs for the media that were installed at the factory and then configures the settings for the programs. HP Recovery media can also be used to...
Start Here
Page 9
... driver, use the Reinstall drivers and/or applications option (select products only) of HP Recovery media or if the HP Recovery media does not work, you can obtain recovery media for recovering your system. If you have replaced the hard drive, you can use the Factory Reset option of expertise: IMPORTANT: Not all products. ● Windows offers several options for your system from support. For more information, see Removing the HP Recovery partition (select products only) on page 5. Recovering using HP Recovery Manager HP Recovery Manager software...
... driver, use the Reinstall drivers and/or applications option (select products only) of HP Recovery media or if the HP Recovery media does not work, you can obtain recovery media for recovering your system. If you have replaced the hard drive, you can use the Factory Reset option of expertise: IMPORTANT: Not all products. ● Windows offers several options for your system from support. For more information, see Removing the HP Recovery partition (select products only) on page 5. Recovering using HP Recovery Manager HP Recovery Manager software...
Start Here
Page 10
... used only if the hard drive is not working . See Changing the computer boot order on -screen instructions. To start the recovery process. ● System Recovery-Reinstalls the original operating system, and then configures the settings for the programs that was installed at the factory. ● Factory Reset-Restores the computer to retain. Select Troubleshoot from one of your system does not have an HP Recovery partition or if the hard drive is still working properly. 1. Select Recovery Manager...
... used only if the hard drive is not working . See Changing the computer boot order on -screen instructions. To start the recovery process. ● System Recovery-Reinstalls the original operating system, and then configures the settings for the programs that was installed at the factory. ● Factory Reset-Restores the computer to retain. Select Troubleshoot from one of your system does not have an HP Recovery partition or if the hard drive is still working properly. 1. Select Recovery Manager...
Start Here
Page 11
... a detachable keyboard, connect the keyboard to the keyboard dock before you remove the Recovery partition, create HP Recovery media; then select f9. - NOTE: The Remove Recovery Partition option is the order of devices listed in BIOS where the computer looks for boot options. or Turn on or restart the computer or tablet, quickly press esc, and then press f9 for startup information. Insert the HP Recovery media. 2. Removing the HP Recovery partition (select products only) HP Recovery Manager software allows you to remove the HP Recovery partition to remove the HP Recovery partition...
... a detachable keyboard, connect the keyboard to the keyboard dock before you remove the Recovery partition, create HP Recovery media; then select f9. - NOTE: The Remove Recovery Partition option is the order of devices listed in BIOS where the computer looks for boot options. or Turn on or restart the computer or tablet, quickly press esc, and then press f9 for startup information. Insert the HP Recovery media. 2. Removing the HP Recovery partition (select products only) HP Recovery Manager software allows you to remove the HP Recovery partition to remove the HP Recovery partition...

Maintenance and Service Guide
Page 8
... 36 Bottom cover ...40 Hard drive ...42 Solid-state drive (M.2) ...44 WLAN module ...45 Memory module ...47 RTC battery ...48 USB board ...49 Speakers ...50 Power button board ...51 Fingerprint reader board ...53 Heat sink assembly ...54 Fan ...57 System board ...59 TouchPad button board ...63 Display assembly ...64 Power connector cable ...70 7 Using Setup Utility (BIOS) in Windows 7 ...71 Starting Setup Utility (BIOS) ...71 Updating the BIOS ...71 Determining the BIOS version ...71 Downloading a BIOS update ...71 8 Using Setup Utility (BIOS) in Windows 10 ...73 Starting Setup Utility (BIOS...
... 36 Bottom cover ...40 Hard drive ...42 Solid-state drive (M.2) ...44 WLAN module ...45 Memory module ...47 RTC battery ...48 USB board ...49 Speakers ...50 Power button board ...51 Fingerprint reader board ...53 Heat sink assembly ...54 Fan ...57 System board ...59 TouchPad button board ...63 Display assembly ...64 Power connector cable ...70 7 Using Setup Utility (BIOS) in Windows 7 ...71 Starting Setup Utility (BIOS) ...71 Updating the BIOS ...71 Determining the BIOS version ...71 Downloading a BIOS update ...71 8 Using Setup Utility (BIOS) in Windows 10 ...73 Starting Setup Utility (BIOS...

Maintenance and Service Guide
Page 9
... 81 Using Windows tools ...82 Restore and recovery ...83 Recovering using HP Recovery Manager 83 What you need to know before you get started 83 Using the HP Recovery partition (select products only 84 Using HP Recovery media to recover 84 Changing the computer boot order 85 Removing the HP Recovery partition (select products only 85 11 Using HP PC Hardware Diagnostics (UEFI) ...87 Downloading HP PC Hardware Diagnostics (UEFI) to a USB device 87 12 Specifications ...89 Computer specifications ...89 35.6-cm (14.0-in) display specifications ...90 Hard drive specifications ...91 DVD±...
... 81 Using Windows tools ...82 Restore and recovery ...83 Recovering using HP Recovery Manager 83 What you need to know before you get started 83 Using the HP Recovery partition (select products only 84 Using HP Recovery media to recover 84 Changing the computer boot order 85 Removing the HP Recovery partition (select products only 85 11 Using HP PC Hardware Diagnostics (UEFI) ...87 Downloading HP PC Hardware Diagnostics (UEFI) to a USB device 87 12 Specifications ...89 Computer specifications ...89 35.6-cm (14.0-in) display specifications ...90 Hard drive specifications ...91 DVD±...

Maintenance and Service Guide
Page 21
... charging): ● Blinking amber: The battery has reached a low battery level. Connects an external VGA monitor or projector. (5) RJ-45 (network) jack/status lights (6) HDMI port (7) USB 3.0 or USB 3.0 charging (powered) port (select products only) ‒ or - Connects an optional video or audio device, such as a keyboard, mouse, external drive, printer, scanner or USB hub. ‒ or - Standard USB ports will not charge all USB devices or will charge using a low current. Enables airflow to 90 percent. ● Off: The battery is not charging. Connects an optional USB device...
... charging): ● Blinking amber: The battery has reached a low battery level. Connects an external VGA monitor or projector. (5) RJ-45 (network) jack/status lights (6) HDMI port (7) USB 3.0 or USB 3.0 charging (powered) port (select products only) ‒ or - Connects an optional video or audio device, such as a keyboard, mouse, external drive, printer, scanner or USB hub. ‒ or - Standard USB ports will not charge all USB devices or will charge using a low current. Enables airflow to 90 percent. ● Off: The battery is not charging. Connects an optional USB device...
Maintenance and Service Guide
Page 45
... this chapter should only be removed, replaced, or loosened when servicing Authorized Service Provider only parts. Component replacement procedures NOTE: Details about your computer, including model, serial number, product key, and length of each screw size and location during removal and replacement. 6 Removal and replacement procedures for details. NOTE: HP continually improves and changes product parts. Accessing these parts can damage the computer or void the warranty. See Labels on -screen instructions.
... this chapter should only be removed, replaced, or loosened when servicing Authorized Service Provider only parts. Component replacement procedures NOTE: Details about your computer, including model, serial number, product key, and length of each screw size and location during removal and replacement. 6 Removal and replacement procedures for details. NOTE: HP continually improves and changes product parts. Accessing these parts can damage the computer or void the warranty. See Labels on -screen instructions.

Maintenance and Service Guide
Page 81
... not insert, remove, connect, or disconnect any device, cable, or cord. Setup Utility (BIOS) includes settings for later BIOS versions, see Downloading a BIOS update on page 71. Start Setup Utility (BIOS). 2. Updating the BIOS Updated versions of system and extended memory. BIOS version information (also known as disk drives, display, keyboard, mouse, and printer). NOTE: Use extreme care when making changes in Setup Utility (BIOS). To check for the types of devices installed, the startup sequence of the computer, and the amount of Setup Utility (BIOS) may be accessed by...
... not insert, remove, connect, or disconnect any device, cable, or cord. Setup Utility (BIOS) includes settings for later BIOS versions, see Downloading a BIOS update on page 71. Start Setup Utility (BIOS). 2. Updating the BIOS Updated versions of system and extended memory. BIOS version information (also known as disk drives, display, keyboard, mouse, and printer). NOTE: Use extreme care when making changes in Setup Utility (BIOS). To check for the types of devices installed, the startup sequence of the computer, and the amount of Setup Utility (BIOS) may be accessed by...

Maintenance and Service Guide
Page 82
... installation by selecting Start > Computer. 2. NOTE: After a message on your hard drive. 72 Chapter 7 Using Setup Utility (BIOS) in Windows 7 If the update is downloaded. If no instructions are ready to the location on your hard drive where the BIOS update is more recent than the BIOS version currently installed on the screen reports a successful installation, you connect your computer to a network, consult the network administrator before installing any instructions that is later than your BIOS version, make...
... installation by selecting Start > Computer. 2. NOTE: After a message on your hard drive. 72 Chapter 7 Using Setup Utility (BIOS) in Windows 7 If the update is downloaded. If no instructions are ready to the location on your hard drive where the BIOS update is more recent than the BIOS version currently installed on the screen reports a successful installation, you connect your computer to a network, consult the network administrator before installing any instructions that is later than your BIOS version, make...

Maintenance and Service Guide
Page 84
... software updates, especially system BIOS updates. 1. You may need to access this information to locate the update later, after the download is complete. Make a note of the path to the location on your computer is downloaded. Follow any device, cable, or cord. Type support in the taskbar. 2. Using the hard drive path you recorded earlier, open the folder that appear on the screen after it to reliable external power using the AC adapter. Complete the installation...
... software updates, especially system BIOS updates. 1. You may need to access this information to locate the update later, after the download is complete. Make a note of the path to the location on your computer is downloaded. Follow any device, cable, or cord. Type support in the taskbar. 2. Using the hard drive path you recorded earlier, open the folder that appear on the screen after it to reliable external power using the AC adapter. Complete the installation...

Maintenance and Service Guide
Page 89
... recovery media 1. Recovering using HP Recovery partition (select models only) The HP Recovery partition (select models only), allows you can only be used if the hard drive is restarting, and then press f9 for Startup Menu" message is displayed on your computer did not ship with a recovery partition. 1. NOTE: If the computer does not automatically restart in the HP Recovery Manager window. 3. Follow the on -screen instructions. Changing the computer boot order To change the boot order for a recovery flash drive: Restore and recovery 79 Select Internal CD/DVD ROM Drive...
... recovery media 1. Recovering using HP Recovery partition (select models only) The HP Recovery partition (select models only), allows you can only be used if the hard drive is restarting, and then press f9 for Startup Menu" message is displayed on your computer did not ship with a recovery partition. 1. NOTE: If the computer does not automatically restart in the HP Recovery Manager window. 3. Follow the on -screen instructions. Changing the computer boot order To change the boot order for a recovery flash drive: Restore and recovery 79 Select Internal CD/DVD ROM Drive...

Maintenance and Service Guide
Page 93
... HP Recovery Manager, select Reinstall drivers and/or applications, and then follow the on-screen instructions. ● If you want to recover the Windows partition to original factory content, you can also find contact information from the HP Restore and recovery 83 Choose the method that was installed at the factory. For more information, see Removing the HP Recovery partition (select products only) on page 85. Recovering using HP Recovery Manager HP Recovery Manager software allows you to recover...
... HP Recovery Manager, select Reinstall drivers and/or applications, and then follow the on-screen instructions. ● If you want to recover the Windows partition to original factory content, you can also find contact information from the HP Restore and recovery 83 Choose the method that was installed at the factory. For more information, see Removing the HP Recovery partition (select products only) on page 85. Recovering using HP Recovery Manager HP Recovery Manager software allows you to recover...

Maintenance and Service Guide
Page 95
... to remove the HP Recovery partition: 1. Removing the HP Recovery partition (select products only) HP Recovery Manager software allows you to remove the HP Recovery partition to perform System Recovery or create HP recovery media from which is only available on products that support this function. Type recovery in the taskbar search box, and then select HP Recovery Manager. 2. For tablets without keyboards: ▲ Turn on or restart the tablet, and then quickly hold down button; NOTE: The Remove Recovery Partition option is the order of devices listed in BIOS...
... to remove the HP Recovery partition: 1. Removing the HP Recovery partition (select products only) HP Recovery Manager software allows you to remove the HP Recovery partition to perform System Recovery or create HP recovery media from which is only available on products that support this function. Type recovery in the taskbar search box, and then select HP Recovery Manager. 2. For tablets without keyboards: ▲ Turn on or restart the tablet, and then quickly hold down button; NOTE: The Remove Recovery Partition option is the order of devices listed in BIOS...

Maintenance and Service Guide
Page 108
... a firmware upgrade is necessary to 8 Kbit No Web camera 64 Kbit No Fingerprint reader 512 KByte flash Yes Does this memory? Select Drivers & Downloads, and then follow the on -screen instructions.) Bluetooth flash 2 Mbit No 802.11 WLAN EEPROM 4 Kbit to address a unique issue. administrator using a utility writing data to this memory and is typically data. enrollment in only specific ZBook and EliteBook models. populated by Intel setup utility...
... a firmware upgrade is necessary to 8 Kbit No Web camera 64 Kbit No Fingerprint reader 512 KByte flash Yes Does this memory? Select Drivers & Downloads, and then follow the on -screen instructions.) Bluetooth flash 2 Mbit No 802.11 WLAN EEPROM 4 Kbit to address a unique issue. administrator using a utility writing data to this memory and is typically data. enrollment in only specific ZBook and EliteBook models. populated by Intel setup utility...

Maintenance and Service Guide
Page 109
... relates to clearing the Real Time Clock (RTC) CMOS memory that can use either a pointing device (Touchscreen, TouchPad, pointing stick, or USB mouse) or the keyboard to display more functionality, such as size, serial number, data width, speed/timing, voltage, and thermal information. Questions and answers 99 d. Like the legacy BIOS, the UEFI BIOS provides an interface to display the system information and configuration settings and to factory settings)? A utility is...
... relates to clearing the Real Time Clock (RTC) CMOS memory that can use either a pointing device (Touchscreen, TouchPad, pointing stick, or USB mouse) or the keyboard to display more functionality, such as size, serial number, data width, speed/timing, voltage, and thermal information. Questions and answers 99 d. Like the legacy BIOS, the UEFI BIOS provides an interface to display the system information and configuration settings and to factory settings)? A utility is...

Maintenance and Service Guide
Page 117
... audio-out (headphone)/audio-in (microphone) combo jack, identifying 12 B backup tools 75 backups 81 battery illustrated 22 removing 32 battery light 11 battery lock, identifying 16 battery release latch 16 BIOS determining version 71, 73 downloading an update 71, 74 starting the Setup Utility 73 updating 71, 73 Bluetooth label 17 boot order changing 79, 85 bottom 17 bottom cover illustrated 22 removing 40 buttons left TouchPad 13 optical drive eject 10 power 15 right TouchPad 13 C cables, service considerations 27 caps lock light...
... audio-out (headphone)/audio-in (microphone) combo jack, identifying 12 B backup tools 75 backups 81 battery illustrated 22 removing 32 battery light 11 battery lock, identifying 16 battery release latch 16 BIOS determining version 71, 73 downloading an update 71, 74 starting the Setup Utility 73 updating 71, 73 Bluetooth label 17 boot order changing 79, 85 bottom 17 bottom cover illustrated 22 removing 40 buttons left TouchPad 13 optical drive eject 10 power 15 right TouchPad 13 C cables, service considerations 27 caps lock light...

Maintenance and Service Guide
Page 118
HP Recovery media creating 81 recovery 84 HP Recovery partition recovery 84 removing 85 HP Sure Start 100 I integrated webcam light, identifying 9 internal card product description 3, 7 internal microphones, identifying 9 J jacks audio-out (headphone)/audio-in (microphone) combo 12 network 11 RJ-45 (network) 11 K keyboard illustrated 20 product description 3, 7 L labels Bluetooth 17 regulatory 17 serial number 17 service 17 wireless certification 17 WLAN 17 latch, battery release 16 lights battery 11 caps lock 14 hard drive 10 power 10 RJ-45 (network) 11 webcam 9 M mass storage devices ...
HP Recovery media creating 81 recovery 84 HP Recovery partition recovery 84 removing 85 HP Sure Start 100 I integrated webcam light, identifying 9 internal card product description 3, 7 internal microphones, identifying 9 J jacks audio-out (headphone)/audio-in (microphone) combo 12 network 11 RJ-45 (network) 11 K keyboard illustrated 20 product description 3, 7 L labels Bluetooth 17 regulatory 17 serial number 17 service 17 wireless certification 17 WLAN 17 latch, battery release 16 lights battery 11 caps lock 14 hard drive 10 power 10 RJ-45 (network) 11 webcam 9 M mass storage devices ...

Maintenance and Service Guide
Page 119
...63 TouchPad zone identifying 13 transporting guidelines 29 traveling with the computer 17 U USB 3.0 charging (powered), identifying 11 USB 3.0 port 10, 12 USB board removing 49 spare part number 21 USB ports, identifying 10, 12 V vents, identifying 11, 16 video, product description 2, 6 W webcam 9 webcam light, identifying 9 webcam module illustrated 25 webcam, identifying 9 webcam/microphone cable illustrated 25 removing 38, 66, 67 webcam/microphone module removing 37, 66 Windows system restore point 81, 82 Windows Backup and Restore restoring files 78 Windows tools using 82 wireless antenna...
...63 TouchPad zone identifying 13 transporting guidelines 29 traveling with the computer 17 U USB 3.0 charging (powered), identifying 11 USB 3.0 port 10, 12 USB board removing 49 spare part number 21 USB ports, identifying 10, 12 V vents, identifying 11, 16 video, product description 2, 6 W webcam 9 webcam light, identifying 9 webcam module illustrated 25 webcam, identifying 9 webcam/microphone cable illustrated 25 removing 38, 66, 67 webcam/microphone module removing 37, 66 Windows system restore point 81, 82 Windows Backup and Restore restoring files 78 Windows tools using 82 wireless antenna...


