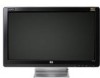
HP 2159m Monitor Back On After Turning It Off - 21 5 LCD
HP 2159m Monitor Back On After Turning It Off
Related Manual Pages


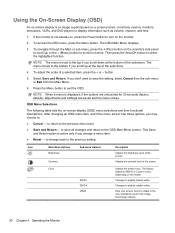
Similar Questions


Hp 2159m Monitor
The screen comes on for 2 seconds then goes to black , I shined a flashlight in the monitor and can ...
The screen comes on for 2 seconds then goes to black , I shined a flashlight in the monitor and can ...
(Posted by johnbaun41 11 years ago)

Screen Size For Hp Monitor Hp 2159m ( 21.5' Diagonal)
Can you please inform me the inside screen Dimensions for HP Monitor model HP 2159m (The diagonal is...
Can you please inform me the inside screen Dimensions for HP Monitor model HP 2159m (The diagonal is...
(Posted by drrao39 11 years ago)

Monitor Turns Off And On Every 3 Seconds...any Idea Wots Wrong Or Just Throw It
(Posted by davegipps123 12 years ago)

My Lcd Monitor Turns Off After Plugged Into Wall Outlet
(Posted by seiking03 13 years ago)