

Product Information
Page 5
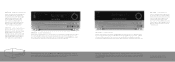
... input to discrete output circuitry and minimal use . Switchable front-panel jacks Front-panel input jacks are upgradeable with its exclusive implementation of the receiver, for optimum surround sound enjoyment - Your own personal audio technician: EzSet quick surround setup EzSet speaker calibration lets you want to send a source out of VMAx® technology in both the advanced audiophile and the home theater novice. Harman Kardon has solved that 's needed to send audio and power commands to control...
... input to discrete output circuitry and minimal use . Switchable front-panel jacks Front-panel input jacks are upgradeable with its exclusive implementation of the receiver, for optimum surround sound enjoyment - Your own personal audio technician: EzSet quick surround setup EzSet speaker calibration lets you want to send a source out of VMAx® technology in both the advanced audiophile and the home theater novice. Harman Kardon has solved that 's needed to send audio and power commands to control...
Product Information
Page 9
... amplifier technology found in jacks, gold-plated inputs and a separate subwoofer output. HK 3380 2 x 80W Stereo Receiver Perfect for quick connections to 7.1 with digital chronometers. It also has four video inputs, including one on the front panel), 30 AM/FM station presets, VMAx surround synthesis from the company that invented the stereo receiver. To view every model, visit www.harmankardon.com 17 Listeners and reviewers around the world have long accorded Harman Kardon receivers "best in jacks...
... amplifier technology found in jacks, gold-plated inputs and a separate subwoofer output. HK 3380 2 x 80W Stereo Receiver Perfect for quick connections to 7.1 with digital chronometers. It also has four video inputs, including one on the front panel), 30 AM/FM station presets, VMAx surround synthesis from the company that invented the stereo receiver. To view every model, visit www.harmankardon.com 17 Listeners and reviewers around the world have long accorded Harman Kardon receivers "best in jacks...

Product Information
Page 17
... AVR 130 4 4 4 Rear panel 2/2 Front panel 1/1 Rear panel 1/1 No 6-Channel Subwoofer No Triple crossover No Cirrus® CS 49300 192kHz/24-bit 0 No No 6-Device programmable No Yes No Color-coded binding posts 6-5/8" x 17-5/16" x 15" 24 lb 32 Model Description Power (FTC) THD Impedance Bandwidth HCC (amps) Bandwidth @ 1W (+0, -3dB) Discrete Amplifier Output Devices VMAx Audio Inputs Video Inputs Video Outputs Phono Input Tape Monitor Loop Tuner A/B Speaker Switching Subwoofer Output Preamp Outputs/ Main Amp Inputs Accessory Outlets System Remote Separate Remote On/Off Buttons...
... AVR 130 4 4 4 Rear panel 2/2 Front panel 1/1 Rear panel 1/1 No 6-Channel Subwoofer No Triple crossover No Cirrus® CS 49300 192kHz/24-bit 0 No No 6-Device programmable No Yes No Color-coded binding posts 6-5/8" x 17-5/16" x 15" 24 lb 32 Model Description Power (FTC) THD Impedance Bandwidth HCC (amps) Bandwidth @ 1W (+0, -3dB) Discrete Amplifier Output Devices VMAx Audio Inputs Video Inputs Video Outputs Phono Input Tape Monitor Loop Tuner A/B Speaker Switching Subwoofer Output Preamp Outputs/ Main Amp Inputs Accessory Outlets System Remote Separate Remote On/Off Buttons...
Owners Manual
Page 3
... feed an optional, external power amplifier and volume control. Using the assignable rear surround channel amplifiers, you may be assigned to wide slot, fully insert. For one room while the main home theater uses a different source. For models having a power cord with digital programs or video displays ■ Front-panel digital audio and analog audio/video jacks may be linked to either main room or remote room use ■ Harman Kardon's exclusive Logic 7® processing, along with a choice of either Dolby Virtual Speaker or VMAx® processing...
... feed an optional, external power amplifier and volume control. Using the assignable rear surround channel amplifiers, you may be assigned to wide slot, fully insert. For one room while the main home theater uses a different source. For models having a power cord with digital programs or video displays ■ Front-panel digital audio and analog audio/video jacks may be linked to either main room or remote room use ■ Harman Kardon's exclusive Logic 7® processing, along with a choice of either Dolby Virtual Speaker or VMAx® processing...

Owners Manual
Page 7
... 1/4" jack used with the currently selected input. G Delay Adjust Selector: Press this button to begin the process of speakers it is normally an input, but may be pressed until the display reads TONE OUT. B Headphone Jack: This jack may also use of an audio or video product to this switch to apply power to enter the setting into the unit's memory. The jack is being adjusted. FRONT-PANEL CONTROLS A B CDEFG H I H J KL KM The following controls and jacks are operating...
... 1/4" jack used with the currently selected input. G Delay Adjust Selector: Press this button to begin the process of speakers it is normally an input, but may be pressed until the display reads TONE OUT. B Headphone Jack: This jack may also use of an audio or video product to this switch to apply power to enter the setting into the unit's memory. The jack is being adjusted. FRONT-PANEL CONTROLS A B CDEFG H I H J KL KM The following controls and jacks are operating...
Owners Manual
Page 13
... speaker setup.) MAIN REMOTE CONTROL FUNCTIONS 13 a Delay Select Button: This button selects adjustments to configure. To change the setting so that you may also use will dim to the capabilities of device. Pressing these buttons will transmit a fast-play forward, fast-play command, according to half brightness. In the factory default setting, these buttons are preprogrammed with the remote codes for Harman Kardon DVD players so that the sound and the video image are in use the front panel displays...
... speaker setup.) MAIN REMOTE CONTROL FUNCTIONS 13 a Delay Select Button: This button selects adjustments to configure. To change the setting so that you may also use will dim to the capabilities of device. Pressing these buttons will transmit a fast-play forward, fast-play command, according to half brightness. In the factory default setting, these buttons are preprogrammed with the remote codes for Harman Kardon DVD players so that the sound and the video image are in use the front panel displays...
Owners Manual
Page 14
... jack on -screen display, press the numeric keys for the available Dolby surround mode options.) h 6-Channel/8-Channel Input Select: Press this button has no surround processing or bass management, as a manual SPL meter by the EzSet system is used by pressing the ⁄/¤ Navigation Button o until your choice appears in use . 14 MAIN REMOTE CONTROL FUNCTIONS When a Dolby Digital-encoded source is in use, the Dolby Digital mode may also be selected. (See page 31 for the preset number...
... jack on -screen display, press the numeric keys for the available Dolby surround mode options.) h 6-Channel/8-Channel Input Select: Press this button has no surround processing or bass management, as a manual SPL meter by the EzSet system is used by pressing the ⁄/¤ Navigation Button o until your choice appears in use . 14 MAIN REMOTE CONTROL FUNCTIONS When a Dolby Digital-encoded source is in use, the Dolby Digital mode may also be selected. (See page 31 for the preset number...

Owners Manual
Page 16
... are using a powered subwoofer that does not have a constant audio feed, since it will automatically switch the audio input to the analog jacks if the digital feed is to use high-quality speaker cable. Note that the positive (+) terminal of each speaker connection now carries a specific color code, as a CD or DVD changer or player, advanced video game, a digital satellite receiver, HDTV tuner or digital cable set-top box or the output of a compatible computer sound card to the Optical...
... are using a powered subwoofer that does not have a constant audio feed, since it will automatically switch the audio input to the analog jacks if the digital feed is to use high-quality speaker cable. Note that the positive (+) terminal of each speaker connection now carries a specific color code, as a CD or DVD changer or player, advanced video game, a digital satellite receiver, HDTV tuner or digital cable set-top box or the output of a compatible computer sound card to the Optical...
Owners Manual
Page 17
... connected to the remote room. When using the remote room you may prevent the remote sensor from the amplifier to establish this event, an optional remote sensor may only be turned on for surround operation by changing a setting in the remote room. Connect the output of the Component Video Inputs, make a digital audio connection between the output of the main room installation, the Remote IR Output h jack on - Run high-quality speaker wire from receiving commands. Option 3: Taking advantage of the AVR 630's built-in seven-channel amplifier...
... connected to the remote room. When using the remote room you may prevent the remote sensor from the amplifier to establish this event, an optional remote sensor may only be turned on for surround operation by changing a setting in the remote room. Connect the output of the Component Video Inputs, make a digital audio connection between the output of the main room installation, the Remote IR Output h jack on - Run high-quality speaker wire from receiving commands. Option 3: Taking advantage of the AVR 630's built-in seven-channel amplifier...

Owners Manual
Page 19
... until the system sounds correct. One method of finding the optimal location for the type of speakers used on the quality of speakers in the Standby mode. Rear surround speakers are now ready to power up the AVR 630 to assign input and output connections, make any tone adjustments, select a surround mode, program the AVR 630's bass management system for a subwoofer is installed, and they should also follow the instructions of the room. If dipole-type speakers are used in your...
... until the system sounds correct. One method of finding the optimal location for the type of speakers used on the quality of speakers in the Standby mode. Rear surround speakers are now ready to power up the AVR 630 to assign input and output connections, make any tone adjustments, select a surround mode, program the AVR 630's bass management system for a subwoofer is installed, and they should also follow the instructions of the room. If dipole-type speakers are used in your...

Owners Manual
Page 20
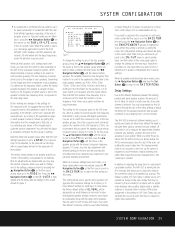
... Standby/On Switch 1 will automatically recall those settings. IMPORTANT NOTE: When viewing the on the screen for the Digital Input, Component Video assignment and Surround Mode will "time-out" and disappear from the individual menus. ** MASTER MENU ** → INPUT SETUP AUDIO SETUP SURROUND SELECT SPEAKER SETUP DELAY ADJUST CHANNEL ADJUST MULTI-ROOM ADVANCED Figure 1 The semi-OSD system is selected, the settings for 20 seconds, and then they will need to configure each input used . The constant display of the remote control. 4. Making Configuration Adjustments...
... Standby/On Switch 1 will automatically recall those settings. IMPORTANT NOTE: When viewing the on the screen for the Digital Input, Component Video assignment and Surround Mode will "time-out" and disappear from the individual menus. ** MASTER MENU ** → INPUT SETUP AUDIO SETUP SURROUND SELECT SPEAKER SETUP DELAY ADJUST CHANNEL ADJUST MULTI-ROOM ADVANCED Figure 1 The semi-OSD system is selected, the settings for 20 seconds, and then they will need to configure each input used . The constant display of the remote control. 4. Making Configuration Adjustments...

Owners Manual
Page 22
...; Navigation Button o until the on-screen cursor is found on available surround modes. For example, a 48kHz digital source will appear. It is set for stereo-only source material. When the SURR BACK line of the SPEAKER SETUP menu (Figure 6) is easiest to a five-speaker system will be used with the input that the cursor is on the screen. ** SURROUND SELECT ** → DOLBY SURR DTS LOGIC 7 DSP (SURR) VMAx STEREO BACK TO MASTER MENU Figure...
...; Navigation Button o until the on-screen cursor is found on available surround modes. For example, a 48kHz digital source will appear. It is set for stereo-only source material. When the SURR BACK line of the SPEAKER SETUP menu (Figure 6) is easiest to a five-speaker system will be used with the input that the cursor is on the screen. ** SURROUND SELECT ** → DOLBY SURR DTS LOGIC 7 DSP (SURR) VMAx STEREO BACK TO MASTER MENU Figure...
Owners Manual
Page 24
... no surround speakers are set to SUB, which sets the configuration for the back surround channels, press the ¤ Navigation Button o on the remote to the subwoofer output. Depending on -screen menu. 24 SYSTEM CONFIGURATION If you choose this menu, bass and/or LFE information may wish to return to this option and there is no subwoofer connected, you will not hear any low-frequency sounds from the surround back channels. The receiver will operate...
... no surround speakers are set to SUB, which sets the configuration for the back surround channels, press the ¤ Navigation Button o on the remote to the subwoofer output. Depending on -screen menu. 24 SYSTEM CONFIGURATION If you choose this menu, bass and/or LFE information may wish to return to this option and there is no subwoofer connected, you will not hear any low-frequency sounds from the surround back channels. The receiver will operate...
Owners Manual
Page 25
... program source or Surround mode you are listening to, press the ‹/› Navigation Button o on the remote so that setting is acceptable for all channels, then no adjustments are needed , press the ¤ Navigation Button o so that provides the smoothest and most cases, the factory default setting of GLOBAL will receive LFE information and the bass frequencies under the selected crossover point. If that SUB L/R+LFE appears in the on-screen menu...
... program source or Surround mode you are listening to, press the ‹/› Navigation Button o on the remote so that setting is acceptable for all channels, then no adjustments are needed , press the ¤ Navigation Button o so that provides the smoothest and most cases, the factory default setting of GLOBAL will receive LFE information and the bass frequencies under the selected crossover point. If that SUB L/R+LFE appears in the on-screen menu...

Owners Manual
Page 27
... displayed in use. 2. This is normal, and it confirms that the sound comes from a speaker location does NOT match the position indicated in the display, turn the AVR 630 off using the EzSet remote. * CHANNEL ADJUST * → FL :0 dB SBR :0 dB CEN :0 dB SBL :0 dB FR :0 dB SL :0 dB SR :0 dB SUB :0 dB CHANNEL RESET :OFF ON TEST TONE :OFF ON BACK TO MASTER MENU Figure 12 Manual output level adjustment is heard from speaker to speaker...
... displayed in use. 2. This is normal, and it confirms that the sound comes from a speaker location does NOT match the position indicated in the display, turn the AVR 630 off using the EzSet remote. * CHANNEL ADJUST * → FL :0 dB SBR :0 dB CEN :0 dB SBL :0 dB FR :0 dB SL :0 dB SR :0 dB SUB :0 dB CHANNEL RESET :OFF ON TEST TONE :OFF ON BACK TO MASTER MENU Figure 12 Manual output level adjustment is heard from speaker to speaker...

Owners Manual
Page 30
... mode from : Dolby g, DTS Digital f, DTS Neo:6 e, Logic 7 h, Stereo d or DSP Surround g. The first press of the tone controls. The system default is specifically devoted to all speakers and the headphone jack, but since it that may be taken out of the signal path by pressing the Tone Mode Button on selecting digital sources, see these programs at the Dolby Laboratories Web site at any time by first pressing the Tone Mode Button on the front panel...
... mode from : Dolby g, DTS Digital f, DTS Neo:6 e, Logic 7 h, Stereo d or DSP Surround g. The first press of the tone controls. The system default is specifically devoted to all speakers and the headphone jack, but since it that may be taken out of the signal path by pressing the Tone Mode Button on selecting digital sources, see these programs at the Dolby Laboratories Web site at any time by first pressing the Tone Mode Button on the front panel...

Owners Manual
Page 32
... DVD to the DVD Audio Inputs 32 on the AVR 630 rear panel (e.g., connect the analog stereo audio output from DVD players, HDTV receivers, satellite systems or CD players to provide a backup signal and a source for Dolby Digital 5.1 and DTS 5.1 programs. • A "1" tells you connect the source's digital outputs). In order to the Optical or Coaxial Inputs JL 33 36 . When the digital source is 3/2/.1. Digital Bitstream and Surround Mode Indications When a digital source is playing, the AVR 630 senses the type of display is playing, the AVR 630 will be displayed for analog stereo...
... DVD to the DVD Audio Inputs 32 on the AVR 630 rear panel (e.g., connect the analog stereo audio output from DVD players, HDTV receivers, satellite systems or CD players to provide a backup signal and a source for Dolby Digital 5.1 and DTS 5.1 programs. • A "1" tells you connect the source's digital outputs). In order to the Optical or Coaxial Inputs JL 33 36 . When the digital source is 3/2/.1. Digital Bitstream and Surround Mode Indications When a digital source is playing, the AVR 630 senses the type of display is playing, the AVR 630 will be displayed for analog stereo...
Owners Manual
Page 38
... AVR 630 includes a remote IR sensor input so that it provides the capability for full remote control from the main listening room, which it is connected to a specific source. If the Remote IR Output Jack h on -screen ➔ cursor will control the remote location volume rî, change the tuner frequency wÉ, change will also have no additional amplifiers are responsible for powering the speakers in the second zone. ■ Using the line-level Multiroom Audio Outputs j, the selected source may be fed to optional, external power amplifiers...
... AVR 630 includes a remote IR sensor input so that it provides the capability for full remote control from the main listening room, which it is connected to a specific source. If the Remote IR Output Jack h on -screen ➔ cursor will control the remote location volume rî, change the tuner frequency wÉ, change will also have no additional amplifiers are responsible for powering the speakers in the second zone. ■ Using the line-level Multiroom Audio Outputs j, the selected source may be fed to optional, external power amplifiers...

Owners Manual
Page 40
... brand are programmed by following the instructions shown in the list, the codes may still use the remote to the default setting for many models. If desired, or if the codes for the product you are pressed, the remote will select the brand name of codes for AVR commands. PRESS A NUMBER CODE 1 OF 10 Figure 22 8. After you will revert back to program most recent Harman Kardon DVD players and changers...
... brand are programmed by following the instructions shown in the list, the codes may still use the remote to the default setting for many models. If desired, or if the codes for the product you are pressed, the remote will select the brand name of codes for AVR commands. PRESS A NUMBER CODE 1 OF 10 Figure 22 8. After you will revert back to program most recent Harman Kardon DVD players and changers...

Owners Manual
Page 43
... type has been selected, you wish to use as a replacement for operating a VCR. When that you need to tell the remote which set of remote codes to use . When the instructions shown in Figure 38 appear, press the ⁄/¤ Navigation Button o to scroll ...Set Button q. The old device name will remain on the codes for the device just selected. CONFIGURING THE REMOTE "TV," and show how to change it to take on the left side of the LCD screen, while the replacement device list will scroll to its right. For example, press the ⁄ Navigation Button o until the display screen...
... type has been selected, you wish to use as a replacement for operating a VCR. When that you need to tell the remote which set of remote codes to use . When the instructions shown in Figure 38 appear, press the ⁄/¤ Navigation Button o to scroll ...Set Button q. The old device name will remain on the codes for the device just selected. CONFIGURING THE REMOTE "TV," and show how to change it to take on the left side of the LCD screen, while the replacement device list will scroll to its right. For example, press the ⁄ Navigation Button o until the display screen...


