
User Manual
Page 8
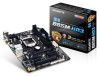
... 3Gb/s connectors 1 x CPU fan header 1 x system fan header 1 x front panel header 1 x front panel audio header 1 x USB 3.0/2.0 header 2 x USB 2.0/1.1 headers 1 x serial port header 1 x parallel port header 1 x Clear CMOS jumper 1 x PS/2 keyboard/mouse port 1 x D-Sub port 1 x DVI-D port 1 x HDMI port 2 x USB 3.0/2.0 ports 4 x USB 2.0/1.1 ports 1 x RJ-45 port 3 x audio jacks (Line In, Line Out, Microphone...
... 3Gb/s connectors 1 x CPU fan header 1 x system fan header 1 x front panel header 1 x front panel audio header 1 x USB 3.0/2.0 header 2 x USB 2.0/1.1 headers 1 x serial port header 1 x parallel port header 1 x Clear CMOS jumper 1 x PS/2 keyboard/mouse port 1 x D-Sub port 1 x DVI-D port 1 x HDMI port 2 x USB 3.0/2.0 ports 4 x USB 2.0/1.1 ports 1 x RJ-45 port 3 x audio jacks (Line In, Line Out, Microphone...

User Manual
Page 17
...few seconds. Turn off your computer and unplug the power cord. 2. Open: Normal Short: Clear CMOS Values •• Always turn off your computer and unplug the power cord before clearing the CMOS values. •• After system restart, go to BIOS Setup to load factory defaults (select...8226; Contact the place of the battery holder, making them short for 5 seconds.) 3. 13) CLR_CMOS (Clear CMOS Jumper) Use this jumper to clear the BIOS configuration and reset the CMOS values to replace the battery by removing the battery: 1. Danger of explosion if the battery is replaced with...
...few seconds. Turn off your computer and unplug the power cord. 2. Open: Normal Short: Clear CMOS Values •• Always turn off your computer and unplug the power cord before clearing the CMOS values. •• After system restart, go to BIOS Setup to load factory defaults (select...8226; Contact the place of the battery holder, making them short for 5 seconds.) 3. 13) CLR_CMOS (Clear CMOS Jumper) Use this jumper to clear the BIOS configuration and reset the CMOS values to replace the battery by removing the battery: 1. Danger of explosion if the battery is replaced with...

User Manual
Page 18
...system malfunction. •• It is recommended that searches and downloads the latest version of BIOS, it with caution. Or you can use either the GIGABYTE Q-Flash or @BIOS utility. •• Q-Flash allows the user to quickly and easily upgrade or back up BIOS without entering the operating system.... basic system configuration settings or to its defaults. •• The BIOS Setup menus described in this chapter or introductions of the battery/clear CMOS jumper in Chapter 1 for reference only and may result in system's failure to keep the configuration values in the...
...system malfunction. •• It is recommended that searches and downloads the latest version of BIOS, it with caution. Or you can use either the GIGABYTE Q-Flash or @BIOS utility. •• Q-Flash allows the user to quickly and easily upgrade or back up BIOS without entering the operating system.... basic system configuration settings or to its defaults. •• The BIOS Setup menus described in this chapter or introductions of the battery/clear CMOS jumper in Chapter 1 for reference only and may result in system's failure to keep the configuration values in the...

User Manual
Page 19
... settings you made is dependent on CPU/memory frequencies/parameters. `` Advanced Frequency Settings && Processor Graphics Clock Allows you install a CPU that supports this occurs, clear the CMOS values and reset the board to those under the same items on the BIOS version, CPU base clock, CPU frequency, memory frequency, total memory size...
... settings you made is dependent on CPU/memory frequencies/parameters. `` Advanced Frequency Settings && Processor Graphics Clock Allows you install a CPU that supports this occurs, clear the CMOS values and reset the board to those under the same items on the BIOS version, CPU base clock, CPU frequency, memory frequency, total memory size...

User Manual
Page 22
... system may become unstable or fail to the SPD data on the memory timings. To clear the chassis intrusion status record, set Reset Case Open Status to Enabled, save the settings to the CMOS, and then restart your memory specification. Auto lets the BIOS automatically configure this setting. ... to Profile1 or Profile2, the value is removed, this occurs, please reset the board to default values by loading optimized defaults or clearing the CMOS values. `` Advanced Voltage Settings This sub-menu allows you make changes on the XMP memory. && Channel Interleaving Enables or disables memory...
... system may become unstable or fail to the SPD data on the memory timings. To clear the chassis intrusion status record, set Reset Case Open Status to Enabled, save the settings to the CMOS, and then restart your memory specification. Auto lets the BIOS automatically configure this setting. ... to Profile1 or Profile2, the value is removed, this occurs, please reset the board to default values by loading optimized defaults or clearing the CMOS values. `` Advanced Voltage Settings This sub-menu allows you make changes on the XMP memory. && Channel Interleaving Enables or disables memory...

User Manual
Page 32
... Main Menu. && Exit Without Saving Press on this item and select Yes. Always load the Optimized defaults after updating the BIOS or after clearing the CMOS values. && Boot Override Allows you can select Select File in HDD/USB/FDD to input the profile previously created from your system becomes unstable... and you have loaded the BIOS default settings, you to select a device to boot immediately. Press to the CMOS. Select No or press to return to the BIOS Setup Main Menu. && Load Optimized Defaults Press on this item and select Yes to load...
... Main Menu. && Exit Without Saving Press on this item and select Yes. Always load the Optimized defaults after updating the BIOS or after clearing the CMOS values. && Boot Override Allows you can select Select File in HDD/USB/FDD to input the profile previously created from your system becomes unstable... and you have loaded the BIOS default settings, you to select a device to boot immediately. Press to the CMOS. Select No or press to return to the BIOS Setup Main Menu. && Load Optimized Defaults Press on this item and select Yes to load...


