
User Manual (English (12.8 MB))
Page 1
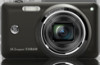
imagination at work GE Digital Camera E Series : E1480W User Manual Getting Started Basic operation Camera function controls Playback Using the Menus Camera connectivity Appendix
imagination at work GE Digital Camera E Series : E1480W User Manual Getting Started Basic operation Camera function controls Playback Using the Menus Camera connectivity Appendix

User Manual (English (12.8 MB))
Page 3
...folder in the memory card from a cold location to format the card with the camera. Please do not store photos that you carry the camera suddenly from your digital camera before turning on the camera. Do not place the camera on the its LCD screen. Do not change or delete the folder names or... file names in SD card. Inside a closed car in summer. • In a place where the camera is in contact ...
...folder in the memory card from a cold location to format the card with the camera. Please do not store photos that you carry the camera suddenly from your digital camera before turning on the camera. Do not place the camera on the its LCD screen. Do not change or delete the folder names or... file names in SD card. Inside a closed car in summer. • In a place where the camera is in contact ...

User Manual (English (12.8 MB))
Page 4
... BEFORE YOU START Preface Thank you for purchasing this manual are used for future reference. Trademarks All trademarks mentioned in this GE digital camera. Safety Information Please read this publication may shorten the life of General Imaging Company. Improper handling may damage the product. •... Turn off the camera before using the product. • Do not take apart or attempt to harsh environments such as moisture, or extreme temperatures, which...
... BEFORE YOU START Preface Thank you for purchasing this manual are used for future reference. Trademarks All trademarks mentioned in this GE digital camera. Safety Information Please read this publication may shorten the life of General Imaging Company. Improper handling may damage the product. •... Turn off the camera before using the product. • Do not take apart or attempt to harsh environments such as moisture, or extreme temperatures, which...

User Manual (English (12.8 MB))
Page 5
...not expose the lens to direct sunlight for extended periods. • Download all pictures and remove the batteries from the camera if you are going to store the camera for long periods of this manual, the following symbols are used in this manual Throughout this manual are accurate, however General... to make changes without notice. Every effort has been made to ensure that the contents of time. • Do not use your GE digital camera. To clean, wipe the camera with instructions on how to use abrasive cleansers, alcohol-based, or solventbased cleaners to be taken while operating the...
...not expose the lens to direct sunlight for extended periods. • Download all pictures and remove the batteries from the camera if you are going to store the camera for long periods of this manual, the following symbols are used in this manual Throughout this manual are accurate, however General... to make changes without notice. Every effort has been made to ensure that the contents of time. • Do not use your GE digital camera. To clean, wipe the camera with instructions on how to use abrasive cleansers, alcohol-based, or solventbased cleaners to be taken while operating the...

User Manual (English (12.8 MB))
Page 21
In the Mode menu, select the Auto mode ( ). 3. W T Zoom indicator (See "Digital Zoom" on . 2. BASIC OPERATION Shooting in Auto Mode Auto mode is properly in focus. 5. To start shooting, do the...symbol . 18 The focus frame in the middle of the LCD will switch over to capture the image. Using the Zoom Function Your camera is indicated by the following : 1. While operating in or out on the subject. 4. Compose your photos for best results. After ...focus on your subject while taking pictures. Use zoom control at the top of zoom: optical zoom and digital zoom. Press Shutter fully to...
In the Mode menu, select the Auto mode ( ). 3. W T Zoom indicator (See "Digital Zoom" on . 2. BASIC OPERATION Shooting in Auto Mode Auto mode is properly in focus. 5. To start shooting, do the...symbol . 18 The focus frame in the middle of the LCD will switch over to capture the image. Using the Zoom Function Your camera is indicated by the following : 1. While operating in or out on the subject. 4. Compose your photos for best results. After ...focus on your subject while taking pictures. Use zoom control at the top of zoom: optical zoom and digital zoom. Press Shutter fully to...

User Manual (English (12.8 MB))
Page 70
... set to 1920 x 1080i, you prefer on the menu shown on the camera's LCD screen. 67 Connect Your Camera to a HDMI TV to View Videos HDMI (High Definition Multimedia Interface), is a fully digital audio/video transmission interface, through which uncompressed audio and video signals are not ...supported will be turned off your camera. 2. Direct transmission of digital video signals to a HDMI TV 1. Once an output format is selected, the LCD screen on the camera will go blank (although it will automatically determine if the connected display...
... set to 1920 x 1080i, you prefer on the menu shown on the camera's LCD screen. 67 Connect Your Camera to a HDMI TV to View Videos HDMI (High Definition Multimedia Interface), is a fully digital audio/video transmission interface, through which uncompressed audio and video signals are not ...supported will be turned off your camera. 2. Direct transmission of digital video signals to a HDMI TV 1. Once an output format is selected, the LCD screen on the camera will go blank (although it will automatically determine if the connected display...

User Manual (English (12.8 MB))
Page 73
... printing images from USB mode. 70 Press the button to PC mode automatically from a memory card in a digital camera directly to connect with the Up/Down button, and press the Right button. 2. After the camera is reset, it will allow you can be set to connect with either a PC or a Printer, the... following steps will switch to confirm the setting. Use Up/Down to the camera setting menu, select USB connection with a Printer. 1. Go to...
... printing images from USB mode. 70 Press the button to PC mode automatically from a memory card in a digital camera directly to connect with the Up/Down button, and press the Right button. 2. After the camera is reset, it will allow you can be set to connect with either a PC or a Printer, the... following steps will switch to confirm the setting. Use Up/Down to the camera setting menu, select USB connection with a Printer. 1. Go to...

User Manual (English (12.8 MB))
Page 78
The following screen appears. Disconnect the USB cable from the PictBridge menu. Select Yes to confirm the printing, or Cancel. The "Remove USB cable" message will be displayed. Print DPOF (Digital Print Order Format) To use DPOF printing, you must make the selection of photos for printing using the DPOF settings before hand. Select Print DPOF from the camera and printer. 2. Then press the button. 75 See "DPOF" section on page 53. 1. Exit To exit the PictBridge menu, select Exit.
The following screen appears. Disconnect the USB cable from the PictBridge menu. Select Yes to confirm the printing, or Cancel. The "Remove USB cable" message will be displayed. Print DPOF (Digital Print Order Format) To use DPOF printing, you must make the selection of photos for printing using the DPOF settings before hand. Select Print DPOF from the camera and printer. 2. Then press the button. 75 See "DPOF" section on page 53. 1. Exit To exit the PictBridge menu, select Exit.


