Gateway T-1622 Display
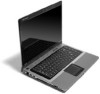
Related Manual Pages


Similar Questions

How To Diagnose Screen Display Problem
screen suddenly displayed fixed vertical lines and flashing horizontal lines all across. image inclu...
screen suddenly displayed fixed vertical lines and flashing horizontal lines all across. image inclu...
(Posted by playchessnow 10 years ago)

Why Is My Lcd Display So Dark?
Help! My c-140x LCD is not working properly. It works fine on startup, then goes very dark. It's not...
Help! My c-140x LCD is not working properly. It works fine on startup, then goes very dark. It's not...
(Posted by tibix158 11 years ago)

Display Device Error
MY LAPTOP BRIGHTNESS SUDDENLY DECREASE AND IT GIVE ME DISPLAY DEVICE ERROR .CAN YOU PLEASE TELL ME W...
MY LAPTOP BRIGHTNESS SUDDENLY DECREASE AND IT GIVE ME DISPLAY DEVICE ERROR .CAN YOU PLEASE TELL ME W...
(Posted by HUMAIS 11 years ago)