
Reference Guide
Page 5
www.gateway.com Changing power modes 56 Changing notebook power settings 58 Changing the power plan 58 Changing advanced settings 59 Chapter 6: Traveling with Your Notebook . . . 61 ... Chapter 7: Maintaining Your Notebook . . . . . 67 Caring for your notebook 68 Cleaning your notebook 69 Cleaning the exterior 69 Cleaning the keyboard 70 Cleaning the notebook screen 70 Maintaining the battery 70 Storing batteries 71 Cleaning CDs or DVDs 72 Recovering your system 72 Recovering pre-installed software and drivers 73 Using...
www.gateway.com Changing power modes 56 Changing notebook power settings 58 Changing the power plan 58 Changing advanced settings 59 Chapter 6: Traveling with Your Notebook . . . 61 ... Chapter 7: Maintaining Your Notebook . . . . . 67 Caring for your notebook 68 Cleaning your notebook 69 Cleaning the exterior 69 Cleaning the keyboard 70 Cleaning the notebook screen 70 Maintaining the battery 70 Storing batteries 71 Cleaning CDs or DVDs 72 Recovering your system 72 Recovering pre-installed software and drivers 73 Using...

Reference Guide
Page 20
... injury. Soft surfaces can avoid glare on the sides clear. Reducing eye strain Sunlight or bright indoor lighting should not reflect on the screen or shine directly into your eyes. CHAPTER 3: Setting Up and Getting Started Working safely and comfortably Before using your notebook, follow these ... long periods of time. You must keep your notebook may overheat, increasing the risk of obstructions, or your head vertical while looking at the screen. Every 10 or 15 minutes, look around the room, and try to focus on a footrest. • Although notebooks are sometimes called "...
... injury. Soft surfaces can avoid glare on the sides clear. Reducing eye strain Sunlight or bright indoor lighting should not reflect on the screen or shine directly into your eyes. CHAPTER 3: Setting Up and Getting Started Working safely and comfortably Before using your notebook, follow these ... long periods of time. You must keep your notebook may overheat, increasing the risk of obstructions, or your head vertical while looking at the screen. Every 10 or 15 minutes, look around the room, and try to focus on a footrest. • Although notebooks are sometimes called "...

Reference Guide
Page 26
... similar surface. CHAPTER 3: Setting Up and Getting Started Starting your notebook Warning Do not work with each device for the first time, follow the on-screen instructions to select the language and time zone and to harm your first user account. 4 Attach and turn on any peripheral devices, such as printers...
... similar surface. CHAPTER 3: Setting Up and Getting Started Starting your notebook Warning Do not work with each device for the first time, follow the on-screen instructions to select the language and time zone and to harm your first user account. 4 Attach and turn on any peripheral devices, such as printers...

Reference Guide
Page 35
Tip You can change this ... Tip For instructions on the screen. To... Move the pointer on how to adjust the double-click speed, pointer speed, right-hand or left...using the touchpad buttons. If you move it to the middle of the touchpad, then continue moving your finger. 29 www.gateway.com When you run out of space and need to shut down the notebook to connect a USB mouse. Move your online ...the touchpad to simulate clicking the left and right buttons below the touchpad to allow tapping on the screen moves in your online User Guide. Do this feature to select objects.
Tip You can change this ... Tip For instructions on the screen. To... Move the pointer on how to adjust the double-click speed, pointer speed, right-hand or left...using the touchpad buttons. If you move it to the middle of the touchpad, then continue moving your finger. 29 www.gateway.com When you run out of space and need to shut down the notebook to connect a USB mouse. Move your online ...the touchpad to simulate clicking the left and right buttons below the touchpad to allow tapping on the screen moves in your online User Guide. Do this feature to select objects.

Reference Guide
Page 36
.... This action is called double-clicking. This action is called clicking. Position the pointer over the object. Move an object on the screen. Position the pointer over the object. Position the pointer over the object. Access a shortcut menu or find more information about an object on... the screen. Quickly press and release the left button twice in rapid succession. Quickly press and release the right button once. CHAPTER 3: Setting Up...
.... This action is called double-clicking. This action is called clicking. Position the pointer over the object. Move an object on the screen. Position the pointer over the object. Position the pointer over the object. Access a shortcut menu or find more information about an object on... the screen. Quickly press and release the left button twice in rapid succession. Quickly press and release the right button once. CHAPTER 3: Setting Up...

Reference Guide
Page 37
...information, see "System key combinations" on the keyboard. For more information, see "System key combinations" on the keyboard. www.gateway.com Adjusting brightness To adjust screen brightness: • Use the increase brightness and decrease brightness keys on page 26. -ORClick (Start), All Programs, Accessories, ... see "Using the Windows Mobility Center" in your online User Guide. Slide the Volume control to the desired screen brightness. Tip For more information about the Windows Mobility Center, see "Using the Windows Mobility Center" in your online User Guide. ...
...information, see "System key combinations" on the keyboard. For more information, see "System key combinations" on the keyboard. www.gateway.com Adjusting brightness To adjust screen brightness: • Use the increase brightness and decrease brightness keys on page 26. -ORClick (Start), All Programs, Accessories, ... see "Using the Windows Mobility Center" in your online User Guide. Slide the Volume control to the desired screen brightness. Tip For more information about the Windows Mobility Center, see "Using the Windows Mobility Center" in your online User Guide. ...

Reference Guide
Page 53
... or connect your notebook to a stereo system using a standard S-Video cable. To view your notebook display on a television: 1 With your notebook off screen saver and Set the volume to if necessary. 4 Click OK. 5 Click Turn on to turn on external video by copyright protection software. Tip If you... are traveling internationally, you are finished giving the presentation, click Turn off to return to your standard notebook settings. www.gateway.com 3 Adjust properties such as Turn off , connect one end of a standard S-Video cable to the S-Video out jack on your notebook....
... or connect your notebook to a stereo system using a standard S-Video cable. To view your notebook display on a television: 1 With your notebook off screen saver and Set the volume to if necessary. 4 Click OK. 5 Click Turn on to turn on external video by copyright protection software. Tip If you... are traveling internationally, you are finished giving the presentation, click Turn off to return to your standard notebook settings. www.gateway.com 3 Adjust properties such as Turn off , connect one end of a standard S-Video cable to the S-Video out jack on your notebook....

Reference Guide
Page 60
...while you are using it starts and you must start the process over . 9 Open the LCD panel. For more information, see a startup screen, press F2. When the recalibration has finished, the message "Press [Esc] key to maintain the accuracy of the battery gauges. The BIOS ...Slide the battery lock to the locked position. 8 Turn your notebook. 2 As soon as it but the battery charge is interrupted, you see "Gateway contact information" on the Customer Care label. The entire process takes several hours. Important If, after completing this procedure, the battery charge indicator still...
...while you are using it starts and you must start the process over . 9 Open the LCD panel. For more information, see a startup screen, press F2. When the recalibration has finished, the message "Press [Esc] key to maintain the accuracy of the battery gauges. The BIOS ...Slide the battery lock to the locked position. 8 Turn your notebook. 2 As soon as it but the battery charge is interrupted, you see "Gateway contact information" on the Customer Care label. The entire process takes several hours. Important If, after completing this procedure, the battery charge indicator still...

Reference Guide
Page 66
To turn on the left side of the screen that you are not tied to change. Help For more information about changing the power management settings, click Start, then click Help and Support. The ...
To turn on the left side of the screen that you are not tied to change. Help For more information about changing the power management settings, click Start, then click Help and Support. The ...
Reference Guide
Page 70
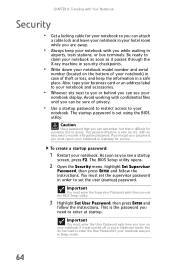
...to enter at startup. You do not need to your notebook. If you forget your password, you must set the supervisor password in order to Gateway for service. To create a startup password: 1 Restart your notebook if it was put in hibernate mode. You must return your notebook to ...waiting in airports, train stations, or bus terminals. Caution Use a password that is very secure, with confidential files until you can see a startup screen, press F2. This is set the user (startup) password. Be ready to enter the User Password if your notebook was turned off or put in...
...to enter at startup. You do not need to your notebook. If you forget your password, you must set the supervisor password in order to Gateway for service. To create a startup password: 1 Restart your notebook if it was put in hibernate mode. You must return your notebook to ...waiting in airports, train stations, or bus terminals. Caution Use a password that is very secure, with confidential files until you can see a startup screen, press F2. This is set the user (startup) password. Be ready to enter the User Password if your notebook was turned off or put in...

Reference Guide
Page 76
... Maintaining the battery The life span of a notebook battery is about recalibrating the battery, see "Recalibrating the battery" on the screen), and wipe the screen with fuel gauges (notebooks) should clean the keyboard occasionally by abrasive or ammonia-based glass cleaners. For more likely to 3... 7: Maintaining Your Notebook Cleaning the keyboard You should be caused by charge/discharge patterns. Cleaning the notebook screen Caution A notebook LCD screen is more information about 1.5 to be recalibrated once every 30 charges. Use a soft cloth and water to replace ...
... Maintaining the battery The life span of a notebook battery is about recalibrating the battery, see "Recalibrating the battery" on the screen), and wipe the screen with fuel gauges (notebooks) should clean the keyboard occasionally by abrasive or ammonia-based glass cleaners. For more likely to 3... 7: Maintaining Your Notebook Cleaning the keyboard You should be caused by charge/discharge patterns. Cleaning the notebook screen Caution A notebook LCD screen is more information about 1.5 to be recalibrated once every 30 charges. Use a soft cloth and water to replace ...

Reference Guide
Page 88
... are not solved by any of the other recovery options, you may need to recover its factory condition. b Click Recovery, then click Next. Gateway System Recovery starts, and the System Recovery Options dialog box opens. 4 Select a language and keyboard layout, then click Next. 5 Click the ...Click Next. 82 Caution A complete factory recovery deletes everything on your hard drive, back them up , repeatedly press F8 until the Recovery Options screen opens. OR - 2 If you can access important files on or restart your hard drive and re-install all factory software: 1 If you ...
... are not solved by any of the other recovery options, you may need to recover its factory condition. b Click Recovery, then click Next. Gateway System Recovery starts, and the System Recovery Options dialog box opens. 4 Select a language and keyboard layout, then click Next. 5 Click the ...Click Next. 82 Caution A complete factory recovery deletes everything on your hard drive, back them up , repeatedly press F8 until the Recovery Options screen opens. OR - 2 If you can access important files on or restart your hard drive and re-install all factory software: 1 If you ...

Reference Guide
Page 90
For instructions, see "Recovering pre-installed software and drivers using recovery discs" on -screen instructions. 5 After Windows is completely re-installed, use the software and driver recovery discs you created to recover your keyboard. A list of valid boot devices appears. 4 Press the arrow keys to boot from CD or DVD" appears, press any key on your computer's pre-installed software and device drivers. CHAPTER 7: Maintaining Your Notebook 3 When the prompt "Press any key to select the drive containing the Windows DVD, then press ENTER and follow the on page 77. 84
For instructions, see "Recovering pre-installed software and drivers using recovery discs" on -screen instructions. 5 After Windows is completely re-installed, use the software and driver recovery discs you created to recover your keyboard. A list of valid boot devices appears. 4 Press the arrow keys to boot from CD or DVD" appears, press any key on your computer's pre-installed software and device drivers. CHAPTER 7: Maintaining Your Notebook 3 When the prompt "Press any key to select the drive containing the Windows DVD, then press ENTER and follow the on page 77. 84

Reference Guide
Page 99
... DVD, close the DVD drive, then restart your notebook over. 20 Connect to boot from CD or DVD" appears, press any PC cards. 93 www.gateway.com 18 Replace the hard drive bay cover, then tighten the cover screw. 19 Insert the battery then turn your notebook. 22 When the prompt...
... DVD, close the DVD drive, then restart your notebook over. 20 Connect to boot from CD or DVD" appears, press any PC cards. 93 www.gateway.com 18 Replace the hard drive bay cover, then tighten the cover screw. 19 Insert the battery then turn your notebook. 22 When the prompt...

Reference Guide
Page 103
The message may help . Troubleshooting Troubleshooting topics are listed in a program, see the program's printed documentation or the online help Gateway Customer Care in diagnosing and fixing the problem. • If you added or removed peripheral devices, review the installation procedures ... • If an error message appears on page 119. Diskette drive (external) The diskette drive is covered under "Sound" on the screen, write down the exact message. www.gateway.com • If a peripheral device (such as a keyboard or mouse) does not work, make sure that your notebook. 97
The message may help . Troubleshooting Troubleshooting topics are listed in a program, see the program's printed documentation or the online help Gateway Customer Care in diagnosing and fixing the problem. • If you added or removed peripheral devices, review the installation procedures ... • If an error message appears on page 119. Diskette drive (external) The diskette drive is covered under "Sound" on the screen, write down the exact message. www.gateway.com • If a peripheral device (such as a keyboard or mouse) does not work, make sure that your notebook. 97

Reference Guide
Page 104
...read by the diskette drive. • Run Error checking on running Error checking, see a "Disk is not correct • Change the screen resolution from the diskette drive, then press ENTER. • Make sure that the diskette you are using the system keys or Windows Mobility ...again. • Not all diskettes are flawed and cannot be full. For more information about adjusting the brightness, see "Adjusting brightness" on changing the screen resolution, see a "Non-system disk," "NTLDR is missing," or "Disk error" error message • Eject the diskette from the Display Settings ...
...read by the diskette drive. • Run Error checking on running Error checking, see a "Disk is not correct • Change the screen resolution from the diskette drive, then press ENTER. • Make sure that the diskette you are using the system keys or Windows Mobility ...again. • Not all diskettes are flawed and cannot be full. For more information about adjusting the brightness, see "Adjusting brightness" on changing the screen resolution, see a "Non-system disk," "NTLDR is missing," or "Disk error" error message • Eject the diskette from the Display Settings ...

Reference Guide
Page 105
.... • Make sure that are trying to identify whether a repair or replacement is justified based on changing the display settings, see "Changing screen settings" in Sleep or Hibernate mode. For more information about adjusting the brightness, see "Identifying drive types" on page 31. • Make... label is facing up, then try again. • If you place a disc on page 31. • Change the display settings. Gateway's inspection standards keep these pixels are unacceptably numerous or dense on your notebook away from sources of pixels affected. Press FN + F4 several ...
.... • Make sure that are trying to identify whether a repair or replacement is justified based on changing the display settings, see "Changing screen settings" in Sleep or Hibernate mode. For more information about adjusting the brightness, see "Identifying drive types" on page 31. • Make... label is facing up, then try again. • If you place a disc on page 31. • Change the display settings. Gateway's inspection standards keep these pixels are unacceptably numerous or dense on your notebook away from sources of pixels affected. Press FN + F4 several ...

Reference Guide
Page 110
... any mail • Click the receive button in the keyboard, turn it upside down to drain it dries, you see "Using the keyboard" on the screen • The numeric keypad is not stuck. Let the keyboard dry before using your notebook People are pressing a letter key and a number appears on page...
... any mail • Click the receive button in the keyboard, turn it upside down to drain it dries, you see "Using the keyboard" on the screen • The numeric keypad is not stuck. Let the keyboard dry before using your notebook People are pressing a letter key and a number appears on page...

Reference Guide
Page 111
... outputs: • VGA-If your TV does not have a VGA port, but includes an S-Video port, connect the S-Video cable from the Gateway Accessory Store. Gateway recommends using high-quality video cables that can be made correctly for computer video display. • Quality of video cables-Poor quality or the... video source, type of connection used -You can lower video quality. 105 Other types of connection used , quality of video cables, display device screen resolution, size of TV, age of the TV, or the type of video cables can cause problems and affect the video quality. The display ...
... outputs: • VGA-If your TV does not have a VGA port, but includes an S-Video port, connect the S-Video cable from the Gateway Accessory Store. Gateway recommends using high-quality video cables that can be made correctly for computer video display. • Quality of video cables-Poor quality or the... video source, type of connection used -You can lower video quality. 105 Other types of connection used , quality of video cables, display device screen resolution, size of TV, age of the TV, or the type of video cables can cause problems and affect the video quality. The display ...

Reference Guide
Page 112
... device. • Age of the TV-Newer TVs usually have more advanced features, produce a better quality picture, and support higher screen resolutions. Help For more information about adjusting display settings, click Start, then click Help and Support. Some small display devices do not... without the odd/even interlacing. For a better picture on your online User Guide. CHAPTER 9: Troubleshooting • Screen resolution-By default, the notebook uses a screen resolution optimized for viewing and using the Media Center computer functions. For more information about changing the...
... device. • Age of the TV-Newer TVs usually have more advanced features, produce a better quality picture, and support higher screen resolutions. Help For more information about adjusting display settings, click Start, then click Help and Support. Some small display devices do not... without the odd/even interlacing. For a better picture on your online User Guide. CHAPTER 9: Troubleshooting • Screen resolution-By default, the notebook uses a screen resolution optimized for viewing and using the Media Center computer functions. For more information about changing the...


