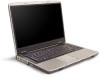
8511418 - Component Replacement Manual
Page 3
... © 2006 Gateway, Inc. All other countries. Never slide components over so the bottom is marked with notebook components, follow these screws cannot be removed), then remove the memory bay cover. Screw 8 Loosen the six memory bay cover screws (these guidelines: • Avoid static-causing surfaces such as carpeted floors, plastic, and packing...
8511418 - Component Replacement Manual
Page 4
... © 2006 Gateway, Inc. Technical Support See the label on your hardware guide for Customer Care Information. All rights reserved. in Step 9. 13 Replace the memory bay cover, then tighten the six cover screws. 14 Replace the keyboard screw. 15 Insert the battery, then turn your notebook over.... 16 Connect the power adapter, modem cable, and network cable, then turn on the bottom of Gateway, Inc. DVD bracket Replacing ...
8511418 - Component Replacement Manual
Page 7
... Batteries" in your online hardware guide. 9 Turn your notebook has the two optional keyboard screws, remove them. www.gateway.com © 2006 Gateway, Inc. ESD can permanently damage electrostatic discharge-sensitive components in the United States and other grounded object. Removing the old...in your notebook and unplug the AC adapter, modem cable, and network cable before replacing a component. Memory bay Wireless network bay Keyboard screw 7 Loosen the six memory bay cover screws and one wireless network bay screw (these guidelines: • Avoid static-causing surfaces ...
8511418 - Component Replacement Manual
Page 8
..., the modem cable, and the network cable, then turn your notebook over so the bottom is not twisted. 14 Pull the cover off the notebook. Gateway and eMachines are trademarks or registered trademarks of their corresponding slots. 15 Lift the back edge of the clip. Be careful to close the LCD.... Technical Support See the label on top of the keyboard cover and gently pry it up . 9 Replace the two optional keyboard screws. 10 Replace the memory bay cover and wireless network bay cover. 11 Replace the keyboard screw. 12 Insert the battery, then turn on the cover in several places until...
8511418 - Component Replacement Manual
Page 9
.... ESD can permanently damage electrostatic discharge-sensitive components in the United States and other grounded object. www.gateway.com © 2006 Gateway, Inc. Replacing the Memory Module Tools You need a small Phillips screwdriver to dangerous electrical voltages and moving parts, turn off your...so the bottom is marked with notebook components, follow these screws cannot be removed), then remove the memory bay cover. See your workbench or other countries. Gateway and eMachines are extremely sensitive to a bare metal part of your workbench or other grounded connection....
8511418 - Component Replacement Manual
Page 10
...important safety, regulatory, and legal information. 2 www.gateway.com © 2006 Gateway, Inc. Important Use only memory modules designed for your Gateway notebook. 11 Gently push the module down until the module tilts upward. 9 Pull the memory module out of the slot. See your notebook. ...8 If you are trademarks or registered trademarks of Gateway, Inc. Gateway and eMachines are removing a memory module, gently press outward on your hardware guide for Customer Care Information. All other countries. Replacing the Memory Module 10 Hold the new or replacement module at ...
8511369 - Gateway Notebook Hardware Reference
Page 3
...1: About this reference 1 About this guide 2 Accessing the online User Guide 2 Gateway contact information 2 Gateway model and serial number 2 Microsoft Certificate of Authenticity 3 For more information 3 Chapter 2: Checking Out Your Gateway Notebook 5 Identifying features 6 Front 6 Left 7 Right 8 Back 9 Bottom 10 ...drive 24 Identifying drive types 24 Inserting a CD or DVD 25 Using the memory card reader 25 Memory card types 25 Inserting a memory card 25 Using a memory card 26 Removing a memory card 26 Adding and removing a PC Card 26 Changing batteries 27 Recalibrating ...
8511369 - Gateway Notebook Hardware Reference
Page 4
Contents www.gateway.com Chapter 3: Maintaining and Upgrading Your Notebook 31 Preventing static electricity discharge 32 Adding or replacing memory 32 Replacing the DVD drive 35 Replacing the hard drive kit 38 Replacing the keyboard 40 Removing the keyboard 40 Installing the keyboard 45 Appendix A: Safety, Regulatory, and Legal Information 47 Index 59 ii
8511369 - Gateway Notebook Hardware Reference
Page 9
CHAPTER 2 Checking Out Your Gateway Notebook • Identifying features • Connecting the AC adapter • Connecting the dial-up modem • Connecting to a cable or DSL modem or to an ...; Using the EZ Pad touchpad • Adjusting the volume • Turning your wireless radio on or off • Using the DVD drive • Using the memory card reader • Adding and removing a PC Card • Changing batteries • Recalibrating the battery • Ordering accessories 5
8511369 - Gateway Notebook Hardware Reference
Page 12
...jack. Plug USB devices (such as a digital camcorder) into this slot. Plug a modem cable into this jack. For more information, see "Using the memory card reader" on page 13. 8 Plug an IEEE 1394 (also known as Firewire® or i.Link®) device (such as a diskette drive,... these ports. For more information, see "Connecting the dial-up modem" on page 25. CHAPTER 2: Checking Out Your Gateway Notebook Right www.gateway.com PC Card slot Memory card reader USB ports IEEE 1394 port Ethernet jack USB ports Modem jack Component Icon PC Card slot IEEE 1394 port...
8511369 - Gateway Notebook Hardware Reference
Page 14
... number. For more information, see "Changing batteries" on page 38. 10 CHAPTER 2: Checking Out Your Gateway Notebook Bottom www.gateway.com Battery latch Battery Memory bay Battery lock System label Hard drive bay Component Icon Battery latch Battery Memory bay Battery lock System label Hard drive bay Description Slide to unlock the battery. Provides...
8511369 - Gateway Notebook Hardware Reference
Page 29
... 1 Press the eject button on the label pointing towards your notebook. 25 You can use the memory card reader to transfer data between your notebook. www.gateway.com Inserting a CD or DVD [ Using the memory card reader Important When you want to play is closed. If the disc has two playable sides..., place the disc so the name of the side you place a single-sided disc in the tray, make sure that uses memory cards, ...
8511369 - Gateway Notebook Hardware Reference
Page 30
... hot-swapping, see the PC Card manufacturer's documentation for example, the E: drive), then double-click the file name. To remove a memory card: 1 Push the memory card into the PC Card slot, label-side up, until you can insert a PC Card while your notebook. 26 You do not...Adding and removing a PC Card Your notebook has a PC Card slot (also known as a PCMCIA card slot). CHAPTER 2: Checking Out Your Gateway Notebook www.gateway.com Using a memory card To access a file on a memory card: 1 Click Start, then click My Computer. 2 Double-click the drive letter (for further information.
8511369 - Gateway Notebook Hardware Reference
Page 33
...battery. When the recalibration has finished, the message "Press [Esc] key to maintain the accuracy of memory. Ordering accessories To order accessories, visit the Accessory Store at support.gateway.com. You should , try adding more information. 29 The BIOS Setup utility opens. 3 Open the...Exit Saving Changes and press ENTER. 6 Select Yes, then press ENTER. Memory Large programs, such as it but the battery charge is interrupted, you see a startup screen, press F2. www.gateway.com Recalibrating the battery Recalibrating the battery Important Do not interrupt the battery ...
8511369 - Gateway Notebook Hardware Reference
Page 35
CHAPTER 3 Maintaining and Upgrading Your Notebook • Preventing static electricity discharge • Adding or replacing memory • Replacing the DVD drive • Replacing the hard drive kit • Replacing the keyboard 31
8511369 - Gateway Notebook Hardware Reference
Page 36
... the information in any module can be placed in this section. Memory bay To add or replace memory modules: 1 Follow the guidelines under "Preventing static electricity discharge" on page 32. 2 Turn off your Gateway notebook. CHAPTER 3: Maintaining and Upgrading Your Notebook www.gateway.com Preventing static electricity discharge Warning To avoid exposure to dangerous...
8511369 - Gateway Notebook Hardware Reference
Page 37
... your notebook over so the bottom is marked with a K. www.gateway.com Tips & Tricks The keyboard screw hole is facing up, then remove the battery. Adding or replacing memory 4 Disconnect all screws may be removed). Be careful not to lift the memory bay cover, then remove it. Screw Screw Screw Screw Keyboard screw...
8511369 - Gateway Notebook Hardware Reference
Page 38
CHAPTER 3: Maintaining and Upgrading Your Notebook www.gateway.com 8 If you are removing a module, gently press outward on the clip at each end of the memory module until the module tilts upward. 9 Pull the memory module out of the slot. 34
8511369 - Gateway Notebook Hardware Reference
Page 39
.... Replacing the DVD drive Important Replace the DVD drive only with a similar drive obtained from Gateway. If your Gateway notebook. 10 Hold the new or replacement module at a 30-degree angle and slide it into the empty memory slot. For more information, see "Changing batteries" on page 32. 3 Turn off your notebook. 4 Disconnect...
8511369 - Gateway Notebook Hardware Reference
Page 40
... Turn your model, not all screws may be removed). CHAPTER 3: Maintaining and Upgrading Your Notebook www.gateway.com Tips & Tricks The keyboard screw hole is facing up. 36 Be careful not to lift the memory bay cover, then remove it in the following picture, then loosen the remaining six captive screws (these...