8513030 - Gateway Computer User Guide
Page 24
... Internet. To set up Internet connections are designed to be temporary connections to the Internet, dial-up telephone modem. This may have a built-in some cases ADSL over the Internet. With this type of service, your cost is the same regardless of the amount of time you access the Internet and...
... Internet. To set up Internet connections are designed to be temporary connections to the Internet, dial-up telephone modem. This may have a built-in some cases ADSL over the Internet. With this type of service, your cost is the same regardless of the amount of time you access the Internet and...
User Guide
Page 7
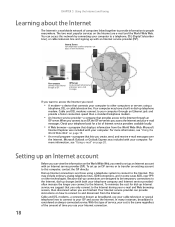
... 189 Selecting a place to work 190 Gathering the tools you need 190 Preventing static electricity discharge 191 Opening the case 192 Removing the side panel 192 Removing the front bezel 195 Closing the case 196 Replacing the side panel 196 Replacing the front bezel 197 Adding or replacing a CD, DVD, or diskette...
... 189 Selecting a place to work 190 Gathering the tools you need 190 Preventing static electricity discharge 191 Opening the case 192 Removing the side panel 192 Removing the front bezel 195 Closing the case 196 Replacing the side panel 196 Replacing the front bezel 197 Adding or replacing a CD, DVD, or diskette...

User Guide
Page 13
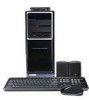
...page 24. Plug a microphone, speakers, or headphones into this jack. For more information, see "Learning about the Internet" on page 24. www.gateway.com 5 Plug USB (Universal Serial Bus) devices (such as Europe, the utility power is preset at 50 Hz. Thumbscrews Parallel port Ethernet (...network) jack Telephone jack Remove these ports. Plug a 10/100 Ethernet network cable into these screws before opening the case. The power supply should always be set to 230. PS/2 keyboard port USB ports Serial port Monitor ports Audio jacks Modem jack Plug...
...page 24. Plug a microphone, speakers, or headphones into this jack. For more information, see "Learning about the Internet" on page 24. www.gateway.com 5 Plug USB (Universal Serial Bus) devices (such as Europe, the utility power is preset at 50 Hz. Thumbscrews Parallel port Ethernet (...network) jack Telephone jack Remove these ports. Plug a 10/100 Ethernet network cable into these screws before opening the case. The power supply should always be set to 230. PS/2 keyboard port USB ports Serial port Monitor ports Audio jacks Modem jack Plug...
User Guide
Page 14
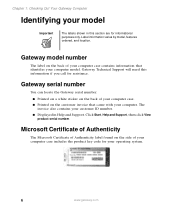
...need this section are for informational purposes only. Gateway serial number You can locate the Gateway serial number: ■ Printed on a white sticker on the back of your computer case. ■ Printed on the side of your computer case includes the product key code for assistance. ... The labels shown in Help and Support. Microsoft Certificate of Authenticity The Microsoft Certificate of your computer case contains information that came with your computer model. Gateway model number The label on the back of Authenticity label found on the customer invoice that identifies your...
...need this section are for informational purposes only. Gateway serial number You can locate the Gateway serial number: ■ Printed on a white sticker on the back of your computer case. ■ Printed on the side of your computer case includes the product key code for assistance. ... The labels shown in Help and Support. Microsoft Certificate of Authenticity The Microsoft Certificate of your computer case contains information that came with your computer model. Gateway model number The label on the back of Authenticity label found on the customer invoice that identifies your...

User Guide
Page 120
... programs, click Start, All Programs, Burn a CD or Data DVD, Nero Programs, then click the program you want . 112 www.gateway.com For more information, see the online help in case of files on your computer configuration. To access the user's guides, click Start, All Programs, Burn a CD or Data DVD, User... times, seek and access times, and more. ■ Nero Cover Designer to create labels for your CDs and DVDs, covers for your CD and DVD cases, booklets to include with your CDs and DVDs, and more. ■ Nero DriveSpeed to control CD or DVD drive read speed and spin down time...
... programs, click Start, All Programs, Burn a CD or Data DVD, Nero Programs, then click the program you want . 112 www.gateway.com For more information, see the online help in case of files on your computer configuration. To access the user's guides, click Start, All Programs, Burn a CD or Data DVD, User... times, seek and access times, and more. ■ Nero Cover Designer to create labels for your CDs and DVDs, covers for your CD and DVD cases, booklets to include with your CDs and DVDs, and more. ■ Nero DriveSpeed to control CD or DVD drive read speed and spin down time...

User Guide
Page 170
... become brittle and easy to break in cold temperatures and can erase data on top of it. Damage due to extreme temperature changes. The case, although strong, is not made to bump or drop your computer. As a general rule, your computer is not covered by your warranty. ■ ... packaging materials. ■ Keep your computer away from your computer, and do not put any liquid can clog the internal mechanisms. 162 www.gateway.com Magnetic fields can melt or warp in extremely expensive repairs that are comfortable for your computer To extend the life of your system: ■...
... become brittle and easy to break in cold temperatures and can erase data on top of it. Damage due to extreme temperature changes. The case, although strong, is not made to bump or drop your computer. As a general rule, your computer is not covered by your warranty. ■ ... packaging materials. ■ Keep your computer away from your computer, and do not put any liquid can clog the internal mechanisms. 162 www.gateway.com Magnetic fields can melt or warp in extremely expensive repairs that are comfortable for your computer To extend the life of your system: ■...
User Guide
Page 171
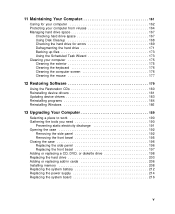
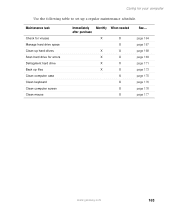
page 164 page 167 page 168 page 169 page 171 page 173 page 175 page 176 page 176 page 177 www.gateway.com 163 Caring for errors Defragment hard drive Back up a regular maintenance schedule. Maintenance task Check for viruses Manage hard drive space Clean up hard drives Scan hard drive for your computer Use the following table to set up files Clean computer case Clean keyboard Clean computer screen Clean mouse Immediately Monthly When needed after purchase X X X X X X X X X X X X X X X See...
page 164 page 167 page 168 page 169 page 171 page 173 page 175 page 176 page 176 page 177 www.gateway.com 163 Caring for errors Defragment hard drive Back up a regular maintenance schedule. Maintenance task Check for viruses Manage hard drive space Clean up hard drives Scan hard drive for your computer Use the following table to set up files Clean computer case Clean keyboard Clean computer screen Clean mouse Immediately Monthly When needed after purchase X X X X X X X X X X X X X X X See...
User Guide
Page 183
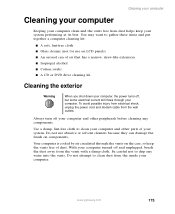
... a computer cleaning kit: ■ A soft, lint-free cloth ■ Glass cleaner (not for use abrasive or solvent cleaners because they can of your computer. www.gateway.com 175 Your computer is cooled by air circulated through your system. Use a damp, lint-free cloth to clean dust from dust helps keep the... cord and modem cable from the vents with a damp cloth. Do not use on LCD panels) ■ An aerosol can damage the finish on the case, so keep your system performing at its best.
... a computer cleaning kit: ■ A soft, lint-free cloth ■ Glass cleaner (not for use abrasive or solvent cleaners because they can of your computer. www.gateway.com 175 Your computer is cooled by air circulated through your system. Use a damp, lint-free cloth to clean dust from dust helps keep the... cord and modem cable from the vents with a damp cloth. Do not use on LCD panels) ■ An aerosol can damage the finish on the case, so keep your system performing at its best.
User Guide
Page 194
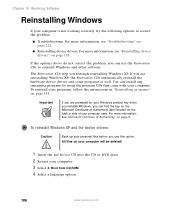
... label located on the back or side of Authenticity" on page 184. To reinstall Windows XP and the device drivers: Caution Back up your computer case. All files on your computer will be deleted! 1 Insert the red Drivers CD into the CD or DVD drive. 2 Restart your programs, follow the instructions... page 6. The Restoration CDs step you use the Restoration CDs to correct the problem: ■ Troubleshooting. Boot from CD-ROM. 4 Select a language option. 186 www.gateway.com You can use this option.
... label located on the back or side of Authenticity" on page 184. To reinstall Windows XP and the device drivers: Caution Back up your computer case. All files on your computer will be deleted! 1 Insert the red Drivers CD into the CD or DVD drive. 2 Restart your programs, follow the instructions... page 6. The Restoration CDs step you use the Restoration CDs to correct the problem: ■ Troubleshooting. Boot from CD-ROM. 4 Select a language option. 186 www.gateway.com You can use this option.

User Guide
Page 197
13 Upgrading Your Computer This chapter provides information about upgrading and replacing components in cards ■ Add memory ■ Change the battery ■ Replace system boards You must open the computer case to upgrade or replace components. Read this chapter to learn how to: ■ Open and close the computer case ■ Remove and install drives and components ■ Remove and install add-in your computer. If you are not comfortable with these procedures, get help from a more experienced computer user or computer service technician. 189
13 Upgrading Your Computer This chapter provides information about upgrading and replacing components in cards ■ Add memory ■ Change the battery ■ Replace system boards You must open the computer case to upgrade or replace components. Read this chapter to learn how to: ■ Open and close the computer case ■ Remove and install drives and components ■ Remove and install add-in your computer. If you are not comfortable with these procedures, get help from a more experienced computer user or computer service technician. 189
User Guide
Page 198
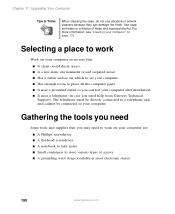
... to work on page 175. Gathering the tools you need Some tools and supplies that you may need to work Work on your computer in case you can damage the finish. For more information, see "Cleaning your computer" on your computer. Use soap and water or a dilution of... screws ■ A grounding wrist strap (available at most electronic stores) 190 www.gateway.com Chapter 11: Upgrading Your Computer Tips & Tricks When cleaning the case, do not use abrasive or solvent cleaners because they can test your computer after installation. ■ Is near a ...
... to work on page 175. Gathering the tools you need Some tools and supplies that you may need to work Work on your computer in case you can damage the finish. For more information, see "Cleaning your computer" on your computer. Use soap and water or a dilution of... screws ■ A grounding wrist strap (available at most electronic stores) 190 www.gateway.com Chapter 11: Upgrading Your Computer Tips & Tricks When cleaning the case, do not use abrasive or solvent cleaners because they can test your computer after installation. ■ Is near a ...
User Guide
Page 199
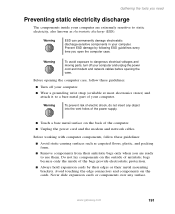
... their edges or their antistatic bags only when you open the computer case. Do not lay components on the outside of antistatic bags because only the inside your computer. www.gateway.com 191 Gathering the tools you need Preventing static electricity discharge The components...can permanently damage electrostatic discharge-sensitive components in your computer and unplug the power cord and modem and network cables before opening the computer case, follow these guidelines: ■ Turn off your computer. ■ Wear a grounding wrist strap (available at most electronics stores) and...
... their edges or their antistatic bags only when you open the computer case. Do not lay components on the outside of antistatic bags because only the inside your computer. www.gateway.com 191 Gathering the tools you need Preventing static electricity discharge The components...can permanently damage electrostatic discharge-sensitive components in your computer and unplug the power cord and modem and network cables before opening the computer case, follow these guidelines: ■ Turn off your computer. ■ Wear a grounding wrist strap (available at most electronics stores) and...
User Guide
Page 200
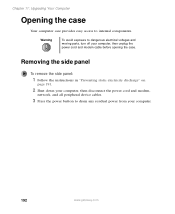
... drain any residual power from your computer, then unplug the power cord and modem cable before opening the case. Warning To avoid exposure to internal components. Chapter 11: Upgrading Your Computer Opening the case Your computer case provides easy access to dangerous electrical voltages and moving parts, turn off your computer. 192 www...
... drain any residual power from your computer, then unplug the power cord and modem cable before opening the case. Warning To avoid exposure to internal components. Chapter 11: Upgrading Your Computer Opening the case Your computer case provides easy access to dangerous electrical voltages and moving parts, turn off your computer. 192 www...
User Guide
Page 201
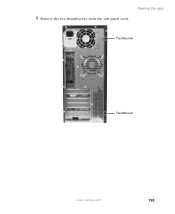
Opening the case Thumbscrew Thumbscrew www.gateway.com 193 4 Remove the two thumbscrews from the side panel cover.
Opening the case Thumbscrew Thumbscrew www.gateway.com 193 4 Remove the two thumbscrews from the side panel cover.

User Guide
Page 203
www.gateway.com 195 Removing the front bezel Opening the case To remove the front bezel: ■ Position the computer where you can grasp the front bottom edge of the bezel, then pull the bezel out and away from the case.
www.gateway.com 195 Removing the front bezel Opening the case To remove the front bezel: ■ Position the computer where you can grasp the front bottom edge of the bezel, then pull the bezel out and away from the case.
User Guide
Page 204
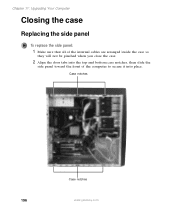
Chapter 11: Upgrading Your Computer Closing the case Replacing the side panel To replace the side panel: 1 Make sure that all of the internal cables are arranged inside the case so they will not be pinched when you close the case. 2 Align the door tabs into the top and bottom case notches, then slide the side panel toward the front of the computer to secure it into place. Case notches Case notches 196 www.gateway.com
Chapter 11: Upgrading Your Computer Closing the case Replacing the side panel To replace the side panel: 1 Make sure that all of the internal cables are arranged inside the case so they will not be pinched when you close the case. 2 Align the door tabs into the top and bottom case notches, then slide the side panel toward the front of the computer to secure it into place. Case notches Case notches 196 www.gateway.com

User Guide
Page 205
Replacing the front bezel To replace the front bezel: 1 Align the latch pins with the computer latch holes. Closing the case 2 Press the bezel firmly into place. www.gateway.com 197 3 Replace the two side panel thumbscrews. 4 Reconnect the cables and power cord.
Replacing the front bezel To replace the front bezel: 1 Align the latch pins with the computer latch holes. Closing the case 2 Press the bezel firmly into place. www.gateway.com 197 3 Replace the two side panel thumbscrews. 4 Reconnect the cables and power cord.

User Guide
Page 210
Chapter 11: Upgrading Your Computer 11 Reconnect the drive cables using your notes from Step 3. See the drive documentation for further instructions. 12 Close the case by following the instructions in "Closing the case" on the side closest to the power supply connection). The red-striped edge of the data ribbon cable indicates Pin 1 and corresponds with Pin 1 on the drive (typically on page 196. 202 www.gateway.com
Chapter 11: Upgrading Your Computer 11 Reconnect the drive cables using your notes from Step 3. See the drive documentation for further instructions. 12 Close the case by following the instructions in "Closing the case" on the side closest to the power supply connection). The red-striped edge of the data ribbon cable indicates Pin 1 and corresponds with Pin 1 on the drive (typically on page 196. 202 www.gateway.com
User Guide
Page 214
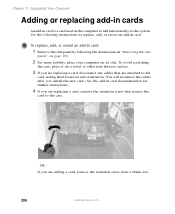
... system. Chapter 11: Upgrading Your Computer Adding or replacing add-in cards An add-in card is a card used in card. To avoid scratching the case, place it on its side. To replace, add, or reseat an add-in card: 1 Remove the side panel by following instructions to replace, add, or... stability, place your computer on a towel or other non-abrasive surface. 3 If you are replacing a card, disconnect any cables that secures the card to the case. - OR If you are adding a card, remove the retention screw from a blank slot. 206 www...
... system. Chapter 11: Upgrading Your Computer Adding or replacing add-in cards An add-in card is a card used in card. To avoid scratching the case, place it on its side. To replace, add, or reseat an add-in card: 1 Remove the side panel by following instructions to replace, add, or... stability, place your computer on a towel or other non-abrasive surface. 3 If you are replacing a card, disconnect any cables that secures the card to the case. - OR If you are adding a card, remove the retention screw from a blank slot. 206 www...
User Guide
Page 216
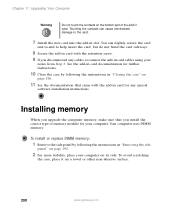
... card documentation for your computer. Chapter 11: Upgrading Your Computer Warning Do not touch the contacts on a towel or other non-abrasive surface. 208 www.gateway.com Your computer uses DIMM memory. To avoid scratching the case, place it on the bottom part of memory module for further instructions. 10 Close the...
... card documentation for your computer. Chapter 11: Upgrading Your Computer Warning Do not touch the contacts on a towel or other non-abrasive surface. 208 www.gateway.com Your computer uses DIMM memory. To avoid scratching the case, place it on the bottom part of memory module for further instructions. 10 Close the...


