
8512418 - Gateway Reference Guide
Page 4
Contents Creating discs 27 Using the memory card reader 28 Memory card types 28 Using a memory card 28 Using the diskette drive 29 Adjusting the volume 30 Configuring the audio jacks 31 Installing a printer, scanner, or other device 32 Chapter 4: Upgrading Your Computer 33 Preventing static electricity discharge 34 Opening the case 34 Removing the...
Contents Creating discs 27 Using the memory card reader 28 Memory card types 28 Using a memory card 28 Using the diskette drive 29 Adjusting the volume 30 Configuring the audio jacks 31 Installing a printer, scanner, or other device 32 Chapter 4: Upgrading Your Computer 33 Preventing static electricity discharge 34 Opening the case 34 Removing the...

8512418 - Gateway Reference Guide
Page 41
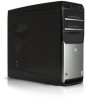
CHAPTER4 Upgrading Your Computer • Preventing static electricity discharge • Opening the case • Closing the case • Replacing the color panel • Installing memory • Adding or replacing an optical disc drive • Replacing the memory card reader • Adding or replacing a hard drive • Replacing the heat sink and processor • Adding or replacing an expansion card • Replacing the system battery • Replacing the system board 33
CHAPTER4 Upgrading Your Computer • Preventing static electricity discharge • Opening the case • Closing the case • Replacing the color panel • Installing memory • Adding or replacing an optical disc drive • Replacing the memory card reader • Adding or replacing a hard drive • Replacing the heat sink and processor • Adding or replacing an expansion card • Replacing the system battery • Replacing the system board 33

8512418 - Gateway Reference Guide
Page 49
... plastic tabs away from the sides of the memory module and remove it on a towel or other non-abrasive surface. 3 Find the memory module banks on its side. www.gateway.com Installing memory When you upgrade the computer memory, make sure that you install the correct type of the memory module bank. 41 To avoid scratching the...
... plastic tabs away from the sides of the memory module and remove it on a towel or other non-abrasive surface. 3 Find the memory module banks on its side. www.gateway.com Installing memory When you upgrade the computer memory, make sure that you install the correct type of the memory module bank. 41 To avoid scratching the...
8512418 - Gateway Reference Guide
Page 50
... Upgrading Your Computer 5 Align the notches on the new DIMM with the notches on your computer is secure, you hear a click. 6 Replace the side panel by following the instructions in your computer. The amount of the memory module should secure the memory module automatically. The tabs on the sides of memory... panel" on page 37. 7 Return your computer to its upright position. 8 Reconnect the cables and the power cord. 9 Turn on the memory module bank and press the module firmly into the bank. Windows starts and the Windows desktop appears. 10 Click (Start), right-click Computer, then...
... Upgrading Your Computer 5 Align the notches on the new DIMM with the notches on your computer is secure, you hear a click. 6 Replace the side panel by following the instructions in your computer. The amount of the memory module should secure the memory module automatically. The tabs on the sides of memory... panel" on page 37. 7 Return your computer to its upright position. 8 Reconnect the cables and the power cord. 9 Turn on the memory module bank and press the module firmly into the bank. Windows starts and the Windows desktop appears. 10 Click (Start), right-click Computer, then...
8512418 - Gateway Reference Guide
Page 62
CHAPTER 4: Upgrading Your Computer 9 Make sure that the positive (+) side of the new battery is facing up (usually the side that... then slide it easier to re-connect them later. 5 Remove the four screws that you wrote down in Step 3. 15 Save all memory modules by following the directions in "Adding or replacing an expansion card" on page 51. 3 Remove all your computer starts, press and... in "Removing the side panel" on page 35. 2 Remove all expansion cards by following the directions in "Installing memory" on your computer. 13 While your settings and exit the BIOS Setup utility.
CHAPTER 4: Upgrading Your Computer 9 Make sure that the positive (+) side of the new battery is facing up (usually the side that... then slide it easier to re-connect them later. 5 Remove the four screws that you wrote down in Step 3. 15 Save all memory modules by following the directions in "Adding or replacing an expansion card" on page 51. 3 Remove all your computer starts, press and... in "Removing the side panel" on page 35. 2 Remove all expansion cards by following the directions in "Installing memory" on your computer. 13 While your settings and exit the BIOS Setup utility.


