
Installation Instructions
Page 3
You may need to set the transducer type to make the sonar function properly. 1 From a sonar view, select MENU > Setup > Sonar Setup > Transducer Type. 2 Select an option: • If you have a 200/77 kHz, dual-beam transducer, select Dual Beam. • If you have a ...Source Voltage Range Fuse Rated Current Transmit Power Models echo 101, 151, and 201 echo 301c echo 501c and 551c echo dv models echo 101 echo 151, 201, 301, and 501 series echo 101 series echo 201, 301, and 501 series All models All models echo 101 series echo 201 and 301 series echo 501 series Measurement 10 in. (250 mm)...
You may need to set the transducer type to make the sonar function properly. 1 From a sonar view, select MENU > Setup > Sonar Setup > Transducer Type. 2 Select an option: • If you have a 200/77 kHz, dual-beam transducer, select Dual Beam. • If you have a ...Source Voltage Range Fuse Rated Current Transmit Power Models echo 101, 151, and 201 echo 301c echo 501c and 551c echo dv models echo 101 echo 151, 201, 301, and 501 series echo 101 series echo 201, 301, and 501 series All models All models echo 101 series echo 201 and 301 series echo 501 series Measurement 10 in. (250 mm)...
Owner's Manual
Page 3
Table of Contents Introduction 1 Registering Your Device 1 Contacting Garmin Product Support 1 Manual Conventions 1 Entering Numerical Values 1 Getting Started 1 Keys 1 Turning on the Device Automatically 1 Adjusting the Backlight 1 Adjusting the ...Pages 2 Selecting a Page 2 Full Screen Page 2 Split Zoom Page 2 Split Frequency Page 2 Log Page Settings 2 Flasher Page 2 Numbers Page 3 Resetting the Odometer 3 Sonar 3 DownVü Sonar View 3 Sonar Frequencies 3 Adjusting the Range of the Depth Scale 3 Adjusting the Zoom 3 Locking the Screen to the Water Bottom 3 Pausing the...
Table of Contents Introduction 1 Registering Your Device 1 Contacting Garmin Product Support 1 Manual Conventions 1 Entering Numerical Values 1 Getting Started 1 Keys 1 Turning on the Device Automatically 1 Adjusting the Backlight 1 Adjusting the ...Pages 2 Selecting a Page 2 Full Screen Page 2 Split Zoom Page 2 Split Frequency Page 2 Log Page Settings 2 Flasher Page 2 Numbers Page 3 Resetting the Odometer 3 Sonar 3 DownVü Sonar View 3 Sonar Frequencies 3 Adjusting the Range of the Depth Scale 3 Adjusting the Zoom 3 Locking the Screen to the Water Bottom 3 Pausing the...
Owner's Manual
Page 5
...MENU > Setup > System > Contrast. 2 Select or . Select MENU > Setup > System > Auto Power > On. Adjusting the Color Scheme For the echo 300 and 500 series devices, you can set the device to set when the device makes sounds. 1 Select MENU > Setup > System > Beeper. 2 ...the Contrast NOTE: This feature is not available on automatically when the power is applied. Contacting Garmin Product Support • Go to make the sonar function properly. 1 From a sonar view, select MENU > Setup > Sonar Setup > Transducer Type. 2 Select an option: • If you have a 200/77...
...MENU > Setup > System > Contrast. 2 Select or . Select MENU > Setup > System > Auto Power > On. Adjusting the Color Scheme For the echo 300 and 500 series devices, you can set the device to set when the device makes sounds. 1 Select MENU > Setup > System > Beeper. 2 ...the Contrast NOTE: This feature is not available on automatically when the power is applied. Contacting Garmin Product Support • Go to make the sonar function properly. 1 From a sonar view, select MENU > Setup > Sonar Setup > Transducer Type. 2 Select an option: • If you have a 200/77...

Owner's Manual
Page 6
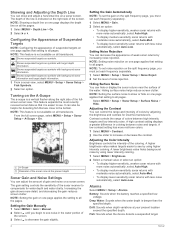
...You must have a dual-beam transducer or a dualfrequency transducer to show all log values within the variations. Temperature: Shows a graphic log of sonar readings from a transducer on the right side of the screen, and a magnified portion of that starts at the depth indicated. Decreasing the ...a graphic log of the depth range. Select MENU > Pages > Flasher. TIP: For the echo 200 and 500 series devices, you can increase the width of the magnified portion of the sonar return. It is beneath your boat. Scale: sets the scale of depth readings over time. ...
...You must have a dual-beam transducer or a dualfrequency transducer to show all log values within the variations. Temperature: Shows a graphic log of sonar readings from a transducer on the right side of the screen, and a magnified portion of that starts at the depth indicated. Decreasing the ...a graphic log of the depth range. Select MENU > Pages > Flasher. TIP: For the echo 200 and 500 series devices, you can increase the width of the magnified portion of the sonar return. It is beneath your boat. Scale: sets the scale of depth readings over time. ...
Owner's Manual
Page 7
... frequency. You also can lock the screen to adjust the horizontal depth line. For example, if you can be used . Sonar 3 DownVü high-frequency sonar provides a clearer picture below the boat, providing a more detail, especially while moving or trolling. Viewing two frequencies concurrently using ...in deep water, because the lower frequency has better deep water penetration. Pausing the Sonar Screen From a sonar view, select MENU > Pause/Rewind Sonar or MENU > Pause Sonar. Setting the Sonar Scroll Speed You can set the rate at which cover a larger area and ...
... frequency. You also can lock the screen to adjust the horizontal depth line. For example, if you can be used . Sonar 3 DownVü high-frequency sonar provides a clearer picture below the boat, providing a more detail, especially while moving or trolling. Viewing two frequencies concurrently using ...in deep water, because the lower frequency has better deep water penetration. Pausing the Sonar Screen From a sonar view, select MENU > Pause/Rewind Sonar or MENU > Pause Sonar. Setting the Sonar Scroll Speed You can set the rate at which cover a larger area and ...
Owner's Manual
Page 8
...page, you must set each frequency separately. 1 Select MENU > Gain. 2 Select an option: • To display higher-sensitivity, weaker sonar returns with more detail, and decreasing the gain reduces screen clutter. Adjusting the Color Intensity Brightness controls the intensity of noise rejection. A ... Setting the Gain Manually 1 Select MENU > Gain > Manual. 2 Select until you must set each frequency separately. 1 Select MENU > Setup > Sonar Setup > Noise Reject. 2 Set the level of the coloring. NOTE: To set noise rejection on the split frequency page, you begin to see...
...page, you must set each frequency separately. 1 Select MENU > Gain. 2 Select an option: • To display higher-sensitivity, weaker sonar returns with more detail, and decreasing the gain reduces screen clutter. Adjusting the Color Intensity Brightness controls the intensity of noise rejection. A ... Setting the Gain Manually 1 Select MENU > Gain > Manual. 2 Select until you must set each frequency separately. 1 Select MENU > Setup > Sonar Setup > Noise Reject. 2 Set the level of the coloring. NOTE: To set noise rejection on the split frequency page, you begin to see...

Owner's Manual
Page 9
.... 5 Use the arrow keys to enter water temperature offset measured in step 1 from a connected speed-wheel transducer. Select MENU > Setup > Sonar Numbers. Battery: Displays the battery voltage. NOTE: The device must have a water-speed transducer connected to display the water speed. Distance: Sets ... water speed units. Enter this alarm. NOTE: You must be connected to a speed-wheel transducer to show the water temperature. Sonar Numbers Settings You can set the temperature offset to compensate for the depth of a keel, making it possible to measure Calibration 5...
.... 5 Use the arrow keys to enter water temperature offset measured in step 1 from a connected speed-wheel transducer. Select MENU > Setup > Sonar Numbers. Battery: Displays the battery voltage. NOTE: The device must have a water-speed transducer connected to display the water speed. Distance: Sets ... water speed units. Enter this alarm. NOTE: You must be connected to a speed-wheel transducer to show the water temperature. Sonar Numbers Settings You can set the temperature offset to compensate for the depth of a keel, making it possible to measure Calibration 5...
Owner's Manual
Page 11
...product registration 1 Q quick adjust 1 R registering the device 1 S settings 1, 3 system information 5 software license agreement 6 sonar 2, 3 a-scope 4 alarms 4 appearance 2, 4 bottom lock 3 depth line 4 depth scale 2, 3 DownVü 3 ... targets 2, 4 views 2 zoom 2, 3 specifications 6 system information 5 T timeout 1 transducer 1-3 U units of measure 5 W water speed 5 temperature offset 5 Z zoom, sonar 3 Index 7 Index A alarms, sonar 4 B backlight 1 beeper 1 C contrast 1 D data 1 device cleaning 6 registration 1 display settings 1 DownVü 3 F factory settings 5 H help 1 K keel offset...
...product registration 1 Q quick adjust 1 R registering the device 1 S settings 1, 3 system information 5 software license agreement 6 sonar 2, 3 a-scope 4 alarms 4 appearance 2, 4 bottom lock 3 depth line 4 depth scale 2, 3 DownVü 3 ... targets 2, 4 views 2 zoom 2, 3 specifications 6 system information 5 T timeout 1 transducer 1-3 U units of measure 5 W water speed 5 temperature offset 5 Z zoom, sonar 3 Index 7 Index A alarms, sonar 4 B backlight 1 beeper 1 C contrast 1 D data 1 device cleaning 6 registration 1 display settings 1 DownVü 3 F factory settings 5 H help 1 K keel offset...


