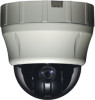
PT112NXT Specifications
Page 1
...; Auto & manual focus control options FEATURES • 128 preset positions w/alpha-numeric labels • 4 mimic tour, 8 swing, and 8 patrol functions • 8 privacy zones (spherical coordinates) • Auto-flip feature • Auto-parking (reverts to pre-programmed preset positions, swing or pattern if no action) • Power up memory (resumes to all pre-programmed functions upon power-up) • On-screen display w/pan/tilt, zoom, compass • Built-in alarm sensor...
...; Auto & manual focus control options FEATURES • 128 preset positions w/alpha-numeric labels • 4 mimic tour, 8 swing, and 8 patrol functions • 8 privacy zones (spherical coordinates) • Auto-flip feature • Auto-parking (reverts to pre-programmed preset positions, swing or pattern if no action) • Power up memory (resumes to all pre-programmed functions upon power-up) • On-screen display w/pan/tilt, zoom, compass • Built-in alarm sensor...

PT112NXT Specifications
Page 2
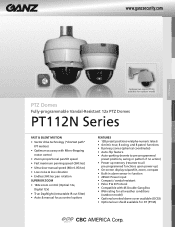
... Detailed View Models Range Pan/Tilt Speed Preset Pattern Swing Group Other Functions Communication Protocol Privacy Zone Alarm Input OSD General Power Dimensions Weight Operating Temp. Model DCS3. All Rights Reserved. 10/14 Model PT-SS Features Back Panel Connections & Settings Specifications Models Operation Signal System Image Device Effective Pixels Resolution S/N Ratio Zoom Focal Length HFOV Min. Indoor www.ganzsecurity.com Vandal-Resistant 12x PTZ Domes Mounting - IP66 All specifications...
... Detailed View Models Range Pan/Tilt Speed Preset Pattern Swing Group Other Functions Communication Protocol Privacy Zone Alarm Input OSD General Power Dimensions Weight Operating Temp. Model DCS3. All Rights Reserved. 10/14 Model PT-SS Features Back Panel Connections & Settings Specifications Models Operation Signal System Image Device Effective Pixels Resolution S/N Ratio Zoom Focal Length HFOV Min. Indoor www.ganzsecurity.com Vandal-Resistant 12x PTZ Domes Mounting - IP66 All specifications...

PT112N/ Manual
Page 2
... 5 Parts Name & Functions 7 ○2 E Installation A A DIP Switch Setup 8 Installation using Ceiling Mount Bracket 11 Installation using Wall Mount Bracket 12 Installation using Flush Mount Bracket 13 Cabling 14 ○3 E Operation A A Check Points before Operation 17 Preset and Pattern Function Pre-Check 17 Starting OSD Menu 18 Reserved Preset 18 Preset 19 Swing 19 Pattern 20 Group 21 Other Functions 22 OSD Display of Main Screen 23 ○4 E How to use OSD Menu A A General Rules of Key Operation for Menu 24...
... 5 Parts Name & Functions 7 ○2 E Installation A A DIP Switch Setup 8 Installation using Ceiling Mount Bracket 11 Installation using Wall Mount Bracket 12 Installation using Flush Mount Bracket 13 Cabling 14 ○3 E Operation A A Check Points before Operation 17 Preset and Pattern Function Pre-Check 17 Starting OSD Menu 18 Reserved Preset 18 Preset 19 Swing 19 Pattern 20 Group 21 Other Functions 22 OSD Display of Main Screen 23 ○4 E How to use OSD Menu A A General Rules of Key Operation for Menu 24...

PT112N/ Manual
Page 3
... be recorded and played back. z Privacy Masks are natural to intrude on . INTRODUCTION 1 Features ‰ Camera Specifications z CCD Sensor : 1/4" Super-HAD CCD z Zoom Magnification : × 12 Optical Zoom, × 12 Digital Zoom (Max × 144 Zoom) z Day & Night Function z Variable Focus Mode: Auto-Focus / Manual Focus / Semi-Auto Focus. This enables camera to automatically follow any trajectory preset by joystick as closely as a control protocol in Preset operation ‰ Advanced Pan/Tilt Functions z Max. 360°/sec high speed Pan/Tilt Motion z Using...
... be recorded and played back. z Privacy Masks are natural to intrude on . INTRODUCTION 1 Features ‰ Camera Specifications z CCD Sensor : 1/4" Super-HAD CCD z Zoom Magnification : × 12 Optical Zoom, × 12 Digital Zoom (Max × 144 Zoom) z Day & Night Function z Variable Focus Mode: Auto-Focus / Manual Focus / Semi-Auto Focus. This enables camera to automatically follow any trajectory preset by joystick as closely as a control protocol in Preset operation ‰ Advanced Pan/Tilt Functions z Max. 360°/sec high speed Pan/Tilt Motion z Using...

PT112N/ Manual
Page 4
.... INTRODUCTION 1 ‰ OSD (On Screen Display) Menu z OSD menu is decoupled from dust and rainstorms. Speed Dome Camera Instruction Manual 4 z To completely eliminate external electric noise and shock, alarm sensor Input is provided to display the status of camera and to "Reserved Preset" in this manual. ‰ IP66 (weather resistant) *(PT112N-XT model only). z If an external sensor is activated, camera can be set up easily and directly...
.... INTRODUCTION 1 ‰ OSD (On Screen Display) Menu z OSD menu is decoupled from dust and rainstorms. Speed Dome Camera Instruction Manual 4 z To completely eliminate external electric noise and shock, alarm sensor Input is provided to display the status of camera and to "Reserved Preset" in this manual. ‰ IP66 (weather resistant) *(PT112N-XT model only). z If an external sensor is activated, camera can be set up easily and directly...

PT112N/ Manual
Page 7
Move projecting part of Main Unit z Dome Cover z Surface Mount Bracket z Gasket (PT112N-XT model only) Do not remove protective vinyl from dome cover before finishing all U installation processes to ceiling. During installation, Power, Video, Communication, Alarm Input cables are connected on to surface mount bracket. U The surface mount bracket is used for installing either a ceiling mount or wall mount bracket. After installing fall-proof spring on Bracket , hang on the safety ring to Main Body hook. Camera must be...
Move projecting part of Main Unit z Dome Cover z Surface Mount Bracket z Gasket (PT112N-XT model only) Do not remove protective vinyl from dome cover before finishing all U installation processes to ceiling. During installation, Power, Video, Communication, Alarm Input cables are connected on to surface mount bracket. U The surface mount bracket is used for installing either a ceiling mount or wall mount bracket. After installing fall-proof spring on Bracket , hang on the safety ring to Main Body hook. Camera must be...

PT112N/ Manual
Page 8
Do not use 0 as camera ID. Examples shown below. Factory U U default of ID is 1~255. z The range of Camera ID is 1. Pin 1 2 3 4 5 6 7 8 ID 1 2 4 8 16 32 64 128 1 on off off off ...Speed Dome Camera Instruction Manual 8 z If you must match the camera ID with Cam ID setting of DVR or Controller. INSTALLATION 2 DIP Switch Setup Before you install the camera, you should set the DIP switches to control a certain camera, you want to configure the camera ID and communication protocol. ‰ Camera ID Setup ON ON 12345678 z The ID number of camera is set using a binary number...
Do not use 0 as camera ID. Examples shown below. Factory U U default of ID is 1~255. z The range of Camera ID is 1. Pin 1 2 3 4 5 6 7 8 ID 1 2 4 8 16 32 64 128 1 on off off off ...Speed Dome Camera Instruction Manual 8 z If you must match the camera ID with Cam ID setting of DVR or Controller. INSTALLATION 2 DIP Switch Setup Before you install the camera, you should set the DIP switches to control a certain camera, you want to configure the camera ID and communication protocol. ‰ Camera ID Setup ON ON 12345678 z The ID number of camera is set using a binary number...

PT112N/ Manual
Page 10
If you change one of following two conditional cases. Speed Dome Camera Instruction Manual 10 In this case, the terminal resistor of all cameras. The camera with the longest cable length is very long, the electrical signal will bind in a degradation of camera function. z Case1: Control cable between camera and controller is relatively long (1:1 connection) If communication cable is determined to be set to the 'ON' state. U Terminal...
If you change one of following two conditional cases. Speed Dome Camera Instruction Manual 10 In this case, the terminal resistor of all cameras. The camera with the longest cable length is very long, the electrical signal will bind in a degradation of camera function. z Case1: Control cable between camera and controller is relatively long (1:1 connection) If communication cable is determined to be set to the 'ON' state. U Terminal...

PT112N/ Manual
Page 11
Do not use surface mount bracket! ① Hang the camera on the ceiling Fasten ceiling mount bracket to ceiling with 3 screws. ② Wire cables to terminals and connect the terminals to main unit. INSTALLATION 2 Installation using the fall-proof spring. Speed Dome Camera Instruction Manual 11 assemble it using Ceiling Mount Bracket After putting the Gasket on the safety ring and ② Remove protective vinyl from dome cover.
Do not use surface mount bracket! ① Hang the camera on the ceiling Fasten ceiling mount bracket to ceiling with 3 screws. ② Wire cables to terminals and connect the terminals to main unit. INSTALLATION 2 Installation using the fall-proof spring. Speed Dome Camera Instruction Manual 11 assemble it using Ceiling Mount Bracket After putting the Gasket on the safety ring and ② Remove protective vinyl from dome cover.

PT112N/ Manual
Page 12
Do not use surface mount bracket! ③ Fasten main unit to main unit. Speed Dome Camera Instruction Manual 12 INSTALLATION 2 Installation using Wall Mount Bracket ① After putting the Gasket on the wall Fasten wall mount bracket to ceiling with 4 screws. ② Wire cables to terminals and connect the terminals to wall mount bracket with 4 ④ Remove protective vinyl from dome cover. screws.
Do not use surface mount bracket! ③ Fasten main unit to main unit. Speed Dome Camera Instruction Manual 12 INSTALLATION 2 Installation using Wall Mount Bracket ① After putting the Gasket on the wall Fasten wall mount bracket to ceiling with 4 screws. ② Wire cables to terminals and connect the terminals to wall mount bracket with 4 ④ Remove protective vinyl from dome cover. screws.

PT112N/ Manual
Page 13
Fasten with screws. . ③ Connect fall-proof spring to the ceiling with screws through the 3 holes on the bracket. ⑥ Cover assembly with bracket cover and turn it clockwise. Speed Dome Camera Instruction Manual 13 Assemble and fasten with flush mount bracket. INSTALLATION 2 Installation using Flush Mount Bracket Cut 3 holes in ceiling ② Align main body bracket with screws. ④ Put main body and bracket assembly into main hole. ⑤ Secure flush mount bracket to main body hook.
Fasten with screws. . ③ Connect fall-proof spring to the ceiling with screws through the 3 holes on the bracket. ⑥ Cover assembly with bracket cover and turn it clockwise. Speed Dome Camera Instruction Manual 13 Assemble and fasten with flush mount bracket. INSTALLATION 2 Installation using Flush Mount Bracket Cut 3 holes in ceiling ② Align main body bracket with screws. ④ Put main body and bracket assembly into main hole. ⑤ Secure flush mount bracket to main body hook.

PT112N/ Manual
Page 14
... settings): the RS-485 communication lines to keyboard and DVR. To control multiple cameras on the back of rated power carefully. DC power wiring to cameras should be kept as short as possible. ‰ RS-485 Communication z For PTZ control, connect the RS-485 line to cameras are connected in parallel as shown below. Speed Dome Camera Instruction Manual 14 Rated Power Input Voltage Range Current Consumption AC 24V (PT112N...
... settings): the RS-485 communication lines to keyboard and DVR. To control multiple cameras on the back of rated power carefully. DC power wiring to cameras should be kept as short as possible. ‰ RS-485 Communication z For PTZ control, connect the RS-485 line to cameras are connected in parallel as shown below. Speed Dome Camera Instruction Manual 14 Rated Power Input Voltage Range Current Consumption AC 24V (PT112N...

PT112N/ Manual
Page 17
... with preset numbers. OPERATION 3 Check Points before Operation z Before power is based on the standard Pelco® Controller. z Refer to that of the target camera. For more than 2 seconds. The camera ID can not be changed camera protocol by reading DIP switch of this manual. Preset and Pattern Function Pre-Check z Check controller or DVR preset and pattern functions in this manual is applied, please check the cables carefully. Speed Dome Camera Instruction Manual 17...
... with preset numbers. OPERATION 3 Check Points before Operation z Before power is based on the standard Pelco® Controller. z Refer to that of the target camera. For more than 2 seconds. The camera ID can not be changed camera protocol by reading DIP switch of this manual. Preset and Pattern Function Pre-Check z Check controller or DVR preset and pattern functions in this manual is applied, please check the cables carefully. Speed Dome Camera Instruction Manual 17...

PT112N/ Manual
Page 22
... (90°), zoom module camera will be set up independently for corresponding presets as soon as the camera (lens) passes through the top of tilt direction (90°), images will keep moving in the opposite tilt direction (180°) to a specific position automatically if operator doesn't operate the controller for each preset. Focus mode changes to resume the last action executed before power down. Note: the latest alarm input is...
... (90°), zoom module camera will be set up independently for corresponding presets as soon as the camera (lens) passes through the top of tilt direction (90°), images will keep moving in the opposite tilt direction (180°) to a specific position automatically if operator doesn't operate the controller for each preset. Focus mode changes to resume the last action executed before power down. Note: the latest alarm input is...

PT112N/ Manual
Page 24
... to factory default configuration. z System Initialize Initializes system configuration and sets all menu levels, to go to item in the menu, use Up/Down of the joystick in the Up/Down or Left/Right. z Dome Camera Setup Configure various functions of an item, use joystick in the controller. z To go into sub menu, press NEAR key. Speed Dome Camera Instruction Manual 24 z At all data to cancel values. Main Menu SPEED DOME CAMERA EXIT...
... to factory default configuration. z System Initialize Initializes system configuration and sets all menu levels, to go to item in the menu, use Up/Down of the joystick in the Up/Down or Left/Right. z Dome Camera Setup Configure various functions of an item, use joystick in the controller. z To go into sub menu, press NEAR key. Speed Dome Camera Instruction Manual 24 z At all data to cancel values. Main Menu SPEED DOME CAMERA EXIT...

PT112N/ Manual
Page 27
... preset is turned off. When set to enhance pictures. Speed Dome Camera Instruction Manual 27 zImage Flip [ON/OFF] Turn watching direction to ON/OFF. z Sharpness [0~3] Sets image sharpness to OFF, optical zoom function runs but zoom function stops at a preset. In Manual mode, Focus data for corresponding presets as soon as it arrives at the end of moving when camera gets vertical sight. HOW TO USE OSD MENU 4 Camera Setup ZOOM CAMERA SETUP FOCUS MODE SEMIAUTO DIGITAL ZOOM ON IMAGE...
... preset is turned off. When set to enhance pictures. Speed Dome Camera Instruction Manual 27 zImage Flip [ON/OFF] Turn watching direction to ON/OFF. z Sharpness [0~3] Sets image sharpness to OFF, optical zoom function runs but zoom function stops at a preset. In Manual mode, Focus data for corresponding presets as soon as it arrives at the end of moving when camera gets vertical sight. HOW TO USE OSD MENU 4 Camera Setup ZOOM CAMERA SETUP FOCUS MODE SEMIAUTO DIGITAL ZOOM ON IMAGE...

PT112N/ Manual
Page 30
... soon as jog tilt. HOW TO USE OSD MENU 4 Motion Setup MOTION SETUP MOTION LOCK OFF PWR UP ACTION ON AUTO FLIP ON JOG MAX SPEED 120/SEC JOG DIRECTION INVERSE FRZ IN PRESET OFF BACK EXIT Setup the general functions of preset movement, camera will move in the opposite direction. To set up , pan/tilt speed goes down. Speed Dome Camera Instruction Manual 30 z Freeze in Preset [ON/OFF] At start point of Pan/Tilt motions.
... soon as jog tilt. HOW TO USE OSD MENU 4 Motion Setup MOTION SETUP MOTION LOCK OFF PWR UP ACTION ON AUTO FLIP ON JOG MAX SPEED 120/SEC JOG DIRECTION INVERSE FRZ IN PRESET OFF BACK EXIT Setup the general functions of preset movement, camera will move in the opposite direction. To set up , pan/tilt speed goes down. Speed Dome Camera Instruction Manual 30 z Freeze in Preset [ON/OFF] At start point of Pan/Tilt motions.

PT112N/ Manual
Page 31
... [HOME/PRESET/PATTERN/SWING/GROUP/PREV ACTION] Speed Dome Camera Instruction Manual 31 If an external sensor is activated, camera will move to home position if there is no PTZ command during assigned "Wait Time". z Hold Time [ENDLESS/1~59 sec/1~180 minute] Sets the time period for the action which is displayed with "hh:mm:ss" format and can be changed in succession to one of Preset positions. z Park Enable...
... [HOME/PRESET/PATTERN/SWING/GROUP/PREV ACTION] Speed Dome Camera Instruction Manual 31 If an external sensor is activated, camera will move to home position if there is no PTZ command during assigned "Wait Time". z Hold Time [ENDLESS/1~59 sec/1~180 minute] Sets the time period for the action which is displayed with "hh:mm:ss" format and can be changed in succession to one of Preset positions. z Park Enable...

PT112N/ Manual
Page 37
... z Reboot Camera Reboots Zoom Camera module z Reboot System Reboots Speed Dome Camera ‰ ‰ Initial Configuration Table z Display Configuration Camera ID ON PTZ Information AUTO Action Title AUTO Preset Label AUTO Alarm Input AUTO North Direction Pan 0° Privacy Zone Undefined z Motion Configuration Motion Lock OFF Power Up Action ON Auto Flip ON Jog Max Speed 120°/sec Jog Direction INVERSE Freeze In Preset OFF Park Action OFF Alarm Action OFF z Camera Configuration Focus Mode SemiAuto Digital Zoom ON Image Flip OFF...
... z Reboot Camera Reboots Zoom Camera module z Reboot System Reboots Speed Dome Camera ‰ ‰ Initial Configuration Table z Display Configuration Camera ID ON PTZ Information AUTO Action Title AUTO Preset Label AUTO Alarm Input AUTO North Direction Pan 0° Privacy Zone Undefined z Motion Configuration Motion Lock OFF Power Up Action ON Auto Flip ON Jog Max Speed 120°/sec Jog Direction INVERSE Freeze In Preset OFF Park Action OFF Alarm Action OFF z Camera Configuration Focus Mode SemiAuto Digital Zoom ON Image Flip OFF...

PT112N/ Manual
Page 38
... (proportional to change without notice. illumination Day & Night Focus Iris Shutter Speed AGC White Balance BLC Flickerless SSNR Range Pan/Tilt General Pan/Tilt Speed Preset Pattern Swing Group Other Functions Communication Protocol Privacy Zone Alarm Input OSD Rated Power** Dimension Weight Operating Temp. about 1.3 Kg, *1.9 Kg Ceiling Approx. *2.2Kg Wall Approx. *2.5Kg 0°C ~ 40°C , (*-30 ~ 50°C / -22~ 122°F) *IP66 * PT112N-XT Model Only ** Check...
... (proportional to change without notice. illumination Day & Night Focus Iris Shutter Speed AGC White Balance BLC Flickerless SSNR Range Pan/Tilt General Pan/Tilt Speed Preset Pattern Swing Group Other Functions Communication Protocol Privacy Zone Alarm Input OSD Rated Power** Dimension Weight Operating Temp. about 1.3 Kg, *1.9 Kg Ceiling Approx. *2.2Kg Wall Approx. *2.5Kg 0°C ~ 40°C , (*-30 ~ 50°C / -22~ 122°F) *IP66 * PT112N-XT Model Only ** Check...
