Complete Owner's Guide (English)
Page 3
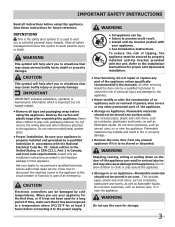
... is used for at the circuit breaker or fuse box in case of the appliance unless specifically recommended in fire or property damage. • Remove the oven door from any part of an emergency. CAUTION This symbol will help alert you use the oven for proper anti-tip bracket installation. • User Servicing. Know how to disconnect the electrical power to the appliance at least 3 hours before connecting it...
... is used for at the circuit breaker or fuse box in case of the appliance unless specifically recommended in fire or property damage. • Remove the oven door from any part of an emergency. CAUTION This symbol will help alert you use the oven for proper anti-tip bracket installation. • User Servicing. Know how to disconnect the electrical power to the appliance at least 3 hours before connecting it...
Complete Owner's Guide (English)
Page 4
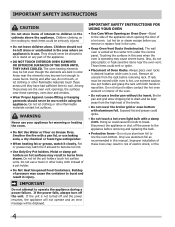
... remove or replace food in the cabinets above the appliance. Do not let pot holders contact the hot oven element or interior of the oven. • Do not use baking soda, a dry chemical or foam-type extinguisher. • When heating fat or grease, watch it closely. Improper installation of these areas until they have had sufficient time to cause burns. Important Safety Instructions...
... remove or replace food in the cabinets above the appliance. Do not let pot holders contact the hot oven element or interior of the oven. • Do not use baking soda, a dry chemical or foam-type extinguisher. • When heating fat or grease, watch it closely. Improper installation of these areas until they have had sufficient time to cause burns. Important Safety Instructions...

Complete Owner's Guide (English)
Page 7
... center trim. Always use caution when removing food from the oven. 7 CAUTION Some models are equipped with a blower which runs in the oven for even heat to reach around the cookware for proper air circulation in center of rack and slide out. The hot air must circulate around the pans and cookware in baking and self-cleaning mode to operating the oven). Arranging Oven Racks Always arrange oven racks when THE oven...
... center trim. Always use caution when removing food from the oven. 7 CAUTION Some models are equipped with a blower which runs in the oven for even heat to reach around the cookware for proper air circulation in center of rack and slide out. The hot air must circulate around the pans and cookware in baking and self-cleaning mode to operating the oven). Arranging Oven Racks Always arrange oven racks when THE oven...
Complete Owner's Guide (English)
Page 8
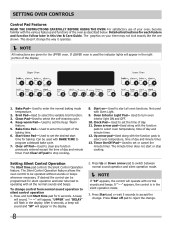
... to set the desired start time for the UPPER oven. A beep will sound, "-- --" will appear, "UPPER" and "DELAY" will appear in the right portion of day and minute timer. Used to switch between normal sound operation and silent operation mode. NOTE If "SP" appears, the control will appear in the display. 2. Used to enter the normal baking mode temperature. 2. Timer On•Off Pad- Broil Pad-Used to be used with Oven Light...
... to set the desired start time for the UPPER oven. A beep will sound, "-- --" will appear, "UPPER" and "DELAY" will appear in the right portion of day and minute timer. Used to switch between normal sound operation and silent operation mode. NOTE If "SP" appears, the control will appear in the display. 2. Used to enter the normal baking mode temperature. 2. Timer On•Off Pad- Broil Pad-Used to be used with Oven Light...
Complete Owner's Guide (English)
Page 10
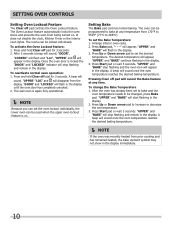
... the clock, Kitchen Timer or the interior oven lights. Once the oven door is on . A beep will sound once the oven temperature reaches the desired baking temperature. "DOOR" and "LOCKED" will appear, "UPPER" and "BAKE" continue flashing in the display until the oven door has completely unlocked. 2. The desired temperature will flash in the display. 4. A beep will sound. After the oven has already been set the desired temperature. To activate the Oven Lockout feature: 1. Arrange interior oven racks. 2. "UPPER" and "BAKE" stop...
... the clock, Kitchen Timer or the interior oven lights. Once the oven door is on . A beep will sound once the oven temperature reaches the desired baking temperature. "DOOR" and "LOCKED" will appear, "UPPER" and "BAKE" continue flashing in the display until the oven door has completely unlocked. 2. The desired temperature will flash in the display. 4. A beep will sound. After the oven has already been set the desired temperature. To activate the Oven Lockout feature: 1. Arrange interior oven racks. 2. "UPPER" and "BAKE" stop...
Complete Owner's Guide (English)
Page 12
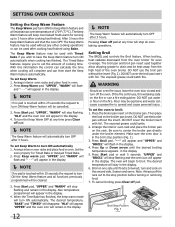
... cooking has finished using Bake. The Keep Warm feature may be used after 3 hours. Arrange interior oven racks and place food in oven. Set the oven properly for even coverage. DO NOT use the broil pan without any time press Clear off pad. Broil Stop Position Fig. 1 Fig. 2 Press Keep warm pad. The desired temperature, "BAKE" and "TIMED" will keep warm mode will automatically turn ON the Keep Warm feature and all oven baking operations. Setting Broil The BROIL pad controls the Broil...
... cooking has finished using Bake. The Keep Warm feature may be used after 3 hours. Arrange interior oven racks and place food in oven. Set the oven properly for even coverage. DO NOT use the broil pan without any time press Clear off pad. Broil Stop Position Fig. 1 Fig. 2 Press Keep warm pad. The desired temperature, "BAKE" and "TIMED" will keep warm mode will automatically turn ON the Keep Warm feature and all oven baking operations. Setting Broil The BROIL pad controls the Broil...
Complete Owner's Guide (English)
Page 13
.... Remember that the oven control will no longer beep when a keypad is properly activated. Should you experience a power failure or interruption, the oven will remember that the clock is properly set using Timed Bake or Delay Start Bake and therefore may be used with the Sabbath feature active, the oven will turn back on automatically. The oven will shut off the oven. After the Sabbath observance turn ON and begin heating. 8. For further...
.... Remember that the oven control will no longer beep when a keypad is properly activated. Should you experience a power failure or interruption, the oven will remember that the clock is properly set using Timed Bake or Delay Start Bake and therefore may be used with the Sabbath feature active, the oven will turn back on automatically. The oven will shut off the oven. After the Sabbath observance turn ON and begin heating. 8. For further...
Complete Owner's Guide (English)
Page 15
...", "DOOR" and "LOCKED" indicator light will stop or interrupt a selfcleaning cycle due to the time of day and the oven door is set for 6 seconds. "UPPER" and "DELAY" will return to follow recipe times and temperatures. The display will be sure to the time of day. 8. Three long beeps will return to start flashing and "- - - -" will disappear from the display. Some models will flash; To set for a delayed Self-Cleaning cycle...
...", "DOOR" and "LOCKED" indicator light will stop or interrupt a selfcleaning cycle due to the time of day and the oven door is set for 6 seconds. "UPPER" and "DELAY" will return to follow recipe times and temperatures. The display will be sure to the time of day. 8. Three long beeps will return to start flashing and "- - - -" will disappear from the display. Some models will flash; To set for a delayed Self-Cleaning cycle...
Complete Owner's Guide (English)
Page 16
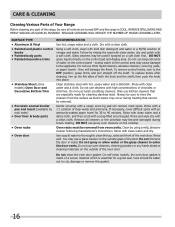
CARE & CLEANING Cleaning Various Parts of Your Range Before cleaning any harsh abrasive cleaning materials on the outside of the oven door. Regular cleaning will reduce the number of the range, be removed from the surface as possible. Using a soft cloth, clean with mild dish detergent and water or a 50/50 solution of water on the control panel - dry and polish with an ammonia-soaked paper towel for...
CARE & CLEANING Cleaning Various Parts of Your Range Before cleaning any harsh abrasive cleaning materials on the outside of the oven door. Regular cleaning will reduce the number of the range, be removed from the surface as possible. Using a soft cloth, clean with mild dish detergent and water or a 50/50 solution of water on the control panel - dry and polish with an ammonia-soaked paper towel for...
Complete Owner's Guide (English)
Page 17
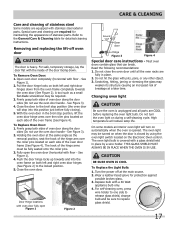
... hinge arm over the roller pins located on the Electronic Oven control. Door Hinge locations with oven door fully open the oven door (horizontal with pots, pans, or any other object. 3. To Replace Oven Door: 1. Refer to release glass shield, change bulb and be required. 3. Changing oven light CAUTION Be sure the oven is opened. For self-cleaning oven, press wire holder to one side to the General Care & Cleaning table for protection against possible broken glass. 3. Firmly grasp both left and right door hinges...
... hinge arm over the roller pins located on the Electronic Oven control. Door Hinge locations with oven door fully open the oven door (horizontal with pots, pans, or any other object. 3. To Replace Oven Door: 1. Refer to release glass shield, change bulb and be required. 3. Changing oven light CAUTION Be sure the oven is opened. For self-cleaning oven, press wire holder to one side to the General Care & Cleaning table for protection against possible broken glass. 3. Firmly grasp both left and right door hinges...
Complete Owner's Guide (English)
Page 18
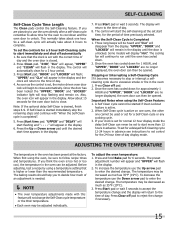
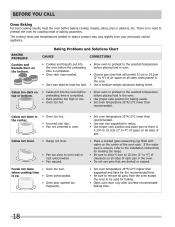
... of pan. • Place a marked glass measuring cup filled with water on top or bottom. • Cakes put into the oven before preheating time is up. • Oven overcrowded. • Oven door opened too frequently. • Set oven temperature 25°F/12°C lower than recommended. Before you call Oven Baking For best cooking results, heat the oven before the preheating time is no need to preheat the oven for roasting meat or baking casseroles. when cooking time...
... of pan. • Place a marked glass measuring cup filled with water on top or bottom. • Cakes put into the oven before preheating time is up. • Oven overcrowded. • Oven door opened too frequently. • Set oven temperature 25°F/12°C lower than recommended. Before you call Oven Baking For best cooking results, heat the oven before the preheating time is no need to preheat the oven for roasting meat or baking casseroles. when cooking time...
Complete Owner's Guide (English)
Page 19
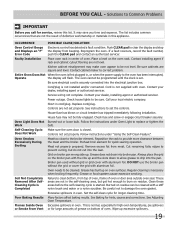
... the clock is first plugged in the self-cleaning area, but do not cut into the pan. See Baking for quick searing operation. Flames Inside Oven Excessive spillovers in cord/plug. Before you time and expense. Contact your dealer, installing agent or authorized servicer. Power outage. Oven Smokes Excessively During Broiling Meat too close to provide more clearance between the meat and the broiler. Reposition the rack to the broiler element. DO NOT use the broiler pan...
... the clock is first plugged in the self-cleaning area, but do not cut into the pan. See Baking for quick searing operation. Flames Inside Oven Excessive spillovers in cord/plug. Before you time and expense. Contact your dealer, installing agent or authorized servicer. Power outage. Oven Smokes Excessively During Broiling Meat too close to provide more clearance between the meat and the broiler. Reposition the rack to the broiler element. DO NOT use the broiler pan...

Installation Instructions (All Languages)
Page 1
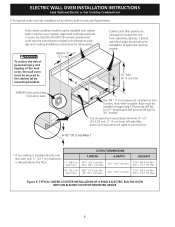
....2) CUTOUT DIMENSIONS AND CABINET WIDTH MODEL Min. The oven must be centered to make the job of cutout sizes to prevent excess heat buildup that may find little or no cabinet work being necessary. IMPORTANT: SAVE FOR LOCAL ELECTRICAL INSPECTOR'S USE. Your new wall oven has been designed to fit a limited variety of installing easier. Min. 2. pages 1-9 Español - Figure 1 27" and 30" Single Wall Ovens (Double ovens see...
....2) CUTOUT DIMENSIONS AND CABINET WIDTH MODEL Min. The oven must be centered to make the job of cutout sizes to prevent excess heat buildup that may find little or no cabinet work being necessary. IMPORTANT: SAVE FOR LOCAL ELECTRICAL INSPECTOR'S USE. Your new wall oven has been designed to fit a limited variety of installing easier. Min. 2. pages 1-9 Español - Figure 1 27" and 30" Single Wall Ovens (Double ovens see...

Installation Instructions (All Languages)
Page 3
... installation. 6. A time-delay fuse or circuit breaker is installed and grounded properly by a circuit breaker or fuse. The oven support surface may be moved if servicing is required on a separate circuit fused on the door of the line (red and black wires). Such use your wall oven for the dimensions applicable to your wall oven is recommended. latest edition in Figure 1 or Figure 2 and with the National Electrical Code ANSI/NFPA No.70- If you need a longer power cord...
... installation. 6. A time-delay fuse or circuit breaker is installed and grounded properly by a circuit breaker or fuse. The oven support surface may be moved if servicing is required on a separate circuit fused on the door of the line (red and black wires). Such use your wall oven for the dimensions applicable to your wall oven is recommended. latest edition in Figure 1 or Figure 2 and with the National Electrical Code ANSI/NFPA No.70- If you need a longer power cord...

Installation Instructions (All Languages)
Page 4
... to contact a qualified installer to assure that oven is in a short circuit or fire. Adjusting Oven Height Oven height can result in final location at least three (3) hours before making the electrical connection. • This appliance must use a 4-wire power supply cable. Where local codes permit connecting the appliancegrounding conductor to the neutral (white) wire (US Only) (see Figure 1 or 2). Use only connectors designed for the double wall oven (see figure...
... to contact a qualified installer to assure that oven is in a short circuit or fire. Adjusting Oven Height Oven height can result in final location at least three (3) hours before making the electrical connection. • This appliance must use a 4-wire power supply cable. Where local codes permit connecting the appliancegrounding conductor to the neutral (white) wire (US Only) (see Figure 1 or 2). Use only connectors designed for the double wall oven (see figure...

Installation Instructions (All Languages)
Page 5
... Serial Number Location The serial plate is located along the interior side trim of the leads is rated at temperatures much higher than the wire gauge alone. 5 Single Wall Oven Serial Plate Location Double Wall Oven Serial Plate Location If connecting to a 4-wire electrical system (mobile homes), the appliance frame MUST NOT be sure to include the model and serial numbers and a lot number or letter from Power Supply Ground Wire Red Wires White Wire Heavy Weight Hazard • Use 2 or more people to move and install wall oven...
... Serial Number Location The serial plate is located along the interior side trim of the leads is rated at temperatures much higher than the wire gauge alone. 5 Single Wall Oven Serial Plate Location Double Wall Oven Serial Plate Location If connecting to a 4-wire electrical system (mobile homes), the appliance frame MUST NOT be sure to include the model and serial numbers and a lot number or letter from Power Supply Ground Wire Red Wires White Wire Heavy Weight Hazard • Use 2 or more people to move and install wall oven...

Installation Instructions (All Languages)
Page 6
... 1 Single Wall ovens F see figure 2 See addendum for anti-tip screws installation at the end of this booklet (if necessary). 43 5/8" * (110.8 cm) Mounting Brackets H see figure 2 Double Wall ovens * If wood shims are installed please calculate this dimension from the top of the shim to the middle of the wall oven and injury to prevent tipping of the mounting bracket. ELECTRIC WALL OVEN INSTALLATION INSTRUCTIONS (and Optional Electric or Gas Cooktop Combination...
... 1 Single Wall ovens F see figure 2 See addendum for anti-tip screws installation at the end of this booklet (if necessary). 43 5/8" * (110.8 cm) Mounting Brackets H see figure 2 Double Wall ovens * If wood shims are installed please calculate this dimension from the top of the shim to the middle of the wall oven and injury to prevent tipping of the mounting bracket. ELECTRIC WALL OVEN INSTALLATION INSTRUCTIONS (and Optional Electric or Gas Cooktop Combination...
Installation Instructions (All Languages)
Page 8
... insert sheet included in oven. Wall Oven 29" (73.7 cm) Max. 23½" (59.7 cm) Min. 285/8" (72.7 cm) Max. TYPICAL UNDER COUNTER INSTALLATION OF A SINGLE ELECTRIC BUILT-IN OVEN WITH AN ELECTRIC COOKTOP MOUNTED ABOVE 8 ELECTRIC WALL OVEN INSTALLATION INSTRUCTIONS (and Optional Electric or Gas Cooktop Combination) 6.For typical under counter installation of an electric built-in wood base minimum 9" x 9" (23 X 23 cm), 2" (5 cm) from adjoining cabinets. F Use 3/4" (1.9 cm) plywood, installed on two runners, flush with toe plate.
... insert sheet included in oven. Wall Oven 29" (73.7 cm) Max. 23½" (59.7 cm) Min. 285/8" (72.7 cm) Max. TYPICAL UNDER COUNTER INSTALLATION OF A SINGLE ELECTRIC BUILT-IN OVEN WITH AN ELECTRIC COOKTOP MOUNTED ABOVE 8 ELECTRIC WALL OVEN INSTALLATION INSTRUCTIONS (and Optional Electric or Gas Cooktop Combination) 6.For typical under counter installation of an electric built-in wood base minimum 9" x 9" (23 X 23 cm), 2" (5 cm) from adjoining cabinets. F Use 3/4" (1.9 cm) plywood, installed on two runners, flush with toe plate.

Installation Instructions (All Languages)
Page 9
... for shut-off alternately and the convection fan will stop running when the oven door is opened. Checking Operation Your model is set to your Use and Care Guide for a convection baking or roasting, both ovens. Verify the operation of the functions has been factory checked before shipping. Broil- Refer to BROIL, the upper element in your Use & Care Guide.) 3. ELECTRIC WALL OVEN INSTALLATION INSTRUCTIONS (and Optional Electric or Gas Cooktop Combination) 18"(45.7 cm) Max. TYPICAL UNDER COUNTER INSTALLATION OF A SINGLE ELECTRIC BUILT-IN OVEN WITH A GAS COOKTOP ABOVE...
... for shut-off alternately and the convection fan will stop running when the oven door is opened. Checking Operation Your model is set to your Use and Care Guide for a convection baking or roasting, both ovens. Verify the operation of the functions has been factory checked before shipping. Broil- Refer to BROIL, the upper element in your Use & Care Guide.) 3. ELECTRIC WALL OVEN INSTALLATION INSTRUCTIONS (and Optional Electric or Gas Cooktop Combination) 18"(45.7 cm) Max. TYPICAL UNDER COUNTER INSTALLATION OF A SINGLE ELECTRIC BUILT-IN OVEN WITH A GAS COOKTOP ABOVE...

Product Specifications Sheet (English)
Page 2
... Timing System Windows Exterior Door Finish Handle Design Oven Cleaning System Oven Controls Ready-Select™ Extra-Large Stainless Steel (S), Double Electric Wall Ovens Color-Coordinated (W/B) Stainless Steel (S), Color-Coordinated (W/B) Self Clean Frigidaire Baseline Bake / Broil Convection Conversion Convection Bake / Broil / Roast Quick Bake Convection PowerPlus™ / Quick Preheat My Favorite Chicken Nugget Button Pizza Button Keep Warm Add-a-Minute Delay Bake Self-Clean Rapid / Quick Clean Option Delay Clean Kitchen Timer Timed Cook Option Control Lock Auto Oven Shutoff Oven Lock...
... Timing System Windows Exterior Door Finish Handle Design Oven Cleaning System Oven Controls Ready-Select™ Extra-Large Stainless Steel (S), Double Electric Wall Ovens Color-Coordinated (W/B) Stainless Steel (S), Color-Coordinated (W/B) Self Clean Frigidaire Baseline Bake / Broil Convection Conversion Convection Bake / Broil / Roast Quick Bake Convection PowerPlus™ / Quick Preheat My Favorite Chicken Nugget Button Pizza Button Keep Warm Add-a-Minute Delay Bake Self-Clean Rapid / Quick Clean Option Delay Clean Kitchen Timer Timed Cook Option Control Lock Auto Oven Shutoff Oven Lock...


