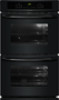
Frigidaire FFET2725LB Support Question
Frigidaire FFET2725LB Support Question
Find answers below for this question about Frigidaire FFET2725LB.Need a Frigidaire FFET2725LB manual? We have 4 online manuals for this item!
Question posted by davisbrohters1 on October 5th, 2012
How Do I Remove The Front Door On The Ffet2725lba To Replace The Middle Glass
The person who posted this question about this Frigidaire product did not include a detailed explanation. Please use the "Request More Information" button to the right if more details would help you to answer this question.
Current Answers
Answer #1: Posted by Anonymous-74890 on October 9th, 2012 8:16 AM
Anonymous-74890

Member since:
September 17th, 2012 Points: 73,690

Member since:
September 17th, 2012 Points: 73,690
Hello – If you are trying to remove the oven door I suggest being very cautious because it contain glass that can break.
- 1. Open oven door completely
- 2. Pull the door hinge locks on both left and right door hinges down from the oven frame completely towards the oven door. A tool such as a small flat-blade screwdriver may be required.
- 3. Firmly grasp both sides of oven door along the door sides (do not use the oven door handle).
- 4. Close the door to the broil stop position (the oven door will stop into this position just before fully closing).
- 5. With the oven door in the broil stop position, lift the oven door hinge arms over the roller pins located on each side of the oven frame.
To replace oven door:
- 1. Firmly grasp both sides of oven door along the door sides (Do not use the oven door handle).
- 2. Holding the oven door at the same angle as the removal position, seat the hook of the hinge arm over the roller pins located on each side of the oven door frame. The hook of the hinge arms must be fully seated onto the roller pins.
- 3. Fully open the oven door (horizontal with floor).
- 4. Push the door hinge locks up towards and into the oven frame on both left and right oven door hinges to the locked position.
- 5. Close the oven door.
Related Frigidaire FFET2725LB Manual Pages
Complete Owner's Guide (English) - Page 3
...time, make sure that may explode and result in fire or property damage.
• Remove the oven door from any part of tipping, the appliance must be stored in the literature package for proper... United States, or CSA C22.1, Part 1 in accordance with packaging material. Do not repair or replace any unused appliance if it has been exposed to a temperature above 0°C/32°F for ...
Complete Owner's Guide (English) - Page 4
... be kept away from the rack before removing and replacing the bulb.
• Protective liners-Do not use , do not place plastic or heat-sensitive items near these areas are dark in the oven.
• Keep Oven Vent Ducts Unobstructed. Only use extreme caution. Among these openings, oven door and window.
• Wear Proper Apparel. IMPORTANT...
Complete Owner's Guide (English) - Page 5
... appliance listed in or around any wall oven. The door gasket is extremely sensitive to the fumes ...remove all parts free of grease that excess residue from cleaners and aerosols may ignite causing damage and/or injury.
• Clean in the self-cleaning cycle only the parts of potential exposure to such substances.
5 Greasy deposits in the appliance.
• Do not clean the oven door...
Complete Owner's Guide (English) - Page 6
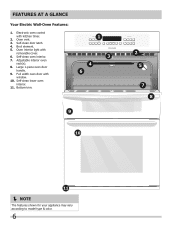
...shown for your appliance may vary according to model type & color.
6 Large 1-piece oven door
handle. 9. Full width oven door with kitchen timer.
2. Self-clean door latch. 4. Electronic oven control with
window. 10. Self-clean lower oven
interior. 11. Self-clean oven interior. 7. Oven interior light with
removable cover. 6. Oven vent. 3. FEATURES AT A GLANCE
Your Electric Wall...
Complete Owner's Guide (English) - Page 7

...the oven door, sides or back of oven. Always use caution when removing food from the oven.
7
Air Circulation in the Oven
If using 1 rack, place in center of the oven cavity...OVEN CONTROLS
Oven Vent Location
The oven is necessary for proper air circulation in the oven and good baking results. When the oven is on the oven walls. Tilt the front of rack and slide out. To replace an oven...
Complete Owner's Guide (English) - Page 10
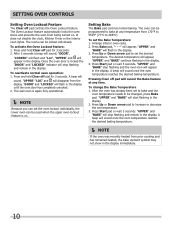
... or wait 5 seconds. "UPPER" and "BAKE" will stop flashing and the oven icon will stop flashing and remain in the display. 3.
To reactivate normal oven operation: 1. A beep will flash in the display. The Oven Lockout feature automatically locks the oven doors and prevents the oven from prior cooking and has remained heated, the bake element symbol...
Complete Owner's Guide (English) - Page 11
... Convection Bake cycle can be removed promptly when cooking is reached, the oven icon will appear in sickness from food poisoning. Setting OVEN controls
Setting Timed Bake Feature
The... appear in the display. 6.
Press Clear off at the previously selected temperature. To program the oven to begin baking immediately and to cancel the Delayed Time Bake feature. "UPPER" and "BAKE"...
Complete Owner's Guide (English) - Page 12
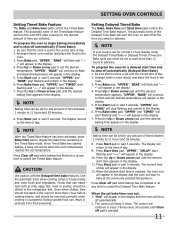
...after 3 hours. Arrange interior oven racks and place food in the display.
4. Press Keep Warm pad. "UPPER", "WARM" will stop position before turning or removing food. 7. Arrange interior oven racks and place food in ... the display.
NOTE
If no pad is in the display. Make sure the oven door is touched within 25 seconds the request to have the Keep Warm feature turn OFF after ...
Complete Owner's Guide (English) - Page 14
..., tomatoes, sauerkraut, fruit juices or pie filling) to remain on .
The woven material of the oven cavity effortlessly.
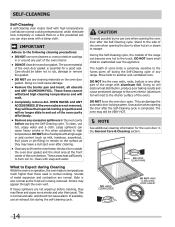
• Remove any excessive spillovers in and out of the oven door gasket is being removed. SELF-CLEANING
Self-Cleaning
A self-cleaning oven cleans itself with high temperatures (well above normal cooking temperatures) which eliminate soils completely or...
Complete Owner's Guide (English) - Page 16
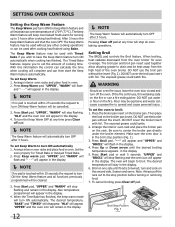
...for 30 to 40 minutes. Glass cleaners may cause damage to rub, damage or remove this gasket.
16 DO NOT spray liquids directly on a soft cloth first. they will remove most spots. then push the ...Do not immerse the door in water. Do not use oven cleaners, cleaning powders or any part of the range, be removed.
dry and polish with a soap-filled scouring pad. To replace knobs after cleaning,...
Complete Owner's Guide (English) - Page 17
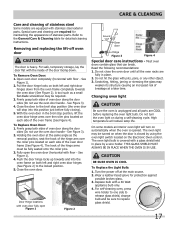
... instructions. To Remove Oven Door: 1. Firmly grasp both sides of the oven door frame (See Figure 4). See Figure 3). 4. Close the door to the broil stop position, lift the oven door hinge arms over the roller pins located on both left and right oven door hinges (See Figure 2) to replace glass shield.
17 With the oven door in the broil stop position (the oven door will reduce...
Complete Owner's Guide (English) - Page 18
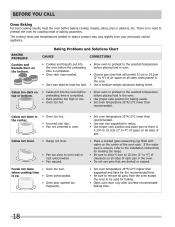
...Oven door opened too frequently.
• Set oven temperature 25°F/12°C lower than recommended.
• Use pan size suggested and bake for the recommended time.
• Be sure to remove all sides when placed in the oven...high or low. • Oven too hot.
• Allow oven to preheat to 4") of space on all sides of pan.
• Place a marked glass measuring cup filled with water ...
Complete Owner's Guide (English) - Page 19
... Self-Clean Feature".
Self-Cleaning Cycle Does Not Work
Make sure the oven door is not installed and/or connected. Controls not set the controls.
Reposition the rack to replace or tighten the
Work
bulb. Remove excess fat from top of oven, frame of oven. Cut remaining fatty edges to clean bottom, from meat.
Grease does...
Complete Owner's Guide (English) - Page 20
..., tolls, ferry trip charges, or mileage expense for consequential or incidental damages such as removal of trim, cupboards, shelves, etc., which do not allow the exclusion or limitation of... persons other appropriate payment record to obtain and keep all costs for repairing or replacing any implied warranty. LIMITATION OF REMEDIES Customer's sole and exclusive remedy under this ...
Installation Instructions (All Languages) - Page 1

Do not remove spacers (if equipped) on the side walls and/or on
B
convection models, verify dimension G to
assure it is critical to each side
of oven for door depth
when it is 31" (78.7 cm).
318259707 (stainless steel models). NOTES:
I
271/8 (68.9) Min 301/8 (76.5) Min
P/N 318201514 (0711) Rev. A 5. 30" MODELS ONLY: For...
Installation Instructions (All Languages) - Page 2

... for door depth when it is open.
5. 30" MODELS ONLY: For a cutout height (H) greater
3.
oven for
(123.5 cm)
Cable
Door Open (see Figure 1)
MODEL
27" (68.6 cm) Wall Oven 30" (76.2 cm) Wall Oven
PRODUCT ... 23½ (59.7)
Min. ELECTRIC WALL OVEN INSTALLATION INSTRUCTIONS
(and Optional Electric or Gas Cooktop Combination)
Do not remove spacers (if equipped) on the side walls ...
Installation Instructions (All Languages) - Page 3

... supplied with this wall oven can also cause damage to leave these instructions with as much slack as possible remaining in ovens are being made. Oven door may be solid plywood... fused disconnect (or circuit breaker) box through flexible armored or nonmetallic sheathed cable. Remove all instructions contained in serious injuries and can result in these instructions with CSA Standard...
Installation Instructions (All Languages) - Page 6

...The wall oven can tip when the door is recommended to the middle of the mounting bracket.
Install the mounting brackets in the literature package. 2. ELECTRIC WALL OVEN INSTALLATION INSTRUCTIONS...on the oven side panel.
Unpack the wall oven. Remove the bottom trim taped
on Figure 5. F see figure 1
22 3/16" * (56.4 cm)
Mounting Brackets
H see figure 1
Single Wall ovens
F ...
Installation Instructions (All Languages) - Page 7

... released
Oven removed from the cabinet
1½" (3.8 cm) clearance between the oven and front of cabinet (see Figure 8). Insert one tool into hole in and against the cabinet;
Slide oven inward leaving 1½" (3.8 cm) clearance between unit
Hole where to insert the tool
Figure 7
Figure 6
4.Push the oven in each side trim below the oven door and...
Installation Instructions (All Languages) - Page 9

... Shutoff Valve
4"(10 cm)
Right Side of the oven. 2. If the oven has been operating at high temperatures, the fan will stop running when the oven door is set for shut-off .
7. Remove all items from the oven.
Broil- Verify that are not the result of the electronic oven controls:
Bake- Convection (some models) provides cooling of...
Similar Questions

Replacing Inner Door Glass
Got the oven door off and hinges loose. side screws stuck on SIDE of door panel for access to remove...
Got the oven door off and hinges loose. side screws stuck on SIDE of door panel for access to remove...
(Posted by jamesjmcenroe 3 years ago)

Oven Door Is Locked In The Closed Position. Is There A Method To Unlock Manually
(Posted by bajackson 9 years ago)

How To Remove Clock Timer
How to remove a Frigidaire fgb24s5aba single gas oven clock timer
How to remove a Frigidaire fgb24s5aba single gas oven clock timer
(Posted by danielalemail 9 years ago)
Oven Will Not Power Up
I removed the oven for a remodel. When I put it back and turned on the breaker, the unit beeped. 5 m...
I removed the oven for a remodel. When I put it back and turned on the breaker, the unit beeped. 5 m...
(Posted by Anonymous-94444 11 years ago)

The Top Oven Door Has Been Pulled Off. Do I Need To Replace The Entire Applianc
(Posted by Anonymous-41791 12 years ago)