
User Manual
Page 5
... Preset - Windows 94 Checking Print Status - OS X...104 Selecting Page Setup Settings - Windows 81 Double-sided Printing Options - OS X...104 Print Options - Copying ...74 Copying Documents or Photos...74 Copying Options...75 Printing from a Computer ...78 Printing with OS X ...99 Selecting Basic Print Settings - Windows 81 Multi-Page Printing Options - Windows 85 Selecting...
... Preset - Windows 94 Checking Print Status - OS X...104 Selecting Page Setup Settings - Windows 81 Double-sided Printing Options - OS X...104 Print Options - Copying ...74 Copying Documents or Photos...74 Copying Options...75 Printing from a Computer ...78 Printing with OS X ...99 Selecting Basic Print Settings - Windows 81 Multi-Page Printing Options - Windows 85 Selecting...

User Manual
Page 9
... Does Not Appear in OS X Printer Window 238 Cannot Print Over a Network...239 Cannot Scan Over a Network ...240 Solving Copying Problems ...241 Product Makes Noise, But Nothing Copies 241 Product Makes Noise When It Sits for a While 241 Solving Paper Problems...241 Paper Feeding Problems...242 Paper Jam Problems Inside... Taskbar 255 Error After Cartridge Replacement 256 Printing is Slow ...256 Solving Page Layout and Content Problems 257 Inverted Image...258 Too Many Copies Print ...258 Blank Pages Print ...258 Incorrect Margins on Printout...259 Border Appears on Borderless Prints 259 9
... Does Not Appear in OS X Printer Window 238 Cannot Print Over a Network...239 Cannot Scan Over a Network ...240 Solving Copying Problems ...241 Product Makes Noise, But Nothing Copies 241 Product Makes Noise When It Sits for a While 241 Solving Paper Problems...241 Paper Feeding Problems...242 Paper Jam Problems Inside... Taskbar 255 Error After Cartridge Replacement 256 Printing is Slow ...256 Solving Page Layout and Content Problems 257 Inverted Image...258 Too Many Copies Print ...258 Blank Pages Print ...258 Incorrect Margins on Printout...259 Border Appears on Borderless Prints 259 9

User Manual
Page 13
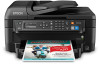
WF-2750 User's Guide Welcome to the WF-2750 User's Guide. For a printable PDF copy of this guide, click here. 13
WF-2750 User's Guide Welcome to the WF-2750 User's Guide. For a printable PDF copy of this guide, click here. 13

User Manual
Page 67
... arrow buttons, select Setup, and press the OK button. Select On to display an error message when the paper size and type settings and the copy/print settings in each mode do not match.
... arrow buttons, select Setup, and press the OK button. Select On to display an error message when the paper size and type settings and the copy/print settings in each mode do not match.
User Manual
Page 71
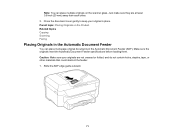
Parent topic: Placing Originals on the Product Related topics Copying Scanning Faxing Placing Originals in the Automatic Document Feeder You can place multiple originals on the scanner glass. Note: You can place multi-page original ...
Parent topic: Placing Originals on the Product Related topics Copying Scanning Faxing Placing Originals in the Automatic Document Feeder You can place multiple originals on the scanner glass. Note: You can place multi-page original ...

User Manual
Page 73
Parent topic: Placing Originals on the Product Related references Automatic Document Feeder (ADF) Specifications Related topics Copying Scanning Faxing 73 4. Slide the ADF edge guide against the originals, but not too tightly.
Parent topic: Placing Originals on the Product Related references Automatic Document Feeder (ADF) Specifications Related topics Copying Scanning Faxing 73 4. Slide the ADF edge guide against the originals, but not too tightly.
User Manual
Page 74
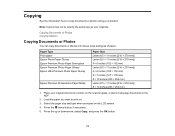
...page documents in the ADF. 2. Press the home button, if necessary. 5. Press the up or down arrow, select Copy, and press the OK button. 74 Copying See the information here to print on. 3. Select the paper size and type when prompted on the LCD screen.... 4. Copying Documents or Photos Copying Options Copying Documents or Photos You can copy documents or photos onto these sizes and types of paper: Paper Type Plain paper Epson Photo Paper Glossy Epson Premium Photo Paper Semi-gloss Epson Premium Photo Paper Glossy Epson Ultra Premium Photo Paper Glossy Epson Premium Presentation...
...page documents in the ADF. 2. Press the home button, if necessary. 5. Press the up or down arrow, select Copy, and press the OK button. 74 Copying See the information here to print on. 3. Select the paper size and type when prompted on the LCD screen.... 4. Copying Documents or Photos Copying Options Copying Documents or Photos You can copy documents or photos onto these sizes and types of paper: Paper Type Plain paper Epson Photo Paper Glossy Epson Premium Photo Paper Semi-gloss Epson Premium Photo Paper Glossy Epson Ultra Premium Photo Paper Glossy Epson Premium Presentation...

User Manual
Page 75
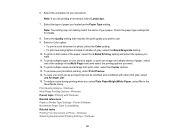
..., press the Stop/Reset button or select Cancel. Press the OK button to copy, press one copy, press a number key or the up or down arrow button. 7. When you want to use for your copies. To print more than one of the Start buttons. You see a screen ...like this: 6. Control Panel Related topics Loading Paper Placing Originals on other copying settings. 75 Then press the back button. 8. Parent topic: Copying Related references Paper Loading Capacity Available Epson Papers Copying Options Paper ...
..., press the Stop/Reset button or select Cancel. Press the OK button to copy, press one copy, press a number key or the up or down arrow button. 7. When you want to use for your copies. To print more than one of the Start buttons. You see a screen ...like this: 6. Control Panel Related topics Loading Paper Placing Originals on other copying settings. 75 Then press the back button. 8. Parent topic: Copying Related references Paper Loading Capacity Available Epson Papers Copying Options Paper ...

User Manual
Page 76
... sizes the image by the percentage you select 1>2-Sided, press the right arrow button and select the binding edge for your copies Adjusts the lightness or darkness of these options, select Settings and change the Document Orientation setting if necessary. Specifies the orientation... of your originals Specifies the document type of your originals and selects the quality of your originals or copies. Copying option Layout Document Size Zoom 2-Sided Document Orientation Quality Density Available settings With Border Borderless 2-up ID Card Letter A4 Legal...
... sizes the image by the percentage you select 1>2-Sided, press the right arrow button and select the binding edge for your copies Adjusts the lightness or darkness of these options, select Settings and change the Document Orientation setting if necessary. Specifies the orientation... of your originals Specifies the document type of your originals and selects the quality of your originals or copies. Copying option Layout Document Size Zoom 2-Sided Document Orientation Quality Density Available settings With Border Borderless 2-up ID Card Letter A4 Legal...

User Manual
Page 77
Copying option Dry Time Available settings Standard Long Longer Description Provides longer drying time for 2-sided copies, if smudges or marks appear on the front of the paper when you print on the second side Parent topic: Copying 77
Copying option Dry Time Available settings Standard Long Longer Description Provides longer drying time for 2-sided copies, if smudges or marks appear on the front of the paper when you print on the second side Parent topic: Copying 77
User Manual
Page 80
... and combined with Windows Related references Paper or Media Type Settings - Select the orientation of gray, select the Black/Grayscale setting. 10. To print multiple copies and arrange their print order, select the...
... and combined with Windows Related references Paper or Media Type Settings - Select the orientation of gray, select the Black/Grayscale setting. 10. To print multiple copies and arrange their print order, select the...

User Manual
Page 84
...: 6. Double-sided Printing Options - If necessary, select the Adjustments options you are printing as the Document Type setting. Click the Print Density button. Print a test copy of document you want to the Main tab. 9. Windows You can select any instructions displayed on the 2-Sided Printing Settings window to set up your...
...: 6. Double-sided Printing Options - If necessary, select the Adjustments options you are printing as the Document Type setting. Click the Print Density button. Print a test copy of document you want to the Main tab. 9. Windows You can select any instructions displayed on the 2-Sided Printing Settings window to set up your...
User Manual
Page 87
To add the following features, click the Watermark Features button: • Anti-Copy Pattern: adds a watermark that only appears when your printout is copied • Watermark: adds a visible watermark to your printout Note: Click the Add/Delete button to create your own watermark, and click the Settings button to ...
To add the following features, click the Watermark Features button: • Anti-Copy Pattern: adds a watermark that only appears when your printout is copied • Watermark: adds a visible watermark to your printout Note: Click the Add/Delete button to create your own watermark, and click the Settings button to ...

User Manual
Page 90
Note: These settings are available to print the following information: • User Name • Computer Name • Date • Date/Time • Collate Number (copy number) Note: The user name, computer name, date, and time come from the Windows Control Panel on your computer. Parent topic: Selecting Additional Layout and ...
Note: These settings are available to print the following information: • User Name • Computer Name • Date • Date/Time • Collate Number (copy number) Note: The user name, computer name, date, and time come from the Windows Control Panel on your computer. Parent topic: Selecting Additional Layout and ...

User Manual
Page 101
You see these settings in the print window, check for your application before printing. 101 Note: If you do not see the expanded printer settings window for them in your product: Note: The print window may look different, depending on the version of OS X and the application you are using. 5. Select the Copies and Pages settings as necessary.
You see these settings in the print window, check for your application before printing. 101 Note: If you do not see the expanded printer settings window for them in your product: Note: The print window may look different, depending on the version of OS X and the application you are using. 5. Select the Copies and Pages settings as necessary.

User Manual
Page 107
... on the screen during printing. OS X Parent topic: Printing with OS X 107 The software automatically sets the Adjustments options for that document type. 3. Print a test copy of the Two-sided Printing options. 2. Follow any instructions displayed on the screen. 4. Double-sided Printing Options and Adjustments - Note: Some options may be pre...
... on the screen during printing. OS X Parent topic: Printing with OS X 107 The software automatically sets the Adjustments options for that document type. 3. Print a test copy of the Two-sided Printing options. 2. Follow any instructions displayed on the screen. 4. Double-sided Printing Options and Adjustments - Note: Some options may be pre...

User Manual
Page 127
... you resize the marquee to retain the same width/height proportions.) • To create additional marquees (up to 50, if available), click the Copy Marquee icon to copy the existing marquee and paste it on the preview image. Otherwise, only the area inside each scan area and make sure you select the... selected marquee will be scanned. • To delete a marquee, click the marquee, then click the Delete Marquee icon. • To rotate your original in the Epson Scan window.
... you resize the marquee to retain the same width/height proportions.) • To create additional marquees (up to 50, if available), click the Copy Marquee icon to copy the existing marquee and paste it on the preview image. Otherwise, only the area inside each scan area and make sure you select the... selected marquee will be scanned. • To delete a marquee, click the marquee, then click the Delete Marquee icon. • To rotate your original in the Epson Scan window.

User Manual
Page 135
... the same width/height proportions.) • Normal preview: To create additional marquees (up to 50, if available), click the Copy Marquee icon to copy the existing marquee and paste it on other settings you need to access additional settings. 135 Click inside the currently selected marquee ...Professional Mode Available Image Adjustments - Not all adjustment settings may be scanned. 3. Click the image adjustment icon to set any necessary settings in Epson Scan Professional Mode. • To resize the scan area, place your cursor over the edge or corner of the marquee, then click ...
... the same width/height proportions.) • Normal preview: To create additional marquees (up to 50, if available), click the Copy Marquee icon to copy the existing marquee and paste it on other settings you need to access additional settings. 135 Click inside the currently selected marquee ...Professional Mode Available Image Adjustments - Not all adjustment settings may be scanned. 3. Click the image adjustment icon to set any necessary settings in Epson Scan Professional Mode. • To resize the scan area, place your cursor over the edge or corner of the marquee, then click ...

User Manual
Page 188
Then click Preferences or Properties on the next screen. Select the Page Range as the printer. 3. Click Print or OK. 188 To change the Paper Size, Orientation, Color, Image Quality, or Character Density settings, click the Preferences or Properties button. Note: If you see a window like this: 2. You see a Setup, Printer, or Options button, click it. For more information about selecting fax print settings, click Help. 4. Select your product with the FAX option as necessary. (Leave the Number of copies set to 1.) 5.
Then click Preferences or Properties on the next screen. Select the Page Range as the printer. 3. Click Print or OK. 188 To change the Paper Size, Orientation, Color, Image Quality, or Character Density settings, click the Preferences or Properties button. Note: If you see a window like this: 2. You see a Setup, Printer, or Options button, click it. For more information about selecting fax print settings, click Help. 4. Select your product with the FAX option as necessary. (Leave the Number of copies set to 1.) 5.

User Manual
Page 191
Note: You may need to 1. 6. See your product FAX option as the Pages setting. Note: Leave the Copies setting set to select a print icon on your screen, the Print option in your application. Select the print command in the File menu, or another command. If necessary, click the arrow next to the Printer setting or the Show Details button to expand the print window. 5. Select the number of pages you are faxing as the Printer setting. 4. Select Recipient Settings from the pop-up menu. 191 2. Select your application's help utility for details. 3.
Note: You may need to 1. 6. See your product FAX option as the Pages setting. Note: Leave the Copies setting set to select a print icon on your screen, the Print option in your application. Select the print command in the File menu, or another command. If necessary, click the arrow next to the Printer setting or the Show Details button to expand the print window. 5. Select the number of pages you are faxing as the Printer setting. 4. Select Recipient Settings from the pop-up menu. 191 2. Select your application's help utility for details. 3.


