
User Manual
Page 4
... of the Platen 47 Adjusting the Angle of the Platen 50 Starting and Cancelling Printing ...51 Starting a Print Job ...52 Cancelling a Print Job...52 Post-treating a T-shirt...53 Removing a Printed T-shirt ...53 Fixing the Ink ...54 Fixing Conditions (Heat Press 55 Fixing ... Height Indicator 65 Maintenance...67 Maintenance Guidelines...67 Maintenance Safety Instructions ...68 Print Head Maintenance...68 Performing a Nozzle Check ...69 Cleaning the Print Head...71 Print Head Alignment ...72 Aligning the Print Head ...72 Using the Ink Cleaning Solution ...74 Disposing of Used Consumables and...
... of the Platen 47 Adjusting the Angle of the Platen 50 Starting and Cancelling Printing ...51 Starting a Print Job ...52 Cancelling a Print Job...52 Post-treating a T-shirt...53 Removing a Printed T-shirt ...53 Fixing the Ink ...54 Fixing Conditions (Heat Press 55 Fixing ... Height Indicator 65 Maintenance...67 Maintenance Guidelines...67 Maintenance Safety Instructions ...68 Print Head Maintenance...68 Performing a Nozzle Check ...69 Cleaning the Print Head...71 Print Head Alignment ...72 Aligning the Print Head ...72 Using the Ink Cleaning Solution ...74 Disposing of Used Consumables and...

User Manual
Page 5
......121 Accessing the Printer's Menus ...121 USB File List Menu Settings...122 Maintenance Menu Settings...123 Printer Setup Menu Settings ...125 Print Logs Menu Settings ...126 Printer Status Menu Settings...127 Administrator Menu Settings ...127 Maintenance Mode Menu Settings 128 Solving Problems ...130 Product...Status Messages ...130 Solving Printer Problems...135 Printer Does Not Turn On ...135 LCD Screen Shuts Off ...135 Solving Printing Problems ...135 Nothing Prints ...136 Cannot Print Over a Network...136 Print Head Moves But Nothing Prints 137 Platen Height Error Is Displayed While...
......121 Accessing the Printer's Menus ...121 USB File List Menu Settings...122 Maintenance Menu Settings...123 Printer Setup Menu Settings ...125 Print Logs Menu Settings ...126 Printer Status Menu Settings...127 Administrator Menu Settings ...127 Maintenance Mode Menu Settings 128 Solving Problems ...130 Product...Status Messages ...130 Solving Printer Problems...135 Printer Does Not Turn On ...135 LCD Screen Shuts Off ...135 Solving Printing Problems ...135 Nothing Prints ...136 Cannot Print Over a Network...136 Print Head Moves But Nothing Prints 137 Platen Height Error Is Displayed While...
User Manual
Page 10
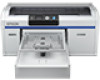
...of the print head nozzles for better print quality High Resolution • UltraChrome DG pigment ink optimized for textile printing for smooth gradations and high color reproducibility • High-density white printing using White ink and pre-treatment solution developed specially for Epson pigment ...-free, direct printing from a commercially available USB thumb drive connected to the printer • Easy-to learn more about your printer and this manual. Printer Features Notations Used in the Documentation Printer Part Locations Printer Features The SureColor F2000 Series printer includes...
...of the print head nozzles for better print quality High Resolution • UltraChrome DG pigment ink optimized for textile printing for smooth gradations and high color reproducibility • High-density white printing using White ink and pre-treatment solution developed specially for Epson pigment ...-free, direct printing from a commercially available USB thumb drive connected to the printer • Easy-to learn more about your printer and this manual. Printer Features Notations Used in the Documentation Printer Part Locations Printer Features The SureColor F2000 Series printer includes...

User Manual
Page 11
... purchase accessories from an Epson authorized reseller. sales) or epson.ca (Canadian sales). Option or part Part number Cleaning cartridge (700 ml) T736000 Pre-treatment solution (20 liter) C13T7361000 Printer maintenance kit C13T736200 Print head cleaning kit C13S092001 Waste ...C12C890913 Sleeve platen (4 inch × 4 inch [10.2 × 10.2 cm]) C12C891191 Epson UltraChrome DG ink cartridge - Black (600 ml) T725100 Epson UltraChrome DG ink cartridge - Cyan (250 ml) T730200 Epson UltraChrome DG ink cartridge - White (250 ml) (White T730A00 Edition) 11 Magenta (250 ...
... purchase accessories from an Epson authorized reseller. sales) or epson.ca (Canadian sales). Option or part Part number Cleaning cartridge (700 ml) T736000 Pre-treatment solution (20 liter) C13T7361000 Printer maintenance kit C13T736200 Print head cleaning kit C13S092001 Waste ...C12C890913 Sleeve platen (4 inch × 4 inch [10.2 × 10.2 cm]) C12C891191 Epson UltraChrome DG ink cartridge - Black (600 ml) T725100 Epson UltraChrome DG ink cartridge - Cyan (250 ml) T730200 Epson UltraChrome DG ink cartridge - White (250 ml) (White T730A00 Edition) 11 Magenta (250 ...

User Manual
Page 14
Printer Parts - Inside 1 Encoder strip (carriage scale) 2 Carriage shaft 3 Flushing pad 4 Air filter 5 Print head 6 Anti-drying caps 7 Suction/cleaning cap 8 Fabric wiper unit 14
Printer Parts - Inside 1 Encoder strip (carriage scale) 2 Carriage shaft 3 Flushing pad 4 Air filter 5 Print head 6 Anti-drying caps 7 Suction/cleaning cap 8 Fabric wiper unit 14

User Manual
Page 18
...a while until capping is performed automatically. • Do not remove ink cartridges while the printer is turned off without first resolving the error, the print head may not be capped on the right side, which may occur. • The suction cap, wiper unit, flushing pad, tubes, encoder strip (...Edition) Handling T-shirts (Media) Using Your Printer Follow these guidelines as you use your printer, ink cartridges, and print media. Failure to heat sources or directly in the print head nozzles drying out and clogging. • Do not bend or pull the waste ink tubes. Cut waste ink tubes ...
...a while until capping is performed automatically. • Do not remove ink cartridges while the printer is turned off without first resolving the error, the print head may not be capped on the right side, which may occur. • The suction cap, wiper unit, flushing pad, tubes, encoder strip (...Edition) Handling T-shirts (Media) Using Your Printer Follow these guidelines as you use your printer, ink cartridges, and print media. Failure to heat sources or directly in the print head nozzles drying out and clogging. • Do not bend or pull the waste ink tubes. Cut waste ink tubes ...

User Manual
Page 19
...maintenance is performed when the printer is consumed for a long time without first resolving the error, the print head may not be capped on the right side, which causes the print head to dry out. If the printer is stored without performing this case, turn on the power and ...each maintenance operation. In this operation, it may be impossible to unclog the print head. • We recommend that the print head has been capped (the print head is not used for clogged nozzles before storing the printer. The print head nozzles can become clogged. • If you do not use the printer ...
...maintenance is performed when the printer is consumed for a long time without first resolving the error, the print head may not be capped on the right side, which causes the print head to dry out. If the printer is stored without performing this case, turn on the power and ...each maintenance operation. In this operation, it may be impossible to unclog the print head. • We recommend that the print head has been capped (the print head is not used for clogged nozzles before storing the printer. The print head nozzles can become clogged. • If you do not use the printer ...

User Manual
Page 21
... may decline or the printer may malfunction. • Remove the installed cartridges at the start of the print head, the printer stops printing before reinstalling them to print properly. • Do not drop ink cartridges or subject them . 21 Parent topic: Printer Usage Guidelines Related references Handling White ...maintain the quality of every working day or every 20 hours, and shake them well before ink cartridges are completely expended. Do not print without maintaining the White ink system; • Removed ink cartridges may have ink around the ink supply port, so be careful not ...
... may decline or the printer may malfunction. • Remove the installed cartridges at the start of the print head, the printer stops printing before reinstalling them to print properly. • Do not drop ink cartridges or subject them . 21 Parent topic: Printer Usage Guidelines Related references Handling White ...maintain the quality of every working day or every 20 hours, and shake them well before ink cartridges are completely expended. Do not print without maintaining the White ink system; • Removed ink cartridges may have ink around the ink supply port, so be careful not ...

User Manual
Page 22
...) Shaking and Replacing the Ink Cartridges Handling T-shirts (Media) Follow these guidelines as alcohol. • Do not rub the printed surface against surfaces printed with a small amount of the nozzles. • When storing cartridges, lay them down flat. If the printer is left without...replacing the White ink, it to prevent nozzles from clogging. If cartridges are stored in a hot place after printing, the printed surface may be able to unclog the print head. If T-shirts are stored standing upright, you may not be impossible to clear the sedimentation by shaking them...
...) Shaking and Replacing the Ink Cartridges Handling T-shirts (Media) Follow these guidelines as alcohol. • Do not rub the printed surface against surfaces printed with a small amount of the nozzles. • When storing cartridges, lay them down flat. If the printer is left without...replacing the White ink, it to prevent nozzles from clogging. If cartridges are stored in a hot place after printing, the printed surface may be able to unclog the print head. If T-shirts are stored standing upright, you may not be impossible to clear the sedimentation by shaking them...

User Manual
Page 27
...; Store the pre-treatment solution at room temperature and away from direct sunlight. • If pre-treatment solution gets stuck to the print head, it could result in the waste ink bottle as it off using soap and water. Make sure that pre-treatment solution does not ...Guidelines Pre-treating a T-shirt with a Roller Pre-treating a T-shirt with a Sprayer Fixing the Pre-treatment Solution (Heat Press) Parent topic: Basic Printing Pre-treatment Solution Safety Precautions If you get caught in the trachea which can be applied to the T-shirt. If problems persist, consult a physician. ...
...; Store the pre-treatment solution at room temperature and away from direct sunlight. • If pre-treatment solution gets stuck to the print head, it could result in the waste ink bottle as it off using soap and water. Make sure that pre-treatment solution does not ...Guidelines Pre-treating a T-shirt with a Roller Pre-treating a T-shirt with a Sprayer Fixing the Pre-treatment Solution (Heat Press) Parent topic: Basic Printing Pre-treatment Solution Safety Precautions If you get caught in the trachea which can be applied to the T-shirt. If problems persist, consult a physician. ...

User Manual
Page 33
Apply the solution evenly in the shoulder-to-shoulder direction; Note: The T-shirt fibers must be pressed flat to the direction of the print head movement. 5. Parent topic: Pre-treating a T-shirt Related references Fixing the Pre-treatment Solution (Heat Press) Related tasks Diluting the Pre-...heat tunnel to fix the ink, use a heat press to an area larger than the target print area. It's important to finish in both directions as shown to fix the pre-treatment solution before printing. 4. Pour the diluted pre-treatment solution into the sprayer. 2. Place the T-shirt on ...
Apply the solution evenly in the shoulder-to-shoulder direction; Note: The T-shirt fibers must be pressed flat to the direction of the print head movement. 5. Parent topic: Pre-treating a T-shirt Related references Fixing the Pre-treatment Solution (Heat Press) Related tasks Diluting the Pre-...heat tunnel to fix the ink, use a heat press to an area larger than the target print area. It's important to finish in both directions as shown to fix the pre-treatment solution before printing. 4. Pour the diluted pre-treatment solution into the sprayer. 2. Place the T-shirt on ...

User Manual
Page 35
The following guidelines are not clogged. 1. Parent topic: Pre-treating a T-shirt Preparing Your Printer Before transmitting print data from the Garment Creator software, check the printer's status and make sure to test in advance to wash them off. Turn on the type ... on the printer. 35 If traces of time, extend the duration while carefully checking if the pre-treatment solution is dry. make sure that the print head nozzles are approximate. The fixing conditions vary depending on the amount of heat press used .
The following guidelines are not clogged. 1. Parent topic: Pre-treating a T-shirt Preparing Your Printer Before transmitting print data from the Garment Creator software, check the printer's status and make sure to test in advance to wash them off. Turn on the type ... on the printer. 35 If traces of time, extend the duration while carefully checking if the pre-treatment solution is dry. make sure that the print head nozzles are approximate. The fixing conditions vary depending on the amount of heat press used .

User Manual
Page 40
If the platen is not in the moveable base and place the platen on the platen. 3. For best results, always align the print head after replacing the platen with the sleeve platen. 1. Align the replacement platen to fit into the holes in the forward position, press the moveable base button to move the platen forward. 40 Parent topic: Loading the T-shirt Related concepts Print Head Alignment Loading a T-shirt on the Platen Before printing, carefully load a T-shirt on the printer. Note: For information about loading a sleeve platen, see the manual supplied with a different size.
If the platen is not in the moveable base and place the platen on the platen. 3. For best results, always align the print head after replacing the platen with the sleeve platen. 1. Align the replacement platen to fit into the holes in the forward position, press the moveable base button to move the platen forward. 40 Parent topic: Loading the T-shirt Related concepts Print Head Alignment Loading a T-shirt on the Platen Before printing, carefully load a T-shirt on the printer. Note: For information about loading a sleeve platen, see the manual supplied with a different size.

User Manual
Page 43
Note: There may stick to the print head and stain other areas of the print. Remove any lint using sticky tape or a lint roller, and press the fibers flat using a hard roller. 43 If not removed, lint and fibers may be lint on the T-shirt if you have not applied pre-treatment solution. Replace the platen frame. 5.
Note: There may stick to the print head and stain other areas of the print. Remove any lint using sticky tape or a lint roller, and press the fibers flat using a hard roller. 43 If not removed, lint and fibers may be lint on the T-shirt if you have not applied pre-treatment solution. Replace the platen frame. 5.

User Manual
Page 47
...: Be careful not to its optimum height. Parent topic: Loading a T-shirt on the Platen Adjusting the Height of the Platen If the print surface is too far from the print head, print quality declines and ink may mist on the inside of the platen is one step lower than the position displayed as the... Platen Height Error on the control panel. To prevent this, adjust the platen to touch the T-shirt while printing as follows, position number 2 is...
...: Be careful not to its optimum height. Parent topic: Loading a T-shirt on the Platen Adjusting the Height of the Platen If the print surface is too far from the print head, print quality declines and ink may mist on the inside of the platen is one step lower than the position displayed as the... Platen Height Error on the control panel. To prevent this, adjust the platen to touch the T-shirt while printing as follows, position number 2 is...

User Manual
Page 67
Maintenance Guidelines Maintenance Safety Instructions Print Head Maintenance Print Head Alignment Using the Ink Cleaning Solution Disposing of waste ink, cleaning the encoder strip (carriage scale), or replacing the air filter, have the following equipment... Cleaning the Suction Cap Replacing the Head Cleaning Set Washing the White Ink Tubes (White Edition) Shaking and Replacing the Ink Cartridges Cleaning the Encoder Strip (Carriage Scale) and Replacing the Air Filter Storing the Printer Cleaning the Printer Maintenance Guidelines To maintain optimum print quality, you need to maintain your...
Maintenance Guidelines Maintenance Safety Instructions Print Head Maintenance Print Head Alignment Using the Ink Cleaning Solution Disposing of waste ink, cleaning the encoder strip (carriage scale), or replacing the air filter, have the following equipment... Cleaning the Suction Cap Replacing the Head Cleaning Set Washing the White Ink Tubes (White Edition) Shaking and Replacing the Ink Cartridges Cleaning the Encoder Strip (Carriage Scale) and Replacing the Air Filter Storing the Printer Cleaning the Printer Maintenance Guidelines To maintain optimum print quality, you need to maintain your...

User Manual
Page 68
... Parent topic: Maintenance Related tasks Removing a Printed T-shirt Cleaning the Suction Cap Replacing the Head Cleaning Set Print Head Maintenance You need to ensure the best print quality. Inspect the printed check pattern and clean the print head if you notice the print quality has declined. Maintenance Safety Instructions When ...displays a message. • Do not touch any parts or circuit boards other discrepancies appear in optimum condition to maintain the print head if lines or other than the parts you have not used the printer for an extended period of the cleaning stick with...
... Parent topic: Maintenance Related tasks Removing a Printed T-shirt Cleaning the Suction Cap Replacing the Head Cleaning Set Print Head Maintenance You need to ensure the best print quality. Inspect the printed check pattern and clean the print head if you notice the print quality has declined. Maintenance Safety Instructions When ...displays a message. • Do not touch any parts or circuit boards other discrepancies appear in optimum condition to maintain the print head if lines or other than the parts you have not used the printer for an extended period of the cleaning stick with...

User Manual
Page 69
... topic: Maintenance Performing a Nozzle Check To maintain optimum print quality, perform a nozzle check before printing. 1. This cleans the surface of the print head to move it forward. 2. The nozzle check pattern may not print correctly on the optional platens. 3. • Head Cleaning: Clean the print head if you notice faint printing or gaps in the forward position, press the...
... topic: Maintenance Performing a Nozzle Check To maintain optimum print quality, perform a nozzle check before printing. 1. This cleans the surface of the print head to move it forward. 2. The nozzle check pattern may not print correctly on the optional platens. 3. • Head Cleaning: Clean the print head if you notice faint printing or gaps in the forward position, press the...

User Manual
Page 70
Press the maintenance button on the control panel. The nozzle check pattern prints directly onto the platen. 8. Make sure that the height adjustment lever is at the "P" position. 5. Press the up and down arrow buttons to highlight Nozzle Check, and press the right arrow button. 7. The Maintenance menu appears. 6. 4. Check the printed pattern: • If there are no gaps in the pattern, the nozzles are clean. • If there are gaps in the pattern, clean the print head. 70 Press the OK button twice.
Press the maintenance button on the control panel. The nozzle check pattern prints directly onto the platen. 8. Make sure that the height adjustment lever is at the "P" position. 5. Press the up and down arrow buttons to highlight Nozzle Check, and press the right arrow button. 7. The Maintenance menu appears. 6. 4. Check the printed pattern: • If there are no gaps in the pattern, the nozzles are clean. • If there are gaps in the pattern, clean the print head. 70 Press the OK button twice.

User Manual
Page 71
...and down arrow buttons to choose one of the following cleaning options: • Selected Nozzles: Select this option when you should clean the print head to highlight Cleaning, and press the right arrow button. 3. Clean the platen using the heavy cleaning level. Ink is consumed for normal ...also performs an automatic Power On Cleaning to each other. Clean the print head only if print quality declines or image colors are adjacent to clean the print head. (Automatic cleaning can be disabled from three levels of head cleaning: • Use light or medium level for all colors or ...
...and down arrow buttons to choose one of the following cleaning options: • Selected Nozzles: Select this option when you should clean the print head to highlight Cleaning, and press the right arrow button. 3. Clean the platen using the heavy cleaning level. Ink is consumed for normal ...also performs an automatic Power On Cleaning to each other. Clean the print head only if print quality declines or image colors are adjacent to clean the print head. (Automatic cleaning can be disabled from three levels of head cleaning: • Use light or medium level for all colors or ...


