Network Guide
Page 11
... IP address and subnet mask for your computer, depending on your operating system. See "Configuring the Network Interface" on the printer and install the printer driver. If necessary, configure the network settings of the network interface, such as TCP/IP) are set up the network interface. 1. Installing Network Components on Your...
... IP address and subnet mask for your computer, depending on your operating system. See "Configuring the Network Interface" on the printer and install the printer driver. If necessary, configure the network settings of the network interface, such as TCP/IP) are set up the network interface. 1. Installing Network Components on Your...
Network Guide
Page 20
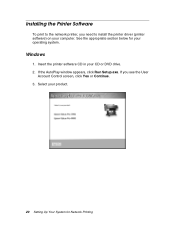
Windows 1. If the AutoPlay window appears, click Run Setup.exe. Installing the Printer Software To print to install the printer driver (printer software) on your computer. See the appropriate section below for Network Printing Select your product. 20 Setting Up Your System for your CD or DVD drive. 2. Insert the printer software CD in your operating system. If you need to the network printer, you see the User Account Control screen, click Yes or Continue. 3.
Windows 1. If the AutoPlay window appears, click Run Setup.exe. Installing the Printer Software To print to install the printer driver (printer software) on your computer. See the appropriate section below for Network Printing Select your product. 20 Setting Up Your System for your CD or DVD drive. 2. Insert the printer software CD in your operating system. If you need to the network printer, you see the User Account Control screen, click Yes or Continue. 3.
Network Guide
Page 22
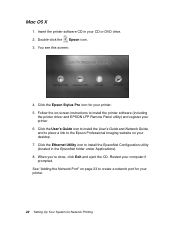
... on page 23 to install the EpsonNet Configuration utility (located in your printer. 22 Setting Up Your System for your computer if prompted. Click the Epson Stylus Pro icon for Network Printing Restart your printer. 5. Insert the printer software CD in the EpsonNet folder under Applications). 8. Click the User's Guide icon to install... the User's Guide and Network Guide, and to place a link to install the printer software (including the printer driver and EPSON LFP Remote Panel utility) and register your desktop. 7. Mac OS X 1.
... on page 23 to install the EpsonNet Configuration utility (located in your printer. 22 Setting Up Your System for your computer if prompted. Click the Epson Stylus Pro icon for Network Printing Restart your printer. 5. Insert the printer software CD in the EpsonNet folder under Applications). 8. Click the User's Guide icon to install... the User's Guide and Network Guide, and to place a link to install the printer software (including the printer driver and EPSON LFP Remote Panel utility) and register your desktop. 7. Mac OS X 1.
Network Guide
Page 39
...28 EpsonNet Config Macintosh, 28 Windows, 27 EpsonNet Config with Web Browser password, 34 settings, 33 to 34 using, 30 to 34 I Installing printer driver Macintosh, 22 Windows, 20 to 21 IP address control panel, 17 to 19 EpsonNet Config with Web Browser, 30 to 32 L Lights, status, ...9 M Macintosh adding printer, 26 Bonjour printing, 26 installing printer driver, 22 network settings, 15 TCP/IP printing, 26 N Network cable, 9 connector, 9 printing status sheet, 19 protocols, 6 Network interface configuring, 17 to ...
...28 EpsonNet Config Macintosh, 28 Windows, 27 EpsonNet Config with Web Browser password, 34 settings, 33 to 34 using, 30 to 34 I Installing printer driver Macintosh, 22 Windows, 20 to 21 IP address control panel, 17 to 19 EpsonNet Config with Web Browser, 30 to 32 L Lights, status, ...9 M Macintosh adding printer, 26 Bonjour printing, 26 installing printer driver, 22 network settings, 15 TCP/IP printing, 26 N Network cable, 9 connector, 9 printing status sheet, 19 protocols, 6 Network interface configuring, 17 to ...
Network Guide
Page 40
Problems, solving, 35 to 36 Protocols, 7 R Resetting network interface, 34 RJ-45 connector, Network connector, 9 Router, 31 S Setting the IP address, 30 Software, uninstalling, 37 to 38 Status lights, 9 Status sheet, printing, 19 Subnet mask, 18, 31 T TCP/IP, 30 definition, 10 setting up in Windows, 12 to 15 setting up on Macintosh, 15, 26 Troubleshooting, 35 to 36 U Uninstalling network software, 37 to 38 Universal Plug and Play, 32 W Windows adding network port, 23 to 25 installing printer driver, 20 to 21 network settings, 12 to 15 40 Index
Problems, solving, 35 to 36 Protocols, 7 R Resetting network interface, 34 RJ-45 connector, Network connector, 9 Router, 31 S Setting the IP address, 30 Software, uninstalling, 37 to 38 Status lights, 9 Status sheet, printing, 19 Subnet mask, 18, 31 T TCP/IP, 30 definition, 10 setting up in Windows, 12 to 15 setting up on Macintosh, 15, 26 Troubleshooting, 35 to 36 U Uninstalling network software, 37 to 38 Universal Plug and Play, 32 W Windows adding network port, 23 to 25 installing printer driver, 20 to 21 network settings, 12 to 15 40 Index
Quick Reference Guide
Page 5
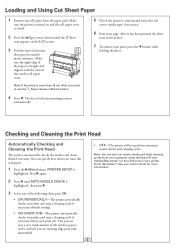
... need to happen. 1 Press the Menu button. Loading and Using Cut Sheet Paper 1 Remove any roll paper from your computer using the Epson Printer Utility4 (Macintosh®) or the Utility tab in the printer. 7 To remove your print, press the button while holding the sheet...down into printing position automatically. 5 Check the printer's control panel and select the correct media type, if necessary. 6 Print your printer driver (Windows®). Checking and Cleaning the Print Head Automatically Checking and Cleaning the Print Head The printer automatically checks the nozzles and cleans them...
... need to happen. 1 Press the Menu button. Loading and Using Cut Sheet Paper 1 Remove any roll paper from your computer using the Epson Printer Utility4 (Macintosh®) or the Utility tab in the printer. 7 To remove your print, press the button while holding the sheet...down into printing position automatically. 5 Check the printer's control panel and select the correct media type, if necessary. 6 Print your printer driver (Windows®). Checking and Cleaning the Print Head Automatically Checking and Cleaning the Print Head The printer automatically checks the nozzles and cleans them...
Quick Reference Guide
Page 12
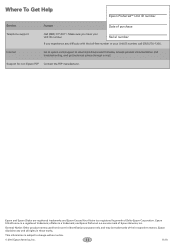
... have your Unit ID number, call (562) 276-1305. This information is subject to download drivers and firmware, access product documentation and troubleshooting, and get technical advice through e-mail. ePlaten is a registered trademark; Epson UltraChrome is a trademark; Epson and Epson Stylus are for non-Epson RIP Contact the RIP manufacturer. and Epson Preferred is a registered logomark of...
... have your Unit ID number, call (562) 276-1305. This information is subject to download drivers and firmware, access product documentation and troubleshooting, and get technical advice through e-mail. ePlaten is a registered trademark; Epson UltraChrome is a trademark; Epson and Epson Stylus are for non-Epson RIP Contact the RIP manufacturer. and Epson Preferred is a registered logomark of...
User's Guide
Page 6
... Paper Basket 80 Optimizing the Settings for Your Paper 81 Creating Paper Configurations 81 Printing Your Paper Configurations 83 Selecting Paper Configurations 83 3 Printing With Epson Drivers for Mac OS X Sizing Images for Borderless Printing on Roll Paper 86 Choosing Page Setup and Basic Print Options 87 Choosing Color Management Options 93...
... Paper Basket 80 Optimizing the Settings for Your Paper 81 Creating Paper Configurations 81 Printing Your Paper Configurations 83 Selecting Paper Configurations 83 3 Printing With Epson Drivers for Mac OS X Sizing Images for Borderless Printing on Roll Paper 86 Choosing Page Setup and Basic Print Options 87 Choosing Color Management Options 93...
User's Guide
Page 7
|7 4 Printing With Epson Drivers for Windows Sizing Images for Borderless Printing on Roll Paper 108 Choosing Basic Print Options 109 Selecting the Correct Media Type Setting 111 Choosing Color ..., and Importing Custom Settings 129 Saving and Exporting a Custom Settings Group 129 Importing a Custom Settings Group 130 Loading a Pre-Defined Settings Group 130 Editing Printer Driver Settings 131 Managing Print Jobs 132 Using the Progress Meter 132 Optimizing Print Speed 133 Setting Monitoring Preferences 135 5 Managing Color With Profiles Mac OS...
|7 4 Printing With Epson Drivers for Windows Sizing Images for Borderless Printing on Roll Paper 108 Choosing Basic Print Options 109 Selecting the Correct Media Type Setting 111 Choosing Color ..., and Importing Custom Settings 129 Saving and Exporting a Custom Settings Group 129 Importing a Custom Settings Group 130 Loading a Pre-Defined Settings Group 130 Editing Printer Driver Settings 131 Managing Print Jobs 132 Using the Progress Meter 132 Optimizing Print Speed 133 Setting Monitoring Preferences 135 5 Managing Color With Profiles Mac OS...
User's Guide
Page 8
8| 6 Maintaining and Transporting the Printer Checking Printer Status 145 Printing Status Information 146 Viewing Status Information 146 Checking Printer Status From the Printer Driver 147 Checking and Cleaning the Print Head 148 Running the Nozzle Check and Head Cleaning Utilities 148 Checking and Cleaning the Print Head Using the ...
8| 6 Maintaining and Transporting the Printer Checking Printer Status 145 Printing Status Information 146 Viewing Status Information 146 Checking Printer Status From the Printer Driver 147 Checking and Cleaning the Print Head 148 Running the Nozzle Check and Head Cleaning Utilities 148 Checking and Cleaning the Print Head Using the ...
User's Guide
Page 9
|9 Uninstalling and Reinstalling the Printer Driver 187 Mac OS X 187 Windows 188 A Specifications Clearing Stored Print Information 189 Environmental 189 Electrical 190 Dimensions and Weight 190 Printer Interfaces 190 Safety Approvals ...
|9 Uninstalling and Reinstalling the Printer Driver 187 Mac OS X 187 Windows 188 A Specifications Clearing Stored Print Information 189 Environmental 189 Electrical 190 Dimensions and Weight 190 Printer Interfaces 190 Safety Approvals ...
User's Guide
Page 11
... tips in case you use and printer maintenance-loading paper, replacing ink cartridges and other components, cleaning and aligning the print head, and using the Epson® printer drivers, and replacing ink cartridges.
... tips in case you use and printer maintenance-loading paper, replacing ink cartridges and other components, cleaning and aligning the print head, and using the Epson® printer drivers, and replacing ink cartridges.
User's Guide
Page 13
...Hi-Speed 2.0 port and a shielded USB "AB" cable from Series A (computer) to Series B (printer), up to 6 PM, Pacific Time, Monday through the Epson PreferredSM Limited Warranty Plan. Dial (888) 377-6611, 6 AM to 10 feet (6 m) long • For network connection: Ethernet-equipped Macintosh and a Category 5... (4×) or faster CD-ROM or DVD drive for solutions to common problems. You can download drivers, firmware, and documentation, get FAQs and troubleshooting advice, or e-mail Epson with the toll-free line or your printer serial number and proof of support are subject to malfunction...
...Hi-Speed 2.0 port and a shielded USB "AB" cable from Series A (computer) to Series B (printer), up to 6 PM, Pacific Time, Monday through the Epson PreferredSM Limited Warranty Plan. Dial (888) 377-6611, 6 AM to 10 feet (6 m) long • For network connection: Ethernet-equipped Macintosh and a Category 5... (4×) or faster CD-ROM or DVD drive for solutions to common problems. You can download drivers, firmware, and documentation, get FAQs and troubleshooting advice, or e-mail Epson with the toll-free line or your printer serial number and proof of support are subject to malfunction...
User's Guide
Page 49
...switch or hub. Make sure that the installer has detected an older version of the cable into the appropriate port on the Epson support site at www.epson.com/support. Plug the interface cable into the appropriate connector on a Macintosh. Then reinstall your CD or DVD drive. 3....for Macintosh Follow the steps below to the trash. Double-click the Epson icon. 4. For Windows, see the message that your printer driver on the printer. Plug the other end of EpsonNet Config on and that the Epson Stylus Pro 7890 or Pro 9890 is connected to the computer. 2. Note: If you see ...
...switch or hub. Make sure that the installer has detected an older version of the cable into the appropriate port on the Epson support site at www.epson.com/support. Plug the interface cable into the appropriate connector on a Macintosh. Then reinstall your CD or DVD drive. 3....for Macintosh Follow the steps below to the trash. Double-click the Epson icon. 4. For Windows, see the message that your printer driver on the printer. Plug the other end of EpsonNet Config on and that the Epson Stylus Pro 7890 or Pro 9890 is connected to the computer. 2. Note: If you see ...

User's Guide
Page 50
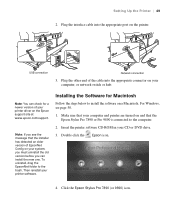
...Yes or Continue. 50 50 | Setting Up the Printer 5. Follow the on-screen instructions to the User's Guide, Network Guide, and Epson Professional Imaging website on your desktop. 7. Make sure your printer. 6. Installing the Software for Windows Follow these steps to install the EpsonNet... window appears, click Run Setup.exe. Click the User's Guide icon to place links to install the printer software (including the printer driver and EPSON LFP Remote Panel utility) and register your printer is turned off. 2. Insert the printer software CD in the EpsonNet folder under Applications...
...Yes or Continue. 50 50 | Setting Up the Printer 5. Follow the on-screen instructions to the User's Guide, Network Guide, and Epson Professional Imaging website on your desktop. 7. Make sure your printer. 6. Installing the Software for Windows Follow these steps to install the EpsonNet... window appears, click Run Setup.exe. Click the User's Guide icon to place links to install the printer software (including the printer driver and EPSON LFP Remote Panel utility) and register your printer is turned off. 2. Insert the printer software CD in the EpsonNet folder under Applications...
User's Guide
Page 53
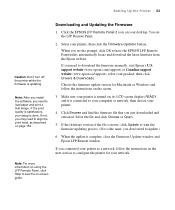
... 3. Select the file and click Choose or Open. 5. support website (www.epson.com/support) or Canadian support website (www.epson.ca/support), select your desktop. Note: For more information on your product, then click Drivers & Downloads. Setting Up the Printer | 53 Caution: Don't turn off the... printer while the firmware is complete, close the Firmware Updater window and Epson LFP Remote window. Click the EPSON LFP Remote Panel 2 icon on using the LFP...
... 3. Select the file and click Choose or Open. 5. support website (www.epson.com/support) or Canadian support website (www.epson.ca/support), select your desktop. Note: For more information on your product, then click Drivers & Downloads. Setting Up the Printer | 53 Caution: Don't turn off the... printer while the firmware is complete, close the Firmware Updater window and Epson LFP Remote window. Click the EPSON LFP Remote Panel 2 icon on using the LFP...
User's Guide
Page 56
... those included in a cool, dry place to wide-format rolls. Available Epson Special Media One of the key elements for achieving professional quality prints is selecting paper that is specifically optimized for a variety of paper stock in both the printer driver software and on the printer's control panel. See page 104 (Mac...
... those included in a cool, dry place to wide-format rolls. Available Epson Special Media One of the key elements for achieving professional quality prints is selecting paper that is specifically optimized for a variety of paper stock in both the printer driver software and on the printer's control panel. See page 104 (Mac...
User's Guide
Page 68
... you can also specify trim lines from your print job. 3. For instructions, see the roll (Auto Cut Off) icon on the right edge of non-Epson media. Press and release the button. The paper is finished. Press d to select the Printer Setup menu. 3. Press to select ON. 5. Press d or u to exit...
... you can also specify trim lines from your print job. 3. For instructions, see the roll (Auto Cut Off) icon on the right edge of non-Epson media. Press and release the button. The paper is finished. Press d to select the Printer Setup menu. 3. Press to select ON. 5. Press d or u to exit...
User's Guide
Page 76
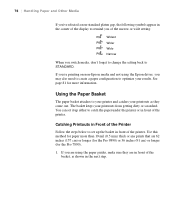
If you're printing on non-Epson media and not using the Epson driver, you are using the paper guides, make sure they come out. Catching Printouts in Front of the Printer Follow the steps below to set it ... your printouts as shown in front of the basket, as they are 62 inches (157 cm) or longer (for the Pro 9890) or 36 inches (91 cm) or longer (for the Pro 7890). 1. 76 | Handling Paper and Other Media If you've selected a non-standard platen gap, the following symbols appear in front...
If you're printing on non-Epson media and not using the Epson driver, you are using the paper guides, make sure they come out. Catching Printouts in Front of the Printer Follow the steps below to set it ... your printouts as shown in front of the basket, as they are 62 inches (157 cm) or longer (for the Pro 9890) or 36 inches (91 cm) or longer (for the Pro 7890). 1. 76 | Handling Paper and Other Media If you've selected a non-standard platen gap, the following symbols appear in front...
User's Guide
Page 81
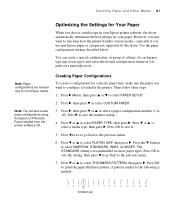
... to save it. 5. Creating Paper Configurations To create a configuration for a specific paper type, make sure the paper you use non-Epson paper or a paper not supported by the driver. Press d or u to select PAPER TYPE, then press r. Press d or u to select PAPER SETUP. 2. The STANDARD setting...r Menu, then press u or d to select PLATEN GAP, then press r. Press OK to the following is loaded in your Epson printer software, the driver automatically determines the best settings for your paper. Press d or u to print the paper thickness pattern. Note: Paper configurations are needed...
... to save it. 5. Creating Paper Configurations To create a configuration for a specific paper type, make sure the paper you use non-Epson paper or a paper not supported by the driver. Press d or u to select PAPER TYPE, then press r. Press d or u to select PAPER SETUP. 2. The STANDARD setting...r Menu, then press u or d to select PLATEN GAP, then press r. Press OK to the following is loaded in your Epson printer software, the driver automatically determines the best settings for your paper. Press d or u to print the paper thickness pattern. Note: Paper configurations are needed...


