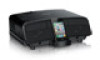
User Manual
Page 2
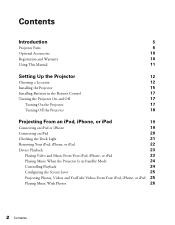
Contents Introduction 5 Projector Parts 6 Optional Accessories 10 Registration and Warranty 10 Using This Manual 11 Setting Up the Projector 12 Choosing a Location 12 Installing the Projector 15 Installing Batteries in the Remote Control 17 Turning the Projector On and ...
Contents Introduction 5 Projector Parts 6 Optional Accessories 10 Registration and Warranty 10 Using This Manual 11 Setting Up the Projector 12 Choosing a Location 12 Installing the Projector 15 Installing Batteries in the Remote Control 17 Turning the Projector On and ...
User Manual
Page 11
...(800) 637-7661 and enter the PIN on the PrivateLine support card that came with your projector. Use this manual to view FAQs or product information and e-mail Epson. The term "iPod" is used in addition to basic setup and maintenance instructions, troubleshooting tips, and specifications....the information you read through the manual: Warning: Must be observed to avoid damage to your equipment. Note: These illustrations show the MG-850HD, but the instructions are the same for the MG-50 unless otherwise noted. If you need to use the Epson PrivateLine® Support service. ...
...(800) 637-7661 and enter the PIN on the PrivateLine support card that came with your projector. Use this manual to view FAQs or product information and e-mail Epson. The term "iPod" is used in addition to basic setup and maintenance instructions, troubleshooting tips, and specifications....the information you read through the manual: Warning: Must be observed to avoid damage to your equipment. Note: These illustrations show the MG-850HD, but the instructions are the same for the MG-50 unless otherwise noted. If you need to use the Epson PrivateLine® Support service. ...
User Manual
Page 19
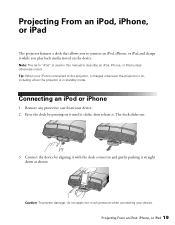
... 1. Connect the device by pressing on it until it clicks, then release it straight down as shown. Note: The term "iPod" is used in this manual to connect an iPod, iPhone, or iPad and charge it charges whenever the projector is on, including when the projector is connected to the projector...
... 1. Connect the device by pressing on it until it clicks, then release it straight down as shown. Note: The term "iPod" is used in this manual to connect an iPod, iPhone, or iPad and charge it charges whenever the projector is on, including when the projector is connected to the projector...

User Manual
Page 45
... 75. This setting can use the Signal menu to one of the input signal. For a list of compatible video formats, see a screen similar to make manual adjustments. Adjusting Signal Settings 45 If necessary, select Wide (for widescreen images) or Normal (for computer images, or change the aspect ratio. 1.
... 75. This setting can use the Signal menu to one of the input signal. For a list of compatible video formats, see a screen similar to make manual adjustments. Adjusting Signal Settings 45 If necessary, select Wide (for widescreen images) or Normal (for computer images, or change the aspect ratio. 1.
User Manual
Page 69
... sure it is properly seated on the dock and that no picture appears on the screen. If the same image is enabled. (See your laptop manual for details.) Wait a few seconds for instructions.) 4. Click the Arrange or Arrangement tab. 4. If you 're using a computer and no status lights are...or sleep) mode. Hold down the laptop's Fn key and press the key labelled with a monitor icon or CRT/LCD. (See your computer or Windows manual for an image to make sure it 's adjusted correctly (see page 46). Open the System Preferences utility and select Displays. 2. If necessary, check your...
... sure it is properly seated on the dock and that no picture appears on the screen. If the same image is enabled. (See your laptop manual for details.) Wait a few seconds for instructions.) 4. Click the Arrange or Arrangement tab. 4. If you 're using a computer and no status lights are...or sleep) mode. Hold down the laptop's Fn key and press the key labelled with a monitor icon or CRT/LCD. (See your computer or Windows manual for an image to make sure it 's adjusted correctly (see page 46). Open the System Preferences utility and select Displays. 2. If necessary, check your...

