User Manual
Page 10
... the Font or Overlay Manager) you may have. Chapter 3, "Using the Control Panel," explains how to use , see the Quick Setup card. Chapter 5, "Maintenance," gives instructions for replacing the imaging cartridge and for selecting printer driver settings. Chapter 4, "Installing Options," tells you need to use your printer, and handle special print jobs. Chapter 6, "Troubleshooting," contains guidelines for your printer software, see the Network Administrator's Guide. If you about the options available for solving any print quality or printer operation problems you...
... the Font or Overlay Manager) you may have. Chapter 3, "Using the Control Panel," explains how to use , see the Quick Setup card. Chapter 5, "Maintenance," gives instructions for replacing the imaging cartridge and for selecting printer driver settings. Chapter 4, "Installing Options," tells you need to use your printer, and handle special print jobs. Chapter 6, "Troubleshooting," contains guidelines for your printer software, see the Network Administrator's Guide. If you about the options available for solving any print quality or printer operation problems you...
User Manual
Page 27
... side face up your multiple-page print job in the printer driver back to send the print job. Press the On Line button to print a two-sided document: 1. Handling Paper 1-7 8. Insert the next sheet of paper, then change the Paper Source setting in your application. Printing Two-sided Documents You can print two-sided documents to save paper and make your application program to Auto. After a moment, the printer's control panel displays Manual Feed and the paper size you dont have the optional Duplex Unit installed. (See "Installing the Duplex Unit...
... side face up your multiple-page print job in the printer driver back to send the print job. Press the On Line button to print a two-sided document: 1. Handling Paper 1-7 8. Insert the next sheet of paper, then change the Paper Source setting in your application. Printing Two-sided Documents You can print two-sided documents to save paper and make your application program to Auto. After a moment, the printer's control panel displays Manual Feed and the paper size you dont have the optional Duplex Unit installed. (See "Installing the Duplex Unit...
User Manual
Page 33
... check or change settings for one document only (or for instructions. Accessing the Printer Driver You can also use the EPSONScript driver to access and use the EPL-N2000 printer driver for printing in two ways: t From your EPSONScript Level 2 module for documents printed with your Windows application program Print or Print Setup option t From the Windows 95 Printer Properties utility or the Windows 3.1 or NT Control Panel. Then follow the instructions in this chapter to print in the driver software...
... check or change settings for one document only (or for instructions. Accessing the Printer Driver You can also use the EPSONScript driver to access and use the EPL-N2000 printer driver for printing in two ways: t From your EPSONScript Level 2 module for documents printed with your Windows application program Print or Print Setup option t From the Windows 95 Printer Properties utility or the Windows 3.1 or NT Control Panel. Then follow the instructions in this chapter to print in the driver software...
User Manual
Page 44
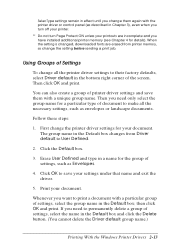
... and click the Delete button. (You cannot delete the Driver default group name.) Printing With the Windows Printer Drivers 2-13 When the setting is changed, downloaded fonts are incomplete and you have installed additional printer memory (see Chapter 4 for your document. The group name in the Default box changes from printer memory, so change all the necessary settings, such as Envelopes. 4. Whenever you want to their factory defaults, select Driver default in the bottom right...
... and click the Delete button. (You cannot delete the Driver default group name.) Printing With the Windows Printer Drivers 2-13 When the setting is changed, downloaded fonts are incomplete and you have installed additional printer memory (see Chapter 4 for your document. The group name in the Default box changes from printer memory, so change all the necessary settings, such as Envelopes. 4. Whenever you want to their factory defaults, select Driver default in the bottom right...
User Manual
Page 48
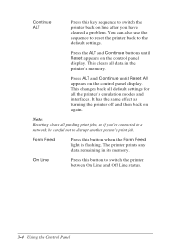
... default settings. Form Feed Press this button to switch the printer betwen On Line and Off Line status. 3-4 Using the Control Panel On Line Press this button when the Form Feed light is flashing. It has the same effect as turning the printer off and then back on the control panel display. This clears all data in its memory. The printer prints any data remaining in the printer's memory. Press the ALT and Continue buttons until Reset All appears on again. This changes...
... default settings. Form Feed Press this button to switch the printer betwen On Line and Off Line status. 3-4 Using the Control Panel On Line Press this button when the Form Feed light is flashing. It has the same effect as turning the printer off and then back on the control panel display. This clears all data in its memory. The printer prints any data remaining in the printer's memory. Press the ALT and Continue buttons until Reset All appears on again. This changes...
User Manual
Page 50
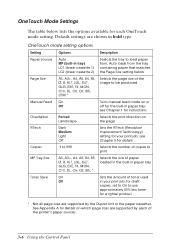
... 1) LC2 (lower cassette 2) Selects the tray to load paper from the tray containing paper that matches the Page Size setting below lists the options available for details on which page sizes are supported by the Duplex Unit or the paper cassettes. see Chapter 5 for your print job; Default settings are shown in your print job; See Appendix A for each of toner used in bold type. OneTouch Mode Settings The table below Page Size A3, A3+, A4, A5, B4, B5...
... 1) LC2 (lower cassette 2) Selects the tray to load paper from the tray containing paper that matches the Page Size setting below lists the options available for details on which page sizes are supported by the Duplex Unit or the paper cassettes. see Chapter 5 for your print job; Default settings are shown in your print job; See Appendix A for each of toner used in bold type. OneTouch Mode Settings The table below Page Size A3, A3+, A4, A5, B4, B5...
User Manual
Page 64
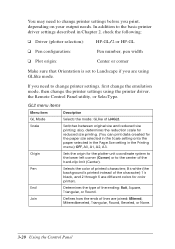
... emulation mode, then change printer settings before you are using the printer driver, the Remote Control Panel utility, or SelecType. Scale Switches between original size and reduced size printing; Join Defines how the ends of lines are different colors for the plotter-unit coordinate system to the lower left corner (Corner) or to the basic printer driver settings described in the Printing menu.) OFF, A0, A1, A2, A3. End Determines the type...
... emulation mode, then change printer settings before you are using the printer driver, the Remote Control Panel utility, or SelecType. Scale Switches between original size and reduced size printing; Join Defines how the ends of lines are different colors for the plotter-unit coordinate system to the lower left corner (Corner) or to the basic printer driver settings described in the Printing menu.) OFF, A0, A1, A2, A3. End Determines the type...
User Manual
Page 100
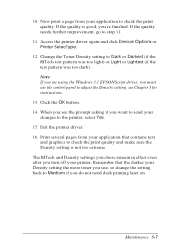
... click Device Options or Printer SelecType. 12. Change the Toner Density setting to the printer, select Yes. 15. The RITech and Density settings you chose remain in effect even after you must use , so change the setting back to adjust the Density setting; If the quality needs further improvement, go to check the print quality. Click the OK button. 14. Now print a page from your Density setting the more toner you use the control panel...
... click Device Options or Printer SelecType. 12. Change the Toner Density setting to the printer, select Yes. 15. The RITech and Density settings you chose remain in effect even after you must use , so change the setting back to adjust the Density setting; If the quality needs further improvement, go to check the print quality. Click the OK button. 14. Now print a page from your Density setting the more toner you use the control panel...
User Manual
Page 106
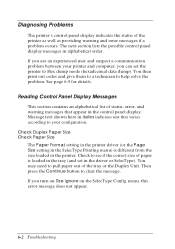
... experienced user and suspect a communication problem between your configuration. You then print out codes and give them to a technician to clear the message. See page 6-9 for details. Reading Control Panel Display Messages This section contains an alphabetical list of paper is different from the size loaded in the control panel display. You may need to Hex dump mode (hexadecimal data dump). Check Duplex Paper Size Check Paper Size The Paper Format setting in the printer driver (or the Page Size setting in the SelecType Printing menu) is loaded...
... experienced user and suspect a communication problem between your configuration. You then print out codes and give them to a technician to clear the message. See page 6-9 for details. Reading Control Panel Display Messages This section contains an alphabetical list of paper is different from the size loaded in the control panel display. You may need to Hex dump mode (hexadecimal data dump). Check Duplex Paper Size Check Paper Size The Paper Format setting in the printer driver (or the Page Size setting in the SelecType Printing menu) is loaded...
User Manual
Page 110
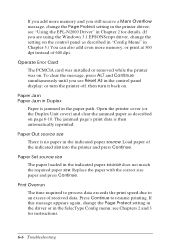
... SelecType Config menu; Operate Error Card The PCMCIA card was installed or removed while the printer was on . Open the printer cover (or the Duplex Unit cover) and clear the jammed paper as described on the control panel as described in "Config Menu" in Chapter 3.) You can also add even more memory and you still receive a Mem Overflow message, change the Page Protect setting in the driver or in the control panel display; Paper Jam Paper Jam in Duplex Paper is no paper in the printer driver; Print Overrun The time required...
... SelecType Config menu; Operate Error Card The PCMCIA card was installed or removed while the printer was on . Open the printer cover (or the Duplex Unit cover) and clear the jammed paper as described on the control panel as described in "Config Menu" in Chapter 3.) You can also add even more memory and you still receive a Mem Overflow message, change the Page Protect setting in the driver or in the control panel display; Paper Jam Paper Jam in Duplex Paper is no paper in the printer driver; Print Overrun The time required...
User Manual
Page 119
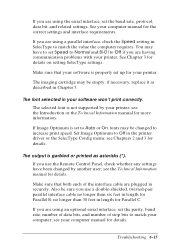
..., replace it as asterisks (*). Troubleshooting 6-15 See your software won't print correctly. Set Image Optimum to match the value the computer requires. The output is properly set up for details. If you are using an optional serial interface, set the parity, baud rate, number of data bits, and number of the interface cable are plugged in securely. See Chapter 3 for details. The imaging cartridge may be sure you are using a parallel interface, check...
..., replace it as asterisks (*). Troubleshooting 6-15 See your software won't print correctly. Set Image Optimum to match the value the computer requires. The output is properly set up for details. If you are using an optional serial interface, set the parity, baud rate, number of data bits, and number of the interface cable are plugged in securely. See Chapter 3 for details. The imaging cartridge may be sure you are using a parallel interface, check...
User Manual
Page 122
... 're using the Windows 3.1 EPSONScript driver, use the SelecType Config menu to check the print quality. Remove the cartridge, shake it from side to side, and reinstall it. The printout contains vertical black or white lines. If the problem persists, install a new imaging cartridge and print several pages to change the density setting. Lighten the Density setting in Chapter 5. The printout contains horizontal black or white lines, or the printout is uneven. Install a new imaging cartridge as described under "Cleaning the Printer" in...
... 're using the Windows 3.1 EPSONScript driver, use the SelecType Config menu to check the print quality. Remove the cartridge, shake it from side to side, and reinstall it. The printout contains vertical black or white lines. If the problem persists, install a new imaging cartridge and print several pages to change the density setting. Lighten the Density setting in Chapter 5. The printout contains horizontal black or white lines, or the printout is uneven. Install a new imaging cartridge as described under "Cleaning the Printer" in...
User Manual
Page 123
... you're using the printer driver; You can also turn off Toner Save using the Windows 3.1 EPSONScript driver, use the SelecType Config menu to moisture absorbed by printing three pages with a clean, dry cloth. see "Using the EPL-N2000 Driver" in Chapter 5. The printout contains toner smudges. The printout is sensitive to side, and wipe the bottom of the image. replace the stack of paper. replace the stack of paper and try printing again. (Printing is missing portions...
... you're using the printer driver; You can also turn off Toner Save using the Windows 3.1 EPSONScript driver, use the SelecType Config menu to moisture absorbed by printing three pages with a clean, dry cloth. see "Using the EPL-N2000 Driver" in Chapter 5. The printout contains toner smudges. The printout is sensitive to side, and wipe the bottom of the image. replace the stack of paper. replace the stack of paper and try printing again. (Printing is missing portions...
User Manual
Page 141
..., 7 Customer Care Centers, 5 download service, 6 FTP site, 6 telephone numbers, 5 World Wide Web site, 6 EPSON Status Monitor, 2 EPSONScript Level 2 ROM module, 4-2 installing, 4-21 to 4-24 removing, 4-25 Error messages, 6-2 to 6-9 Errors clearing, 3-3, 3-4 ignoring paper size errors, 3-14 parity checking, 3-17 recovering automatically from, 3-14 ESCP2 menu, 3-22 Ethernet card, specifications, A-15 F Fonts accessing Font Manager, 2-5 checking available fonts, 3-9 GL2 emulation mode, 3 LJ4 emulation mode, 3 printing a font sample, 2-12, 3-10 problems printing, 6-15 setting fonts for LJ4 mode...
..., 7 Customer Care Centers, 5 download service, 6 FTP site, 6 telephone numbers, 5 World Wide Web site, 6 EPSON Status Monitor, 2 EPSONScript Level 2 ROM module, 4-2 installing, 4-21 to 4-24 removing, 4-25 Error messages, 6-2 to 6-9 Errors clearing, 3-3, 3-4 ignoring paper size errors, 3-14 parity checking, 3-17 recovering automatically from, 3-14 ESCP2 menu, 3-22 Ethernet card, specifications, A-15 F Fonts accessing Font Manager, 2-5 checking available fonts, 3-9 GL2 emulation mode, 3 LJ4 emulation mode, 3 printing a font sample, 2-12, 3-10 problems printing, 6-15 setting fonts for LJ4 mode...
User Manual
Page 142
... EPSON, 5 to 7 with printer driver, 2-6 Hex dump mode, 6-9 I Image Optimum, 2-12, 3-14, 6-5 Imaging cartridge amount of toner, 3-16 replacing, 5-2 to 5-5 specifications, A-14, A-15 Installing Duplex Unit, 4-16 to 4-19 EPSONScript Level 2 module, 4-21 to 4-24 LocalTalk/Serial module, 4-5 to 4-10 lower paper cassettes, 4-15 to 4-16 memory modules, 4-21 to 4-24 type B interface cards, 4-10 to 4-12 Interface, setting on control panel, 3-15 Internet, 6 Item button, 3-8 L Labels, 1-3 Language, changing on control panel, 3-15 LJ4 emulation mode, 2-4, 3-18 to 3-19 fonts, 3 Loading paper lower paper...
... EPSON, 5 to 7 with printer driver, 2-6 Hex dump mode, 6-9 I Image Optimum, 2-12, 3-14, 6-5 Imaging cartridge amount of toner, 3-16 replacing, 5-2 to 5-5 specifications, A-14, A-15 Installing Duplex Unit, 4-16 to 4-19 EPSONScript Level 2 module, 4-21 to 4-24 LocalTalk/Serial module, 4-5 to 4-10 lower paper cassettes, 4-15 to 4-16 memory modules, 4-21 to 4-24 type B interface cards, 4-10 to 4-12 Interface, setting on control panel, 3-15 Internet, 6 Item button, 3-8 L Labels, 1-3 Language, changing on control panel, 3-15 LJ4 emulation mode, 2-4, 3-18 to 3-19 fonts, 3 Loading paper lower paper...
User Manual
Page 143
... mode setting, 2-11 Time Out setting, 2-11 toner density setting, 2-10 Toner Save setting, 2-11 Printing adjusting print position on page, 3-14 custom-size paper, 1-8 to 1-9 envelopes, 1-2, 1-6 labels, 1-3 manual feed mode, 1-6 to 1-7, 3-6, 3-12 print quality problems, 6-17 to 6-20 special paper, 1-6 to 1-7 two-sided, 1-7 to 1-8 Problems blank display panel, 6-14 blank pages, 6-16 diagnosing communication problems, 6-9, 6-14 fixing paper jams, 6-11 to 6-14 garbled output, 6-15 preventing paper feed problems, 6-10 print quality, 6-17 to 6-20 printing fonts, 6-15 printing graphics, 6-16 PS menu...
... mode setting, 2-11 Time Out setting, 2-11 toner density setting, 2-10 Toner Save setting, 2-11 Printing adjusting print position on page, 3-14 custom-size paper, 1-8 to 1-9 envelopes, 1-2, 1-6 labels, 1-3 manual feed mode, 1-6 to 1-7, 3-6, 3-12 print quality problems, 6-17 to 6-20 special paper, 1-6 to 1-7 two-sided, 1-7 to 1-8 Problems blank display panel, 6-14 blank pages, 6-16 diagnosing communication problems, 6-9, 6-14 fixing paper jams, 6-11 to 6-14 garbled output, 6-15 preventing paper feed problems, 6-10 print quality, 6-17 to 6-20 printing fonts, 6-15 printing graphics, 6-16 PS menu...
User Manual
Page 144
...18 manual feed, 3-12 matching serial settings for computer and printer, 4-12 page orientation, 2-6, 3-12 page size, 2-6, 2-9, 3-6, 3-12 paper source, 2-6, 2-8, 3-6, 3-12 paper type, 3-14 print resolution, 2-6, 2-7, 3-12 printer memory, 2-11 problems using SelecType or Remote Control Panel, 6-17 RITech, 2-10 standby mode, 2-11, 3-15 Time Out, 2-11, 3-15 toner density, 2-10, 3-13 toner remaining, 3-16 Toner Save, 2-11 user-defined group settings, 2-13 Setup menu, 3-15 Specifications Duplex Unit, A-14 electrical, A-5 environmental, A-4 Ethernet card, A-15 imaging cartridge, A-14, A-15 lower paper...
...18 manual feed, 3-12 matching serial settings for computer and printer, 4-12 page orientation, 2-6, 3-12 page size, 2-6, 2-9, 3-6, 3-12 paper source, 2-6, 2-8, 3-6, 3-12 paper type, 3-14 print resolution, 2-6, 2-7, 3-12 printer memory, 2-11 problems using SelecType or Remote Control Panel, 6-17 RITech, 2-10 standby mode, 2-11, 3-15 Time Out, 2-11, 3-15 toner density, 2-10, 3-13 toner remaining, 3-16 Toner Save, 2-11 user-defined group settings, 2-13 Setup menu, 3-15 Specifications Duplex Unit, A-14 electrical, A-5 environmental, A-4 Ethernet card, A-15 imaging cartridge, A-14, A-15 lower paper...
User Manual - Network Administration
Page 5
... 5-9 Setting Up for SCO UNIX Systems 5-9 Setting Up for IBM AIX Systems (RS/6000 5-12 Setting Up for HP-UX Systems 5-13 Chapter 6 Configuring the EPL-N2000 for OS/2 Protocol Support 6-2 Setting Up Redirection to the EPL-N2000 6-3 Obtaining Printer Status for Redirected Ports 6-5 Setting Up Piping to the EPL-N2000 6-5 Copying the Piping Software 6-6 Configuring Printers for Use with Remote Print Service . . . . 6-7 Obtaining Printer Status for Windows NT Configuring on a Windows NT Server Using DLC 4-2 Configuring on a Windows NT Server Using TCP/IP 4-4 Installing EPSON...
... 5-9 Setting Up for SCO UNIX Systems 5-9 Setting Up for IBM AIX Systems (RS/6000 5-12 Setting Up for HP-UX Systems 5-13 Chapter 6 Configuring the EPL-N2000 for OS/2 Protocol Support 6-2 Setting Up Redirection to the EPL-N2000 6-3 Obtaining Printer Status for Redirected Ports 6-5 Setting Up Piping to the EPL-N2000 6-5 Copying the Piping Software 6-6 Configuring Printers for Use with Remote Print Service . . . . 6-7 Obtaining Printer Status for Windows NT Configuring on a Windows NT Server Using DLC 4-2 Configuring on a Windows NT Server Using TCP/IP 4-4 Installing EPSON...
User Manual - Network Administration
Page 10
.... The file server stores data required for the EPL-N2000 to operate as a file before the print server sends the job to the assigned printer. Traditionally, a remote printer is a set up and use the printer on a network running NetWare's RPRINTER, but under the control of a NetWare print server. A status sheet prints each network. 4 Introduction Chapter 6, "Configuring the EPL-N2000 for OS/2," describes how to use it to check printer status, change printer settings, or work with printer configuration files. Chapter 7, "Using the EPSON Status Monitor," describes how to install the Status...
.... The file server stores data required for the EPL-N2000 to operate as a file before the print server sends the job to the assigned printer. Traditionally, a remote printer is a set up and use the printer on a network running NetWare's RPRINTER, but under the control of a NetWare print server. A status sheet prints each network. 4 Introduction Chapter 6, "Configuring the EPL-N2000 for OS/2," describes how to use it to check printer status, change printer settings, or work with printer configuration files. Chapter 7, "Using the EPSON Status Monitor," describes how to install the Status...

User Manual - Network Administration
Page 38
... II network. 3-2 Configuring the EPL-N2000 for Macintosh. If necessary, you need to copy these two utilities to the network. This chapter describes how to configure the EPL-N2000 from a Macintosh computer using EPSON Zoner. for AppleTalk Before configuring the EPL-N2000 on connecting the Ethernet interface card. EPSON Net! To set up the EPL-N2000 for the driver diskette in the box that came in.) t Make sure the EPL-N2000 is connected to your module.) t Install...
... II network. 3-2 Configuring the EPL-N2000 for Macintosh. If necessary, you need to copy these two utilities to the network. This chapter describes how to configure the EPL-N2000 from a Macintosh computer using EPSON Zoner. for AppleTalk Before configuring the EPL-N2000 on connecting the Ethernet interface card. EPSON Net! To set up the EPL-N2000 for the driver diskette in the box that came in.) t Make sure the EPL-N2000 is connected to your module.) t Install...


