Reference Manual
Page 6
... Network For Windows 159 Sharing the printer 159 Setting up your printer as a shared printer 160 Using an additional driver 162 Setting up a clients 168 Installing the printer driver from the CD-ROM 176 For Macintosh 178 Sharing the printer 178 Setting up your printer as a shared printer 178 Accessing the shared printer 179 For Mac OS X 181... the Adobe PostScript 3 ROM module 213 Interface Cards 216 Removing an interface card 219 Chapter 7 Replacing Consumable Products Replacement Messages 221 Toner Cartridge 222 Photoconductor unit 228 Fuser unit 234 Transfer unit 238 6
... Network For Windows 159 Sharing the printer 159 Setting up your printer as a shared printer 160 Using an additional driver 162 Setting up a clients 168 Installing the printer driver from the CD-ROM 176 For Macintosh 178 Sharing the printer 178 Setting up your printer as a shared printer 178 Accessing the shared printer 179 For Mac OS X 181... the Adobe PostScript 3 ROM module 213 Interface Cards 216 Removing an interface card 219 Chapter 7 Replacing Consumable Products Replacement Messages 221 Toner Cartridge 222 Photoconductor unit 228 Fuser unit 234 Transfer unit 238 6
Reference Manual
Page 10
Photoconductor unit 370 Transfer unit 370 Fuser unit 120/220 371 Appendix B Working with Fonts EPSON BarCode Fonts (Windows Only 373 System requirements 375 Installing EPSON BarCode Fonts 375 Printing with EPSON BarCode Fonts 377 BarCode Font specifications 381 Available Fonts 392 LJ4/GL2 mode 393 ESC/P 2 and FX modes ...FX Modes 405 International character sets 407 Characters available with the ESC (^ command 407 In the I239X Emulation Mode 408 In the EPSON GL/ 2 Mode 408 Contacting Customer Support 409 For users in Latin America 410 For users in Australia 410 For users in Singapore...
Photoconductor unit 370 Transfer unit 370 Fuser unit 120/220 371 Appendix B Working with Fonts EPSON BarCode Fonts (Windows Only 373 System requirements 375 Installing EPSON BarCode Fonts 375 Printing with EPSON BarCode Fonts 377 BarCode Font specifications 381 Available Fonts 392 LJ4/GL2 mode 393 ESC/P 2 and FX modes ...FX Modes 405 International character sets 407 Characters available with the ESC (^ command 407 In the I239X Emulation Mode 408 In the EPSON GL/ 2 Mode 408 Contacting Customer Support 409 For users in Latin America 410 For users in Australia 410 For users in Singapore...

Reference Manual
Page 17
Dispose of used toner cartridges, photoconductor units, fuser units, or transfer units in this guide. ❏ Never force the printer's components into place. Because the fine particles can cause a fire or explosion if they can damage it. ❏ When handling an imaging cartridge, ... environment to do not use a broom and dustpan or a damp cloth with a spark, do so in fire, as they come into the fuser unit. 2. Although the printer is spilled, use a vacuum cleaner. ❏ Wait at least one hour before using an imaging cartridge after moving it up. Keep the toner away...
Dispose of used toner cartridges, photoconductor units, fuser units, or transfer units in this guide. ❏ Never force the printer's components into place. Because the fine particles can cause a fire or explosion if they can damage it. ❏ When handling an imaging cartridge, ... environment to do not use a broom and dustpan or a damp cloth with a spark, do so in fire, as they come into the fuser unit. 2. Although the printer is spilled, use a vacuum cleaner. ❏ Wait at least one hour before using an imaging cartridge after moving it up. Keep the toner away...

Reference Manual
Page 18
The unit contains a green-colored light-sensitive drum. Avoid touching the drum, since oil from the printer, always place the unit on a clean, smooth surface. Important Safety Instructions ❏ Connect your dealer. 18 Exposure to light can cause the printer to overheat. ❏ Avoid sharing outlets with an opaque... affect print quality. ❏ To get the best print quality, do not store the photoconductor unit in temperature or humidity. ❏ Be sure to keep the unit out of the printer for long periods, cover it to keep consumable components out of the reach of children. ...
The unit contains a green-colored light-sensitive drum. Avoid touching the drum, since oil from the printer, always place the unit on a clean, smooth surface. Important Safety Instructions ❏ Connect your dealer. 18 Exposure to light can cause the printer to overheat. ❏ Avoid sharing outlets with an opaque... affect print quality. ❏ To get the best print quality, do not store the photoconductor unit in temperature or humidity. ❏ Be sure to keep the unit out of the printer for long periods, cover it to keep consumable components out of the reach of children. ...
Reference Manual
Page 27
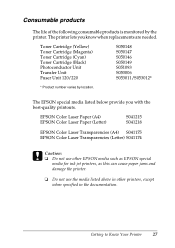
...EPSON Color Laser Paper (A4) S041215 EPSON Color Laser Paper (Letter) S041218 1 EPSON Color Laser Transparencies (A4) S041175 EPSON Color Laser Transparencies (Letter) S041174 1 c Caution: ❏ Do not use other EPSON media such as EPSON special 1 media for ink jet printers, as this can cause paper jams and damage the printer... 1 Photoconductor Unit S051093 Transfer Unit Fuser Unit 120/220 S053006 S053011/S053012* 1 * Product number varies by the printer. Consumable products 1 The life of the following consumable products is monitored by location. 1 The EPSON special ...
...EPSON Color Laser Paper (A4) S041215 EPSON Color Laser Paper (Letter) S041218 1 EPSON Color Laser Transparencies (A4) S041175 EPSON Color Laser Transparencies (Letter) S041174 1 c Caution: ❏ Do not use other EPSON media such as EPSON special 1 media for ink jet printers, as this can cause paper jams and damage the printer... 1 Photoconductor Unit S051093 Transfer Unit Fuser Unit 120/220 S053006 S053011/S053012* 1 * Product number varies by the printer. Consumable products 1 The life of the following consumable products is monitored by location. 1 The EPSON special ...

Reference Manual
Page 99
...toner. e. Toner: Indicates the amount of the printer. The toner icon flashes if the toner is displayed. 3 Clicking this option is installed. g. 3 Photoconductor Indicates the remaining functional life Unit: of paper remaining in the paper source. 3... Information for the optional cassette is displayed only if this button closes the dialog box. Printer image: c. b. When a problem occurs, the 3 most probable solution is low. Paper: 3 Displays the paper size, paper type and the approximate amount of the photoconductor unit...
...toner. e. Toner: Indicates the amount of the printer. The toner icon flashes if the toner is displayed. 3 Clicking this option is installed. g. 3 Photoconductor Indicates the remaining functional life Unit: of paper remaining in the paper source. 3... Information for the optional cassette is displayed only if this button closes the dialog box. Printer image: c. b. When a problem occurs, the 3 most probable solution is low. Paper: 3 Displays the paper size, paper type and the approximate amount of the photoconductor unit...

Reference Manual
Page 150
... solution is low. Information for the optional cassettes are displayed only if this button closes the dialog box. Toner: g. Photoconductor Unit: The text box next to the printer image displays the current status of the photoconductor unit. 150 For Macintosh Close button: e. Displays the paper size and the approximate amount of remaining toner. The toner...
... solution is low. Information for the optional cassettes are displayed only if this button closes the dialog box. Toner: g. Photoconductor Unit: The text box next to the printer image displays the current status of the photoconductor unit. 150 For Macintosh Close button: e. Displays the paper size and the approximate amount of remaining toner. The toner...
Reference Manual
Page 221
...Products 7 7 Replacement Messages 7 When you remove the toner cartridge to maintain print quality and extend the life of your printer. 7 Note: 7 Do not replace the toner cartridge when the XXXX Toner Low message appears. Toner remaining in the ... Consumable Products 221 Worn Transfer Unit The transfer unit is near the end of EPSON Status Monitor 3, replace the appropriate consumable products. Replace the toner cartridge when the Replace Toner xxxx message appears. 7 LCD Panel Description Message 7 Worn The photoconductor unit has Photoconductor reached the end of its ...
...Products 7 7 Replacement Messages 7 When you remove the toner cartridge to maintain print quality and extend the life of your printer. 7 Note: 7 Do not replace the toner cartridge when the XXXX Toner Low message appears. Toner remaining in the ... Consumable Products 221 Worn Transfer Unit The transfer unit is near the end of EPSON Status Monitor 3, replace the appropriate consumable products. Replace the toner cartridge when the Replace Toner xxxx message appears. 7 LCD Panel Description Message 7 Worn The photoconductor unit has Photoconductor reached the end of its ...

Reference Manual
Page 228
... subject to scratch the surface of the drum. Handling precautions Note the following handling precautions before replacing the photoconductor unit: ❏ The photoconductor unit weighs 4.5 kg (9.9 lb). Also, avoid touching the drum, since oil from your skin may permanently ...quality, do so. Replace the top cover. Photoconductor unit Prepare a new photoconductor unit for replacement when you see a message informing you to do not store the photoconductor unit in temperature or humidity. ❏ Do not tilt the photoconductor unit. 228 Replacing Consumable Products Be sure to hold...
... subject to scratch the surface of the drum. Handling precautions Note the following handling precautions before replacing the photoconductor unit: ❏ The photoconductor unit weighs 4.5 kg (9.9 lb). Also, avoid touching the drum, since oil from your skin may permanently ...quality, do so. Replace the top cover. Photoconductor unit Prepare a new photoconductor unit for replacement when you see a message informing you to do not store the photoconductor unit in temperature or humidity. ❏ Do not tilt the photoconductor unit. 228 Replacing Consumable Products Be sure to hold...

Reference Manual
Page 229
Turn off the printer. 7 2. Press the latch on cover A and open the cover. 7 7 7 7 7 7 7 7 Replacing Consumable Products 229 Dispose of it according to replace the photoconductor unit. 1. w Warning: ❏ Do not dispose of children. 7 Replacing the photoconductor unit 7 Follow these steps to local 7 regulations. ❏ Keep the photoconductor unit out of the reach of the used photoconductor unit in fire, as it may explode and cause injury.
Turn off the printer. 7 2. Press the latch on cover A and open the cover. 7 7 7 7 7 7 7 7 Replacing Consumable Products 229 Dispose of it according to replace the photoconductor unit. 1. w Warning: ❏ Do not dispose of children. 7 Replacing the photoconductor unit 7 Follow these steps to local 7 regulations. ❏ Keep the photoconductor unit out of the reach of the used photoconductor unit in fire, as it may explode and cause injury.

Reference Manual
Page 230
Raise cover D. 4. Hold the photoconductor unit by the handle, and slowly lift it straight out of the printer. 230 Replacing Consumable Products 3.
Raise cover D. 4. Hold the photoconductor unit by the handle, and slowly lift it straight out of the printer. 230 Replacing Consumable Products 3.

Reference Manual
Page 231
Then, grab the handle and remove the styrofoam insert and tear open the bag along the dotted line to expose the handle. 5. Note: 7 Always keep the cartridge positioned as shown in the illustration. 7 7 7 7 7 7 7 7 7 7 Replacing Consumable Products 231 Take the new photoconductor unit and tear away the top 7 portion of the bag along the dotted line.
Then, grab the handle and remove the styrofoam insert and tear open the bag along the dotted line to expose the handle. 5. Note: 7 Always keep the cartridge positioned as shown in the illustration. 7 7 7 7 7 7 7 7 7 7 Replacing Consumable Products 231 Take the new photoconductor unit and tear away the top 7 portion of the bag along the dotted line.

Reference Manual
Page 233
Close covers D and A. 7 7 7 7 7 Replacing Consumable Products 233 Holding the handle firmly, lower the photoconductor unit 7 into the printer, making sure the posts on the sides of the unit slide into the slots. 7 7 7 7 7 7 9. 8.
Close covers D and A. 7 7 7 7 7 Replacing Consumable Products 233 Holding the handle firmly, lower the photoconductor unit 7 into the printer, making sure the posts on the sides of the unit slide into the slots. 7 7 7 7 7 7 9. 8.

Reference Manual
Page 243
Remove the photoconductor unit. After unpacking and setting your printer at the new location, you need to move the printer for a short distance. 7 1. Turn off the printer and remove the following handling precautions when you 7 need to check the color registration and adjust the color alignment if necessary. Then pack them in their original boxes with the optional...
Remove the photoconductor unit. After unpacking and setting your printer at the new location, you need to move the printer for a short distance. 7 1. Turn off the printer and remove the following handling precautions when you 7 need to check the color registration and adjust the color alignment if necessary. Then pack them in their original boxes with the optional...

Reference Manual
Page 244
Turn off the printer and remove the following items. ❏ Power cord 244 Replacing Consumable Products Moving the printer together with the optional paper cassette unit: For 1000-Sheet Paper Cassette Unit users 1. Be sure to lift the printer by the correct positions as shown below. * Do not lift the printer by these steps to move the printer together with an optional paper cassette unit installed Follow these areas. 3. ❏ Interface cable ❏ Paper ❏ Photoconductor unit 2. When moving the printer, always keep it horizontal.
Turn off the printer and remove the following items. ❏ Power cord 244 Replacing Consumable Products Moving the printer together with the optional paper cassette unit: For 1000-Sheet Paper Cassette Unit users 1. Be sure to lift the printer by the correct positions as shown below. * Do not lift the printer by these steps to move the printer together with an optional paper cassette unit installed Follow these areas. 3. ❏ Interface cable ❏ Paper ❏ Photoconductor unit 2. When moving the printer, always keep it horizontal.

Reference Manual
Page 245
Turn off the printer and remove the following items. ❏ Power cord 7 ❏ Interface cable 7 ❏ Paper Replacing Consumable Products 245 For 500-Sheet Paper Cassette Unit users 7 1. Roll the printer to the new location. 7 4. Lock the casters after relocating the printer. 7 c Caution: Do not move the printer on angled or uneven surfaces. ❏ Interface cable ❏ Paper 7 ❏ Photoconductor unit 7 2. Unlock the two casters at the bottom of the unit. 7 7 7 7 7 3.
Turn off the printer and remove the following items. ❏ Power cord 7 ❏ Interface cable 7 ❏ Paper Replacing Consumable Products 245 For 500-Sheet Paper Cassette Unit users 7 1. Roll the printer to the new location. 7 4. Lock the casters after relocating the printer. 7 c Caution: Do not move the printer on angled or uneven surfaces. ❏ Interface cable ❏ Paper 7 ❏ Photoconductor unit 7 2. Unlock the two casters at the bottom of the unit. 7 7 7 7 7 3.

Reference Manual
Page 246
... additional space. 246 Replacing Consumable Products Finding a place for the printer When relocating the printer, always choose a location that has adequate space for the amount of paper cassette unit. 3. ❏ Photoconductor unit 2. Be sure to lift the printer by the bottom of space required around the printer to ensure smooth operation. Dimensions shown in the illustrations below...
... additional space. 246 Replacing Consumable Products Finding a place for the printer When relocating the printer, always choose a location that has adequate space for the amount of paper cassette unit. 3. ❏ Photoconductor unit 2. Be sure to lift the printer by the bottom of space required around the printer to ensure smooth operation. Dimensions shown in the illustrations below...

Reference Manual
Page 256
Open cover D. 4. 3. Grasp the handle of the photoconductor unit firmly and remove the unit from the printer. 256 Troubleshooting
Open cover D. 4. 3. Grasp the handle of the photoconductor unit firmly and remove the unit from the printer. 256 Troubleshooting

Reference Manual
Page 257
5. Remove any jammed paper. 8 8 8 8 8 8 6. Reinstall the photoconductor unit, making sure the posts on the sides of the unit slide into the slots. 8 8 8 8 8 8 Troubleshooting 257
5. Remove any jammed paper. 8 8 8 8 8 8 6. Reinstall the photoconductor unit, making sure the posts on the sides of the unit slide into the slots. 8 8 8 8 8 8 Troubleshooting 257

Reference Manual
Page 278
There may be no toner left in EPSON Status Monitor 3 indicates that the amount of toner left is low, see "Replacing a toner cartridge" on page 223. There may be a problem with Replace the photoconductor unit. See the photoconductor unit. If the message on page 228. 278 Troubleshooting "Photoconductor unit" on the LCD panel or in the toner cartridge.
There may be no toner left in EPSON Status Monitor 3 indicates that the amount of toner left is low, see "Replacing a toner cartridge" on page 223. There may be a problem with Replace the photoconductor unit. See the photoconductor unit. If the message on page 228. 278 Troubleshooting "Photoconductor unit" on the LCD panel or in the toner cartridge.

