Start Here
Page 7
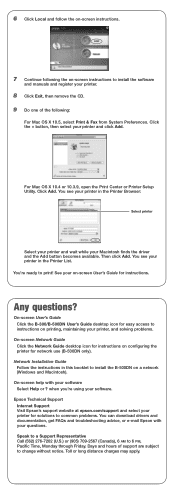
... Do one of support are subject to common problems. You can download drivers and documentation, get FAQs and troubleshooting advice, or e-mail Epson with your printer and click Add. Days and hours of the following the on-screen instructions to print! 6 Click Local and follow the on-screen ...OS X 10.5, select Print & Fax from System Preferences. On-screen User's Guide Click the B-300/B-500DN User's Guide desktop icon for instructions. You're ready to install the software and manuals and register your on-screen User's Guide for easy access to install the B-500DN on a network ...
... Do one of support are subject to common problems. You can download drivers and documentation, get FAQs and troubleshooting advice, or e-mail Epson with your printer and click Add. Days and hours of the following the on-screen instructions to print! 6 Click Local and follow the on-screen ...OS X 10.5, select Print & Fax from System Preferences. On-screen User's Guide Click the B-300/B-500DN User's Guide desktop icon for instructions. You're ready to install the software and manuals and register your on-screen User's Guide for easy access to install the B-500DN on a network ...
User's Guide
Page 19
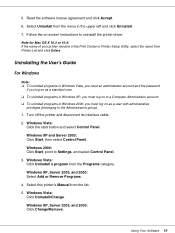
... in the upper left and click Uninstall. 7. Windows 2000: Click Start, point to uninstall the printer driver. Read the software license agreement and click Accept. 6. Turn off the printer and disconnect its interface cable. 2. Windows XP and Server 2003: Click Start, then select Control ... Vista: Click the start button and select Control Panel. Select this printer's Manual from the Programs category. Select Uninstall from the menu in the Print Center or Printer Setup Utility, select the name from Printer List and click Delete. Windows XP, Server 2003, and 2000: Select...
... in the upper left and click Uninstall. 7. Windows 2000: Click Start, point to uninstall the printer driver. Read the software license agreement and click Accept. 6. Turn off the printer and disconnect its interface cable. 2. Windows XP and Server 2003: Click Start, then select Control ... Vista: Click the start button and select Control Panel. Select this printer's Manual from the Programs category. Select Uninstall from the menu in the Print Center or Printer Setup Utility, select the name from Printer List and click Delete. Windows XP, Server 2003, and 2000: Select...

User's Guide
Page 22
You can also purchase supplies from an Epson authorized reseller. sales) or www.epson.ca (Canadian sales). You can purchase genuine Epson ink and paper at Epson Supplies CentralSM at a time Up to 100 sheets Up to load paper: Paper Handling 22 To find the nearest one, call 800-GO-EPSON (800-463-7766). Loading Paper Follow... tray has a maximum capacity of 170 sheets. Make sure the paper stack fits under the c arrow mark inside the edge guide. ❏ Maximum capacity for manual double-sided printing) Up to 20 sheets 1 sheet at a time 1 sheet at www...
You can also purchase supplies from an Epson authorized reseller. sales) or www.epson.ca (Canadian sales). You can purchase genuine Epson ink and paper at Epson Supplies CentralSM at a time Up to 100 sheets Up to load paper: Paper Handling 22 To find the nearest one, call 800-GO-EPSON (800-463-7766). Loading Paper Follow... tray has a maximum capacity of 170 sheets. Make sure the paper stack fits under the c arrow mark inside the edge guide. ❏ Maximum capacity for manual double-sided printing) Up to 20 sheets 1 sheet at a time 1 sheet at www...

User's Guide
Page 61
...to pull out your application. and even-numbered pages onto opposite sides of the binding margin. Note: The actual binding margin may be placed. Manual Double-sided Printing Follow the steps below to open the Margins window. 10. Click Margins to print odd- Choose cm or inch as the.... 11. Experiment with Special Layout Options 61 Then click OK to 3.0 cm. Printing with a few sheets to the Page Layout window. 9. Access the printer settings. Specify the edge of the paper, reduce the print density and increase the drying time to the Page Layout window. Click OK to return...
...to pull out your application. and even-numbered pages onto opposite sides of the binding margin. Note: The actual binding margin may be placed. Manual Double-sided Printing Follow the steps below to open the Margins window. 10. Click Margins to print odd- Choose cm or inch as the.... 11. Experiment with Special Layout Options 61 Then click OK to 3.0 cm. Printing with a few sheets to the Page Layout window. 9. Access the printer settings. Specify the edge of the paper, reduce the print density and increase the drying time to the Page Layout window. Click OK to return...

User's Guide
Page 63
Printing with Special Layout Options 63 Select Manual to change the orientation of your printout. 7. Select Portrait (tall) or Landscape (wide) to use manual double-sided printing function. 9. Click Margins to open the Margins window. Click the Page Layout tab, then select the Duplex Printing check box. 8. 6.
Printing with Special Layout Options 63 Select Manual to change the orientation of your printout. 7. Select Portrait (tall) or Landscape (wide) to use manual double-sided printing function. 9. Click Margins to open the Margins window. Click the Page Layout tab, then select the Duplex Printing check box. 8. 6.

User's Guide
Page 72
Select the Auto Duplex Printing check box. 15. Printing with Special Layout Options 72 Select the Binding edge setting. 16. Load paper into the printer, and click Print. & See "Loading Paper" on page 22. Select one of the Document Type settings. Note: Folded booklet double-sided... printing function is available only when manual double-sided printing is set. This automatically adjusts Print Density and Ink Drying Time. Select Auto Duplex Printing Settings from the pop-up menu. 14. 13. Folded Booklet Double-...
Select the Auto Duplex Printing check box. 15. Printing with Special Layout Options 72 Select the Binding edge setting. 16. Load paper into the printer, and click Print. & See "Loading Paper" on page 22. Select one of the Document Type settings. Note: Folded booklet double-sided... printing function is available only when manual double-sided printing is set. This automatically adjusts Print Density and Ink Drying Time. Select Auto Duplex Printing Settings from the pop-up menu. 14. 13. Folded Booklet Double-...

User's Guide
Page 74
Click the Page Layout tab and select the Duplex Printing check box. Then select Manual and select the Folded Booklet check box. 8. Printing with Special Layout Options 74 Select Portrait (tall) or Landscape (wide) to open the Margins window. Select the appropriate Size setting. 6. Click Margins to change the orientation of your printout. 7. 5.
Click the Page Layout tab and select the Duplex Printing check box. Then select Manual and select the Folded Booklet check box. 8. Printing with Special Layout Options 74 Select Portrait (tall) or Landscape (wide) to open the Margins window. Select the appropriate Size setting. 6. Click Margins to change the orientation of your printout. 7. 5.

User's Guide
Page 76
... You can also resize your page to the following. & See "The Paper Jams" on another size paper. Fit to Page printing automatically resizes your page manually. ❏ Follow the instructions provided when reloading the printouts. Once the paper is complete, fold the sheets and bind them together using a stapler or other...
... You can also resize your page to the following. & See "The Paper Jams" on another size paper. Fit to Page printing automatically resizes your page manually. ❏ Follow the instructions provided when reloading the printouts. Once the paper is complete, fold the sheets and bind them together using a stapler or other...
User's Guide
Page 150
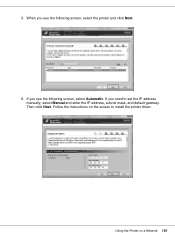
If you see the following screen, select the printer and click Next. 6. Using the Printer on the screen to set the IP address manually, select Manual and enter the IP address, subnet mask, and default gateway. If you need to install the printer driver. Then click Next. 5. When you see the following screen, select Automatic. Follow the instructions on a Network 150
If you see the following screen, select the printer and click Next. 6. Using the Printer on the screen to set the IP address manually, select Manual and enter the IP address, subnet mask, and default gateway. If you need to install the printer driver. Then click Next. 5. When you see the following screen, select Automatic. Follow the instructions on a Network 150

User's Guide
Page 197
... to Windows Vista, XP, Server 2003, and 2000. ❏ Windows Vista refers to Windows Vista Home Basic Edition, Windows Vista Home Premium Edition, Windows Vista Business Edition, Windows Vista Enterprise Edition, and Windows Vista Ultimate Edition. ❏ Windows XP refers to Windows XP Home Edition, Windows XP Professional x64 Edition, and...; Windows Server 2003 refers to Windows Server 2003 and Windows Server 2003 x64 Editions. ❏ Windows 2000 refers to 10.5.x. Operating System Versions In this manual, the following abbreviations are used.
... to Windows Vista, XP, Server 2003, and 2000. ❏ Windows Vista refers to Windows Vista Home Basic Edition, Windows Vista Home Premium Edition, Windows Vista Business Edition, Windows Vista Enterprise Edition, and Windows Vista Ultimate Edition. ❏ Windows XP refers to Windows XP Home Edition, Windows XP Professional x64 Edition, and...; Windows Server 2003 refers to Windows Server 2003 and Windows Server 2003 x64 Editions. ❏ Windows 2000 refers to 10.5.x. Operating System Versions In this manual, the following abbreviations are used.


