Network Installation Guide
Page 2
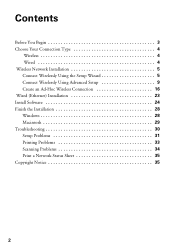
Contents Before You Begin 3 Choose Your Connection Type 4 Wireless 4 Wired 4 Wireless Network Installation 5 Connect Wirelessly Using the Setup Wizard 5 Connect Wirelessly Using Advanced Setup 9 Create an Ad-Hoc Wireless Connection 16 Wired (Ethernet) Installation 23 Install Software 24 Finish the Installation 28 Windows 28 Macintosh 29 Troubleshooting 30 Setup Problems 31 Printing Problems 33 Scanning Problems 34 Print a Network Status Sheet 35 Copyright Notice 35 2
Contents Before You Begin 3 Choose Your Connection Type 4 Wireless 4 Wired 4 Wireless Network Installation 5 Connect Wirelessly Using the Setup Wizard 5 Connect Wirelessly Using Advanced Setup 9 Create an Ad-Hoc Wireless Connection 16 Wired (Ethernet) Installation 23 Install Software 24 Finish the Installation 28 Windows 28 Macintosh 29 Troubleshooting 30 Setup Problems 31 Printing Problems 33 Scanning Problems 34 Print a Network Status Sheet 35 Copyright Notice 35 2
Network Installation Guide
Page 16
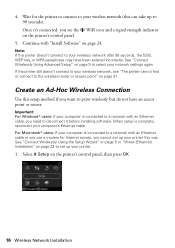
... connect to your wireless network (this can take up your computer is connected to the wireless router or access point" on page 24. Important: For Windows® users: If your computer's Ethernet cable. Once it before installing software. Create an Ad-Hoc Wireless Connection Use this way. Note: If the printer...
... connect to your wireless network (this can take up your computer is connected to the wireless router or access point" on page 24. Important: For Windows® users: If your computer's Ethernet cable. Once it before installing software. Create an Ad-Hoc Wireless Connection Use this way. Note: If the printer...
Network Installation Guide
Page 24
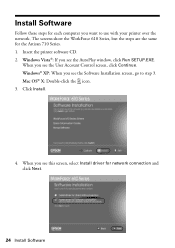
... window, click Run SETUP.EXE. Windows® XP: When you want to step 3. The screens show the WorkForce 610 Series, but the steps are the same for network connection and click Next. 24 Install Software Install Software Follow these steps for each computer you see this screen, select Install driver for the Artisan 710...
... window, click Run SETUP.EXE. Windows® XP: When you want to step 3. The screens show the WorkForce 610 Series, but the steps are the same for network connection and click Next. 24 Install Software Install Software Follow these steps for each computer you see this screen, select Install driver for the Artisan 710...
Network Installation Guide
Page 26
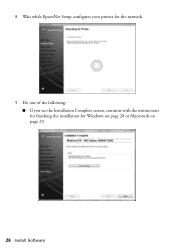
Do one of the following: ■ If you see the Installation Complete screen, continue with the instructions for finishing the installation for the network. 9. Wait while EpsonNet Setup configures your printer for Windows on page 28 or Macintosh on page 29. 26 Install Software 8.
Do one of the following: ■ If you see the Installation Complete screen, continue with the instructions for finishing the installation for the network. 9. Wait while EpsonNet Setup configures your printer for Windows on page 28 or Macintosh on page 29. 26 Install Software 8.
Network Installation Guide
Page 28
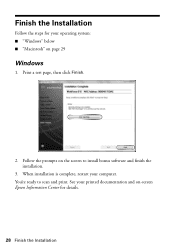
Finish the Installation Follow the steps for your printed documentation and on-screen Epson Information Center for details. 28 Finish the Installation You're ready to install bonus software and finish the installation. 3. Follow the prompts on page 29 Windows 1. See your operating system: ■ "Windows" below ■ "Macintosh" on the screen to scan and print. When installation is complete, restart your computer. Print a test page, then click Finish. 2.
Finish the Installation Follow the steps for your printed documentation and on-screen Epson Information Center for details. 28 Finish the Installation You're ready to install bonus software and finish the installation. 3. Follow the prompts on page 29 Windows 1. See your operating system: ■ "Windows" below ■ "Macintosh" on the screen to scan and print. When installation is complete, restart your computer. Print a test page, then click Finish. 2.
Network Installation Guide
Page 32
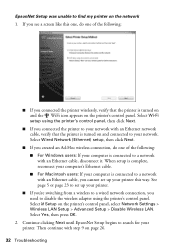
... OK. 2. Select Wired Network (Ethernet) setup, then click Next. ■ If you created an Ad-Hoc wireless connection, do one of the following : ■ For Windows users: If your computer is turned on the printer's control panel, select Network Settings > Wireless LAN Setup > Advanced Setup > Disable Wireless LAN. Continue clicking Next...
... OK. 2. Select Wired Network (Ethernet) setup, then click Next. ■ If you created an Ad-Hoc wireless connection, do one of the following : ■ For Windows users: If your computer is turned on the printer's control panel, select Network Settings > Wireless LAN Setup > Advanced Setup > Disable Wireless LAN. Continue clicking Next...
Network Installation Guide
Page 33
... and reinsert the CD to install an application that allows you 're switching from the printer. The printer does not appear in the Add Printer window (Mac OS X) Make sure the printer driver was installed correctly and that the printer is connected to disable the wireless adapter using the printer's control...
... and reinsert the CD to install an application that allows you 're switching from the printer. The printer does not appear in the Add Printer window (Mac OS X) Make sure the printer driver was installed correctly and that the printer is connected to disable the wireless adapter using the printer's control...
Product Brochure
Page 2
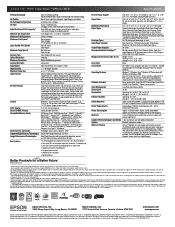
... of five black and color pages as 8 hours with the power on accelerated testing of Epson America, Inc. Microsoft, Windows, Windows Vista and the Windows logos are registered trademarks, Epson Exceed Your Vision is a registered logomark and Better Products for the life of prints. With.../Support and Details 1-year warranty, 2-year with product registration3 Options Bluetooth photo print adapter What's In The Box Artisan 710 photo all rights in accordance with product registration3 Length of their respective companies. CPD-31163R1 9/09 Power consumption will vary...
... of five black and color pages as 8 hours with the power on accelerated testing of Epson America, Inc. Microsoft, Windows, Windows Vista and the Windows logos are registered trademarks, Epson Exceed Your Vision is a registered logomark and Better Products for the life of prints. With.../Support and Details 1-year warranty, 2-year with product registration3 Options Bluetooth photo print adapter What's In The Box Artisan 710 photo all rights in accordance with product registration3 Length of their respective companies. CPD-31163R1 9/09 Power consumption will vary...
Quick Guide
Page 2
... 22 Printing Coloring Book Pages 22 Printing Lined Paper and Graph Paper 23 Printing Personal Note Paper 24 Printing From Your Computer 26 Printing in Windows 26 Printing With a Macintosh 28 Selecting the Correct Paper Type 32 Two-sided Printing 33 Scanning a Document or Photo 35 Basic Scanning 35 2 Contents
... 22 Printing Coloring Book Pages 22 Printing Lined Paper and Graph Paper 23 Printing Personal Note Paper 24 Printing From Your Computer 26 Printing in Windows 26 Printing With a Macintosh 28 Selecting the Correct Paper Type 32 Two-sided Printing 33 Scanning a Document or Photo 35 Basic Scanning 35 2 Contents
Quick Guide
Page 18
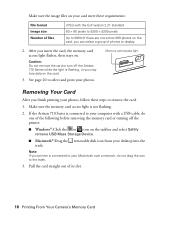
... network, do one of the following before removing the memory card or turning off the Artisan 710 Series while the light is not flashing. 2. Pull the card straight out of photos to display. 2. If the Artisan 710 Series is connected to your photos. Note: If your printer is connected to your computer... card, the memory card access light flashes, then stays on. Caution: Do not remove the card or turn off the printer: ■ Windows®:Click the or icon on the taskbar and select Safely remove USB Mass Storage Device. ■ Macintosh®:Drag the removable disk icon from...
... network, do one of the following before removing the memory card or turning off the Artisan 710 Series while the light is not flashing. 2. Pull the card straight out of photos to display. 2. If the Artisan 710 Series is connected to your photos. Note: If your printer is connected to your computer... card, the memory card access light flashes, then stays on. Caution: Do not remove the card or turn off the printer: ■ Windows®:Click the or icon on the taskbar and select Safely remove USB Mass Storage Device. ■ Macintosh®:Drag the removable disk icon from...
Quick Guide
Page 26
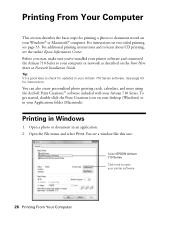
Printing in an application. 2. You see a window like this one: Select EPSON Artisan 710 Series Click here to open your computer or network as described on the Start Here sheet or Network Installation Guide. Before you start, make sure you've installed your printer software and connected the Artisan 710 Series to check for instructions. Open the...
Printing in an application. 2. You see a window like this one: Select EPSON Artisan 710 Series Click here to open your computer or network as described on the Start Here sheet or Network Installation Guide. Before you start, make sure you've installed your printer software and connected the Artisan 710 Series to check for instructions. Open the...
Quick Guide
Page 27
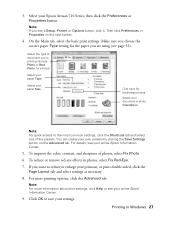
... the Page Layout tab and select settings as necessary. 8. Select the type of photos, select Fix Photo. 6. For details, see your online Epson Information Center. 9. For more information about print settings, click Help or see your settings. To improve the color, contrast, and sharpness of document... by clicking the Save Settings button on the next screen. 4. You can create your Epson Artisan 710 Series, then click the Preferences or Properties button. To reduce or remove red-eye effects in Windows 27 Click OK to the most common settings, click the Shortcuts tab and select one...
... the Page Layout tab and select settings as necessary. 8. Select the type of photos, select Fix Photo. 6. For details, see your online Epson Information Center. 9. For more information about print settings, click Help or see your settings. To improve the color, contrast, and sharpness of document... by clicking the Save Settings button on the next screen. 4. You can create your Epson Artisan 710 Series, then click the Preferences or Properties button. To reduce or remove red-eye effects in Windows 27 Click OK to the most common settings, click the Shortcuts tab and select one...

Quick Guide
Page 28
10. Mac OS X 10.5 1. Open a photo or document in an application. 2. Click d to expand 4. Open the File menu and select Print. 3. Select your Mac OS® operating system. Select EPSON Artisan 710 Click to expand the Print window, if necessary. 28 Printing From Your Computer Click OK or Print to start printing. Check ink cartridge status Cancel printing Printing With a Macintosh See the section below for your Epson Artisan 710 Series as the Printer setting. This window appears and shows the progress of your print job.
10. Mac OS X 10.5 1. Open a photo or document in an application. 2. Click d to expand 4. Open the File menu and select Print. 3. Select your Mac OS® operating system. Select EPSON Artisan 710 Click to expand the Print window, if necessary. 28 Printing From Your Computer Click OK or Print to start printing. Check ink cartridge status Cancel printing Printing With a Macintosh See the section below for your Epson Artisan 710 Series as the Printer setting. This window appears and shows the progress of your print job.

Quick Guide
Page 29
... mode 7. 5. Choose Print Settings from the pop-up menu Select your application before printing. See the online Epson Information Center for it in the settings for your application at the bottom of this window. (If you're printing from Preview, you may need from the pop-up menu, then select the following...
... mode 7. 5. Choose Print Settings from the pop-up menu Select your application before printing. See the online Epson Information Center for it in the settings for your application at the bottom of this window. (If you're printing from Preview, you may need from the pop-up menu, then select the following...

Quick Guide
Page 31
...if available) Select Automatic mode Note: In certain programs, you may need from the pop-up menu Select your paper type (see a window like this one: Select Print Settings 5. Note: For more information about printer settings, click the ? Choose any other printing options you ...menu. Printing With a Macintosh 31 Click OK to change additional settings. Click the Advanced button to close the Page Setup window. 4. See the online Epson Information Center for details. 3. Choose Print Settings from the File menu. For more information on advanced settings click ?. 7. button. 6....
...if available) Select Automatic mode Note: In certain programs, you may need from the pop-up menu Select your paper type (see a window like this one: Select Print Settings 5. Note: For more information about printer settings, click the ? Choose any other printing options you ...menu. Printing With a Macintosh 31 Click OK to change additional settings. Click the Advanced button to close the Page Setup window. 4. See the online Epson Information Center for details. 3. Choose Print Settings from the File menu. For more information on advanced settings click ?. 7. button. 6....
Quick Guide
Page 33
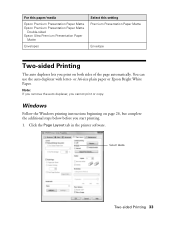
...-sided Printing 33 Windows Follow the Windows printing instructions beginning on both sides of the page automatically. You can use the auto duplexer with letter- Note: If you remove the auto duplexer, you start printing. 1. For this paper/media Epson Premium Presentation Paper Matte Epson Premium Presentation Paper Matte Double-sided Epson Ultra Premium Presentation... the additional steps below before you cannot print or copy. Click the Page Layout tab in the printer software. or A4-size plain paper or Epson Bright White Paper.
...-sided Printing 33 Windows Follow the Windows printing instructions beginning on both sides of the page automatically. You can use the auto duplexer with letter- Note: If you remove the auto duplexer, you start printing. 1. For this paper/media Epson Premium Presentation Paper Matte Epson Premium Presentation Paper Matte Double-sided Epson Ultra Premium Presentation... the additional steps below before you cannot print or copy. Click the Page Layout tab in the printer software. or A4-size plain paper or Epson Bright White Paper.
Quick Guide
Page 34
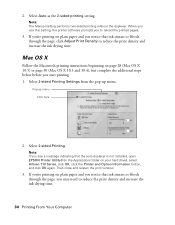
...Note: If you see a message indicating that the auto duplexer is not installed, open EPSON Printer Utility3 (in the Applications folder on plain paper and you 're printing on your hard drive), select Artisan 710 Series, click OK, click the Printer and Option Information button, and click OK again.... Select 2-sided Printing Settings from the pop-up menu Click here 2. Then close and reopen the print window. 3. Mac OS X Follow the Macintosh printing...
...Note: If you see a message indicating that the auto duplexer is not installed, open EPSON Printer Utility3 (in the Applications folder on plain paper and you 're printing on your hard drive), select Artisan 710 Series, click OK, click the Printer and Option Information button, and click OK again.... Select 2-sided Printing Settings from the pop-up menu Click here 2. Then close and reopen the print window. 3. Mac OS X Follow the Macintosh printing...

Quick Guide
Page 35
...■ Professional Mode previews your image and provides a full array of the following to start Epson Scan: ■ Windows: Double-click the EPSON Scan icon on your desktop. ■ Macintosh: Double-click EPSON Scan in the back left corner, as digital files on these topics, see the online... and select your network- See "Basic Scanning" below. Basic Scanning You can use the included Epson Scan software to scan original documents and photos and save your image to your Artisan 710 Series (if necessary). Do one of tools. Scanning a Document or Photo 35 Open the document...
...■ Professional Mode previews your image and provides a full array of the following to start Epson Scan: ■ Windows: Double-click the EPSON Scan icon on your desktop. ■ Macintosh: Double-click EPSON Scan in the back left corner, as digital files on these topics, see the online... and select your network- See "Basic Scanning" below. Basic Scanning You can use the included Epson Scan software to scan original documents and photos and save your image to your Artisan 710 Series (if necessary). Do one of tools. Scanning a Document or Photo 35 Open the document...

Quick Guide
Page 36
If the Mode setting in Home, Office, or Professional mode, you see the Epson Scan settings window. 36 Scanning a Document or Photo Note: If you want to automatically restore a color photo as you scan, click the Customize button, then check the Color ...Restoration box. ■ If you are in the upper right corner is scanned and you see the Epson Scan standby window. You see its icon in Windows Explorer or Macintosh Finder. ■ If you are scanning from an application, the scanned image opens in your application...
If the Mode setting in Home, Office, or Professional mode, you see the Epson Scan settings window. 36 Scanning a Document or Photo Note: If you want to automatically restore a color photo as you scan, click the Customize button, then check the Color ...Restoration box. ■ If you are in the upper right corner is scanned and you see the Epson Scan standby window. You see its icon in Windows Explorer or Macintosh Finder. ■ If you are scanning from an application, the scanned image opens in your application...
Quick Guide
Page 39
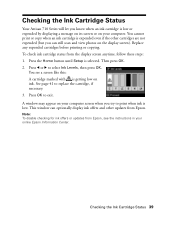
To check ink cartridge status from Epson, see a screen like this: A cartridge marked with is getting low on your computer screen when you try to replace the cartridge, if necessary. 3. Press the Home button until Setup is selected. Then press OK. 2. A window may appear on ink. You see the...display ink offers and other updates from Epson. This window can still scan and view photos on your online Epson Information Center. Checking the Ink Cartridge Status 39 See page 41 to print when ink is low. Checking the Ink Cartridge Status Your Artisan 710 Series will let you know when ...
To check ink cartridge status from Epson, see a screen like this: A cartridge marked with is getting low on your computer screen when you try to replace the cartridge, if necessary. 3. Press the Home button until Setup is selected. Then press OK. 2. A window may appear on ink. You see the...display ink offers and other updates from Epson. This window can still scan and view photos on your online Epson Information Center. Checking the Ink Cartridge Status 39 See page 41 to print when ink is low. Checking the Ink Cartridge Status Your Artisan 710 Series will let you know when ...


