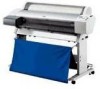
Product Information Guide
Page 6
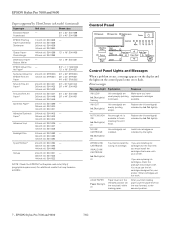
... S041496 Canvas 24-inch roll: S041531 - 36-inch roll: S041532 44-inch roll: S041533 NOTE: Check the EPSON Pro Graphics web site (http:// prographics.epson.com) for your printer. Replace the ink cartridge(s) indicated by the lights. Install ink cartridges as indicated by Ink Out light(s). You... on Ink cartridge(s) not installed. INK OUT Ink Out light(s) on You tried to finish cleaning the print head. If you finish loading paper, pull the paper lever all the way back) while loading paper. After you are empty (printing stops). EPSON Stylus Pro 7600 and 9600 7/02
... S041496 Canvas 24-inch roll: S041531 - 36-inch roll: S041532 44-inch roll: S041533 NOTE: Check the EPSON Pro Graphics web site (http:// prographics.epson.com) for your printer. Replace the ink cartridge(s) indicated by the lights. Install ink cartridges as indicated by Ink Out light(s). You... on Ink cartridge(s) not installed. INK OUT Ink Out light(s) on You tried to finish cleaning the print head. If you finish loading paper, pull the paper lever all the way back) while loading paper. After you are empty (printing stops). EPSON Stylus Pro 7600 and 9600 7/02
Product Information Guide
Page 7
... and back on again. 7/02 EPSON Stylus Pro 7600 and 9600 - 8 PAPER JAM Paper Out light flashing Paper has jammed in printer software is different from the printer, then reload paper. Image is not installed. Resize your printer. PAPER NOT CUT error was left in the printer and load more paper. Reload paper. Head cleaning automatically starts. NO The maintenance...
... and back on again. 7/02 EPSON Stylus Pro 7600 and 9600 - 8 PAPER JAM Paper Out light flashing Paper has jammed in printer software is different from the printer, then reload paper. Image is not installed. Resize your printer. PAPER NOT CUT error was left in the printer and load more paper. Reload paper. Head cleaning automatically starts. NO The maintenance...
Product Information Guide
Page 9
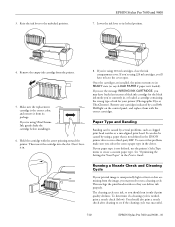
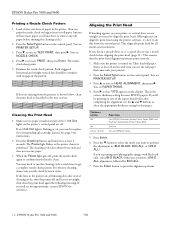
...you may need to run it from the printer. 5. If you see if the cleaning cycle was successful. 7/02 EPSON Stylus Pro 7600 and 9600 - 10 Remove the empty ink cartridge from its package. Make sure the replacement cartridge is the correct color, and remove it only if print quality declines...nozzle check (below). This unclogs the print head nozzles so they can be caused by several problems, such as clogged print head nozzles or a mis-aligned print head. You should run a cleaning cycle. If you should also print a nozzle check after cleaning to its READY state (or says LOAD...
...you may need to run it from the printer. 5. If you see if the cleaning cycle was successful. 7/02 EPSON Stylus Pro 7600 and 9600 - 10 Remove the empty ink cartridge from its package. Make sure the replacement cartridge is the correct color, and remove it only if print quality declines...nozzle check (below). This unclogs the print head nozzles so they can be caused by several problems, such as clogged print head nozzles or a mis-aligned print head. You should run a cleaning cycle. If you should also print a nozzle check after cleaning to its READY state (or says LOAD...
Product Information Guide
Page 10
....) 2. If you 'll be complete, with no paper is at least 3 seconds. EPSON Stylus Pro 7600 and 9600 7/02 You see PRINTER SETUP. 3. Examine the nozzle check pattern. Each staggered horizontal and straight vertical line should be printing on your printer). 2. Cleaning the Print Head 1. The cleaning cycle takes about 60 seconds and does not use the roll paper...
....) 2. If you 'll be complete, with no paper is at least 3 seconds. EPSON Stylus Pro 7600 and 9600 7/02 You see PRINTER SETUP. 3. Examine the nozzle check pattern. Each staggered horizontal and straight vertical line should be printing on your printer). 2. Cleaning the Print Head 1. The cleaning cycle takes about 60 seconds and does not use the roll paper...

Product Support Bulletin(s)
Page 57
Stylus Pro 7600/9600 PSB.2002.09.003 ISSUES AND SOLUTIONS 10/7/02 Below are some common issues you could experience and suggestions on how they may be corrected using the Epson driver and media or 3rd party RIP and media: • General Print Quality: Head Cleaning...or Dark lines): Head Cleaning, Paper Thickness Adj., Paper Feed Adj., Print Adj. • Horizontal Banding: (Wide usually darker bands): Head Cleaning, Paper Thickness Adj., Dry Time Adj., Print Adj. • Bi-Directional printing mis-registration: Head Cleaning, Paper Thickness Adj., Print Adj. Printer Control Panel Paper ...
Stylus Pro 7600/9600 PSB.2002.09.003 ISSUES AND SOLUTIONS 10/7/02 Below are some common issues you could experience and suggestions on how they may be corrected using the Epson driver and media or 3rd party RIP and media: • General Print Quality: Head Cleaning...or Dark lines): Head Cleaning, Paper Thickness Adj., Paper Feed Adj., Print Adj. • Horizontal Banding: (Wide usually darker bands): Head Cleaning, Paper Thickness Adj., Dry Time Adj., Print Adj. • Bi-Directional printing mis-registration: Head Cleaning, Paper Thickness Adj., Print Adj. Printer Control Panel Paper ...

Product Support Bulletin(s)
Page 58
...standard printer driver. Print Head Alignment for the EPSON Stylus Pro 7600/ 9600 Series Inkjet printers. The settings you of the EPSON Printer Service Utility for unidirectional and bidirectional printing. 2. PURPOSE: The EPSON Printer ...EPSON Stylus Pro 7600/9600 Series Subject: EPSON Printer Service Utility Originator: RR Authorization: Total Pages: 31 This bulletin was created to inform you make custom settings without using the utility to ensure that the unit is always recommended to perform a nozzle check prior to using the standard printer driver. Power Head Cleaning...
...standard printer driver. Print Head Alignment for the EPSON Stylus Pro 7600/ 9600 Series Inkjet printers. The settings you of the EPSON Printer Service Utility for unidirectional and bidirectional printing. 2. PURPOSE: The EPSON Printer ...EPSON Stylus Pro 7600/9600 Series Subject: EPSON Printer Service Utility Originator: RR Authorization: Total Pages: 31 This bulletin was created to inform you make custom settings without using the utility to ensure that the unit is always recommended to perform a nozzle check prior to using the standard printer driver. Power Head Cleaning...

Product Support Bulletin(s)
Page 73
... micro banding you to adjust the amount the paper is feed to missing or deflected print head nozzles. This adjustment allows you should first perform a nozzle test print and cleanings, as thin dark or light evenly spaced lines. Custom Paper Configuration Page 16. If the... dark horizontal micro band can be performed from the Utility tab in the Epson driver, from the Select Type printer control panel menu, or with the Power Head Cleaning selection in this utility program. Stylus Pro 7600/9600 Printer Service Utility 8/26/02 PAPER FEED ADJUSTMENT Prior to performing the paper feed ...
... micro banding you to adjust the amount the paper is feed to missing or deflected print head nozzles. This adjustment allows you should first perform a nozzle test print and cleanings, as thin dark or light evenly spaced lines. Custom Paper Configuration Page 16. If the... dark horizontal micro band can be performed from the Utility tab in the Epson driver, from the Select Type printer control panel menu, or with the Power Head Cleaning selection in this utility program. Stylus Pro 7600/9600 Printer Service Utility 8/26/02 PAPER FEED ADJUSTMENT Prior to performing the paper feed ...

Product Support Bulletin(s)
Page 83
Stylus Pro 7600/9600 Printer Service Utility 8/26/02 Power Head Cleaning If Horizontal micro banding is noticed and a Nozzle test print shows misaligned, missing or deflected nozzles, head cleaning form the printer control panel, or Epson driver should be repeated if improvement is noticed. This process can be performed. Form the Function drop down menu select: "Power Head Cleaning". 3. Power Head Cleaning Page 26...
Stylus Pro 7600/9600 Printer Service Utility 8/26/02 Power Head Cleaning If Horizontal micro banding is noticed and a Nozzle test print shows misaligned, missing or deflected nozzles, head cleaning form the printer control panel, or Epson driver should be repeated if improvement is noticed. This process can be performed. Form the Function drop down menu select: "Power Head Cleaning". 3. Power Head Cleaning Page 26...

Product Support Bulletin(s)
Page 84
Stylus Pro 7600/9600 Printer Service Utility 8/26/02 4. Power Head Cleaning Page 27. Click Start to exit the Printer Service Utility program. During the Power Head Cleaning Wait will be displayed on the printers LCD control panel and the Pause Led will be blinking. 6. Click Home to return to the Printer Service Utility main menu, or Quit to run for approximately 2 1/2 minutes, it uses more ink then a driver or printer control panel cleaning try them first to clear nozzle issues. 5. NOTE: A "Power Head Cleaning" can run a Power Head Cleaning.
Stylus Pro 7600/9600 Printer Service Utility 8/26/02 4. Power Head Cleaning Page 27. Click Start to exit the Printer Service Utility program. During the Power Head Cleaning Wait will be displayed on the printers LCD control panel and the Pause Led will be blinking. 6. Click Home to return to the Printer Service Utility main menu, or Quit to run for approximately 2 1/2 minutes, it uses more ink then a driver or printer control panel cleaning try them first to clear nozzle issues. 5. NOTE: A "Power Head Cleaning" can run a Power Head Cleaning.

User Manual
Page 54
... if any print head nozzles are clogged. 54 | Setting Up the Printer TIP Use the paper that came with your printer for actual print jobs. Follow the steps below to print a nozzle check from the File menu. That way, you see the Utility menu: Click to run the head cleaning utility 1-54 Make... sure the printer is turned on and the paper that lets you can save your higher-quality paper for printing the nozzle check. Double-click...
... if any print head nozzles are clogged. 54 | Setting Up the Printer TIP Use the paper that came with your printer for actual print jobs. Follow the steps below to print a nozzle check from the File menu. That way, you see the Utility menu: Click to run the head cleaning utility 1-54 Make... sure the printer is turned on and the paper that lets you can save your higher-quality paper for printing the nozzle check. Double-click...

User Manual
Page 55
... loupe that you may be complete, with the printer to see misaligned or "deflected" dots. If you're unable to clean the print head fully from the printer software, follow the instructions on screen to "Aligning the Print Head" on page 57. 6. The pattern should clean the print head. 5. If the nozzle check pattern is complete, click...
... loupe that you may be complete, with the printer to see misaligned or "deflected" dots. If you're unable to clean the print head fully from the printer software, follow the instructions on screen to "Aligning the Print Head" on page 57. 6. The pattern should clean the print head. 5. If the nozzle check pattern is complete, click...

User Manual
Page 95
...your print. • Click to check your ink levels. 8. Printing with EPSON Drivers for other layout options. • Click to turn on your Macintosh while you're printing and use the nozzle check and print head cleaning utilities, see page 132; When you work on background printing. Choose from...fit on the page, or for Macintosh | 95 7. To use the Monitor3 utility. to align the print head, see page 135. • Click if you want to reduce your image to access the printer monitoring and maintenance utilities. This lets you 're finished choosing print options, click Print. 3-95
...your print. • Click to check your ink levels. 8. Printing with EPSON Drivers for other layout options. • Click to turn on your Macintosh while you're printing and use the nozzle check and print head cleaning utilities, see page 132; When you work on background printing. Choose from...fit on the page, or for Macintosh | 95 7. To use the Monitor3 utility. to align the print head, see page 135. • Click if you want to reduce your image to access the printer monitoring and maintenance utilities. This lets you 're finished choosing print options, click Print. 3-95

User Manual
Page 105
...moves the job before Normal priority jobs in the print queue • Hold holds the job in the EPSON Monitor3 dialog box, select Start print queue from the Printer menu to start the print head cleaning utility. Note If you see a stop sign icon and the message Print queue on hold in the ...Double-click a file in the list to preview it • Double-click Copies to change . Priority list box Settings selected for more information about the cleaning utility. See page 132 for the highlighted print job Click the print job whose priority you want to change the number of copies to be...
...moves the job before Normal priority jobs in the print queue • Hold holds the job in the EPSON Monitor3 dialog box, select Start print queue from the Printer menu to start the print head cleaning utility. Note If you see a stop sign icon and the message Print queue on hold in the ...Double-click a file in the list to preview it • Double-click Copies to change . Priority list box Settings selected for more information about the cleaning utility. See page 132 for the highlighted print job Click the print job whose priority you want to change the number of copies to be...

User Manual
Page 132
... you should also print a nozzle check after cleaning the print head to see TEST PRINT, then press r. You should run a cleaning cycle. Press d until you see PRINTER SETUP. 3. 132 | Maintaining and Transporting the Printer Running a Cleaning Cycle If your printer software, as described below • Using the Head Cleaning utility in the printer, following the instructions on page 77. (You...
... you should also print a nozzle check after cleaning the print head to see TEST PRINT, then press r. You should run a cleaning cycle. Press d until you see PRINTER SETUP. 3. 132 | Maintaining and Transporting the Printer Running a Cleaning Cycle If your printer software, as described below • Using the Head Cleaning utility in the printer, following the instructions on page 77. (You...

User Manual
Page 145
...cartridges, close the ink compartment cover. Once the cartridges are installed, the printer returns to verify the results. 8. Note If you 'll have entered the ink delivery system. Then run several print head cleaning cycles (see the message WRONG INK CARTRIDGE, you may have loaded an ...incorrect black ink cartridge for your printer (Photographic Dye or UltraChrome). Remove any cartridges indicated by a nozzle check to its ...
...cartridges, close the ink compartment cover. Once the cartridges are installed, the printer returns to verify the results. 8. Note If you 'll have entered the ink delivery system. Then run several print head cleaning cycles (see the message WRONG INK CARTRIDGE, you may have loaded an ...incorrect black ink cartridge for your printer (Photographic Dye or UltraChrome). Remove any cartridges indicated by a nozzle check to its ...
User Manual
Page 155
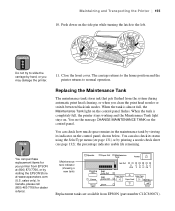
... (showing a new tank) Replacement tanks are available from EPSON at (800) 873-7766, or by hand, or you clean the print head nozzles or switch between black ink modes. Note 11. You see page 132); The carriage returns to the home position and the printer returns to the left. You can also check its...
... (showing a new tank) Replacement tanks are available from EPSON at (800) 873-7766, or by hand, or you clean the print head nozzles or switch between black ink modes. Note 11. You see page 132); The carriage returns to the home position and the printer returns to the left. You can also check its...

Quick Reference Guide
Page 8
...cutter: 1 Press the SelecType button on before you start. 2 Pull out the maintenance tank from the system during print head cleaning and other maintenance procedures. Make sure the printer is complete. If no stars are displayed, the cutter needs to replace the cutter blade. Replacing the Cutter Blade If ...you notice that gets flushed from the side of the printer. Follow these steps to let the spring fly out. 3 Insert the new tank. 7 Replacing the Maintenance Tank The maintenance tank stores ink...
...cutter: 1 Press the SelecType button on before you start. 2 Pull out the maintenance tank from the system during print head cleaning and other maintenance procedures. Make sure the printer is complete. If no stars are displayed, the cutter needs to replace the cutter blade. Replacing the Cutter Blade If ...you notice that gets flushed from the side of the printer. Follow these steps to let the spring fly out. 3 Insert the new tank. 7 Replacing the Maintenance Tank The maintenance tank stores ink...
Service Manual
Page 149
...self-diagnostic function. Adjustment If dot missing is not found , execute head cleaning. (If deemed necessary, select and execute "Power cleaning (p.60)" in the SelecType mode or "Cleaning (p.259)" by self-diagnostic function.)If the Head ID value is wrong, set the correct value. 2. If there...cause of ink adhering to the paper feed path. EPSON Stylus Pro 7600/9600 Revision A 3.3.4 Smudged or Marred Printout (Reverse side) If smudging or marring of the paper back surface with ink occurs, the following items should be wiped off in "Printer Settings" → "Panel Setting Menu" →...
...self-diagnostic function. Adjustment If dot missing is not found , execute head cleaning. (If deemed necessary, select and execute "Power cleaning (p.60)" in the SelecType mode or "Cleaning (p.259)" by self-diagnostic function.)If the Head ID value is wrong, set the correct value. 2. If there...cause of ink adhering to the paper feed path. EPSON Stylus Pro 7600/9600 Revision A 3.3.4 Smudged or Marred Printout (Reverse side) If smudging or marring of the paper back surface with ink occurs, the following items should be wiped off in "Printer Settings" → "Panel Setting Menu" →...
Service Manual
Page 256
... are necessary for this work. „ "Opener I /C (3) Install cleaning cartridges.[Enter] Head Cleaning (3) Completion of cleaning liquid filling Adj : Counter Clear [Pause] Ink Dischg. Skip (2) [Enter] [Pause] Head Wash Skip (2) [Enter] [Pause] Ink Dischg. washfluid (3) Completion of cleaning liquid filling Set Cleaning I /C" in this function. EPSON Stylus Pro 7600/9600 5.2.3.20 Clean Head When Head replacement is required on the service site, execute ink...
... are necessary for this work. „ "Opener I /C (3) Install cleaning cartridges.[Enter] Head Cleaning (3) Completion of cleaning liquid filling Adj : Counter Clear [Pause] Ink Dischg. Skip (2) [Enter] [Pause] Head Wash Skip (2) [Enter] [Pause] Ink Dischg. washfluid (3) Completion of cleaning liquid filling Set Cleaning I /C" in this function. EPSON Stylus Pro 7600/9600 5.2.3.20 Clean Head When Head replacement is required on the service site, execute ink...

Service Manual
Page 259
... and tube insertion and check for air leak. EPSON Stylus Pro 7600/9600 5.2.4 Cleaning Execute head cleaning. Table 5-25. KK0 Cleaning: Std. KK2 Minimum vacuum Maximum vacuum Maximum vacuum (With rubbing) Initial charge Cleaning: Init. Printing end [Paper Feed ∆] Print : ? KK1 Cleaning: Std. KK2 Init.Fill [Enter] End Cleaning [Enter] End Cleaning [Enter] End Cleaning [Enter] End INK CHARGING 5.2.5 Print Execute test...
... and tube insertion and check for air leak. EPSON Stylus Pro 7600/9600 5.2.4 Cleaning Execute head cleaning. Table 5-25. KK0 Cleaning: Std. KK2 Minimum vacuum Maximum vacuum Maximum vacuum (With rubbing) Initial charge Cleaning: Init. Printing end [Paper Feed ∆] Print : ? KK1 Cleaning: Std. KK2 Init.Fill [Enter] End Cleaning [Enter] End Cleaning [Enter] End Cleaning [Enter] End INK CHARGING 5.2.5 Print Execute test...


