Network Guide
Page 5
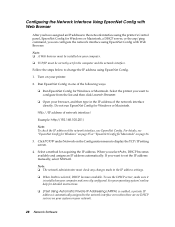
... use may vary depending on the operating system and the network configuration. About This Guide This Network Guide contains information about your printer, see your network, you want to configure the network interface for protocols such as TCP/IP, AppleTalk®, IPP, and ...use EpsonNet Config to quickly and easily configure the network interface to the person responsible for network administrators, and many of the printer in this manual, automatically selects the correct standard when it supports and automatically selects the IEEE 802.2, IEEE 802.3, Ethernet II, and Ethernet SNAP...
... use may vary depending on the operating system and the network configuration. About This Guide This Network Guide contains information about your printer, see your network, you want to configure the network interface for protocols such as TCP/IP, AppleTalk®, IPP, and ...use EpsonNet Config to quickly and easily configure the network interface to the person responsible for network administrators, and many of the printer in this manual, automatically selects the correct standard when it supports and automatically selects the IEEE 802.2, IEEE 802.3, Ethernet II, and Ethernet SNAP...
Network Guide
Page 6
...above or OS X 10.5 and above Protocol TCP/IP (using LPR or Standard TCP/IP Port) IPP Bonjour TCP/IP AppleTalk Features of your printer. Notes contain important information and useful tips on the network. ❏ Supports the Dynamic DNS function. ❏ Supports SNMP and MIB. ❏...interface even if there is no DHCP server on the operation of the Network Interface ❏ Connects your Epson printer using a built-in Ethernet interface, which is called the network interface in this manual, to the network. ❏ Supports multiple protocols, such as TCP/IP, AppleTalk, and IPP. &#...
...above or OS X 10.5 and above Protocol TCP/IP (using LPR or Standard TCP/IP Port) IPP Bonjour TCP/IP AppleTalk Features of your printer. Notes contain important information and useful tips on the network. ❏ Supports the Dynamic DNS function. ❏ Supports SNMP and MIB. ❏...interface even if there is no DHCP server on the operation of the Network Interface ❏ Connects your Epson printer using a built-in Ethernet interface, which is called the network interface in this manual, to the network. ❏ Supports multiple protocols, such as TCP/IP, AppleTalk, and IPP. &#...
Network Guide
Page 15
... of the last octet, press r. Press r, then press u or d to choose one of the last octet, press the Pause button to exit the printer menu. Then continue with step 14. ❏ If you selected AUTO as the IP address setting, continue with Web Browser. ❏ See the User's...10063; If you selected PANEL as the IP address setting, press the Pause button to exit the printer menu. 14. Press Enter. Turn the printer off then back on page 16 to configure the printer's IP settings manually. 8. Note: ❏ You must first set the IP address before using EpsonNet with step 10....
... of the last octet, press r. Press r, then press u or d to choose one of the last octet, press the Pause button to exit the printer menu. Then continue with step 14. ❏ If you selected AUTO as the IP address setting, continue with Web Browser. ❏ See the User's...10063; If you selected PANEL as the IP address setting, press the Pause button to exit the printer menu. 14. Press Enter. Turn the printer off then back on page 16 to configure the printer's IP settings manually. 8. Note: ❏ You must first set the IP address before using EpsonNet with step 10....
Network Guide
Page 18
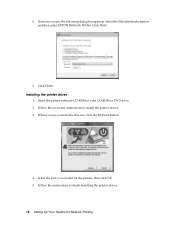
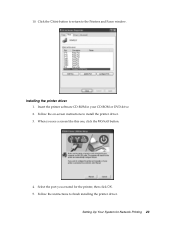
6. Select the Standard radio button and then select EPSON Network Printer. When you created for Network Printing Click Finish. Follow the on-screen instructions to finish installing the printer driver. 18 Setting Up Your System for the printer, then click OK. 5. Follow the instructions to install the printer driver. 3. Click Next. 7. If an error occurs, the following dialog box appears. Select the port you see a screen like this one, click the Manual button. 4. Insert the printer software CD-ROM in your CD-ROM or DVD drive. 2. Installing the printer driver 1.
6. Select the Standard radio button and then select EPSON Network Printer. When you created for Network Printing Click Finish. Follow the on-screen instructions to finish installing the printer driver. 18 Setting Up Your System for the printer, then click OK. 5. Follow the instructions to install the printer driver. 3. Click Next. 7. If an error occurs, the following dialog box appears. Select the port you see a screen like this one, click the Manual button. 4. Insert the printer software CD-ROM in your CD-ROM or DVD drive. 2. Installing the printer driver 1.
Network Guide
Page 21
...on the network status sheet, in the Printer Name or IP Address text box. Then click Next. 7. Then click Next. ❏ If you are selected, and then click Next. 6. Do one of the following: ❏ If you manually assigned an IP address to the printer using DHCP to assign an IP address... to the printer, enter the printer's Host Name or IP address, shown on the network status sheet, in the...
...on the network status sheet, in the Printer Name or IP Address text box. Then click Next. 7. Then click Next. ❏ If you are selected, and then click Next. 6. Do one of the following: ❏ If you manually assigned an IP address to the printer using DHCP to assign an IP address... to the printer, enter the printer's Host Name or IP address, shown on the network status sheet, in the...
Network Guide
Page 23
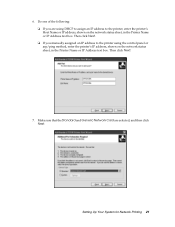
Follow the on-screen instructions to the Printers and Faxes window. Select the port you see a screen like this one, click the Manual button. 4. Insert the printer software CD-ROM in your CD-ROM or DVD drive. 2. Setting Up Your System for the printer, then click OK. 5. Click the Close button to return to install the printer driver. 3. 10. Follow the instructions to finish installing the printer driver. When you created for Network Printing 23 Installing the printer driver 1.
Follow the on-screen instructions to the Printers and Faxes window. Select the port you see a screen like this one, click the Manual button. 4. Insert the printer software CD-ROM in your CD-ROM or DVD drive. 2. Setting Up Your System for the printer, then click OK. 5. Click the Close button to return to install the printer driver. 3. 10. Follow the instructions to finish installing the printer driver. When you created for Network Printing 23 Installing the printer driver 1.
Network Guide
Page 24
...connected with TCP/IP. Open the Applications folder. 2. Select the printer model that the printer driver is not displayed with TCP/IP, click More Printers, select EPSON TCP/IP from the drop-down list, and then select the printer model. 5. Open the Applications folder. 2. Note: If your ...following the steps below. Click Add. Insert the printer software CD-ROM in your printer is connected with Bonjour. See the manual shipped with your printer is installed on how to install the printer driver. Note: If your printer for Network Printing Note: Make sure that is not...
...connected with TCP/IP. Open the Applications folder. 2. Select the printer model that the printer driver is not displayed with TCP/IP, click More Printers, select EPSON TCP/IP from the drop-down list, and then select the printer model. 5. Open the Applications folder. 2. Note: If your ...following the steps below. Click Add. Insert the printer software CD-ROM in your printer is connected with Bonjour. See the manual shipped with your printer is installed on how to install the printer driver. Note: If your printer for Network Printing Note: Make sure that is not...
Network Guide
Page 28
... to the IP address settings. ❏ When Auto is installed on your computer. ❏ TCP/IP must be installed on your system or your printer. 2. Select a method for Windows or Macintosh. Click TCP/IP under Network on page 26. 3. Note: ❏ The network administrator must be... correctly set the IP address manually, select Manual. Note: ❏ A Web browser must check any changes made to display the TCP/IP setting screen. 4. Do not run EpsonNet Config for...
... to the IP address settings. ❏ When Auto is installed on your computer. ❏ TCP/IP must be installed on your system or your printer. 2. Select a method for Windows or Macintosh. Click TCP/IP under Network on page 26. 3. Note: ❏ The network administrator must be... correctly set the IP address manually, select Manual. Note: ❏ A Web browser must check any changes made to display the TCP/IP setting screen. 4. Do not run EpsonNet Config for...
Network Guide
Page 29
...values there. 6. Mac OS X only: Select Enable or Disable for Register Network Interface Address to DNS Server if you want to use the printer on the network just by the DHCP server, leave it at Enable for Register Network Interface Address Directly to DNS Server. 11. otherwise, ...select Disable. 7. If you select Enable, enter the Bonjour Name and the Bonjour Printer Name. Network Software 29 This is not supported, we recommend that you select Manual and then enter an IP address. When setting an IP address using the ping command, select Enable for...
...values there. 6. Mac OS X only: Select Enable or Disable for Register Network Interface Address to DNS Server if you want to use the printer on the network just by the DHCP server, leave it at Enable for Register Network Interface Address Directly to DNS Server. 11. otherwise, ...select Disable. 7. If you select Enable, enter the Bonjour Name and the Bonjour Printer Name. Network Software 29 This is not supported, we recommend that you select Manual and then enter an IP address. When setting an IP address using the ping command, select Enable for...

Network Guide
Page 32
...disables IP address setting using . To use the DHCP server, make sure the setting matches the type of hub or switch you are connecting the printer directly to a hub or switch, select MDI. Be sure the IP address does not conflict with a straight-through cable, select MDI-X. otherwise,...devices on your operating system's online help for Acquire DNS server address automatically, the DNS server address set the IP address manually, select Manual. If you are connecting the printer to a PC with any other than Auto, make sure it is installed on the network. Set the gateway address if ...
...disables IP address setting using . To use the DHCP server, make sure the setting matches the type of hub or switch you are connecting the printer directly to a hub or switch, select MDI. Be sure the IP address does not conflict with a straight-through cable, select MDI-X. otherwise,...devices on your operating system's online help for Acquire DNS server address automatically, the DNS server address set the IP address manually, select Manual. If you are connecting the printer to a PC with any other than Auto, make sure it is installed on the network. Set the gateway address if ...
Network Guide
Page 34
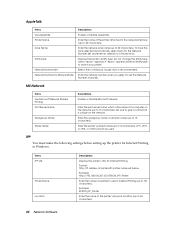
...(*) in Windows. Do not change the entity type unless "epson" appears. Enter the workgroup name or domain name (up to use for Internet Printing. To have the zone selected automatically, select Auto for Manual Mode Descriptions Enable or Disable AppleTalk. Enter the print server name...168.100.201:631/EPSON_IPP_Printer Enter the name of the printer's physical location (up to 32 characters). Enter the printer's shared name (up to 15 characters). Format: http://IP address of the printer attached to 12 characters). If "epson" appears, enter an entity type to 32 characters)....
...(*) in Windows. Do not change the entity type unless "epson" appears. Enter the workgroup name or domain name (up to use for Internet Printing. To have the zone selected automatically, select Auto for Manual Mode Descriptions Enable or Disable AppleTalk. Enter the print server name...168.100.201:631/EPSON_IPP_Printer Enter the name of the printer's physical location (up to 32 characters). Enter the printer's shared name (up to 15 characters). Format: http://IP address of the printer attached to 12 characters). If "epson" appears, enter an entity type to 32 characters)....

Network Guide
Page 36
... acquired from the time server. Enter the difference between 0 and 3600 seconds). Enter 0 not to reload the display. Manual Settings If the network interface has RTC (Real Time Clock), you set the time manually. Set the length of time for IPP before a timeout occurs (between time at the present location and Greenwich...
... acquired from the time server. Enter the difference between 0 and 3600 seconds). Enter 0 not to reload the display. Manual Settings If the network interface has RTC (Real Time Clock), you set the time manually. Set the length of time for IPP before a timeout occurs (between time at the present location and Greenwich...
Network Guide
Page 39
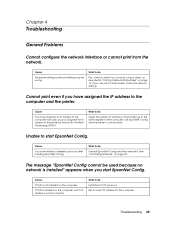
Cause You have assigned an IP address to the computer manually, but its IP address is not installed on page 16. Cause TCP/IP is not set correctly. What to do Uninstall EpsonNet Config and then ... can print a status sheet, as described in "Printing a Network Status Sheet" on the computer. Unable to the same segment of the computer. What to the printer by Automatic Private IP Addressing (APIPA). Cause You have added or deleted protocols after installing EpsonNet Config. What to do First, check to see if...
Cause You have assigned an IP address to the computer manually, but its IP address is not installed on page 16. Cause TCP/IP is not set correctly. What to do Uninstall EpsonNet Config and then ... can print a status sheet, as described in "Printing a Network Status Sheet" on the computer. Unable to the same segment of the computer. What to the printer by Automatic Private IP Addressing (APIPA). Cause You have added or deleted protocols after installing EpsonNet Config. What to do First, check to see if...

Printer Guide
Page 2
...herein are subject to the purchaser of this manual are for any use of this information as applied to other than those marks. Seiko Epson Corporation shall not be liable for identification purposes...Epson, Epson Stylus, and MicroWeave are trademarks; Legal Notices Neither Seiko Epson Corporation nor its affiliates shall be trademarks of Seiko Epson Corporation. The contents of this product or third parties for use of this product or unauthorized modifications, repairs, or alterations to this product, or (excluding the U.S.) failure to strictly comply with these Epson printers...
...herein are subject to the purchaser of this manual are for any use of this information as applied to other than those marks. Seiko Epson Corporation shall not be liable for identification purposes...Epson, Epson Stylus, and MicroWeave are trademarks; Legal Notices Neither Seiko Epson Corporation nor its affiliates shall be trademarks of Seiko Epson Corporation. The contents of this product or third parties for use of this product or unauthorized modifications, repairs, or alterations to this product, or (excluding the U.S.) failure to strictly comply with these Epson printers...

Printer Guide
Page 3
..., in which case the user will invalidate the FCC Certification of the FCC Rules. For Canadian Users This Class A digital apparatus complies with the instruction manual, may cause radio interference, in which case the user may be required to take adequate measures. Changes or modifications not expressly approved by the FCC...
..., in which case the user will invalidate the FCC Certification of the FCC Rules. For Canadian Users This Class A digital apparatus complies with the instruction manual, may cause radio interference, in which case the user may be required to take adequate measures. Changes or modifications not expressly approved by the FCC...
Printer Guide
Page 6
... Printer 47 Guidelines for Using Epson Media 48 Using Roll Paper 48 Roll Paper Guidelines 48 Loading the Paper onto the Spindle 50 Placing the Paper in the Printer 51 Removing Paper from the Spindle 53 Switching Between 2-Inch and 3-Inch Roll Paper 54 Cutting Paper Manually ... for Thick or Thin Paper 61 Using the Paper Basket 62 Catching Printouts From the Epson Stylus Pro 7880 62 Catching Printouts in Front of the Epson Stylus Pro 9880 64 Catching Printouts Under the Epson Stylus Pro 9880 65 Optimizing the Settings for Your Paper 67 Creating Paper Configurations 67 Printing Your ...
... Printer 47 Guidelines for Using Epson Media 48 Using Roll Paper 48 Roll Paper Guidelines 48 Loading the Paper onto the Spindle 50 Placing the Paper in the Printer 51 Removing Paper from the Spindle 53 Switching Between 2-Inch and 3-Inch Roll Paper 54 Cutting Paper Manually ... for Thick or Thin Paper 61 Using the Paper Basket 62 Catching Printouts From the Epson Stylus Pro 7880 62 Catching Printouts in Front of the Epson Stylus Pro 9880 64 Catching Printouts Under the Epson Stylus Pro 9880 65 Optimizing the Settings for Your Paper 67 Creating Paper Configurations 67 Printing Your ...
Printer Guide
Page 7
Contents | 7 4 Printing With Epson Drivers for Windows Sizing Images for Borderless Printing on Roll Paper 90 Choosing Basic Print Options 91 Selecting the Correct Media Type Setting 93 Choosing Color Management Options 95 Choosing Roll Paper Options 97 Choosing Cut Sheet Paper Options 100 ...118 Viewing Status Information 118 Checking Printer Status From the Printer Driver 120 Checking and Cleaning the Print Head 121 Running the Nozzle Check and Head Cleaning Utilities 121 Checking and Cleaning the Print Head Using the Control Panel . . 122 Manually Checking and Cleaning the Print ...
Contents | 7 4 Printing With Epson Drivers for Windows Sizing Images for Borderless Printing on Roll Paper 90 Choosing Basic Print Options 91 Selecting the Correct Media Type Setting 93 Choosing Color Management Options 95 Choosing Roll Paper Options 97 Choosing Cut Sheet Paper Options 100 ...118 Viewing Status Information 118 Checking Printer Status From the Printer Driver 120 Checking and Cleaning the Print Head 121 Running the Nozzle Check and Head Cleaning Utilities 121 Checking and Cleaning the Print Head Using the Control Panel . . 122 Manually Checking and Cleaning the Print ...

Printer Guide
Page 10
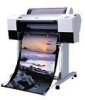
or 3-inch Epson Stylus Pro 7880: Epson Stylus Pro 9880: Paper Roller Spindle (High Tension) - 2- or 3-inch Epson Stylus Pro 7880: Epson Stylus Pro 9880: Manual Media Cutting System* Epson Stylus Pro 7880: Epson Stylus Pro 9880: Replacement Manual Cutting Blade (for Manual Media Cutting System) One-year extended warranty Two-... currently available. Options and Accessories Your Epson Stylus® Pro 7880/9880 offers these user-replaceable items: Consumables and user-replaceable parts Part Replacement Ink Maintenance Tank (see page 157) Replacement Printer Cutter Blade (see page 154) Ink...
or 3-inch Epson Stylus Pro 7880: Epson Stylus Pro 9880: Paper Roller Spindle (High Tension) - 2- or 3-inch Epson Stylus Pro 7880: Epson Stylus Pro 9880: Manual Media Cutting System* Epson Stylus Pro 7880: Epson Stylus Pro 9880: Replacement Manual Cutting Blade (for Manual Media Cutting System) One-year extended warranty Two-... currently available. Options and Accessories Your Epson Stylus® Pro 7880/9880 offers these user-replaceable items: Consumables and user-replaceable parts Part Replacement Ink Maintenance Tank (see page 157) Replacement Printer Cutter Blade (see page 154) Ink...

Printer Guide
Page 42
...folder and drag the EpsonNet folder into the trash. Follow the on-screen instructions to install the software and manuals, register your printer, and place a link to rename the printer for easier identification, enter a new name for it in the Name field on your system, you must ... one. Select your desktop. 8. Click the Install button. 7. You see your printer software. 6. Then reinstall your printer in the Printer Browser: Tip: If you want to the Epson Professional Imaging Website on your printer from the list and click Add. 44 After your Macintosh finds the driver and ...
...folder and drag the EpsonNet folder into the trash. Follow the on-screen instructions to install the software and manuals, register your printer, and place a link to rename the printer for easier identification, enter a new name for it in the Name field on your system, you must ... one. Select your desktop. 8. Click the Install button. 7. You see your printer software. 6. Then reinstall your printer in the Printer Browser: Tip: If you want to the Epson Professional Imaging Website on your printer from the list and click Add. 44 After your Macintosh finds the driver and ...

Printer Guide
Page 44
... to turn on your printer with Epson, then remove the printer software CD-ROM. Updating Your Printer Firmware To keep your printer features and functionality up to the Epson Professional Imaging Website on the printer, press the printer's P Power button. (Make sure the printer is connected; Follow the on-screen instructions to install the software and manuals, and place a link...
... to turn on your printer with Epson, then remove the printer software CD-ROM. Updating Your Printer Firmware To keep your printer features and functionality up to the Epson Professional Imaging Website on the printer, press the printer's P Power button. (Make sure the printer is connected; Follow the on-screen instructions to install the software and manuals, and place a link...


