
Operation Guide - EasyMP Monitor v4.53
Page 3
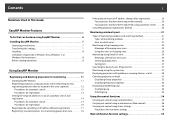
Contents 3 Notations Used in This Guide EasyMP Monitor Features Tasks that can be done using EasyMP Monitor 6 Installing EasyMP Monitor 7 Operating environment 7 Transferring the settings 7 Installing 8 Limitations imposed by a Windows Vista, Windows 7, or Windows 8 environment 8 Before starting operations 8 Using EasyMP Monitor Registering and deleting projectors for monitoring 11 Starting EasyMP Monitor ...
Contents 3 Notations Used in This Guide EasyMP Monitor Features Tasks that can be done using EasyMP Monitor 6 Installing EasyMP Monitor 7 Operating environment 7 Transferring the settings 7 Installing 8 Limitations imposed by a Windows Vista, Windows 7, or Windows 8 environment 8 Before starting operations 8 Using EasyMP Monitor Registering and deleting projectors for monitoring 11 Starting EasyMP Monitor ...

Operation Guide - EasyMP Monitor v4.53
Page 8
...Before: EMP Monitor _ After: EasyMP Monitor If you update the operating system to use EasyMP Monitor. Follow the on your projector's User's Guide. q The software name has been changed. If EasyMP or EMP Monitor is Windows 2000 or Windows XP Overwrite the existing EMP Monitor.dat ... copy of EasyMP Monitor.s "Monitoring using the system tray" p.27 • If EasyMP Monitor is installed on -screen instructions. The existing EMP Monitor.dat file is in "C:\Program Files\EPSON Projector\EasyMP Monitor Ver.x.xx". • If your operating system is Windows 8 "C:\Users\(User Name)\...
...Before: EMP Monitor _ After: EasyMP Monitor If you update the operating system to use EasyMP Monitor. Follow the on your projector's User's Guide. q The software name has been changed. If EasyMP or EMP Monitor is Windows 2000 or Windows XP Overwrite the existing EMP Monitor.dat ... copy of EasyMP Monitor.s "Monitoring using the system tray" p.27 • If EasyMP Monitor is installed on -screen instructions. The existing EMP Monitor.dat file is in "C:\Program Files\EPSON Projector\EasyMP Monitor Ver.x.xx". • If your operating system is Windows 8 "C:\Users\(User Name)\...
Operation Guide - EasyMP Monitor v4.53
Page 9
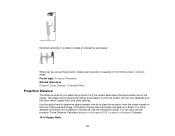
See your User's Guide for more information. • Set Standby Mode to Communication On (or Network On). • Set Network Monitoring to On. * When the projector's indicator is lit orange. The settings that need to be monitored and controlled even when they are using. Installing EasyMP Monitor 9 q To enable projectors to be made will vary depending on the projector you are in standby mode*, make the following settings at the projectors.
See your User's Guide for more information. • Set Standby Mode to Communication On (or Network On). • Set Network Monitoring to On. * When the projector's indicator is lit orange. The settings that need to be monitored and controlled even when they are using. Installing EasyMP Monitor 9 q To enable projectors to be made will vary depending on the projector you are in standby mode*, make the following settings at the projectors.
Operation Guide - EasyMP Monitor v4.53
Page 46
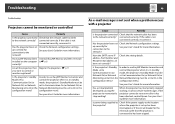
... Network set to Communication On (or Network On) or Monitoring set to On in the configuration menu? See your User's Guide for more information. address, Port Number and Recipient mail address all the projectors that the projector is set Check the Network...Has EasyMP Monitor been Uninstall EasyMP Monitor and then re-install installed on the computer it has been checked, contact Epson. If the cable is not connected correctly, reconnect it . configuration menu. See your User's Guide for more information. Troubleshooting 46 Troubleshooting Projectors cannot be ...
... Network set to Communication On (or Network On) or Monitoring set to On in the configuration menu? See your User's Guide for more information. address, Port Number and Recipient mail address all the projectors that the projector is set Check the Network...Has EasyMP Monitor been Uninstall EasyMP Monitor and then re-install installed on the computer it has been checked, contact Epson. If the cable is not connected correctly, reconnect it . configuration menu. See your User's Guide for more information. Troubleshooting 46 Troubleshooting Projectors cannot be ...
Operation Guide - EasyMP Multi PC Projection
Page 15
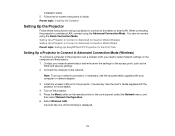
... Setting Up a Projector to Connect in Advanced Connection Mode (Wireless) Setting Up a Projector to a wireless or wired LAN. Parent topic: Installing the Software Setting Up the Projector Follow these instructions to set up a projector to connect to Connect in Advanced Connection Mode (Wired) Parent... topic: Setting Up EasyMP Multi PC Projection for more details. 4. See the User's Guide supplied with your network administrator and write down the settings for the access point, such as the SSID and security settings. 2. Turn ...
... Setting Up a Projector to Connect in Advanced Connection Mode (Wireless) Setting Up a Projector to a wireless or wired LAN. Parent topic: Installing the Software Setting Up the Projector Follow these instructions to set up a projector to connect to Connect in Advanced Connection Mode (Wired) Parent... topic: Setting Up EasyMP Multi PC Projection for more details. 4. See the User's Guide supplied with your network administrator and write down the settings for the access point, such as the SSID and security settings. 2. Turn ...
Operation Guide - EasyMP Multi PC Projection
Page 18
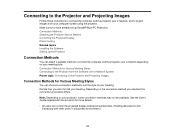
... a network depending on your meeting . Connection Methods Selecting the Projector Search Method Controlling the Projected Display Disconnecting Related topics Installing the Software Setting Up the Projector Connection Methods You can control the projected display and become presenters. (Holding discussions and... choose a connection method to the Projector from your projector, some connection methods may not be available. See the User's Guide supplied with other users in a business environment.) 18 Depending on your computer screen using the projector. Connection Methods for Various...
... a network depending on your meeting . Connection Methods Selecting the Projector Search Method Controlling the Projected Display Disconnecting Related topics Installing the Software Setting Up the Projector Connection Methods You can control the projected display and become presenters. (Holding discussions and... choose a connection method to the Projector from your projector, some connection methods may not be available. See the User's Guide supplied with other users in a business environment.) 18 Depending on your computer screen using the projector. Connection Methods for Various...
Operation Guide - EasyMP Multi PC Projection
Page 61
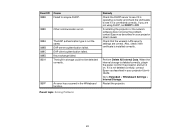
... storage is installed correctly. EAP server authentication failed. If you are correct. Perform Delete All Internal Data. EAP client authentication failed. If restarting the projector or the network software does not solve the problem, contact Epson as described in your projector User's Guide. The built... 0899 Other communication errors 089A 089B 089C 089D 0B01 The EAP authentication type is not deleted correctly, contact Epson as described in your projector User's Guide. Parent topic: Solving Problems Remedy Check the DHCP server to see if it is operating correctly and check...
... storage is installed correctly. EAP server authentication failed. If you are correct. Perform Delete All Internal Data. EAP client authentication failed. If restarting the projector or the network software does not solve the problem, contact Epson as described in your projector User's Guide. The built... 0899 Other communication errors 089A 089B 089C 089D 0B01 The EAP authentication type is not deleted correctly, contact Epson as described in your projector User's Guide. Parent topic: Solving Problems Remedy Check the DHCP server to see if it is operating correctly and check...
User Manual
Page 3
... Interface Panel...21 Projector Parts - Touch Unit ...28 Setting Up the Projector ...31 Projector Placement...31 Projector Setup and Installation Options 31 Projection Distance...32 Removing and Attaching the Cable Cover 34 Projector Connections...35 Connecting to Computer Sources 36 Connecting to...or USB Mouse Control 39 Connecting to Go for Sound 40 3 Side...20 Projector Parts - Contents BrightLink 575Wi/585Wi/595Wi User's Guide 11 Introduction to Your Projector ...12 Projector Features...12 Product Box Contents...14 Additional Components ...15 Optional Equipment and ...
... Interface Panel...21 Projector Parts - Touch Unit ...28 Setting Up the Projector ...31 Projector Placement...31 Projector Setup and Installation Options 31 Projection Distance...32 Removing and Attaching the Cable Cover 34 Projector Connections...35 Connecting to Computer Sources 36 Connecting to...or USB Mouse Control 39 Connecting to Go for Sound 40 3 Side...20 Projector Parts - Contents BrightLink 575Wi/585Wi/595Wi User's Guide 11 Introduction to Your Projector ...12 Projector Features...12 Product Box Contents...14 Additional Components ...15 Optional Equipment and ...

User Manual
Page 30
1 Laser diffusion ports 2 Installation magnets 3 Guide markers (used for performing angle adjustment) Parent topic: Projector Part Locations 30
1 Laser diffusion ports 2 Installation magnets 3 Guide markers (used for performing angle adjustment) Parent topic: Projector Part Locations 30
User Manual
Page 31
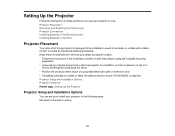
Projector Placement Removing and Attaching the Cable Cover Projector Connections Installing Batteries in the Remote Control Installing Batteries in the Installation Guide to install the projector using the included mounting equipment. • Leave plenty of space around and under the projector for use. Keep these sections to set up ...
Projector Placement Removing and Attaching the Cable Cover Projector Connections Installing Batteries in the Remote Control Installing Batteries in the Installation Guide to install the projector using the included mounting equipment. • Leave plenty of space around and under the projector for use. Keep these sections to set up ...
User Manual
Page 32
..., aspect ratio, and other settings. Extended Menu Projection Distance The distance at which you set up or down.) For more detailed information and installation instructions, see the Installation Guide. Use the tables here to determine approximately how far to place the projector from the screen, but can also use the projector Throw Distance... the projected image. (Conversion figures may have been rounded up the projector, make sure to position it squarely in front of the screen, not at epson.com/support (U.S.) or epson.ca/support (Canada). 16:10 Aspect Ratio 32
..., aspect ratio, and other settings. Extended Menu Projection Distance The distance at which you set up or down.) For more detailed information and installation instructions, see the Installation Guide. Use the tables here to determine approximately how far to place the projector from the screen, but can also use the projector Throw Distance... the projected image. (Conversion figures may have been rounded up the projector, make sure to position it squarely in front of the screen, not at epson.com/support (U.S.) or epson.ca/support (Canada). 16:10 Aspect Ratio 32
User Manual
Page 55
... projector over a network. See the EasyMP Network Updater Operation Guide for network projection. You can download the latest software and documentation from the Epson web site. See the EasyMP Multi PC Projection Operation Guide for network projection. Go to hold interactive meetings by projecting...projector through the network. You can download the latest software and documentation from the Epson Projector Software CD or download the software as described here, install the network software from the Epson web site. Note: To use on a Network Follow the instructions in these ...
... projector over a network. See the EasyMP Network Updater Operation Guide for network projection. You can download the latest software and documentation from the Epson web site. See the EasyMP Multi PC Projection Operation Guide for network projection. Go to hold interactive meetings by projecting...projector through the network. You can download the latest software and documentation from the Epson Projector Software CD or download the software as described here, install the network software from the Epson web site. Note: To use on a Network Follow the instructions in these ...
User Manual
Page 131
... projector). Note: Make sure you install the Touch Unit (BrightLink 595Wi). To restart the calibration process, press and hold the Esc button for finger touch interactivity. 131 Continue until all of the next circle, then repeat. Note: See the Installation Guide for detailed instructions on the remote ...control to go back to the bottom of the column, the next circle appears at the top of a new column. 7. When you make a mistake, press the Esc button on installing the Touch Unit and calibrating for...
... projector). Note: Make sure you install the Touch Unit (BrightLink 595Wi). To restart the calibration process, press and hold the Esc button for finger touch interactivity. 131 Continue until all of the next circle, then repeat. Note: See the Installation Guide for detailed instructions on the remote ...control to go back to the bottom of the column, the next circle appears at the top of a new column. 7. When you make a mistake, press the Esc button on installing the Touch Unit and calibrating for...
User Manual
Page 138
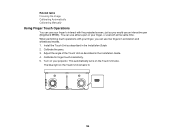
...or use two fingers in annotation and whiteboard modes. 1. When performing touch operations with the projected screen, just as described in the Installation Guide. 4. Turn on the Touch Unit also. This automatically turns on your projector. Related tasks Focusing the Image Calibrating Automatically Calibrating Manually ...Using Finger Touch Operations You can use your finger to interact with your finger, you would use an interactive pen (BrightLink 595Wi). Install the Touch Unit as you can use both at the same time. Calibrate the pens. 3. The blue light on the Touch ...
...or use two fingers in annotation and whiteboard modes. 1. When performing touch operations with the projected screen, just as described in the Installation Guide. 4. Turn on the Touch Unit also. This automatically turns on your projector. Related tasks Focusing the Image Calibrating Automatically Calibrating Manually ...Using Finger Touch Operations You can use your finger to interact with your finger, you would use an interactive pen (BrightLink 595Wi). Install the Touch Unit as you can use both at the same time. Calibrate the pens. 3. The blue light on the Touch ...

User Manual
Page 215
...is no interference from infrared remote controls, mice, or infrared microphones. • Make sure you have calibrated the system. See your projector's Installation Guide for details. • Make sure there are no interference from infrared remote controls, mice, or infrared microphones. • Make sure the ...Solutions When Finger Touch Interactivity Does Not Work If finger touch interactivity does not work (BrightLink 595Wi), try the following solutions: • Make sure the Touch Unit is installed correctly and the power cable is worn out or damaged, you may need to the computer ...
...is no interference from infrared remote controls, mice, or infrared microphones. • Make sure you have calibrated the system. See your projector's Installation Guide for details. • Make sure there are no interference from infrared remote controls, mice, or infrared microphones. • Make sure the ...Solutions When Finger Touch Interactivity Does Not Work If finger touch interactivity does not work (BrightLink 595Wi), try the following solutions: • Make sure the Touch Unit is installed correctly and the power cable is worn out or damaged, you may need to the computer ...

Installation Guide
Page 2
...If the instructions are used throughout this guide before using the wall mount. Safety Instructions For your projector and follow the instructions in personal injury or even death due to install and operate the Touch Unit. Keep this installation guide on hand for your safety, read all... the instructions in this installation guide to prevent personal injury or property damage. Explanation of Symbols The warning...
...If the instructions are used throughout this guide before using the wall mount. Safety Instructions For your projector and follow the instructions in personal injury or even death due to install and operate the Touch Unit. Keep this installation guide on hand for your safety, read all... the instructions in this installation guide to prevent personal injury or property damage. Explanation of Symbols The warning...

Installation Guide
Page 5
... thick frames in the shaded areas in . (20 mm) About This Installation Guide This guide describes how to mount the ultra-short-throw projectors BrightLink 595Wi/595Wi+ to install the Touch Unit after wall mount installation. 5 It also explains how to a wall using the included Epson wall mount. The Touch Unit will not operate correctly if anything is...
... thick frames in the shaded areas in . (20 mm) About This Installation Guide This guide describes how to mount the ultra-short-throw projectors BrightLink 595Wi/595Wi+ to install the Touch Unit after wall mount installation. 5 It also explains how to a wall using the included Epson wall mount. The Touch Unit will not operate correctly if anything is...

Product Specifications
Page 6
...-day limited lamp warranty What's In the Box BrightLink 595Wi ultra-short-throw interactive projector, Finger touch module, projector wall mount, projector template sheet, installation guide, quick user's guide, power cable, USB A/B cable, finger touch cable, computer/VGA cable, electronic user manual, interactive driver for Mac, Epson Easy Interactive Tools, Network Management software, projector remote...
...-day limited lamp warranty What's In the Box BrightLink 595Wi ultra-short-throw interactive projector, Finger touch module, projector wall mount, projector template sheet, installation guide, quick user's guide, power cable, USB A/B cable, finger touch cable, computer/VGA cable, electronic user manual, interactive driver for Mac, Epson Easy Interactive Tools, Network Management software, projector remote...
Installation Guide - Ultra-Short Throw Wall Mount (ELPMB43)
Page 2
... information that should be performed by this guide when installing the wall mount. Keep this installation guide. Symbol indicating an action that must not be done Safety Precautions for your safety, read all the instructions in this guide: • BrightLink® 475Wi/480i/485Wi/575Wi/585Wi/595Wi and 575Wi+/585Wi+/595Wi+ • BrightLink Pro 1410Wi/1420Wi/1430Wi...
... information that should be performed by this guide when installing the wall mount. Keep this installation guide. Symbol indicating an action that must not be done Safety Precautions for your safety, read all the instructions in this guide: • BrightLink® 475Wi/480i/485Wi/575Wi/585Wi/595Wi and 575Wi+/585Wi+/595Wi+ • BrightLink Pro 1410Wi/1420Wi/1430Wi...
Installation Guide - Ultra-Short Throw Wall Mount (ELPMB43)
Page 66
... to prevent someone from taking it. For details, see the online User's Guide or visit: U.S.: epson.com/support/brightlinkdownloads Canada: epson.ca/support/brightlinkdownloads Latin America: global.latin.epson.com/Soporte (website available only in the room with a productspecific installation guide or an installation leave-behind list, use a commercially available theft-prevention wire lock to secure the...
... to prevent someone from taking it. For details, see the online User's Guide or visit: U.S.: epson.com/support/brightlinkdownloads Canada: epson.ca/support/brightlinkdownloads Latin America: global.latin.epson.com/Soporte (website available only in the room with a productspecific installation guide or an installation leave-behind list, use a commercially available theft-prevention wire lock to secure the...


