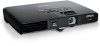
Installation Guide - ELPMBUNI Universal Mount Assembly
Page 2
... OF MERCHANTABILITY AND FITNESS FOR A PARTICULAR PURPOSE. ELPMBUNI Table of Contents Warranty ...- 3 Contact Premier Mounts ...- 3 Warning Statements ...- 4 Parts List ...- 5 Installation Tools ...- 5 ELPMBUNI Universal Mount Assembly ...- 6 Projector Preparation ...- 7 Securing the Bracket to the Projector ...- 9 Leveling the Mounting bracket ...- 14 Securing the Upper Assembly Ceiling Plate...- 15 Low-Profile Installation ...- 16 Securing the...
Installation Guide - ELPMBUNI Universal Mount Assembly
Page 3
...INSTALLATION INSTRUCTIONS MUST BE READ TO PREVENT PERSONAL INJURY AND PROPERTY DAMAGE. Contact Premier Mounts with any surface other source of the projector. Safety precautions must support the weight, or load, of direct heat energy. Failure to do so may result in damage to the... projector and could result in damage to the projector and/or damage to vibration, movement or chance of impact. Installation Manual KEEP THESE INSTALLATION INSTRUCTIONS IN AN EASILY ACCESSIBLE...
Installation Guide - ELPMBUNI Universal Mount Assembly
Page 4
... (Qty 4) M6 x 12mm Security Head Screws (Qty 4) Portable Drill Pencil Level (Supplied) Stud Finder (Commercially Available) M5 Allen Wrench NOTE: Mounting screws will vary by projector. Upper Assembly (Qty 1) Mounting Bracket (Qty 1) Plastic Barrel Caps (Qty 4) M3 Flat Washers (Qty 4) Note: Must be used with all proper installation hardware and components...
Installation Guide - ELPMBUNI Universal Mount Assembly
Page 5
ELPMBUNI A NOTE: The four (2-piece) leg assemblies can be used as single leg or any combination C of your projector for your G projector. K M J L J L Installation Manual Page - 6 - ELPMBUNI Universal Mount Assembly A Single Wooden Stud Mounting Points B Solid ... Plate D Allen Wrench E Height Adjustment Screws F Tension Knobs G Safety Knob H Security Screws I Leveling Barrels J Universal Mounting Bracket K Leg Assembly L Projector (Not Supplied) M Tri-Lock Opening Option 1 H B D F Combination I Leg Single Leg D Option 2 M NOTE: See the best configuration for...
Installation Guide - ELPMBUNI Universal Mount Assembly
Page 6
...possible damage to the top screen etc. Identify the number of mounting points and screw thread (pitch) size. 3. Mounting Points Inverted Projector Blanket, soft cloth etc Figure 1 Flat surface Installation Manual Page - 7 - Here you will enhance the quality of your final image... on a smooth flat surface. 2. HANDLE WITH CARE AT ALL TIMES. NOTE: Review the projectors manufacture's operation manual and refer to these recommendations during your installation will normally find important reference information regarding installation dimensions such as...
Installation Guide - ELPMBUNI Universal Mount Assembly
Page 7
Next loosen the safety screw knurl knob far enough to allow the two parts to create free play between the bracket tri-lock assembly and the upper section tri-lock assembly points. 5. Installation Manual Figure 2 Tri-Lock Opening Rotate 180° To Unlock Tension Knobs Upper Assembly Safety Knob Figure 3 Figure 4 Page - 8 - ELPMBUNI 4. Separate the upper assembly from the projector mounting bracket by slightly loosening the two tension knurl knobs to be rotated 180° apart and separate.
Installation Guide - ELPMBUNI Universal Mount Assembly
Page 8
... through the leveling barrel. Using a Phillips screwdriver, loosely secure the screws to the projector. 1. FIGURE 6 Two-Piece Leg FIGURE 7 One-Piece Leg Allen Wrench Mounting Hardware Inverted Projector Leveling Barrels FIGURE A Installation Manual Figure 5 Line up the leveling barrels to allow ... of the mounting bracket. Locate the mounting points on the base of the projector as shown for a better overall fit to the projector (Figure A). Select the mounting hardware that your projector requires and loosely install the universal mount to adjust the height of mounting legs...
Installation Guide - ELPMBUNI Universal Mount Assembly
Page 9
This mount works with all sub-25 pound projectors. PowerLite 830p, 835p Hardware: M4 x 12mm (Qty 4) Installation Manual ELPMBUNI NOTE: If your projector model is not shown, when arranging the leg combination, simply ensure access to filters and lamp housings when aligning brackets. PowerLite S3, S4, 62C, 76C, 82C, Hardware: M4 x 12mm (Qty 3) Page - 10 -
Installation Guide - ELPMBUNI Universal Mount Assembly
Page 13
... tighten the hex head leg screws with the Allen wrench (supplied) (Figure 8 and Figure 9). Installation Manual Allen Wrench Level Inverted Projector DOWN UP Adjusting the Mount Figure 8 Leveling Barrels Page - 14 - When the position desired is achieved tighten the mounting hardware to do not over-tighten ...
Installation Guide - ELPMBUNI Universal Mount Assembly
Page 14
...the top image edge of the lens as close to a point centered horizontally on your installation environment (Figure 9). Before you mount your projector's distance calculation to determine what distance is normally better to have the top edge of the screen). 3. NOTE: Make sure to measure... stud. It is recommended from the center of the mounting bracket to the front edge of the lens to the center of the projector. ELPMBUNI Securing the Upper Assembly Ceiling Plate 1. Ceiling Structure Ceiling Wood Stud Wood Screws Upper Assembly Installation Manual Knurl Knobs (3ea) ...
Installation Guide - ELPMBUNI Universal Mount Assembly
Page 17
... mounting bracket to the upper assembly Insert universal bracket to the Upper Assembly 1. NOTE: Follow the number sequence prior to securing the projector to prevent further rotation of the bracket in the upper assembly. 4. Safety Knurl Knob Tension Knurl Knobs Figure 13 Tri-Lock Opening Alignment ...Slot Projector Mount Installation Manual The alignment slot must be in the base of the upper assembly. 3. Tighten the remaining two tension knurl knobs ...
Installation Guide - ELPMBUNI Universal Mount Assembly
Page 18
... 14 Figure 15 Wood Stud Ceiling Tilt Adjusting Screws Allen Wrench Wood Stud Ceiling Figure 16 Page - 19 - To adjust the tilt angle of the projector, slightly loosen the side M8 screws and tilt to the desired angle to optimize the projected image. 2. Once the height is needed to square the... can be adjusted by slightly loosening the two 8mm height adjustment screws and raising or lowering the projector (Figure 14). 3. With the projector secured in the mount and power on the screen, slightly loosen the front and rear M8 screws and adjust to the desired angle then firmly ...
EasyMP Network Projection - Operations Guide
Page 2
... Installing the Software 6 Software Requirements 6 Installing 7 Connecting the Computer and Projector Two Connection Modes 9 Quick Connection Mode 9 Advanced Connection Mode 9 Preparing to Connect 10 Connecting to a Projector on a Network and Projecting 11 Operating the Computer 11 Using the Connection Screen... 11 Using the Toolbar 14 Connecting to a Projector on a Different Subnet 17 Specifying Either an IP Address or Projector Name and Performing a Search (Advanced Connection Mode Only 17 Performing a Search with a Profile ...
EasyMP Network Projection - Operations Guide
Page 3
...flickers 43 When connecting with EasyMP Network Projection the image is not displayed or the image is slow to appear 44 No audio from the projector when connecting with EasyMP Network Projection 44 When a connection is made using EasyMP Network Projection, a PowerPoint Slide Show cannot be started 44 ... Projection, the screen will not be refreshed when using an Office application.. . . . . 45 Error Message List 45 Cannot connect to the projector 45 Error message when starting up EasyMP Network Projection 45 Glossary 48 Notices 49 Copyright Notice 49 About Notations 49 Trademarks 49
EasyMP Network Projection - Operations Guide
Page 5
... start presentations smoothly without changing the signal cable. Sharing the projector over the network allows you can use up to four projectors to project data such as a report on your computer screen from one projector simultaneously. You cannot connect multiple computers to project data from ... computer. A black screen is projected when the Slide Show is away from the computer, you to project a different image from the projector via a network. 5 • Multi-screen display s "Using Multi-Screen Display" p.24 You can project only the PowerPoint Slide Show running ...
EasyMP Network Projection - Operations Guide
Page 6
Software Requirements EasyMP Network Projection runs on the EPSON Projector Software CD-ROM. For Windows OS Windows 2000 Service Pack 4 The following 32 bit OS versions: Windows XP Windows XP Service Pack 2 or later Windows ...
EasyMP Network Projection - Operations Guide
Page 7
... and then double-click EMP_NSCInst.exe. Installing the Software 7 Installing Close all running applications before starting installation. B Insert the EPSON Projector Software CD-ROM into the computer. q If the installer does not start automatically, open the CD-ROM drive from that of...changed. For Windows q You need administrator authority to the projector correctly using the same function as EMP NS Connection on -screen instructions to install. Depending on -screen instructions to install. B Insert the EPSON Projector Software CD-ROM into the computer. Before change: EMP...
EasyMP Network Projection - Operations Guide
Page 8
8 Connecting the Computer and Projector This chapter explains how to connect the computer and the projector via a network, and the procedure for projecting images from your computer's screen with the projector.
EasyMP Network Projection - Operations Guide
Page 9
..., and connects to the network hub with a commercially available LAN cable. In Quick Connection Mode, you can connect the projector and a computer directly using the Advanced Connection Mode or Quick Connection Mode. You can easily project images on the... projector model, either a wired or a wireless LAN connection may not be available. When connecting the projector via wired LAN, connect the projector to an existing network system. Advanced Connection Mode Advanced Connection Mode is not ...
EasyMP Network Projection - Operations Guide
Page 10
...EasyMP Network Projection on the computer and connect with your computer, LAN adapter, or AirMac card for details. Event ID: 04xx See your projector User's Guide for more details on a Network and Projecting" p.11 q If a connection error occurs, a number indicating the type of...using EasyMP Network Projection. C Make network settings on the remote control. See your projector User's Guide for the current input source, it into network connection status. See the documentation supplied with the projector. s "Installing" p.7 B Make network settings on the computer to the LAN ...