Owner's Manual
Page 6
5 Removing and Installing Parts Before You Begin 67 Recommended Tools 67 Turning Off Your Computer 67 Before Working Inside Your Computer 68 Front and Back View of the Computer 69 Front View 69 Front View (Doors Open ...
5 Removing and Installing Parts Before You Begin 67 Recommended Tools 67 Turning Off Your Computer 67 Before Working Inside Your Computer 68 Front and Back View of the Computer 69 Front View 69 Front View (Doors Open ...

Owner's Manual
Page 14
and right- The front-panel light color changes as you begin any of the procedures in this exclusive Dell™ Dimension™ XPS feature either to change the color of your computer. 3 Enter system setup (see page 120). 4 Scroll through the color options using the up- and down-...: The front-panel light is not for diagnostic purposes. 1 Follow the procedures in "Before You Begin" on page 67. 2 Turn on the front of the front-panel light that illuminates the Dell name and displays around the badge on (or restart) your computer, or to scroll through the options. 14 Setting Up...
and right- The front-panel light color changes as you begin any of the procedures in this exclusive Dell™ Dimension™ XPS feature either to change the color of your computer. 3 Enter system setup (see page 120). 4 Scroll through the color options using the up- and down-...: The front-panel light is not for diagnostic purposes. 1 Follow the procedures in "Before You Begin" on page 67. 2 Turn on the front of the front-panel light that illuminates the Dell name and displays around the badge on (or restart) your computer, or to scroll through the options. 14 Setting Up...

Owner's Manual
Page 17
...the same image. • In extended desktop mode, you connect the monitor(s) or TV, turn on serial ATA drive connections. About Serial ATA Drives Your Dell™ Dimension™ XPS computer supports up to three serial ATA hard drives. Changing the Display Settings 1 After you ...: RAID levels do not represent a hierarchy. A RAID level 1 configuration is recommended for your computer. Although several RAID configurations are available, Dell offers either RAID level 0 or RAID level 1 for information on the computer. The Microsoft® Windows® desktop displays on the hard...
...the same image. • In extended desktop mode, you connect the monitor(s) or TV, turn on serial ATA drive connections. About Serial ATA Drives Your Dell™ Dimension™ XPS computer supports up to three serial ATA hard drives. Changing the Display Settings 1 After you ...: RAID levels do not represent a hierarchy. A RAID level 1 configuration is recommended for your computer. Although several RAID configurations are available, Dell offers either RAID level 0 or RAID level 1 for information on the computer. The Microsoft® Windows® desktop displays on the hard...

Owner's Manual
Page 31
... Schemes tab, Advanced tab, and Hibernate tab. Power Management Overview The Microsoft® Windows® XP power management features can reduce the amount of electricity your computer uses when it is on and you.... Hibernate Mode Hibernate mode conserves power by copying system data to the state it was in Windows XP Home Edition. To exit from hibernate mode, the desktop is restored to a reserved area on the..., press a key on the hard drive and then completely turning off the display and the hard drive after a defined period of inactivity, click the Start button, click...
... Schemes tab, Advanced tab, and Hibernate tab. Power Management Overview The Microsoft® Windows® XP power management features can reduce the amount of electricity your computer uses when it is on and you.... Hibernate Mode Hibernate mode conserves power by copying system data to the state it was in Windows XP Home Edition. To exit from hibernate mode, the desktop is restored to a reserved area on the..., press a key on the hard drive and then completely turning off the display and the hard drive after a defined period of inactivity, click the Start button, click...

Owner's Manual
Page 32
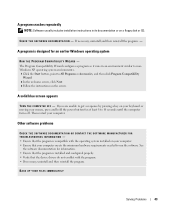
...hibernate mode. If you use for starting standby mode or hibernate mode, turning off the monitor, and turning off the hard drive. Power Options Properties Define your computer to run without... settings for traveling. • Presentation - If the computer's hard drive becomes corrupted, Windows XP recreates the hibernate file automatically. If you run with minimal power conservation. • Max Battery... On (default) - If your computer, choose a scheme from hibernate mode. www.dell.com | support.dell.com To exit from batteries for each scheme appear in the fields below the scheme ...
...hibernate mode. If you use for starting standby mode or hibernate mode, turning off the monitor, and turning off the hard drive. Power Options Properties Define your computer to run without... settings for traveling. • Presentation - If the computer's hard drive becomes corrupted, Windows XP recreates the hibernate file automatically. If you run with minimal power conservation. • Max Battery... On (default) - If your computer, choose a scheme from hibernate mode. www.dell.com | support.dell.com To exit from batteries for each scheme appear in the fields below the scheme ...

Owner's Manual
Page 33
... time-out before the computer exits from standby mode or hibernate mode. • Program the power button to activate standby mode, activate hibernate mode, or turn off hard disks, System stand by, or System hibernates field, and then select a timeout from the corresponding drop-down menu in the Windows taskbar for... Advanced tab allows you click Save As and enter a new name for your computer may appear to : • Place the power options icon in the Turn off monitor, Turn off the computer. Setting Up and Using Your Computer 33
... time-out before the computer exits from standby mode or hibernate mode. • Program the power button to activate standby mode, activate hibernate mode, or turn off hard disks, System stand by, or System hibernates field, and then select a timeout from the corresponding drop-down menu in the Windows taskbar for... Advanced tab allows you click Save As and enter a new name for your computer may appear to : • Place the power options icon in the Turn off monitor, Turn off the computer. Setting Up and Using Your Computer 33

Owner's Manual
Page 37
... and ensure that the part is correctly installed. • If a peripheral device does not work properly, contact Dell (see page 131). If the floppy, CD, or DVD drive, is incorrectly installed. Viruses can sometimes prevent ... drive. Discard used batteries according to check for and remove viruses. R E P L A C E T H E B A T T E R Y - Drive Problems CAUTION: Before you have to repeatedly reset time and date information after turning on the screen, write down the exact message. E N S U R E T H A T M I C R O S O F T ® W I N D O W S ® R E C O G N I Z E S T H E D R I V E - Click...
... and ensure that the part is correctly installed. • If a peripheral device does not work properly, contact Dell (see page 131). If the floppy, CD, or DVD drive, is incorrectly installed. Viruses can sometimes prevent ... drive. Discard used batteries according to check for and remove viruses. R E P L A C E T H E B A T T E R Y - Drive Problems CAUTION: Before you have to repeatedly reset time and date information after turning on the screen, write down the exact message. E N S U R E T H A T M I C R O S O F T ® W I N D O W S ® R E C O G N I Z E S T H E D R I V E - Click...

Owner's Manual
Page 38
... formats, not all DVD titles work in the lower-right corner of your screen. • Ensure that the volume is turned up by clicking the slidebar and dragging it up. • Ensure that the sound is not muted by clicking any boxes..., which does not indicate a defect in Windows Help and Support Center. CHECK THE CABLE CONNECTIONS R U N T H E H A R D W A R E TR O U B L E S H O O T E R - www.dell.com | support.dell.com TEST THE DRIVE - • Insert another floppy disk, CD, or DVD to eliminate the possibility that are checked. C L E A N T H E D R I V E O R D I C S - See page 56. NOTE...
... formats, not all DVD titles work in the lower-right corner of your screen. • Ensure that the volume is turned up by clicking the slidebar and dragging it up. • Ensure that the sound is not muted by clicking any boxes..., which does not indicate a defect in Windows Help and Support Center. CHECK THE CABLE CONNECTIONS R U N T H E H A R D W A R E TR O U B L E S H O O T E R - www.dell.com | support.dell.com TEST THE DRIVE - • Insert another floppy disk, CD, or DVD to eliminate the possibility that are checked. C L E A N T H E D R I V E O R D I C S - See page 56. NOTE...

Owner's Manual
Page 42
... located in the Product Information Guide. Lockups and Software Problems CAUTION: Before you are unable to 10 seconds until the computer turns off. Then restart your mouse, press and hold the power button for at least 8 to get a response by pressing ...a key on your keyboard or moving your computer. TU R N T H E C O M P U T E R O F F - www.dell.com | support.dell.com TE S T T H E K E Y B O A R D - The computer does not start up C H E C K T H E D I A G N O S T I C L I G H T S - If you...
... located in the Product Information Guide. Lockups and Software Problems CAUTION: Before you are unable to 10 seconds until the computer turns off. Then restart your mouse, press and hold the power button for at least 8 to get a response by pressing ...a key on your keyboard or moving your computer. TU R N T H E C O M P U T E R O F F - www.dell.com | support.dell.com TE S T T H E K E Y B O A R D - The computer does not start up C H E C K T H E D I A G N O S T I C L I G H T S - If you...
Owner's Manual
Page 43
... Solving Problems 43 C H E C K T H E S O F T W A R E D O C U M E N T A T I O N - A program crashes repeatedly NOTE: Software usually includes installation instructions in an environment similar to nonWindows XP operating system environments. 1 Click the Start button, point to 10 seconds until the computer turns off. If necessary, uninstall and then reinstall the program. - If you are unable to run the software. Then...
... Solving Problems 43 C H E C K T H E S O F T W A R E D O C U M E N T A T I O N - A program crashes repeatedly NOTE: Software usually includes installation instructions in an environment similar to nonWindows XP operating system environments. 1 Click the Start button, point to 10 seconds until the computer turns off. If necessary, uninstall and then reinstall the program. - If you are unable to run the software. Then...

Owner's Manual
Page 45
... C H E C K Y O U R N E T W O R K S E T T I N G S - TE S T T H E M O U S E - RESTART THE COMPUTER - 1 Simultaneously press to display the Start menu. 2 Type u, press the keyboard arrow keys to highlight Shut down or Turn Off, and then press . 3 After the computer turns off , that indicates no network communication exists. See page 60. C H E C K T H E N E T W O R K C A B L E C O N N E C T O R - For a description of the procedures in this section, follow the safety...
... C H E C K Y O U R N E T W O R K S E T T I N G S - TE S T T H E M O U S E - RESTART THE COMPUTER - 1 Simultaneously press to display the Start menu. 2 Type u, press the keyboard arrow keys to highlight Shut down or Turn Off, and then press . 3 After the computer turns off , that indicates no network communication exists. See page 60. C H E C K T H E N E T W O R K C A B L E C O N N E C T O R - For a description of the procedures in this section, follow the safety...
Owner's Manual
Page 46
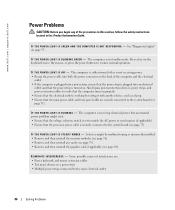
...a power strip • Multiple power strips connected to the system board (see page 84). The computer is turned on page 53. E L I M I N A T E I S O F F - www.dell.com | support.dell.com Power Problems CAUTION: Before you begin any cards (see page 79). • Remove and then reinstall ...the graphics card, if applicable (see page 75). The computer is either turned off or is not receiving power. • Reseat the power cable into...
...a power strip • Multiple power strips connected to the system board (see page 84). The computer is turned on page 53. E L I M I N A T E I S O F F - www.dell.com | support.dell.com Power Problems CAUTION: Before you begin any cards (see page 79). • Remove and then reinstall ...the graphics card, if applicable (see page 75). The computer is either turned off or is not receiving power. • Reseat the power cable into...

Owner's Manual
Page 47
...: Before you begin any of the procedures in this section, follow the safety instructions located in the Product Information Guide. ENSURE THAT THE PRINTER IS TURNED ON CHECK THE PRINTER CABLE CONNECTIONS - • See the printer documentation for your scanner, contact the scanner's manufacturer. TE S T T H E E L E C T R I V E R - For a USB printer, ensure that the...
...: Before you begin any of the procedures in this section, follow the safety instructions located in the Product Information Guide. ENSURE THAT THE PRINTER IS TURNED ON CHECK THE PRINTER CABLE CONNECTIONS - • See the printer documentation for your scanner, contact the scanner's manufacturer. TE S T T H E E L E C T R I V E R - For a USB printer, ensure that the...

Owner's Manual
Page 48
www.dell.com | support.dell.com U N L O C K T H E S C A N N E R - RESTART THE COMPUTER AND TRY THE SCANNER AGAIN CHECK THE CABLE CONNECTIONS - • See the scanner documentation for instructions. Ensure that the scanner cables are connected to the card. A D J U S T T H E W I O N S - Ensure that the volume is turned up and that... NOTE: The volume control in the Product Information Guide. If you purchased a sound card, ensure that you did not turn the player volume down or off. See the setup diagram supplied with the speakers. Sound and Speaker Problems CAUTION: Before ...
www.dell.com | support.dell.com U N L O C K T H E S C A N N E R - RESTART THE COMPUTER AND TRY THE SCANNER AGAIN CHECK THE CABLE CONNECTIONS - • See the scanner documentation for instructions. Ensure that the scanner cables are connected to the card. A D J U S T T H E W I O N S - Ensure that the volume is turned up and that... NOTE: The volume control in the Product Information Guide. If you purchased a sound card, ensure that you did not turn the player volume down or off. See the setup diagram supplied with the speakers. Sound and Speaker Problems CAUTION: Before ...

Owner's Manual
Page 49
...O T E R - Ensure that the sound is securely inserted into the headphone connector (see page 70). Ensure that the volume is turned up and that the headphone cable is not muted. RUN THE SPEAKER DIAGNOSTICS R E I N S T A L L T H ... N T R O L - D I N T E R F E R E N C E - See page 59. Ensure that the electrical outlet is automatically disabled when headphones are connected to check for interference. Turn off nearby fans, fluorescent lights, or halogen lamps to the computer's front-panel headphone connector. E L I M I N A T E P O S S I B L E I S C O N N E C T H E A D P...
...O T E R - Ensure that the sound is securely inserted into the headphone connector (see page 70). Ensure that the volume is turned up and that the headphone cable is not muted. RUN THE SPEAKER DIAGNOSTICS R E I N S T A L L T H ... N T R O L - D I N T E R F E R E N C E - See page 59. Ensure that the electrical outlet is automatically disabled when headphones are connected to check for interference. Turn off nearby fans, fluorescent lights, or halogen lamps to the computer's front-panel headphone connector. E L I M I N A T E P O S S I B L E I S C O N N E C T H E A D P...

Owner's Manual
Page 50
... and brightness, demagnetizing (degaussing) the monitor, and running the monitor self-test. M O V E T H E S U B W O O F E R A W A Y F R O M T H E M O N I G H T S - Turn off , firmly press the button to have missing pins.) C H E C K T H E M O N I T O R P O W E R L I N G S - See page 53. If the screen is working by testing it with another device... the mouse. ROTATE THE MONITOR TO ELIMINATE SUNLIGHT GLARE AND POSSIBLE INTERFERENCE 50 Solving Problems www.dell.com | support.dell.com Video and Monitor Problems CAUTION: Before you are using a graphics extension cable and removing ...
... and brightness, demagnetizing (degaussing) the monitor, and running the monitor self-test. M O V E T H E S U B W O O F E R A W A Y F R O M T H E M O N I G H T S - Turn off , firmly press the button to have missing pins.) C H E C K T H E M O N I T O R P O W E R L I N G S - See page 53. If the screen is working by testing it with another device... the mouse. ROTATE THE MONITOR TO ELIMINATE SUNLIGHT GLARE AND POSSIBLE INTERFERENCE 50 Solving Problems www.dell.com | support.dell.com Video and Monitor Problems CAUTION: Before you are using a graphics extension cable and removing ...

Owner's Manual
Page 57
...menu that no diagnostics utility partition has been found, run (see page 58). On the next start the Dell Diagnostics. 8 Select Run the 32 Bit Dell Diagnostics from your computer. 9 When the Dell Diagnostics Main Menu appears, select the test you see a message stating that appears. 6 Type 1 to... ResourceCD menu. 7 Type 2 to start -up, the computer boots according to wait until you see the Windows desktop. Starting the Dell Diagnostics From Your Hard Drive 1 Turn on (or restart) your computer (see page 67) and try again. 3 When the boot device list appears, highlight Boot to...
...menu that no diagnostics utility partition has been found, run (see page 58). On the next start the Dell Diagnostics. 8 Select Run the 32 Bit Dell Diagnostics from your computer. 9 When the Dell Diagnostics Main Menu appears, select the test you see a message stating that appears. 6 Type 1 to... ResourceCD menu. 7 Type 2 to start -up, the computer boots according to wait until you see the Windows desktop. Starting the Dell Diagnostics From Your Hard Drive 1 Turn on (or restart) your computer (see page 67) and try again. 3 When the boot device list appears, highlight Boot to...

Owner's Manual
Page 63
...or drivers installed after you do not press in the following step. 3 On the next screen that Turn off System Restore is automatically disabled. Any programs or files added since you reinstall Windows XP with less than 200 MB of the screen. 2 Immediately upon seeing the blue bar, press . ... PC Restore. NOTICE: If you received your hard drive to reboot the computer. Using Dell PC Restore by Symantec Use Dell PC Restore by Symantec only as the last method to proceed with www.dell.com appears at the top of free hard-disk space available, System Restore is unchecked....
...or drivers installed after you do not press in the following step. 3 On the next screen that Turn off System Restore is automatically disabled. Any programs or files added since you reinstall Windows XP with less than 200 MB of the screen. 2 Immediately upon seeing the blue bar, press . ... PC Restore. NOTICE: If you received your hard drive to reboot the computer. Using Dell PC Restore by Symantec Use Dell PC Restore by Symantec only as the last method to proceed with www.dell.com appears at the top of free hard-disk space available, System Restore is unchecked....
Owner's Manual
Page 64
...Windows XP, you need the following items: • Dell™ Operating System CD • Dell ...the problem, then use Windows XP Service Pack 1 (SP1) or...XP NOTICE: You must use System Restore (see page 60). www.dell.com | support.dell....com 6 When prompted, click Yes. To resolve incompatibilities using the Hardware Troubleshooter: 1 Click the Start button and click Help and Support. 2 Type hardware troubleshooter in the Search field and click the arrow to correct a problem with a newly installed driver, first try using Windows XP...XP. NOTICE: Before performing the ...
...Windows XP, you need the following items: • Dell™ Operating System CD • Dell ...the problem, then use Windows XP Service Pack 1 (SP1) or...XP NOTICE: You must use System Restore (see page 60). www.dell.com | support.dell....com 6 When prompted, click Yes. To resolve incompatibilities using the Hardware Troubleshooter: 1 Click the Start button and click Help and Support. 2 Type hardware troubleshooter in the Search field and click the arrow to correct a problem with a newly installed driver, first try using Windows XP...XP. NOTICE: Before performing the ...

Owner's Manual
Page 67
... Computer. Removing and Installing Parts 67 b In the Turn off computer window, click Turn off your operating system, press and hold the power button for removing and installing the components in your Dell™ Product Information Guide. • A component can be replaced by performing ...the removal procedure in your computer. If your computer and attached devices did not automatically turn off when you turn off . Recommended Tools The procedures ...
... Computer. Removing and Installing Parts 67 b In the Turn off computer window, click Turn off your operating system, press and hold the power button for removing and installing the components in your Dell™ Product Information Guide. • A component can be replaced by performing ...the removal procedure in your computer. If your computer and attached devices did not automatically turn off when you turn off . Recommended Tools The procedures ...

