Owner's Manual (PDF)
Page 14
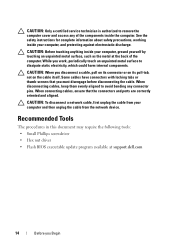
CAUTION: Before touching anything inside your computer, ground yourself by touching an unpainted metal surface, such as the metal at support.dell.com 14 Before you disconnect a cable, pull on its connector or on its pull-tab, not on the cable itself. While you .... Recommended Tools The procedures in this document may require the following tools: • Small Phillips screwdriver • Hex nut driver • Flash BIOS executable update program available at the back of the components inside your computer and then unplug the cable from the network device. CAUTION: When you...
CAUTION: Before touching anything inside your computer, ground yourself by touching an unpainted metal surface, such as the metal at support.dell.com 14 Before you disconnect a cable, pull on its connector or on its pull-tab, not on the cable itself. While you .... Recommended Tools The procedures in this document may require the following tools: • Small Phillips screwdriver • Hex nut driver • Flash BIOS executable update program available at the back of the components inside your computer and then unplug the cable from the network device. CAUTION: When you...
Owner's Manual (PDF)
Page 107
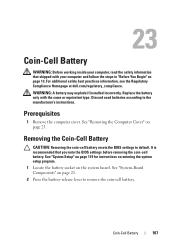
... battery. Discard used batteries according to default. Removing the Coin-Cell Battery CAUTION: Removing the coin-cell battery resets the BIOS settings to the manufacturer's instructions. It is recommended that shipped with the same or equivalent type. Coin-Cell Battery 107 ...computer cover. See "System-Board Components" on page 23. For additional safety best practices information, see the Regulatory Compliance Homepage at dell.com/regulatory_compliance. See "System Setup" on page 119 for instructions on entering the system setup program. 1 Locate the battery socket on...
... battery. Discard used batteries according to default. Removing the Coin-Cell Battery CAUTION: Removing the coin-cell battery resets the BIOS settings to the manufacturer's instructions. It is recommended that shipped with the same or equivalent type. Coin-Cell Battery 107 ...computer cover. See "System-Board Components" on page 23. For additional safety best practices information, see the Regulatory Compliance Homepage at dell.com/regulatory_compliance. See "System Setup" on page 119 for instructions on entering the system setup program. 1 Locate the battery socket on...

Owner's Manual (PDF)
Page 109
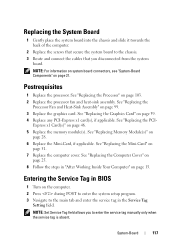
Postrequisites 1 Replace the computer cover. See "System Setup" on page 15. 3 Enter the system setup program and set the time and date. See "Replacing the Computer Cover" on page 25. 2 Follow the steps in "After Working Inside Your Computer" on page 119. See "Entering System Setup" on page 119. 4 Update the BIOS settings with values you may have noted before replacing the coin-cell battery. Coin-Cell Battery 109
Postrequisites 1 Replace the computer cover. See "System Setup" on page 15. 3 Enter the system setup program and set the time and date. See "Replacing the Computer Cover" on page 25. 2 Follow the steps in "After Working Inside Your Computer" on page 119. See "Entering System Setup" on page 119. 4 Update the BIOS settings with values you may have noted before replacing the coin-cell battery. Coin-Cell Battery 109
Owner's Manual (PDF)
Page 115
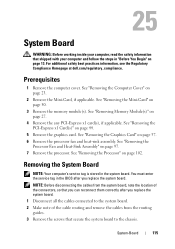
...See "Removing the Graphics Card" on page 97. 7 Remove the processor. For additional safety best practices information, see the Regulatory Compliance Homepage at dell.com/regulatory_compliance. Prerequisites 1 Remove the computer cover. See "Removing the Processor Fan and Heat-Sink Assembly" on page 37. 6 Remove the processor...-sink assembly. See "Removing the Computer Cover" on page 50. 3 Remove the memory module(s). You must enter the service tag in the BIOS after you replace the system board. See "Removing the Mini-Card" on page 23. 2 Remove the Mini-Card, if applicable. See "...
...See "Removing the Graphics Card" on page 97. 7 Remove the processor. For additional safety best practices information, see the Regulatory Compliance Homepage at dell.com/regulatory_compliance. Prerequisites 1 Remove the computer cover. See "Removing the Processor Fan and Heat-Sink Assembly" on page 37. 6 Remove the processor...-sink assembly. See "Removing the Computer Cover" on page 50. 3 Remove the memory module(s). You must enter the service tag in the BIOS after you replace the system board. See "Removing the Mini-Card" on page 23. 2 Remove the Mini-Card, if applicable. See "...
Owner's Manual (PDF)
Page 117
... Fan and Heat-Sink Assembly" on page 46. 5 Replace the memory module(s). See "Replacing the Graphics Card" on page 15. Entering the Service Tag in BIOS 1 Turn on the computer. 2 Press during POST to enter the system setup program. 3 Navigate to enter the service tag manually only when the service tag...
... Fan and Heat-Sink Assembly" on page 46. 5 Replace the memory module(s). See "Replacing the Graphics Card" on page 15. Entering the Service Tag in BIOS 1 Turn on the computer. 2 Press during POST to enter the system setup program. 3 Navigate to enter the service tag manually only when the service tag...

Owner's Manual (PDF)
Page 120
... configuration of the computer when the service tag is absent 120 System Setup Utility Main System Information BIOS Revision BIOS Build Date System Name System Time System Date Service Tag Displays the BIOS version number Displays the BIOS build date in mm/dd/yyyy format Displays the marketing name of the system Displays the...
... configuration of the computer when the service tag is absent 120 System Setup Utility Main System Information BIOS Revision BIOS Build Date System Name System Time System Date Service Tag Displays the BIOS version number Displays the BIOS build date in mm/dd/yyyy format Displays the marketing name of the system Displays the...

Owner's Manual (PDF)
Page 126
... press . 126 System Setup Utility NOTE: To boot to the boot menu. The previous boot sequence is bootable, check the device documentation. • Network - The BIOS detects the device and adds the USB flash option to a USB device, the device must be bootable. • CD/DVD/CD-RW Drive - The Boot...
... press . 126 System Setup Utility NOTE: To boot to the boot menu. The previous boot sequence is bootable, check the device documentation. • Network - The BIOS detects the device and adds the USB flash option to a USB device, the device must be bootable. • CD/DVD/CD-RW Drive - The Boot...
Owner's Manual (PDF)
Page 133
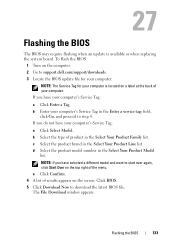
.... If you have your computer's Service Tag: a Click Enter a Tag. To flash the BIOS: 1 Turn on the screen. Click BIOS. 5 Click Download Now to support.dell.com/support/downloads. 3 Locate the BIOS update file for your computer: NOTE: The Service Tag for your computer's Service Tag: a ...Click Select Model. Flashing the BIOS 133 b Select the type of your computer's Service Tag in ...
.... If you have your computer's Service Tag: a Click Enter a Tag. To flash the BIOS: 1 Turn on the screen. Click BIOS. 5 Click Download Now to support.dell.com/support/downloads. 3 Locate the BIOS update file for your computer: NOTE: The Service Tag for your computer's Service Tag: a ...Click Select Model. Flashing the BIOS 133 b Select the type of your computer's Service Tag in ...
Owner's Manual (PDF)
Page 134
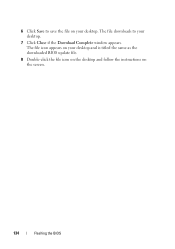
The file downloads to save the file on the screen. 134 Flashing the BIOS The file icon appears on your desktop and is titled the same as the downloaded BIOS update file. 8 Double-click the file icon on the desktop and follow the instructions on your desktop. 7 Click Close if the Download Complete window appears. 6 Click Save to your desktop.
The file downloads to save the file on the screen. 134 Flashing the BIOS The file icon appears on your desktop and is titled the same as the downloaded BIOS update file. 8 Double-click the file icon on the desktop and follow the instructions on your desktop. 7 Click Close if the Download Complete window appears. 6 Click Save to your desktop.


