
Owner's Manual
Page 14
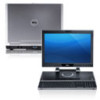
...wireless mini-card 11 system board 13 coin-cell battery 15 I/O panel 10 11 12 13 2 converter board 4 power-supply unit 6 cooling vents 8 processor heat-sink 10 memory module(s) 12 mSATA mini-card 14 trim cover 16 power-supply fan 14 | Technical Overview Technical Overview WARNING: Before working... inside your computer, read the safety information that shipped with your computer, follow the steps in "After Working Inside Your Computer" on page 11. For additional safety best practices information,...
...wireless mini-card 11 system board 13 coin-cell battery 15 I/O panel 10 11 12 13 2 converter board 4 power-supply unit 6 cooling vents 8 processor heat-sink 10 memory module(s) 12 mSATA mini-card 14 trim cover 16 power-supply fan 14 | Technical Overview Technical Overview WARNING: Before working... inside your computer, read the safety information that shipped with your computer, follow the steps in "After Working Inside Your Computer" on page 11. For additional safety best practices information,...

Owner's Manual
Page 44
... information, see the Regulatory Compliance Homepage at dell.com/regulatory_compliance. Procedure 1 Locate the wireless mini-card. See "Removing the Back Cover" on page 15. 2 Disconnect the antenna cables from the wireless mini-card. 3 Remove the screws that shipped with your computer, follow the steps in "After Working Inside Your Computer" on page 13. See...
... information, see the Regulatory Compliance Homepage at dell.com/regulatory_compliance. Procedure 1 Locate the wireless mini-card. See "Removing the Back Cover" on page 15. 2 Disconnect the antenna cables from the wireless mini-card. 3 Remove the screws that shipped with your computer, follow the steps in "After Working Inside Your Computer" on page 13. See...

Owner's Manual
Page 46
...page 11. The following table provides the wireless-antenna cable color schemes for the wireless mini-cards supported by your computer and follow the instructions in "After Working Inside Your Computer" on page 13. ...Wireless Mini-Card WARNING: Before working inside your computer, read the safety information that no cables are placed under the wireless mini-card. 1 Align the notch on the wireless mini-card with your computer. Procedure CAUTION: To avoid damage to the wireless mini-card. Connectors on the wireless mini-card connector. 2 Insert the wireless mini-card at dell...
...page 11. The following table provides the wireless-antenna cable color schemes for the wireless mini-cards supported by your computer and follow the instructions in "After Working Inside Your Computer" on page 13. ...Wireless Mini-Card WARNING: Before working inside your computer, read the safety information that no cables are placed under the wireless mini-card. 1 Align the notch on the wireless mini-card with your computer. Procedure CAUTION: To avoid damage to the wireless mini-card. Connectors on the wireless mini-card connector. 2 Insert the wireless mini-card at dell...

Owner's Manual
Page 61
... the Back Cover" on page 21. 3 Remove the trim cover. See "Removing the I /O panel. Removing the Wireless Keyboard/Mouse Receiver | 61 After working inside your computer and follow the instructions in "Before You Begin" on page 11. For additional safety best practices information,...see the Regulatory Compliance Homepage at dell.com/regulatory_compliance. See "Removing the Inner Frame" on page 31. 6 Remove the inner frame. See "Removing the System-Board Shield" on page 49. Removing the Wireless Keyboard/Mouse Receiver WARNING: Before working inside your computer, read the ...
... the Back Cover" on page 21. 3 Remove the trim cover. See "Removing the I /O panel. Removing the Wireless Keyboard/Mouse Receiver | 61 After working inside your computer and follow the instructions in "Before You Begin" on page 11. For additional safety best practices information,...see the Regulatory Compliance Homepage at dell.com/regulatory_compliance. See "Removing the Inner Frame" on page 31. 6 Remove the inner frame. See "Removing the System-Board Shield" on page 49. Removing the Wireless Keyboard/Mouse Receiver WARNING: Before working inside your computer, read the ...

Owner's Manual
Page 63
... on page 11. Replacing the Wireless Keyboard/Mouse Receiver WARNING: Before working inside your computer and follow the instructions in "After Working Inside Your Computer" on page 13. After working inside your computer, follow the steps in "After Working Inside Your Computer" on the chassis...cable to the system board. See "Replacing the I /O panel. Replacing the Wireless Keyboard/Mouse Receiver | 63 For additional safety best practices information, see the Regulatory Compliance Homepage at dell.com/regulatory_compliance. See "Replacing the Inner Frame" on page 20. 6 Replace ...
... on page 11. Replacing the Wireless Keyboard/Mouse Receiver WARNING: Before working inside your computer and follow the instructions in "After Working Inside Your Computer" on page 13. After working inside your computer, follow the steps in "After Working Inside Your Computer" on the chassis...cable to the system board. See "Replacing the I /O panel. Replacing the Wireless Keyboard/Mouse Receiver | 63 For additional safety best practices information, see the Regulatory Compliance Homepage at dell.com/regulatory_compliance. See "Replacing the Inner Frame" on page 20. 6 Replace ...

Owner's Manual
Page 73
... the Antenna Modules | 73 For additional safety best practices information, see the Regulatory Compliance Homepage at dell.com/regulatory_compliance. Replacing the Antenna Modules WARNING: Before working inside your computer, read the safety information that shipped with the alignment posts on the display bezel ...and adhere the antenna modules to the display bezel. 2 Route the antenna cables through their routing guides and connect the antenna cables to the wireless ...
... the Antenna Modules | 73 For additional safety best practices information, see the Regulatory Compliance Homepage at dell.com/regulatory_compliance. Replacing the Antenna Modules WARNING: Before working inside your computer, read the safety information that shipped with the alignment posts on the display bezel ...and adhere the antenna modules to the display bezel. 2 Route the antenna cables through their routing guides and connect the antenna cables to the wireless ...
Owner's Manual
Page 77
.... You must enter the Service Tag in "After Working Inside Your Computer" on page 13. See "Removing the I/O Panel" on page 19. 3 Remove the stand. After working inside your computer and follow the instructions in system ... the processor. See "Removing the Memory Module(s)" on page 47. 9 Remove the wireless mini-card. See "Removing the mSATA Mini-Card" on page 28. 8 Remove the mSATA mini-card. See "Removing ...the Wireless Mini-Card" on page 21. 4 Remove the I /O-Board" on page 17. 2 Remove the...
.... You must enter the Service Tag in "After Working Inside Your Computer" on page 13. See "Removing the I/O Panel" on page 19. 3 Remove the stand. After working inside your computer and follow the instructions in system ... the processor. See "Removing the Memory Module(s)" on page 47. 9 Remove the wireless mini-card. See "Removing the mSATA Mini-Card" on page 28. 8 Remove the mSATA mini-card. See "Removing ...the Wireless Mini-Card" on page 21. 4 Remove the I /O-Board" on page 17. 2 Remove the...

Owner's Manual
Page 79
...on page 56. 2 Replace the processor heat-sink. After working inside your computer, follow the steps in "After Working Inside Your Computer" on page 13. See "Replacing the mSATA Mini-Card" on page 54. 3 Replace the wireless mini-card. See "Replacing the Back Cover" on page ...18. 12 Follow the instructions in the system board. For additional safety best practices information, see the Regulatory Compliance Homepage at dell...
...on page 56. 2 Replace the processor heat-sink. After working inside your computer, follow the steps in "After Working Inside Your Computer" on page 13. See "Replacing the mSATA Mini-Card" on page 54. 3 Replace the wireless mini-card. See "Replacing the Back Cover" on page ...18. 12 Follow the instructions in the system board. For additional safety best practices information, see the Regulatory Compliance Homepage at dell...

Owner's Manual
Page 81
...Wireless Mini-Card" on page 31. 6 Remove the inner frame. See "Removing the I/O Panel" on page 21. 4 Remove the I/O panel. After working inside your computer and follow the instructions in "After Working Inside Your Computer" on page 13. For additional safety best practices information, see the Regulatory Compliance Homepage at dell....com/regulatory_compliance. Removing the Side I/O-Board WARNING: Before working inside your computer, read the safety information that shipped with your ...
...Wireless Mini-Card" on page 31. 6 Remove the inner frame. See "Removing the I/O Panel" on page 21. 4 Remove the I/O panel. After working inside your computer and follow the instructions in "After Working Inside Your Computer" on page 13. For additional safety best practices information, see the Regulatory Compliance Homepage at dell....com/regulatory_compliance. Removing the Side I/O-Board WARNING: Before working inside your computer, read the safety information that shipped with your ...

Owner's Manual
Page 83
...at dell.com/regulatory_compliance. See "Replacing the Processor Heat-Sink" on page 70. 5 Replace the inner frame. Replacing the Side-I/O Board | 83 NOTE: Ensure to secure the grounding cable with the same screw that secures the side I/O-shield to display bezel. See "Replacing the Wireless Mini..." on page 46. 4 Follow the instructions from step 1 to the wireless mini-card. See "Replacing the Stand" on page 13. See "Replacing the Back Cover" on page 18. 11 Follow the instructions in "After Working Inside Your Computer" on page 22. 9 Replace the trim cover. Postrequisites...
...at dell.com/regulatory_compliance. See "Replacing the Processor Heat-Sink" on page 70. 5 Replace the inner frame. Replacing the Side-I/O Board | 83 NOTE: Ensure to secure the grounding cable with the same screw that secures the side I/O-shield to display bezel. See "Replacing the Wireless Mini..." on page 46. 4 Follow the instructions from step 1 to the wireless mini-card. See "Replacing the Stand" on page 13. See "Replacing the Back Cover" on page 18. 11 Follow the instructions in "After Working Inside Your Computer" on page 22. 9 Replace the trim cover. Postrequisites...

Owner's Manual
Page 97
...Replace the inner frame. See "Replacing the Stand" on page 13. See "Replacing the Back Cover" on page 18. 8 Follow the instructions in "After Working Inside Your Computer" on page 22. 6 Replace the trim cover. Postrequisites 1 Replace the processor heat-sink fan. Replacing the Display Panel | 97 See "Replacing...secures the side I/O-board shield to the display bezel. 14 Route the power-button, speakers, camera, input source/display-settings controls, wireless keyboard/mouse receiver, and touchscreen cables through their routing guides and connect the cables to the system board. 15 Route the...
...Replace the inner frame. See "Replacing the Stand" on page 13. See "Replacing the Back Cover" on page 18. 8 Follow the instructions in "After Working Inside Your Computer" on page 22. 6 Replace the trim cover. Postrequisites 1 Replace the processor heat-sink fan. Replacing the Display Panel | 97 See "Replacing...secures the side I/O-board shield to the display bezel. 14 Route the power-button, speakers, camera, input source/display-settings controls, wireless keyboard/mouse receiver, and touchscreen cables through their routing guides and connect the cables to the system board. 15 Route the...


