
User's Guide
Page 4
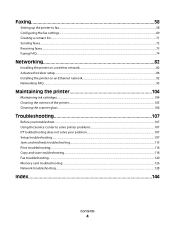
... Sending faxes...72 Receiving faxes...73 Faxing FAQ...74 Networking 82 Installing the printer on a wireless network...82 Advanced wireless setup...86 Installing the printer on an Ethernet network...92 Networking FAQ...93 Maintaining the printer 104 Maintaining ink cartridges...104 Cleaning ... you troubleshoot...107 Using the Service Center to solve printer problems 107 If Troubleshooting does not solve your problem 107 Setup troubleshooting...107 Jams and misfeeds troubleshooting...113 Print troubleshooting...116 Copy and scan troubleshooting...118 Fax troubleshooting...120 Memory card ...
... Sending faxes...72 Receiving faxes...73 Faxing FAQ...74 Networking 82 Installing the printer on a wireless network...82 Advanced wireless setup...86 Installing the printer on an Ethernet network...92 Networking FAQ...93 Maintaining the printer 104 Maintaining ink cartridges...104 Cleaning ... you troubleshoot...107 Using the Service Center to solve printer problems 107 If Troubleshooting does not solve your problem 107 Setup troubleshooting...107 Jams and misfeeds troubleshooting...113 Print troubleshooting...116 Copy and scan troubleshooting...118 Fax troubleshooting...120 Memory card ...
User's Guide
Page 6
... photographs and save . Duplexing lets you get the most out of time (the Power Saver timeout). • Share your new printer right away, use the setup materials that came with our printers, and we want to make sure it better. By selecting certain printer settings or tasks, you to reduce your...
... photographs and save . Duplexing lets you get the most out of time (the Power Saver timeout). • Share your new printer right away, use the setup materials that came with our printers, and we want to make sure it better. By selecting certain printer settings or tasks, you to reduce your...
User's Guide
Page 7
... your ink cartridges, try using printer software • Setting up and using the "Clean Printhead" and "Deep Clean Printhead" features. Initial setup instructions: • Connecting the printer • Installing the printer software Find it away. • Recycle paper from discarded print jobs. &#...; Clean the printhead. Additional setup and instructions for and maintaining the printer • Troubleshooting and solving problems User's Guide The User's Guide is available on the installation software CD. For updates, check our Web site at support.dell.com. About your old printer...
... your ink cartridges, try using printer software • Setting up and using the "Clean Printhead" and "Deep Clean Printhead" features. Initial setup instructions: • Connecting the printer • Installing the printer software Find it away. • Recycle paper from discarded print jobs. &#...; Clean the printhead. Additional setup and instructions for and maintaining the printer • Troubleshooting and solving problems User's Guide The User's Guide is available on the installation software CD. For updates, check our Web site at support.dell.com. About your old printer...
User's Guide
Page 14
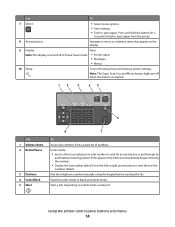
... an automated answering system. In Fax mode: • Insert a three-second pause in Power Saver mode. • Printer status • Messages • Menus 10 Setup Access the setup menu and change printer settings. Press the left or right arrow button to color mode or black-and-white mode. Use To 7 Select •...
... an automated answering system. In Fax mode: • Insert a three-second pause in Power Saver mode. • Printer status • Messages • Menus 10 Setup Access the setup menu and change printer settings. Press the left or right arrow button to color mode or black-and-white mode. Use To 7 Select •...
User's Guide
Page 15
... a menu level of the Copy, Scan, Fax, Photo, or File Print menu to the top level of a menu. • Exit from a menu level of the Setup menu to the top level of the previous mode. • Clear current settings or error messages, and return to default settings. 8 Keypad In Copy mode... most energy, select the lowest Power Saver timeout. 1 From the printer control panel, press . 2 Press the up or down arrow button to scroll to Device Setup, and then press . 3 Press the up or down arrow button to scroll to Power Saver, and then press . 4 Press the up or down arrow button...
... a menu level of the Copy, Scan, Fax, Photo, or File Print menu to the top level of a menu. • Exit from a menu level of the Setup menu to the top level of the previous mode. • Clear current settings or error messages, and return to default settings. 8 Keypad In Copy mode... most energy, select the lowest Power Saver timeout. 1 From the printer control panel, press . 2 Press the up or down arrow button to scroll to Device Setup, and then press . 3 Press the up or down arrow button to scroll to Power Saver, and then press . 4 Press the up or down arrow button...
User's Guide
Page 17
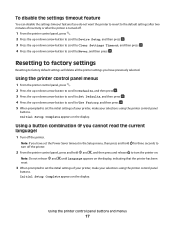
... you have previously selected. Using the printer control panel buttons and menus 17 Note: Do not release and until Language appears on . Initial Setup Complete appears on the display. Using the printer control panel menus 1 From the printer control panel, press . 2 Press the up or ...press . 5 When prompted to set the initial settings of your printer, make your selections using the printer control panel buttons. Initial Setup Complete appears on the display. Resetting to factory settings Resetting to factory default settings will delete all the printer settings you have set ...
... you have previously selected. Using the printer control panel buttons and menus 17 Note: Do not release and until Language appears on . Initial Setup Complete appears on the display. Using the printer control panel menus 1 From the printer control panel, press . 2 Press the up or ...press . 5 When prompted to set the initial settings of your printer, make your selections using the printer control panel buttons. Initial Setup Complete appears on the display. Resetting to factory settings Resetting to factory default settings will delete all the printer settings you have set ...
User's Guide
Page 19
... a fax in three-in-one printers. • Add, edit, or delete contacts in the built-in phone book. • Access the Dell Fax Setup Utility. The dialog lets you select File Print with a word-processing program. Note: Printing Preferences is installed automatically with the printer software...to set the Speed Dial and Group Dial numbers, set Ringing and Answering, and print fax history and status reports. Dell Fax Solutions (referred to as Wireless Setup Utility) • Set up the wireless printer on a wireless network. • Change the wireless settings of the printer...
... a fax in three-in-one printers. • Add, edit, or delete contacts in the built-in phone book. • Access the Dell Fax Setup Utility. The dialog lets you select File Print with a word-processing program. Note: Printing Preferences is installed automatically with the printer software...to set the Speed Dial and Group Dial numbers, set Ringing and Answering, and print fax history and status reports. Dell Fax Solutions (referred to as Wireless Setup Utility) • Set up the wireless printer on a wireless network. • Change the wireless settings of the printer...
User's Guide
Page 20
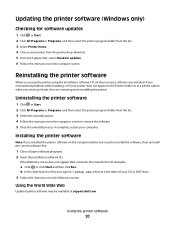
... the necessary software was installed. Using the World Wide Web Updated printer software may be available at support.dell.com. Using the printer software 20 b In the Start Search or Run box, type D:\setup.exe, where D is the letter of your computer. Installing the printer software Note: If you send a print job...
... the necessary software was installed. Using the World Wide Web Updated printer software may be available at support.dell.com. Using the printer software 20 b In the Start Search or Run box, type D:\setup.exe, where D is the letter of your computer. Installing the printer software Note: If you send a print job...
User's Guide
Page 29
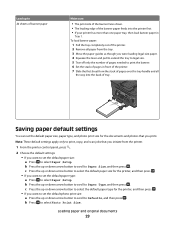
... printer. 1 From the printer control panel, press . 2 Choose the default settings: • If you want to set the default paper size: a Press to select Paper Setup. To load banner paper: 1 Pull the tray completely out of tray. Saving paper default settings You can set the default paper size, paper type, and... select the default paper size for the printer, and then press . • If you want to set the default paper type: a Press to select Paper Setup. c Press the up or down arrow button to scroll to select Photo Print Size.
... printer. 1 From the printer control panel, press . 2 Choose the default settings: • If you want to set the default paper size: a Press to select Paper Setup. To load banner paper: 1 Pull the tray completely out of tray. Saving paper default settings You can set the default paper size, paper type, and... select the default paper size for the printer, and then press . • If you want to set the default paper type: a Press to select Paper Setup. c Press the up or down arrow button to scroll to select Photo Print Size.

User's Guide
Page 31
...the print job: a With a document open , click File Print. 2 Click Properties, Preferences, Options, or Setup. 3 From the Copies section of the Print Setup tab, enter the number of paper to print, and then select Collate Copies. Collated Not collated Notes: • The ...when printing photos or when working with specialty media. • Select the borderless setting when printing photos. b Click Properties, Preferences, Options, or Setup. Printing basic documents Printing a document 1 Load the paper in the ink cartridges. • Remove each sheet as it dry before stacking. ...
...the print job: a With a document open , click File Print. 2 Click Properties, Preferences, Options, or Setup. 3 From the Copies section of the Print Setup tab, enter the number of paper to print, and then select Collate Copies. Collated Not collated Notes: • The ...when printing photos or when working with specialty media. • Select the borderless setting when printing photos. b Click Properties, Preferences, Options, or Setup. Printing basic documents Printing a document 1 Load the paper in the ink cartridges. • Remove each sheet as it dry before stacking. ...
User's Guide
Page 32
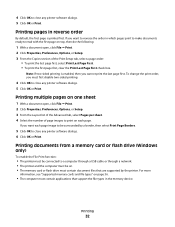
... is printed first. Printing multiple pages on one sheet 1 With a document open , click File Print. 2 Click Properties, Preferences, Options, or Setup. 3 From the Copies section of page images to print on each page image to be on. • The memory card or flash drive must contain... 1 With a document open , click File Print. 2 Click Properties, Preferences, Options, or Setup. 3 From the Layout list of the Advanced tab, select Pages per sheet. 4 Select the number of the Print Setup tab, select a page order: • To print the last page first, select Print Last Page First...
... is printed first. Printing multiple pages on one sheet 1 With a document open , click File Print. 2 Click Properties, Preferences, Options, or Setup. 3 From the Copies section of page images to print on each page image to be on. • The memory card or flash drive must contain... 1 With a document open , click File Print. 2 Click Properties, Preferences, Options, or Setup. 3 From the Layout list of the Advanced tab, select Pages per sheet. 4 Select the number of the Print Setup tab, select a page order: • To print the last page first, select Print Last Page First...
User's Guide
Page 33
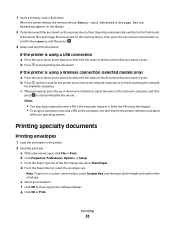
... system. If document files and image files are stored on the memory device, then the printer automatically switches to print. b Click Properties, Preferences, Options, or Setup. Printing 33 c When prompted, press the up or down arrow button to select the file name of the network computer, and then press to start... the display. 2 If only document files are stored on a custom-size envelope, select Custom Size, and then specify the height and width of the Print Setup tab, select Plain Paper.
... system. If document files and image files are stored on the memory device, then the printer automatically switches to print. b Click Properties, Preferences, Options, or Setup. Printing 33 c When prompted, press the up or down arrow button to select the file name of the network computer, and then press to start... the display. 2 If only document files are stored on a custom-size envelope, select Custom Size, and then specify the height and width of the Print Setup tab, select Plain Paper.
User's Guide
Page 34
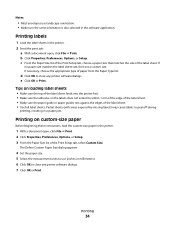
...the label sheets in the printer. 2 Send the print job: a With a document open , click File Print. 2 Click Properties, Preferences, Options, or Setup. 3 From the Paper Size list of the label sheet feeds into the printer first. • Make sure the adhesive on custom-size paper Before beginning... custom-size paper in the printer. 1 With a document open , click File Print. b Click Properties, Preferences, Options, or Setup. Tips on loading label sheets • Make sure the top of the Print Setup tab, select Custom Size. Printing 34 c From the Paper Size list of the Print...
...the label sheets in the printer. 2 Send the print job: a With a document open , click File Print. 2 Click Properties, Preferences, Options, or Setup. 3 From the Paper Size list of the label sheet feeds into the printer first. • Make sure the adhesive on custom-size paper Before beginning... custom-size paper in the printer. 1 With a document open , click File Print. b Click Properties, Preferences, Options, or Setup. Tips on loading label sheets • Make sure the top of the Print Setup tab, select Custom Size. Printing 34 c From the Paper Size list of the Print...

User's Guide
Page 41
...your PDA. It supports the following profiles: Object Push Profile (OPP) and Serial Port Profile (SPP). You will need to repeat the setup of the printer. For more information, see the documentation for each Bluetooth device that you are required. Bluetooth Dongle Connected appears on your ... a Bluetooth-enabled device • This printer is recommended that you use to send a print job to the printer. You need to repeat the setup if: • You reset the printer to its factory default settings. • You change the Bluetooth security level or the Bluetooth pass key. ...
...your PDA. It supports the following profiles: Object Push Profile (OPP) and Serial Port Profile (SPP). You will need to repeat the setup of the printer. For more information, see the documentation for each Bluetooth device that you are required. Bluetooth Dongle Connected appears on your ... a Bluetooth-enabled device • This printer is recommended that you use to send a print job to the printer. You need to repeat the setup if: • You reset the printer to its factory default settings. • You change the Bluetooth security level or the Bluetooth pass key. ...

User's Guide
Page 42
...: A Bluetooth adapter is not included with the printer. 2 From the printer control panel, press . 3 Press the up or down arrow button to scroll to Bluetooth Setup, and then press . 4 Press the up or down arrow button to scroll to Security Level, and then press . 5 Press the up or down arrow button...
...: A Bluetooth adapter is not included with the printer. 2 From the printer control panel, press . 3 Press the up or down arrow button to scroll to Bluetooth Setup, and then press . 4 Press the up or down arrow button to scroll to Security Level, and then press . 5 Press the up or down arrow button...
User's Guide
Page 43
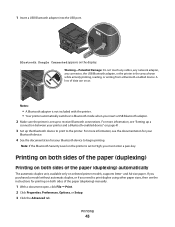
.... 4 See the documentation for printing on both sides of the paper (duplexing) manually. 1 With a document open, click File Print. 2 Click Properties, Preferences, Options, or Setup. 3 Click the Advanced tab. Printing 43 Warning-Potential Damage: Do not touch any cables, any network adapter, any connector, the USB Bluetooth adapter, or the...
.... 4 See the documentation for printing on both sides of the paper (duplexing) manually. 1 With a document open, click File Print. 2 Click Properties, Preferences, Options, or Setup. 3 Click the Advanced tab. Printing 43 Warning-Potential Damage: Do not touch any cables, any network adapter, any connector, the USB Bluetooth adapter, or the...
User's Guide
Page 44
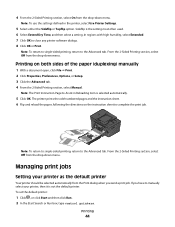
... the paper, following the directions on both sides of the paper (duplexing) manually 1 With a document open, click File Print. 2 Click Properties, Preferences, Options, or Setup. 3 Click the Advanced tab. 4 From the 2-Sided Printing section, select Manual. To set the default printer: 1 Click , or click Start and then click Run. 2 In...
... the paper, following the directions on both sides of the paper (duplexing) manually 1 With a document open, click File Print. 2 Click Properties, Preferences, Options, or Setup. 3 Click the Advanced tab. 4 From the 2-Sided Printing section, select Manual. To set the default printer: 1 Click , or click Start and then click Run. 2 In...
User's Guide
Page 45
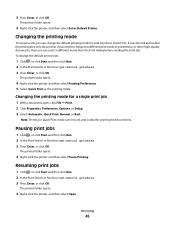
... Quick Print mode uses less ink and is ideal for a single print job 1 With a document open, click File Print. 2 Click Properties, Preferences, Options, or Setup. 3 Select Automatic, Quick Print, Normal, or Best. The printer folder opens. 4 Right-click the printer, and then select Pause Printing. Printing 45 3 Press Enter, or...
... Quick Print mode uses less ink and is ideal for a single print job 1 With a document open, click File Print. 2 Click Properties, Preferences, Options, or Setup. 3 Select Automatic, Quick Print, Normal, or Best. The printer folder opens. 4 Right-click the printer, and then select Pause Printing. Printing 45 3 Press Enter, or...
User's Guide
Page 58
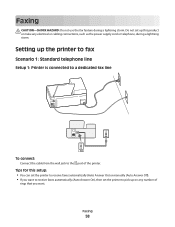
... is connected to a dedicated fax line EXT LINE To connect: Connect the cable from the wall jack to pick up this setup: • You can set the printer to receive faxes automatically (Auto Answer On) or manually (Auto Answer Off). • If you want. Faxing 58 Faxing ...
... is connected to a dedicated fax line EXT LINE To connect: Connect the cable from the wall jack to pick up this setup: • You can set the printer to receive faxes automatically (Auto Answer On) or manually (Auto Answer Off). • If you want. Faxing 58 Faxing ...

User's Guide
Page 59
Setup 2: Printer is sharing the line with an answering machine Connected to the same telephone wall jack EXT LINE PHONE LINE To connect: 1 Connect the cable from the wall jack to the port of the printer. 2 Remove the protective plug from the port of the printer, and then connect the answering machine to different wall jacks EXT LINE PHONE LINE Faxing 59 Connected to the port.
Setup 2: Printer is sharing the line with an answering machine Connected to the same telephone wall jack EXT LINE PHONE LINE To connect: 1 Connect the cable from the wall jack to the port of the printer. 2 Remove the protective plug from the port of the printer, and then connect the answering machine to different wall jacks EXT LINE PHONE LINE Faxing 59 Connected to the port.


