User's Guide
Page 6
8 System Setup 81 Entering System Setup 81 System Setup Screens 81 System Setup Options 82 Boot Sequence 92 Changing Boot Sequence for the Current Boot 93 Changing Boot Sequence for Future Boots . . . . 94 9 Clearing Passwords and CMOS Settings 95 Clearing Passwords 95 Clearing CMOS Settings 96 Flashing the BIOS 97 10 Troubleshooting Tools 99 Power Lights 99 Diagnostic Lights 100 Diagnostic Light Codes During POST 100 Beep Codes 104 System Messages 105 Hardware Troubleshooter 107 Dell Diagnostics 107 When to Use the Dell Diagnostics 108 6 Contents
8 System Setup 81 Entering System Setup 81 System Setup Screens 81 System Setup Options 82 Boot Sequence 92 Changing Boot Sequence for the Current Boot 93 Changing Boot Sequence for Future Boots . . . . 94 9 Clearing Passwords and CMOS Settings 95 Clearing Passwords 95 Clearing CMOS Settings 96 Flashing the BIOS 97 10 Troubleshooting Tools 99 Power Lights 99 Diagnostic Lights 100 Diagnostic Light Codes During POST 100 Beep Codes 104 System Messages 105 Hardware Troubleshooter 107 Dell Diagnostics 107 When to Use the Dell Diagnostics 108 6 Contents
User's Guide
Page 8
... 126 Video and Monitor Problems 126 The screen is blank 127 The screen is difficult to read 127 3D image quality is poor 129 Only part of the screen is readable 129 12 Reinstalling Software 131 Drivers 131 What Is a Driver 131 Identifying Drivers 131 Reinstalling Drivers and Utilities 132 Restoring Your Operating System 136 Using Microsoft Windows System Restore . . . . 136 Using Dell PC Restore and Dell Factory Image Restore 138 Using the Operating System Media 141 13 Adding and Replacing Parts...
... 126 Video and Monitor Problems 126 The screen is blank 127 The screen is difficult to read 127 3D image quality is poor 129 Only part of the screen is readable 129 12 Reinstalling Software 131 Drivers 131 What Is a Driver 131 Identifying Drivers 131 Reinstalling Drivers and Utilities 132 Restoring Your Operating System 136 Using Microsoft Windows System Restore . . . . 136 Using Dell PC Restore and Dell Factory Image Restore 138 Using the Operating System Media 141 13 Adding and Replacing Parts...
User's Guide
Page 10
... Optional Fourth SATA Hard Drive (Tower Computer 201 Installing an Optional Fourth Hard Drive (Tower Computer 202 Removing an Optional Third Hard Drive (Desktop Computer 203 Installing an Optional Third Hard Drive (Desktop Computer 206 Installing an Additional Fan 210 Drive Panel 212 Removing the Drive Panel (Tower Computer) . . . 213 Replacing the Drive Panel (Tower Computer) . . . 214 Removing the Drive Panel (Desktop Computer) . . 215 Replacing the Drive Panel (Desktop Computer) . . 216 Removing a Drive-Panel Insert 218 Installing a Drive-Panel Insert 218 Floppy Drive or Media Card...
... Optional Fourth SATA Hard Drive (Tower Computer 201 Installing an Optional Fourth Hard Drive (Tower Computer 202 Removing an Optional Third Hard Drive (Desktop Computer 203 Installing an Optional Third Hard Drive (Desktop Computer 206 Installing an Additional Fan 210 Drive Panel 212 Removing the Drive Panel (Tower Computer) . . . 213 Replacing the Drive Panel (Tower Computer) . . . 214 Removing the Drive Panel (Desktop Computer) . . 215 Replacing the Drive Panel (Desktop Computer) . . 216 Removing a Drive-Panel Insert 218 Installing a Drive-Panel Insert 218 Floppy Drive or Media Card...

User's Guide
Page 18
...; Upgrades - What Are You Looking For? Service call and order status, and warranty and repair information • Service and support - Proactive e-mail notification of your country/region, and then click Drivers & Downloads. 2 Click Select Model or Enter a Tag, make the appropriate selections or enter the appropriate information for components, such as the memory, hard drive, and operating system • Customer Care - NOTE: The support.dell.com user interface...
...; Upgrades - What Are You Looking For? Service call and order status, and warranty and repair information • Service and support - Proactive e-mail notification of your country/region, and then click Drivers & Downloads. 2 Click Select Model or Enter a Tag, make the appropriate selections or enter the appropriate information for components, such as the memory, hard drive, and operating system • Customer Care - NOTE: The support.dell.com user interface...

User's Guide
Page 30
... setting up multiple network connections (such as a separate intra- A click indicates that you connect occasionally, such as printers and keyboards. It is recommended that typically remain connected, such as flash memory keys or cameras, or for bootable USB devices. 30 About Your Computer On computers with a sound card, use Category 5 wiring and connectors for devices that the network cable has been securely attached. A high volume of the network cable to the network adapter connector...
... setting up multiple network connections (such as a separate intra- A click indicates that you connect occasionally, such as printers and keyboards. It is recommended that typically remain connected, such as flash memory keys or cameras, or for bootable USB devices. 30 About Your Computer On computers with a sound card, use Category 5 wiring and connectors for devices that the network cable has been securely attached. A high volume of the network cable to the network adapter connector...
User's Guide
Page 62
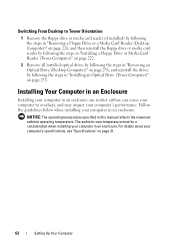
... floppy drive or media card reader by following the steps in "Installing a Floppy Drive or Media Card Reader (Tower Computer)" on page 222. 2 Remove all installed optical drives by following the steps in "Removing an Optical Drive (Desktop Computer)" on page 236, and reinstall the drives by following the steps in "Installing an Optical Drive (Tower Computer)" on page 31. 62 Setting Up Your Computer For details about your computer's specifications, see "Specifications" on...
... floppy drive or media card reader by following the steps in "Installing a Floppy Drive or Media Card Reader (Tower Computer)" on page 222. 2 Remove all installed optical drives by following the steps in "Removing an Optical Drive (Desktop Computer)" on page 236, and reinstall the drives by following the steps in "Installing an Optical Drive (Tower Computer)" on page 31. 62 Setting Up Your Computer For details about your computer's specifications, see "Specifications" on...

User's Guide
Page 91
... not restore factory-installed default settings. • Continue - Enables or disables the numerical and mathematical features of the rightmost bank of keys on event or error. Enables or disables the ASF management mechanism. • Off - All ASF functionality is enabled. NOTE: Some graphic cards require that entry cannot be disabled. System Setup 91 NOTE: Once an event log entry is marked as unread (U). Maintenance Service Tag ASF Mode (Off default) SERR...
... not restore factory-installed default settings. • Continue - Enables or disables the numerical and mathematical features of the rightmost bank of keys on event or error. Enables or disables the ASF management mechanism. • Off - All ASF functionality is enabled. NOTE: Some graphic cards require that entry cannot be disabled. System Setup 91 NOTE: Once an event log entry is marked as unread (U). Maintenance Service Tag ASF Mode (Off default) SERR...

User's Guide
Page 93
... the diagnostic tests are booting to a USB device, connect the USB device to a USB floppy drive, you are complete. NOTE: If you are booting to a USB connector (see the Microsoft Windows desktop, then shut down your device is held down -arrow keys or press the appropriate number on page 81). 1 If you must be used for the current boot only, and then press . NOTE: Keyboard failure may result when a key on the Drivers and Utilities disc...
... the diagnostic tests are booting to a USB device, connect the USB device to a USB floppy drive, you are complete. NOTE: If you are booting to a USB connector (see the Microsoft Windows desktop, then shut down your device is held down -arrow keys or press the appropriate number on page 81). 1 If you must be used for the current boot only, and then press . NOTE: Keyboard failure may result when a key on the Drivers and Utilities disc...

User's Guide
Page 107
... the Fix a Problem section, click Hardware Troubleshooter. 4 In the Hardware Troubleshooter list, select the option that best describes the problem and follow the remaining troubleshooting steps. N O T A B O O T D I S K E T T E - DELL RECOMMENDS THAT YOU BACK UP YOUR DATA REGULARLY. Insert a bootable floppy disk and restart your computer. NOTICE - A PARAMETER OUT OF RANGE MAY OR MAY NOT INDICATE A POTENTIAL HARD DRIVE PROBLEM. - Windows Vista: 1 Click the Windows Vista start button , and click Help and Support. 2 Type hardware troubleshooter in BIOS setup.
... the Fix a Problem section, click Hardware Troubleshooter. 4 In the Hardware Troubleshooter list, select the option that best describes the problem and follow the remaining troubleshooting steps. N O T A B O O T D I S K E T T E - DELL RECOMMENDS THAT YOU BACK UP YOUR DATA REGULARLY. Insert a bootable floppy disk and restart your computer. NOTICE - A PARAMETER OUT OF RANGE MAY OR MAY NOT INDICATE A POTENTIAL HARD DRIVE PROBLEM. - Windows Vista: 1 Click the Windows Vista start button , and click Help and Support. 2 Type hardware troubleshooter in BIOS setup.

User's Guide
Page 113
... time or date displays during start-up, replace the battery (see the program's documentation. Troubleshooting Follow these tips when you troubleshoot your Dell™ computer to the Windows Classic view. Replace the battery only with the same or equivalent type recommended by the manufacturer. Troubleshooting 113 Drive Problems CAUTION: Before you added or removed a part before the problem started, review the installation procedures and ensure that the device is incorrectly installed. This message...
... time or date displays during start-up, replace the battery (see the program's documentation. Troubleshooting Follow these tips when you troubleshoot your Dell™ computer to the Windows Classic view. Replace the battery only with the same or equivalent type recommended by the manufacturer. Troubleshooting 113 Drive Problems CAUTION: Before you added or removed a part before the problem started, review the installation procedures and ensure that the device is incorrectly installed. This message...
User's Guide
Page 128
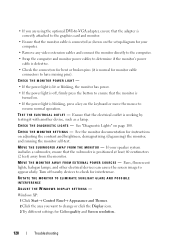
... THE WINDOWS DISPLAY SETTINGS - Ensure that the subwoofer is working by testing it is normal for interference. C H E C K T H E M O N I T O R S E T T I N G S - Fans, fluorescent lights, halogen lamps, and other electrical devices can cause the screen image to change or click the Display icon. 3 Try different settings for instructions on page 100. If your computer. • Remove any video extension cables and connect the monitor directly to the computer. • Swap the computer and monitor power cables to...
... THE WINDOWS DISPLAY SETTINGS - Ensure that the subwoofer is working by testing it is normal for interference. C H E C K T H E M O N I T O R S E T T I N G S - Fans, fluorescent lights, halogen lamps, and other electrical devices can cause the screen image to change or click the Display icon. 3 Try different settings for instructions on page 100. If your computer. • Remove any video extension cables and connect the monitor directly to the computer. • Swap the computer and monitor power cables to...

User's Guide
Page 132
... Windows Vista start button , then right-click Computer. 2 Click Properties, then click Device Manager. If you may need to reinstall the driver or install a new driver (see "Reinstalling Drivers and Utilities" on the computer, click Continue; 3 Click System. 4 In the System Properties window, click the Hardware tab. 5 Click Device Manager. 6 Scroll down the list of devices and check for an exclamation point (a circle with the previously installed version. NOTE: The User...
... Windows Vista start button , then right-click Computer. 2 Click Properties, then click Device Manager. If you may need to reinstall the driver or install a new driver (see "Reinstalling Drivers and Utilities" on the computer, click Continue; 3 Click System. 4 In the System Properties window, click the Hardware tab. 5 Click Device Manager. 6 Scroll down the list of devices and check for an exclamation point (a circle with the previously installed version. NOTE: The User...

User's Guide
Page 133
... open programs. 2 Insert the Drivers and Utilities disc. Click OK, and then follow the instructions on the computer, click Continue; NOTE: The User Account Control window may prompt you are an administrator on the screen. Windows Vista: 1 Click the Windows Vista start Windows Explorer, click your administrator to install setup files. In most cases, the CD/DVD starts running automatically. If you to continue. 3 Right-click the device for which the new driver was installed...
... open programs. 2 Insert the Drivers and Utilities disc. Click OK, and then follow the instructions on the computer, click Continue; NOTE: The User Account Control window may prompt you are an administrator on the screen. Windows Vista: 1 Click the Windows Vista start Windows Explorer, click your administrator to install setup files. In most cases, the CD/DVD starts running automatically. If you to continue. 3 Right-click the device for which the new driver was installed...

User's Guide
Page 137
... the instructions on the screen. Windows Vista: 1 Click Start . 2 In the Start Search box, type System Restore and press . 3 Click Undo my last restoration and click Next. NOTE: If a problem occurs after you install a device driver, first try to resolve the problem by using Windows XP Device Driver Rollback (see "Using Windows Device Driver Rollback" on page 132), or reinstall the driver with the Drivers and Utilities disc (see "Using the Drivers and Utilities Disc" on page 133). 1 Click Start→...
... the instructions on the screen. Windows Vista: 1 Click Start . 2 In the Start Search box, type System Restore and press . 3 Click Undo my last restoration and click Next. NOTE: If a problem occurs after you install a device driver, first try to resolve the problem by using Windows XP Device Driver Rollback (see "Using Windows Device Driver Rollback" on page 132), or reinstall the driver with the Drivers and Utilities disc (see "Using the Drivers and Utilities Disc" on page 133). 1 Click Start→...
User's Guide
Page 142
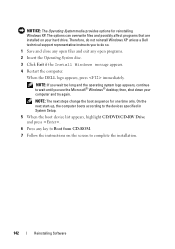
... hard drive. When the DELL logo appears, press immediately. Therefore, do not reinstall Windows XP unless a Dell technical support representative instructs you see the Microsoft® Windows® desktop; The options can overwrite files and possibly affect programs that are installed on the screen to do so. 1 Save and close any open files and exit any open programs. 2 Insert the Operating System disc. 3 Click Exit if the Install Windows...
... hard drive. When the DELL logo appears, press immediately. Therefore, do not reinstall Windows XP unless a Dell technical support representative instructs you see the Microsoft® Windows® desktop; The options can overwrite files and possibly affect programs that are installed on the screen to do so. 1 Save and close any open files and exit any open programs. 2 Insert the Operating System disc. 3 Click Exit if the Install Windows...

User's Guide
Page 145
... the system board. NOTICE: Before touching anything inside your computer on its side with the computer cover facing up and away from the computer. 6 Slide the cover forward to remove it from the hinge slots, then set the cover aside in the Product Information Guide. Adding and Replacing Parts 145 NOTICE: To avoid damaging the system board, you must remove the main battery before opening the display.
... the system board. NOTICE: Before touching anything inside your computer on its side with the computer cover facing up and away from the computer. 6 Slide the cover forward to remove it from the hinge slots, then set the cover aside in the Product Information Guide. Adding and Replacing Parts 145 NOTICE: To avoid damaging the system board, you must remove the main battery before opening the display.

User's Guide
Page 239
...: To connect a network cable, first plug the cable in to the network port or device and then plug it in to the computer. 8 Connect your computer and devices to avoid blocking the fan and cooling vents. 6 Replace the front panel (see "Replacing the Front Panel" on page 261). 7 Replace the computer cover (see "Replacing the Computer Cover" on installing any software required for drive operation. See the documentation that came with the drive for instructions on...
...: To connect a network cable, first plug the cable in to the network port or device and then plug it in to the computer. 8 Connect your computer and devices to avoid blocking the fan and cooling vents. 6 Replace the front panel (see "Replacing the Front Panel" on page 261). 7 Replace the computer cover (see "Replacing the Computer Cover" on installing any software required for drive operation. See the documentation that came with the drive for instructions on...

User's Guide
Page 261
... Guide. NOTICE: To prevent static damage to engage and secure the front panel. NOTICE: To connect a network cable, first plug the cable into the network port or device and then plug it into position. 5 Replace any of the computer until the assembly clicks into the computer. 8 Connect your computer and devices to the ones on the existing board (see "Replacing the Computer Cover" on page 148). Adding and Replacing Parts...
... Guide. NOTICE: To prevent static damage to engage and secure the front panel. NOTICE: To connect a network cable, first plug the cable into the network port or device and then plug it into position. 5 Replace any of the computer until the assembly clicks into the computer. 8 Connect your computer and devices to the ones on the existing board (see "Replacing the Computer Cover" on page 148). Adding and Replacing Parts...

User's Guide
Page 286
... user accounts and access to underline, change fonts, and so on the computer, do not change the settings for example, Windows Notepad uses a text editor. text editor - TPM - The number of colors and resolution that a program displays depends on the capabilities of the monitor, the video controller and its drivers, and the amount of video memory installed in your computer. The main circuit board in the computer. A utility...
... user accounts and access to underline, change fonts, and so on the computer, do not change the settings for example, Windows Notepad uses a text editor. text editor - TPM - The number of colors and resolution that a program displays depends on the capabilities of the monitor, the video controller and its drivers, and the amount of video memory installed in your computer. The main circuit board in the computer. A utility...

User's Guide
Page 287
... installed primarily influences the number of speakers, printer, broadband devices (DSL and cable modems), imaging devices, or storage devices. USB - Devices are plugged directly in to video functions. Memory that can display. Video memory is no electrical power. Graphics-based software, such as x columns by z colors. uninterruptible power supply - V video controller - A mode that supports resolutions up to protect against interference. When an infected program starts, its embedded virus also starts. UPS - A UPS keeps a computer running for video cards...
... installed primarily influences the number of speakers, printer, broadband devices (DSL and cable modems), imaging devices, or storage devices. USB - Devices are plugged directly in to video functions. Memory that can display. Video memory is no electrical power. Graphics-based software, such as x columns by z colors. uninterruptible power supply - V video controller - A mode that supports resolutions up to protect against interference. When an infected program starts, its embedded virus also starts. UPS - A UPS keeps a computer running for video cards...


