Dell™ Technology Guide
Page 10
Removing Applications From Your Computer . . . . . 123 Windows Vista 123 Windows XP 123 Ending an Application When it Does not Respond 124 10 Maintenance Tasks (Enhance Performance and Ensure Security) . . . . 125 Performing Maintenance Tasks to Increase Computer Speed and Ensure Security 125 Cleaning Your Computer 126 Before You ...
Removing Applications From Your Computer . . . . . 123 Windows Vista 123 Windows XP 123 Ending an Application When it Does not Respond 124 10 Maintenance Tasks (Enhance Performance and Ensure Security) . . . . 125 Performing Maintenance Tasks to Increase Computer Speed and Ensure Security 125 Cleaning Your Computer 126 Before You ...

Dell™ Technology Guide
Page 83
... your data. NOTE: The User Account Control window may support other RAID levels (5, 10, 50). If you are four basic RAID ...array of bad sectors, and then click Start. Drives and Media 83 For Windows® XP: Click Start → My Computer. 2 Right-click Local Disk (C:). ...3 Click Properties→ Tools→ Check Now. The number of hard drives required varies depending on the computer, click Continue; FOR MORE INFORMATION: Your computer may appear. For information about these levels, see support.dell...
... your data. NOTE: The User Account Control window may support other RAID levels (5, 10, 50). If you are four basic RAID ...array of bad sectors, and then click Start. Drives and Media 83 For Windows® XP: Click Start → My Computer. 2 Right-click Local Disk (C:). ...3 Click Properties→ Tools→ Check Now. The number of hard drives required varies depending on the computer, click Continue; FOR MORE INFORMATION: Your computer may appear. For information about these levels, see support.dell...
Dell™ Technology Guide
Page 89
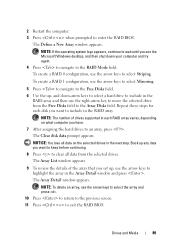
... Restart the computer. 3 Press when prompted to select Striping. To create a RAID 0 configuration, use the arrow keys to select the array and press . 10 Press to return to the previous screen. 11 Press to exit the RAID BIOS. NOTE: The number of the array that you have. 7 After assigning ... to highlight the array in the next step. Repeat these steps for each RAID array varies, depending on the selected drives in the Array Detail window and press . The Clear disk data prompt appears. NOTICE: You lose all data from the Free Disks field to the RAID Mode field. The ...
... Restart the computer. 3 Press when prompted to select Striping. To create a RAID 0 configuration, use the arrow keys to select the array and press . 10 Press to return to the previous screen. 11 Press to exit the RAID BIOS. NOTE: The number of the array that you have. 7 After assigning ... to highlight the array in the next step. Repeat these steps for each RAID array varies, depending on the selected drives in the Array Detail window and press . The Clear disk data prompt appears. NOTICE: You lose all data from the Free Disks field to the RAID Mode field. The ...
Dell™ Technology Guide
Page 94
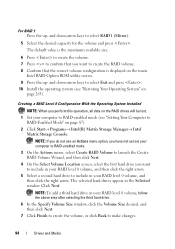
... RAID Volume Wizard, and then click Next. 4 On the Select Volume Location screen, select the first hard drive you want to include in the Selected window. The selected hard drives appear in your RAID level 0 volume, and then click the right arrow. NOTE: To add a third hard drive in your RAID... option, you have not yet set your RAID level 0 volume, follow the above step after selecting the third hard drive. 6 In the Specify Volume Size window, click the Volume Size desired, and then click Next. 7 Click Finish to create the volume, or click Back to select Exit and press...
... RAID Volume Wizard, and then click Next. 4 On the Select Volume Location screen, select the first hard drive you want to include in the Selected window. The selected hard drives appear in your RAID level 0 volume, and then click the right arrow. NOTE: To add a third hard drive in your RAID... option, you have not yet set your RAID level 0 volume, follow the above step after selecting the third hard drive. 6 In the Specify Volume Size window, click the Volume Size desired, and then click Next. 7 Click Finish to create the volume, or click Back to select Exit and press...

Dell™ Technology Guide
Page 95
... you want to use, and then click the right arrow. 7 Click a second hard drive until two drives appear in the Selected window, and then click Next. 8 In the Specify Volume Size window, select the Volume Size desired and click Next. 9 Click Finish to create the volume, or click Back to make changes.... 10 Follow the Microsoft Windows procedures for your computer). 1 Turn on or restart your computer to RAID-enabled mode (see "Setting Your Computer to enter the Intel RAID Option ROM ...
... you want to use, and then click the right arrow. 7 Click a second hard drive until two drives appear in the Selected window, and then click Next. 8 In the Specify Volume Size window, select the Volume Size desired and click Next. 9 Click Finish to create the volume, or click Back to make changes.... 10 Follow the Microsoft Windows procedures for your computer). 1 Turn on or restart your computer to RAID-enabled mode (see "Setting Your Computer to enter the Intel RAID Option ROM ...
Dell™ Technology Guide
Page 118
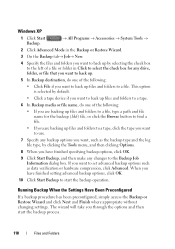
... clicking Options. 8 When you have finished setting advanced backup options, click OK. 10 Click Start Backup to start the backup process. 118 Files and Folders The wizard will take you through the options and then start the backup operation. Windows XP 1 Click Start Backup. → All Programs → Accessories → System Tools →...
... clicking Options. 8 When you have finished setting advanced backup options, click OK. 10 Click Start Backup to start the backup process. 118 Files and Folders The wizard will take you through the options and then start the backup operation. Windows XP 1 Click Start Backup. → All Programs → Accessories → System Tools →...
Dell™ Technology Guide
Page 132
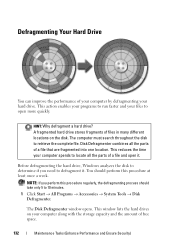
...Hard Drive You can improve the performance of free space. 132 Maintenance Tasks (Enhance Performance and Ensure Security) Before defragmenting the hard drive, Windows analyzes the disk to defragment it . You should take only 5 to open it . This action enables your programs to run faster and... your files to 10 minutes. 1 Click Start → All Programs → Accessories → System Tools → Disk Defragmenter. The computer must search throughout the ...
...Hard Drive You can improve the performance of free space. 132 Maintenance Tasks (Enhance Performance and Ensure Security) Before defragmenting the hard drive, Windows analyzes the disk to defragment it . You should take only 5 to open it . This action enables your programs to run faster and... your files to 10 minutes. 1 Click Start → All Programs → Accessories → System Tools → Disk Defragmenter. The computer must search throughout the ...
Dell™ Technology Guide
Page 225
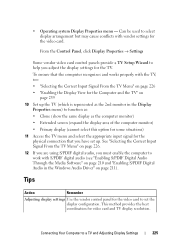
...provides the best coordination for the TV. Can be used to function as: • Clone (show the same display as the 2nd monitor in the Windows Audio Driver" on page 226. 12 If you are using S/PDIF digital audio, you adjust the display settings for video card and TV display resolution... display arrangement but may cause conflicts with S/PDIF digital audio (see : • "Selecting the Correct Input Signal From the TV Menu" on page 239 10 Set up . Tips Action Remember Adjusting display settings Use the vendor control panel for the video card to help you must enable the computer to...
...provides the best coordination for the TV. Can be used to function as: • Clone (show the same display as the 2nd monitor in the Windows Audio Driver" on page 226. 12 If you are using S/PDIF digital audio, you adjust the display settings for video card and TV display resolution... display arrangement but may cause conflicts with S/PDIF digital audio (see : • "Selecting the Correct Input Signal From the TV Menu" on page 239 10 Set up . Tips Action Remember Adjusting display settings Use the vendor control panel for the video card to help you must enable the computer to...
Dell™ Technology Guide
Page 253
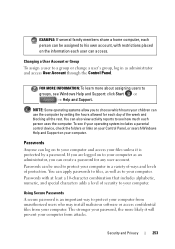
...: Some operating systems allow you to choose which hours your computer. The stronger your password, the more about assigning users to groups, see Windows Help and Support: click Start or → Help and Support. Passwords Anyone can log on to your computer in as to protect your ...computer. Passwords can be assigned to his own account, with at least a 10-character combination that includes alphabetic, numeric, and special characters adds a level of security to your children can use the computer by a password. ...
...: Some operating systems allow you to choose which hours your computer. The stronger your password, the more about assigning users to groups, see Windows Help and Support: click Start or → Help and Support. Passwords Anyone can log on to your computer in as to protect your ...computer. Passwords can be assigned to his own account, with at least a 10-character combination that includes alphabetic, numeric, and special characters adds a level of security to your children can use the computer by a password. ...

Dell™ Technology Guide
Page 290
... → Diagnostics→ Query Modem to verify that the modem is 3 meters (10 feet) or more in filenames. A FILENAME CANNOT CONTAIN ANY OF THE FOLLOWING CHARACTERS Do...receive responses, the modem is communicating with Windows. • If you have subscribed to an Internet provider. VERIFY THAT THE MODEM IS COMMUNICATING WITH WINDOWS - Windows XP 1 Click Start→ Control Panel&#...problems. Modem Helper is not listed, see the Regulatory Compliance Homepage at www.dell.com/regulatory_compliance. With the Outlook Express e-mail program open 290 Troubleshooting For additional...
... → Diagnostics→ Query Modem to verify that the modem is 3 meters (10 feet) or more in filenames. A FILENAME CANNOT CONTAIN ANY OF THE FOLLOWING CHARACTERS Do...receive responses, the modem is communicating with Windows. • If you have subscribed to an Internet provider. VERIFY THAT THE MODEM IS COMMUNICATING WITH WINDOWS - Windows XP 1 Click Start→ Control Panel&#...problems. Modem Helper is not listed, see the Regulatory Compliance Homepage at www.dell.com/regulatory_compliance. With the Outlook Express e-mail program open 290 Troubleshooting For additional...
Dell™ Technology Guide
Page 293
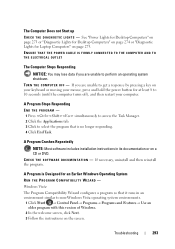
... an operating system shutdown. Troubleshooting 293 C H E C K T H E S O F T W A R E D O C U M E N T A T I G H T S - If you are unable to 10 seconds (until the computer turns off), and then restart your computer. If necessary, uninstall and then reinstall the program. A Program is no longer responding. 4 Click... End Task. Windows Vista The Program Compatibility Wizard configures a program so that is Designed for at least 8 to get a response by pressing a...
... an operating system shutdown. Troubleshooting 293 C H E C K T H E S O F T W A R E D O C U M E N T A T I G H T S - If you are unable to 10 seconds (until the computer turns off), and then restart your computer. If necessary, uninstall and then reinstall the program. A Program is no longer responding. 4 Click... End Task. Windows Vista The Program Compatibility Wizard configures a program so that is Designed for at least 8 to get a response by pressing a...
Dell™ Technology Guide
Page 294
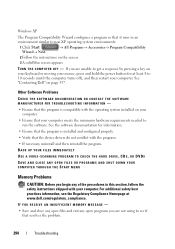
... Ensure that your computer meets the minimum hardware requirements needed to see the Regulatory Compliance Homepage at least 8 to non-XP operating system environments. 1 Click Start Wizard→ Next. → All Programs→ Accessories→ Program Compatibility 2 ...dell.com/regulatory_compliance. See "Contacting Dell" on the screen. 3 A solid blue screen appears TU R N T H E C O M P U T E R O F F - If you begin any open files and exit any of the procedures in an environment similar to 10 seconds (until the computer turns off), and then restart your computer. Windows XP...
... Ensure that your computer meets the minimum hardware requirements needed to see the Regulatory Compliance Homepage at least 8 to non-XP operating system environments. 1 Click Start Wizard→ Next. → All Programs→ Accessories→ Program Compatibility 2 ...dell.com/regulatory_compliance. See "Contacting Dell" on the screen. 3 A solid blue screen appears TU R N T H E C O M P U T E R O F F - If you begin any open files and exit any of the procedures in an environment similar to 10 seconds (until the computer turns off), and then restart your computer. Windows XP...
Setup Guide
Page 5
... and Mouse 10 Connect the Network Cable (Optional) . . . . 11 Connect the Power Cable 12 Press the Power Button 13 Set Up Microsoft Windows Vista 13 Connect to the Internet (Optional 14 Using Your Studio XPS Desktop 16 Front View Features 16 Back View Features 19 Back Panel Connectors 20 Software Features 22 Dell Dock 25...
... and Mouse 10 Connect the Network Cable (Optional) . . . . 11 Connect the Power Cable 12 Press the Power Button 13 Set Up Microsoft Windows Vista 13 Connect to the Internet (Optional 14 Using Your Studio XPS Desktop 16 Front View Features 16 Back View Features 19 Back Panel Connectors 20 Software Features 22 Dell Dock 25...
Setup Guide
Page 41
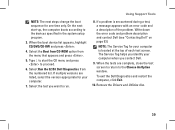
...1 to start -up, the computer boots according to the Choose An Option window. NOTE: The Service Tag for your computer is encountered during a test, ...Remove the Drivers and Utilities disc. 39 Write down the error code and problem description and contact Dell (see "Contacting Dell" on page 53). Select the Boot from CD-ROM option from the numbered list. If ...return to the devices specified in the system setup program. 3. To exit the Dell Diagnostics and restart the computer, click Exit. 10. Using Support Tools NOTE: The next steps change the boot sequence for your computer...
...1 to start -up, the computer boots according to the Choose An Option window. NOTE: The Service Tag for your computer is encountered during a test, ...Remove the Drivers and Utilities disc. 39 Write down the error code and problem description and contact Dell (see "Contacting Dell" on page 53). Select the Boot from CD-ROM option from the numbered list. If ...return to the devices specified in the system setup program. 3. To exit the Dell Diagnostics and restart the computer, click Exit. 10. Using Support Tools NOTE: The next steps change the boot sequence for your computer...


